
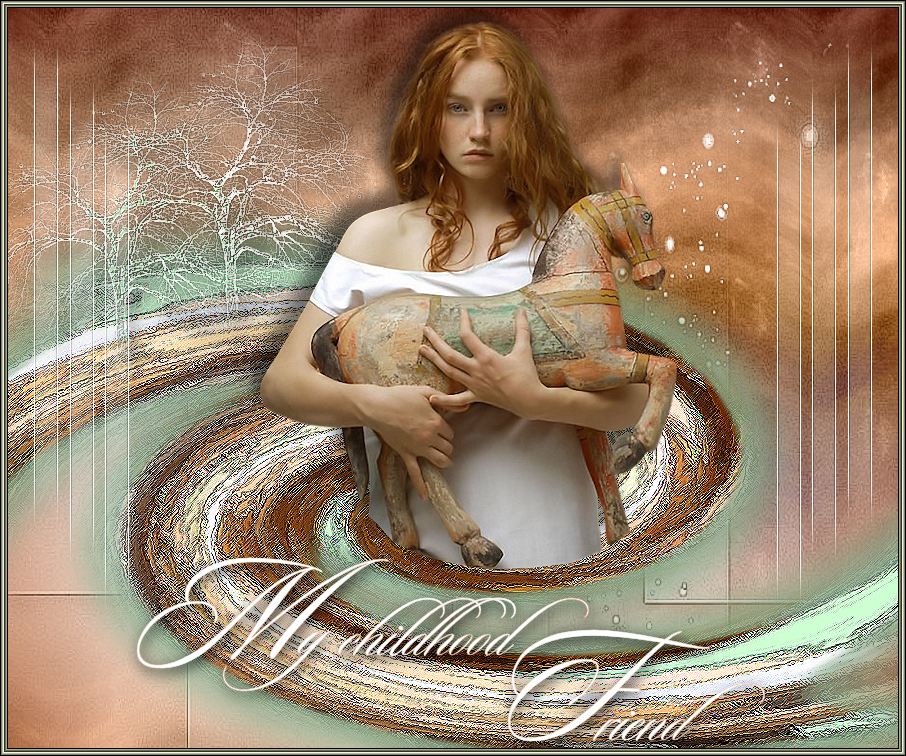
My Childhood Friend
For an Italian, Danish, Dutch, Spanish, German and French translation, click on the flags.


For this tutorial you will need the materials in the zip file below.

Thanks go to Maryse and to the unknown tubers for her lovely tube used in this tutorial.
Unzip the materials into a working folder you have created on your desktop named My childhood Friend. Please duplicate and close original tubes. Place the Mask in your PSP Files/Masks folder, export the brushes into your PSP Files/Brushes folder. Place the Gradients into your PSP Files/Gradients folder. I have used the plugins Plugin Galaxy/Warp 2, Eye Candy 4000/Gradient Glow, Brush Strokes/Ink Outlines, AAA Frames/Frame Works and Filter Attacks in this tutorial. It is assumed you have a working knowledge of PSP to follow these directions. I have used PSPX7 for this tutorial but other versions may be used. To work this tutorial, it is assumed you have some working knowledge of Paint Shop Pro.
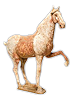
Use the horse below to mark your place along the way.
1. In Materials Palette, set Foreground to dkd pibronze Gradient, Background to #90b393.
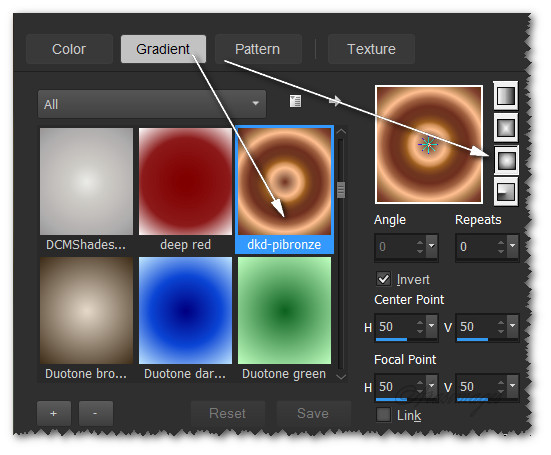
2. New/New Image 900px by 750px. Flood fill with Gradient.
3. Effects/Distortion Effects/Polar Coordinates/Polar to Rectangular.
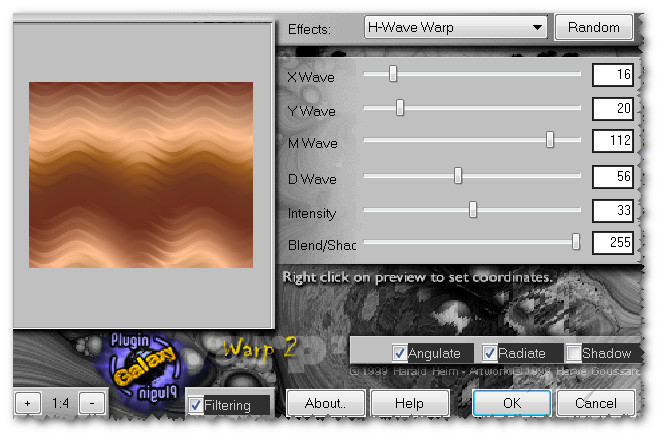
4. Effects/Plugin Galaxy/Warp 2.
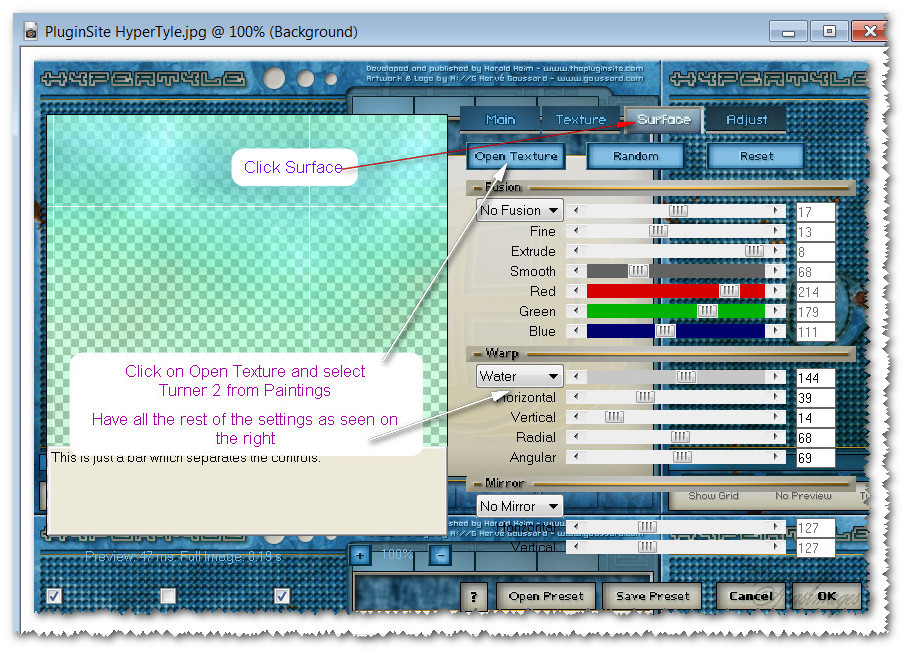
5. Effects/ThePlugin Site/HyperTyle.
6. Layers/New Raster Layer.
7. Change Foreground color to #d28d64 and select ForeWhitFore Gradient. Flood fill the new layer with this Gradient.

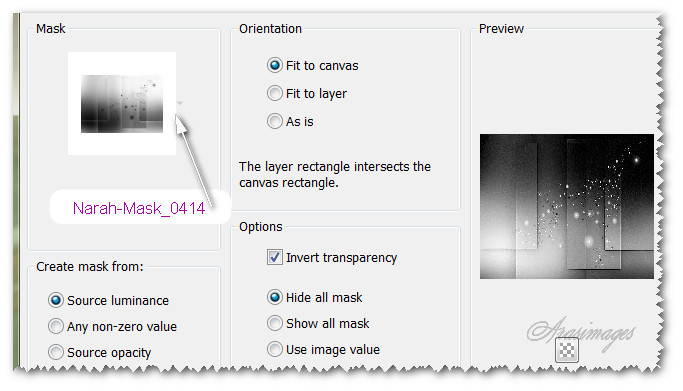
8. Layers/Load Save Mask/Load Mask from Disk. From drop down, select Narah_mask_0414. Load.
9. Merge/Merge Group.
10. Effects/Edge Effects/Enhance.
11. Layers/New Raster Layer. Flood fill with Background color #90b393.
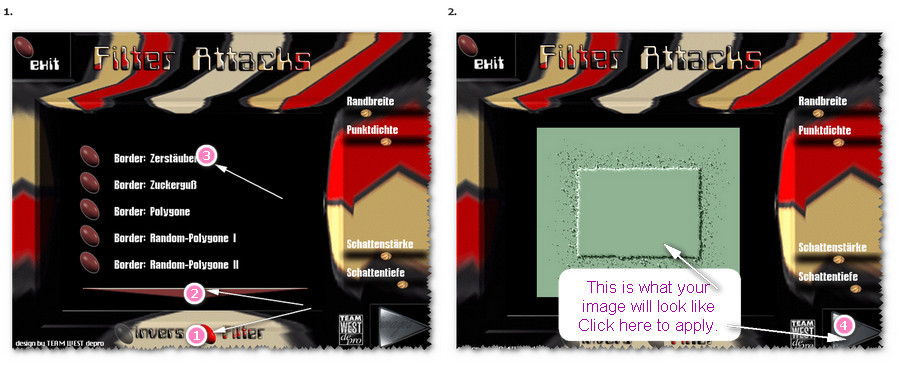
12. Effects/Filter Attacks/Filter Attacks.
13. Selections/Select All. Selections/Float. Selections/Defloat.
14. Open copy of MR_My Wooden Horse.pspimage. Erase the tuber's name using Eraser tool. Copy/Paste into Selection.
15. Selections/Select None.
16. Effects/Geometric Effects/Perspective-Horizontal set to Distortion 52/Transparent checked.
17. Move large edge to the left side. Duplicate and Image/Mirror. Place each layer so they meet in center of image. Do not overlap.
18. Merge/Merge Down.
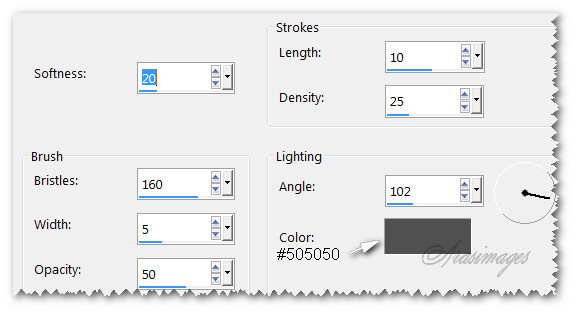
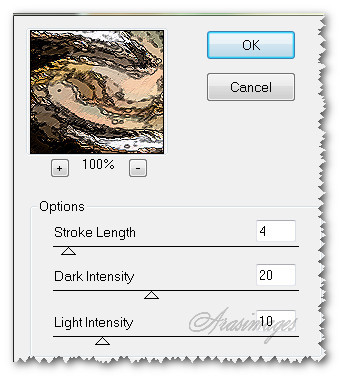
19. Effects/Art Media Effects/Brush Strokes.
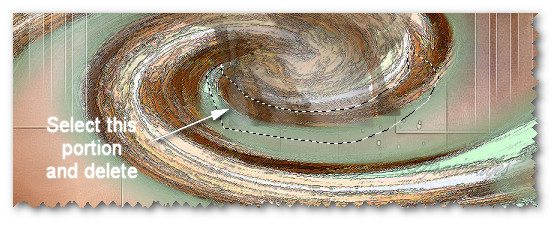
20. Effects/Distortion Effects/Twirl. Degrees set to 360.
21. Effects/Brush Strokes/Ink Outlines.
22. Effects/Edge Effects/Enhance.
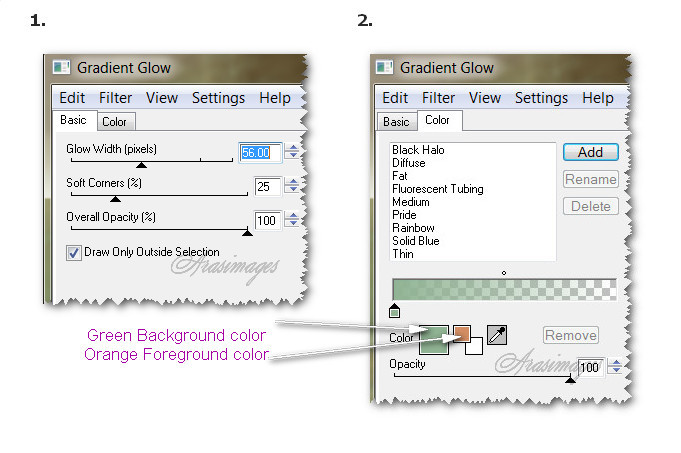
23. Effects/Eye Candy 4000/Gradient Glow. Background color used is #90b393/Foreground color #d28d64.
24. Pull swirl down to the bottom border.
25. Layers/New Raster Layer.
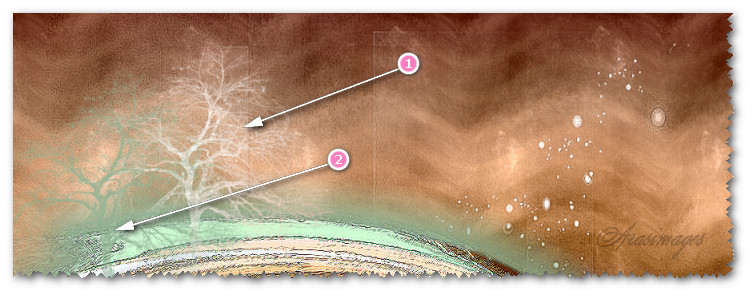
26. From tool bar, select the Paint Brush tool. Find Lone tree brush. Set Size to 400, using Foreground Gradient ForeWhitFore, left click/stamp the tree in the left top corner. Then using the Background color set to #90b393 set to same settings, stamp again by right clicking to the left of first tree.

27. Effects/Edge Effects/Enhance More.
28. Effects/3D Effects/Drop Shadow. Vertical 15, Horizontal 10, Opacity 50, Blur 20, color #000000.
29. Layers/New Raster Layer.
30. From tool bar, select the Paint Brush tool. Find Geometric10 brush. Change Background color to #ffffff, right click to stamp three times on left side of image. Second one will be lower than the first, third one lower than the second. See below for placement.

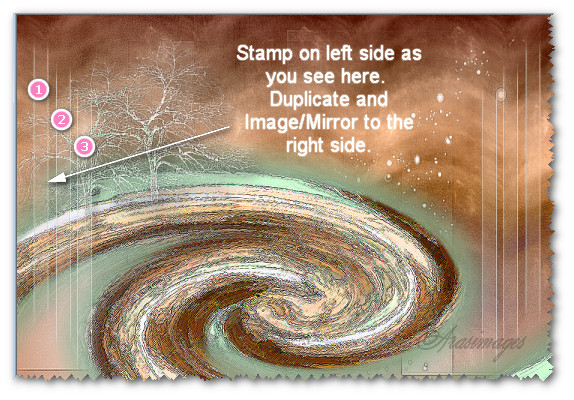
31. Duplicate. Image/Mirror to the right side. Merge/Merge Down.
32. Effects/Edge Effects/Enhance.
33. Open copy of MR_My Wooden Horse.pspimage. Using Eraser tool, erase tuber's watermark. Copy/Paste as New Layer.
34. Image/Resize/Resize by 80%/Resize all layers unchecked.
35. Place girl with horse in center of image over swirl.
36. Lower the Opacity on the girl so you can see the swirl through it. Using Freehand Selection tool, Point to point/Add(Shift)/Feather 1, select the bottom of girl so it appears she is emerging through the swirl. Press Delete key. Deselect.
37. Bring Opacity back up to 100 on the girl.
38. Effects/3D Effects/Drop Shadow. Vertical -15, Horizontal -10, Opacity 50, Blur 20, color #000000.
39. Adjust/Sharpness/Sharpen.
40. From the Tool bar, select the Text tool. Find Sloop Script Three, set to font Size 150, Stroke width 0.5 Line style Solid. Make sure your Background color is set to #ffffff for all text. Type out the letter "M". Convert to Raster Layer.

41. Change the font Size to 72 and type out "y childhood". Convert to Raster Layer.

42. Change the font Size back to 150 and type out the letter "F". Convert to Raster Layer.
43. Change the font Size back to 72 and type out the rest of the word "riend". Convert to Raster Layer.
44. Arange the letters so they read "My childhood" on the top line, then pull the other letters lower to read "Friend".
45. Merge/Merge Down each letter layer until they are all on one layer.
46. Objects/Align/Horizontal Center.
47. Effects/3D Effects/Drop Shadow. Vertical 4, Horizontal 2, Opacity 100, Blur 20, color #000000.
48. Image/Add Borders/Add 3px border, Symmetric checked, color #ffffff.
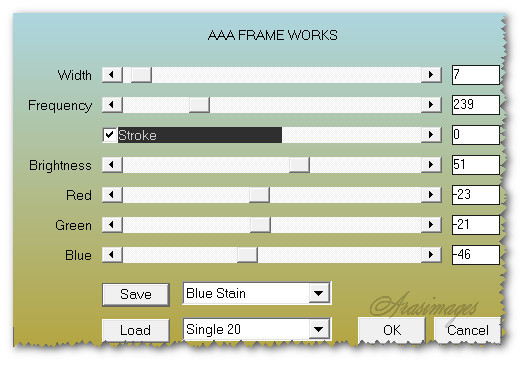
49. Effects/AAA Frames/Frame Works.
50. Sign your name or leave your watermark if you wish and save as a .jpg or .png file.
This tutorial was tested by PamelaD and Evatexas. Thanks ladies!
If you are going to use this tutorial for stationery, cards or place the tutorial/tag on another site, I would appreciate you contacting me for permission, giving Arasimages credit for the original tutorial and if possible, a link back to my site. Thank you.
Copyright © Arasimages All Rights Reserved