
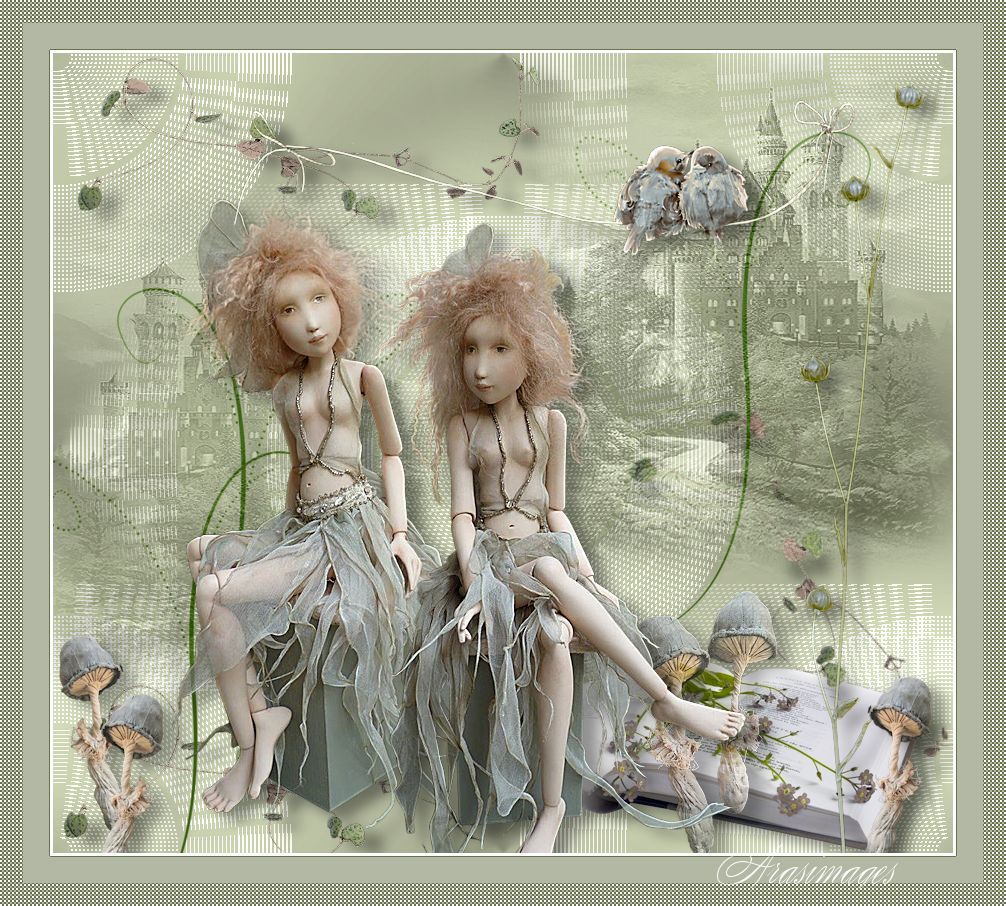
The Visit
For a Dutch, Spanish, Italian and Danish translation, click on the flags.


For this tutorial you will need the materials in the zip file below.

Thanks go to Daisy Web, to PamelaD for her lovely tubes made from the wonderful work of Yvonne Flipse as well as the unknown tubers of scraps used in this tutorial.
Unzip the materials into a working folder you have created on your desktop named The Visit. Please duplicate and close originals. I have used the Plugins FunHouse/Polar Perversion and [AFS] Import/sqborder2 and also some effects of PSP in this tutorial. It is assumed you have a working knowledge of PSP to follow these directions. I have used PSPX7 for this tutorial but other versions may be used. To work this tutorial, it is assumed you have some working knowledge of Paint Shop Pro.
Use the pin below to mark your place along the way.

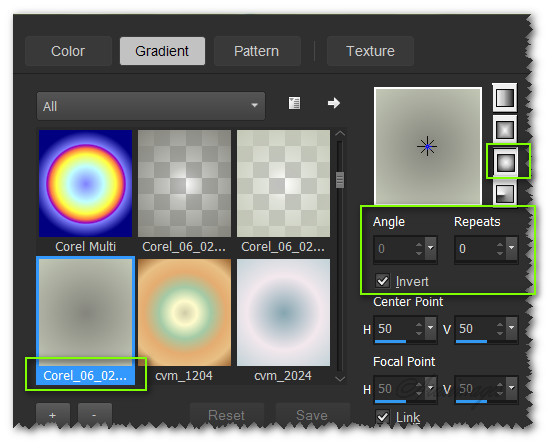
1. In Materials Palette, set Foreground to #c2c7b5, Background to #85857d.
2. Create a Gradient using the above colors, Style Sunburst, Angle 0, Repeats 0, Invert checked.
3. New/New Image 900px by 800px. Flood fill with Gradient.
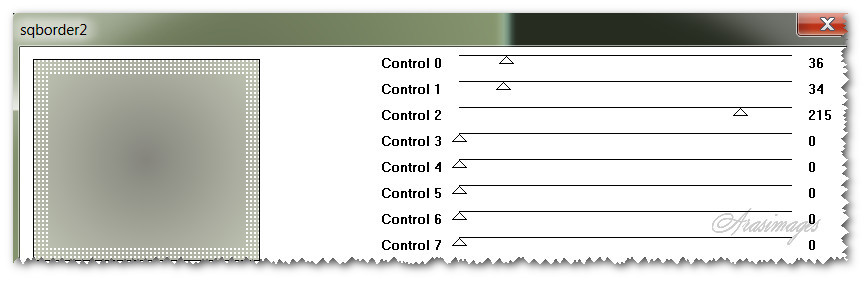
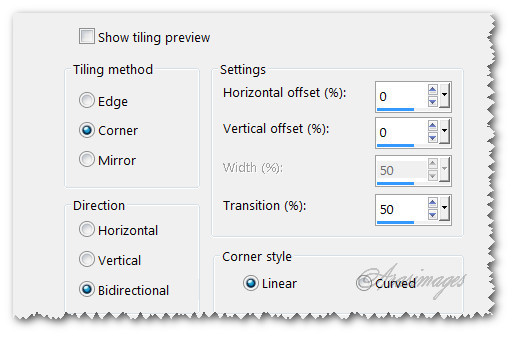
4. Effects/[AFS] Import/sqborder2.
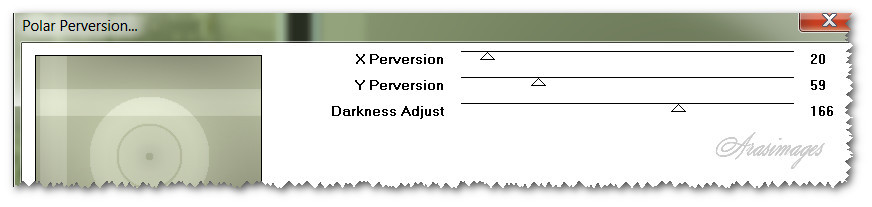
5. Effects/FunHouse/PolarPerversion.
6. Effects/Image Effects/Seamless Tiling.
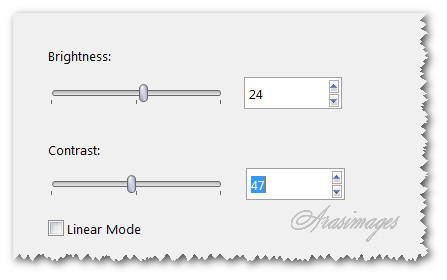
7. Adjust/Brightness/Contrast.
8. Open MR_Fleurs_Livre.pspimage. Copy/Paste as New Layer.
9. Erase Maryse's watermark from pasted layer.
10. Image/Resize/Resize by 45%/Resize all layers unchecked. Move book into bottom right corner.
11. Effects/3D Effects/Drop Shadow. Vertical 9, Horizontal 14, Opacity 40, Blur 20, color #000000.
12. Open DaisyWeb_Enchanged-Neuschwanstein.pspimage. Copy/Paste as New Layer.
13. Set Opacity to 40, Blend Mode to Luminance (Legacy).
14. Use the Pick Tool to stretch the image horizontally a little.
15. Move into upper right corner. Effects/Edge Effects/Enhance.
16. Duplicate. Image/Mirror. Move into center left side of image.
17. Drop Opacity down to 29.
18. Open 0_aab20_86f131c5.L.pspimage (trailing flower). Copy/Paste as New Layer.
19. Effects/3D Effects/Drop Shadow. Vertical 9, Horizontal 14, Opacity 40, Blur 20, color #000000.
20. Move trailing flower into upper left corner.
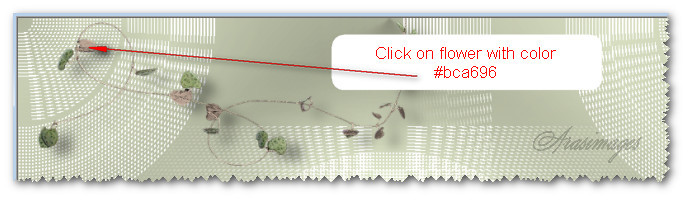
21. Change Foreground color to #bca696. Using the Color Changer, left click on the flower.
22. Adjust/Sharpness/Sharpen.
23. Duplicate. Pull down into bottom left corner.
24. Duplicate. Image/Free Rotate/Rotate Right by 45 degrees. Move into bottom right corner.
25. Open 0_a5651_b9b7667_L.pspimage of Green stem. Copy/Paste as New Layer.
26. Effects/3D Effects/Drop Shadow. Vertical 9, Horizontal 14, Opacity 40, Blur 20, color #000000.
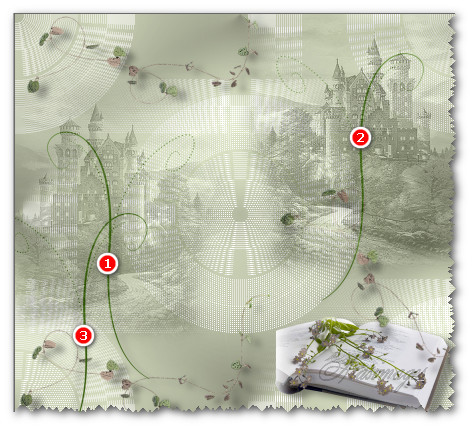
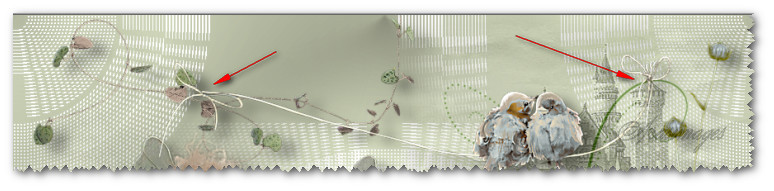
27. Move toward left side. (1)
28. Duplicate. Image/Mirror. Move upward a little.(2)
29. Duplicate. Move to bottom left corner.(3) (See example below for where to place the stems.)
30. Open ArasMushrooms.psp. Copy/Paste as New Layer.
31. Image/Resize/Resize by 53%/Resize all layers unchecked.
32. Drop Opacity down to 70. Adjust/Sharpness/Sharpen.
33. Effects/3D Effects/Drop Shadow. Vertical 9, Horizontal 14, Opacity 40, Blur 20, color #000000.
34. Move so they are over the left side of book in bottom right corner.
35. Working on the ArasMushrooms.psp copy/Select around left mushroom with Freehand Selection tool set to Freehand Selection/Add (Shift) Mode, Feather 0. Copy.
36. Back to working image. Paste as New Layer.
37. Image/Resize/Resize by 43%/Resize all layers unchecked.
38. Effects/3D Effects/Drop Shadow. Vertical 9, Horizontal 14, Opacity 40, Blur 20, color #000000.
39. Drop Opacity down to 87. Move into bottom left corner.
40. Duplicate. Image/Mirror. Move a little lower over first mushroom in left bottom corner.
41. Duplicate. Move to bottom right corner over right side of book.
42. Open Doll2.pspimage. Copy Tubed layer/Paste as New Layer.
43. Image/Resize/Resize by 76%/Resize all layers unchecked.
44. Effects/3D Effects/Drop Shadow. Vertical 9, Horizontal 14, Opacity 40, Blur 20, color #000000.
45. Adjust/Sharpness/Sharpen More.
46. Place in left half of image as I have done. (See finished tag).
47. Open Doll1.pspimage. CopyTubed1 Layer/Paste as New Layer.
48. Image/Resize/Resize by 76%/Resize all layers unchecked.
49. Effects/3D Effects/Drop Shadow. Vertical 9, Horizontal 14, Opacity 40, Blur 20, color #000000.
50. Adjust/Sharpness/Sharpen More.
51. Move Doll1 into center of image at the bottom slightly over Doll 2.
52. Open 0_8d598_60277d5a.XL.png. Copy/Paste as New Layer.
53. Using Color Changer, color #b9c5c5, click on flower of stem.
54. Adjust/Sharpness/Sharpen More.
55. Effects/3D Effects/Drop Shadow. Vertical 9, Horizontal 14, Opacity 40, Blur 20, color #000000.
56. Move to right side of image.
57. Open 0_9f5cb_ecac4b04.XL.png of birds. Copy/Paste as New Layer.
58. Using Color Changer, color #b9c5c5, click on brown part of one bird.
59. Adjust/Sharpness/Sharpen More.
60. Effects/3D Effects/Drop Shadow. Vertical 9, Horizontal 14, Opacity 40, Blur 20, color #000000.
61. Move toward top of image so bows appear to be tied to the stems.
62. Image/Add Borders/Add 3px border, Symmetric checked, color #ffffff.
63. Image/Add Borders/Add 50px border, Symmetric checked, color #b3b8a5.
64. Effects/[AFS] Import/sqborder2.

65. Using Magic Wand, select the sqborder2 and 50px green border.
66. Effects/Edge Effects/Enhance. Selections/Select None.
67. Sign your name or place your watermark if you wish and save as .png file.
This tutorial was tested by PamelaD and Evatexas. Thanks ladies!
If you are going to use this tutorial for stationery, cards or place the tutorial/tag on another site, I would appreciate you contacting me for permission, giving Arasimages credit for the original tutorial and if possible, a link back to my site. Thank you.
Copyright © Arasimages All Rights Reserved