
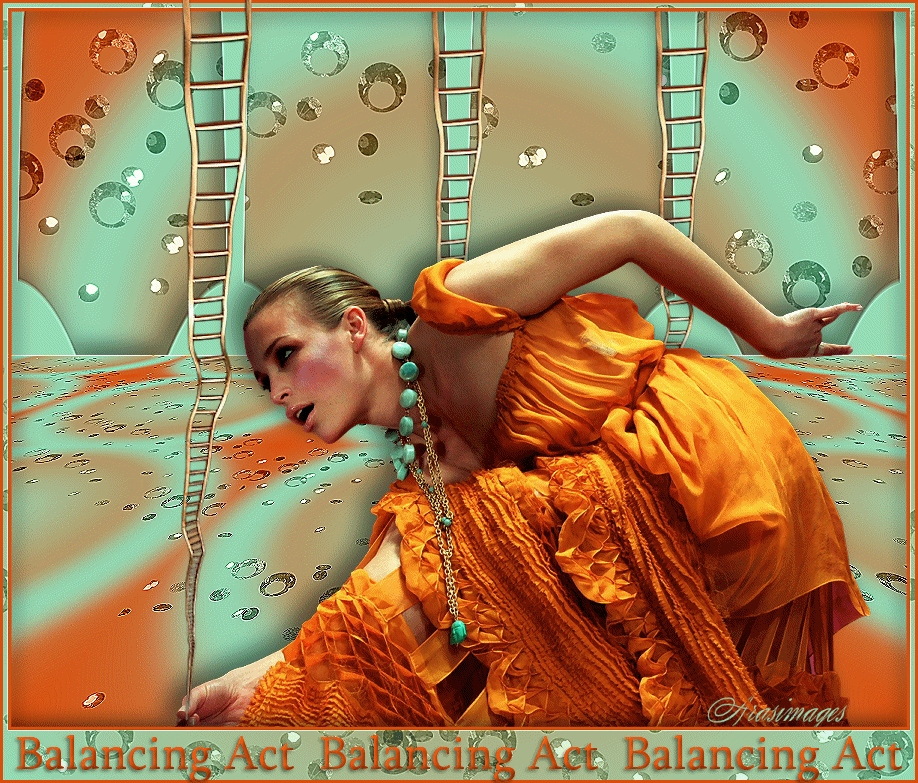
Balancing Act
For a Danish, Italian, Dutch, Russian, Spanish and German translation, click on the flags.


For this tutorial you will need the materials in the zip file below.

Thanks go to Cibi and to Ann for their lovely tubes used in this tutorial. Thanks go to PamelaD of Arasimages for tubing the ladder so I could create the animation as well.
Unzip the materials into a working folder you have created on your desktop named Balancing Act. Please duplicate and close original tubes. Use the copies for your work so you will not lose the originals. I have used the plugins Creativity/Splatter in this tutorial. (You can find the filter Splatter here: http://www.plugincreativity.net/index.shtml). I also used Animation Shop. It is assumed you have a working knowledge of PSP to follow these directions. I have used PSPX7 for this tutorial but other versions may be used. To work this tutorial, it is assumed you have some working knowledge of Paint Shop Pro.
Use the star below to mark your place along the way.

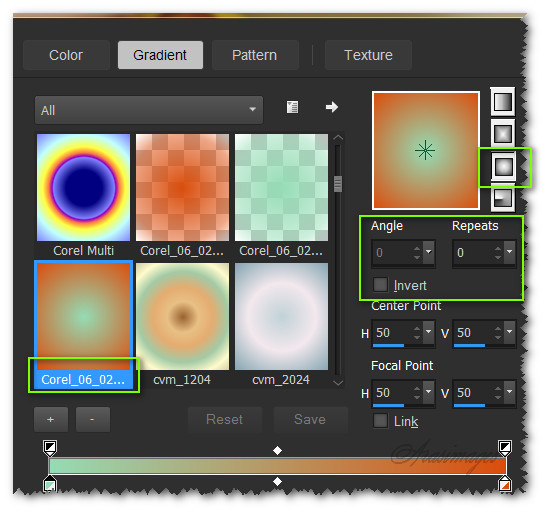
1. In Materials Palette, set Foreground to #95dcb5, Background to #da4e0e. Create a Gradient using these colors, Gradient Corel_06_029 (foreground/background), Style Sunburst, Angle 0, Repeats 0, Invert unchecked.
2. New/New Image 900px by 720px. Flood fill with Gradient.
3. Change Gradient back to Foreground color #95dcb5. Using Color Changer and Foreground color #95dcb5, Tolerance set to 7, Edge Softness to 23, left click as shown below to form a green halo on gradient.

4. Adjust/Blur/Gaussian Blur. Radius set to 15.
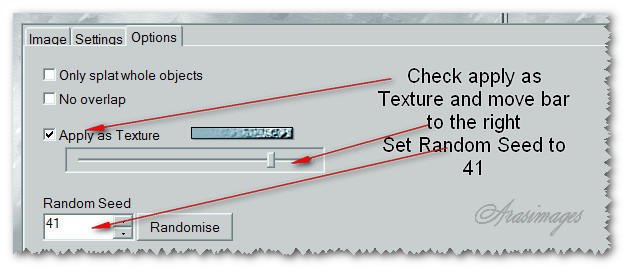
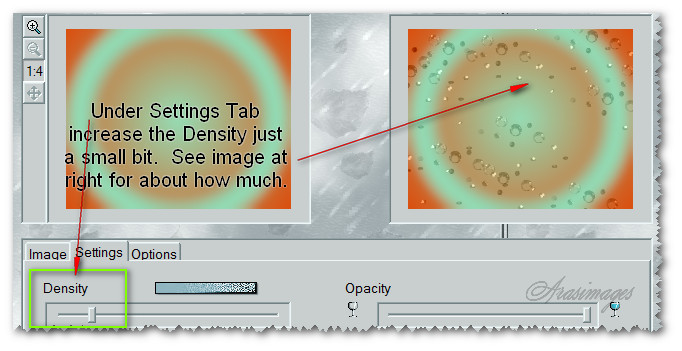
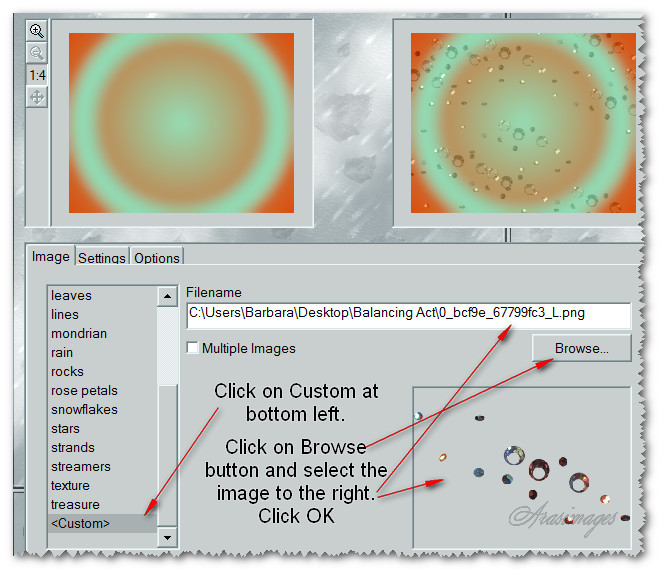
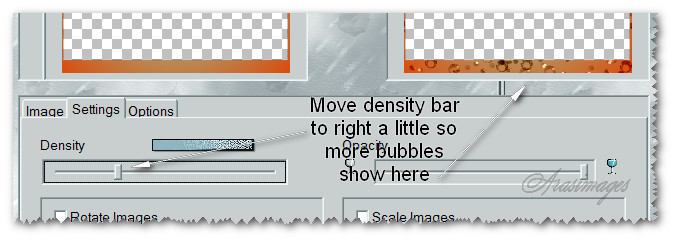
5. Effects/Creativity/Splatter. Under the Options tab, check Apply as Texture, Random Seed at 41. Under Settings Tab, increase the density just a small amount, (see the image at right). Then click on Image tab, select Custom then Browse tab and browse to where you placed the .png file0_bcf9e_67799fc3. Click OK.
6. Effects/Edge Effects/Enhance.
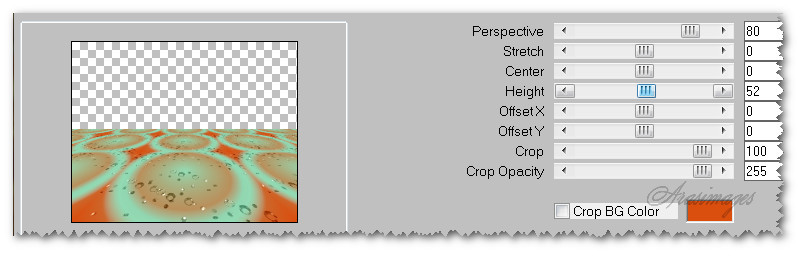
7. Duplicate. Effects/Mura'sMeister/Perspective Tiling on duplicate layer.
8. Effects/Edge Effects/Enhance.
9. Effects/3D Effects/Drop Shadow. Vertical -12, Horizontal -12, Opacity 46, Blur 25, color #000000.
10. Layers/New Raster Layer. Flood fill with Foreground #95dcb5.
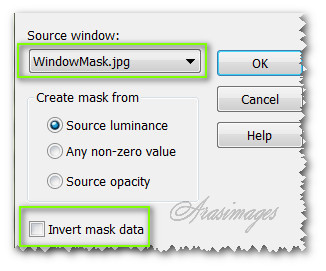
11. Open Windows Mask.jpg and keep open on your workspace. Back to working image. Layers/New Mask Layer/From Image. Select Windows Mask.jpg. Click OK.
12. Merge/Merge Group.
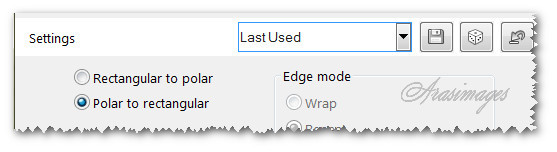
13. Effects/Distortion Effects/Polar Coordinates. Select Polar to rectangular. OK.
14. Effects/3D Effects/Drop Shadow. Vertical -12, Horizontal -9, Opacity 50, Blur 25.
15. Effects/Edge Effects/Enhance.
16. Pull Group-Raster 2 layer upward until bottom sets on perspective horizon. (See Step #18 for placement).
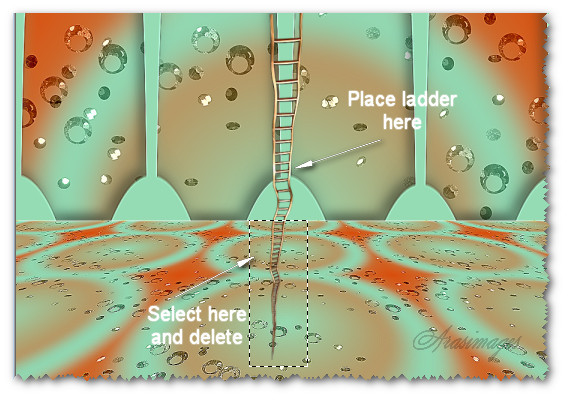
17. Open Background Ladder.pspimage. Copy/Paste as New Layer.
18. Place over center column as seen below. Select portion of ladder below horizon, press Delete key. Deselect.
19. Duplicate and place duplicated ladder over column to right.
20. Open Beauty_malakite_CibiBijoux.psp image. Copy/Paste as New Layer.
21. Effects/3D Effects/Drop Shadow. Vertical -9, Horizontal -12, Opacity 50, Blur 30, color #000000.
22. Move lady toward bottom center of image.
23. Adjust/Sharpness/Sharpen.
24. Image/Add Borders/Add 3px border, Symmetric checked, color #da4e0e.
25. Image/Add Borders/Add border of 5px top, both sides, 50px bottom, color #95deb5, Symmetric unchecked.
26. Click on large border with Magic Wand to activate it. Have Tolerance set to 5, Feather to 0.
27. Effects/3D Effects/Drop Shadow. Vertical 9, Horizontal 9, Opacity 50, Blur 25, color #000000.
28. Effects/3D Effects/Drop Shadow. Vertical -9, Horizontal -9, Opacity 50, Blur 25, color #000000.
29. In Materials Palette, under Gradient tab, check the Invert box.
30. Layers/New Raster Layer. Flood fill selected area of new layer with Gradient.
31. Effects/Creativity/Splatter. Under the Settings tab, move density bar to right so bubbles fill the bottom 50px border. Under the Options tab, have Apply as Texture checked and Random Seed set to 9358. Click OK.
32. Selections/Select None. Set Opacity to 69. Effects/Edge Effects/Enhance.
33. Image/Add Borders/Add 3px border/color #da4e0e, Symmetric checked.
34. Activate Text tool, select font Sylfaen, Size 48, Stroke width 0.0, Line style solid, type out the words "Balancing Act" three times, spacing two times between each set of words.

35. Objects/Align/Horizontal Center. Convert to Raster Layer.
36. Selections/Select All. Selections/Float. Selections/Defloat.
37. Effects/3D Effects/Drop Shadow. Vertical 2, Horizontal -2, Opacity 50, Blur 5, color #000000. Repeat.
38. Selections/Select None. Merge/Merge Visible.
39. Sign your name or leave your watermark if you wish and save as a .jpg file.
40. Open Animation Shop Program. File/Open. Select the Balancing Act .jpg file.
41. Duplicate the Balancing Act file 62 times until you have 63 frames in all. Highlight first frame. Edit/Select All.
42. Open/Ladder.psp file. Highlight first frame/Edit/Select All. COPY.
43. Highlighting first frame of Balancing Act main image, right click/Paste/Into Selected Frame. Hover the ladder so the small bottom fits in between her thumb and finger. Left click to set into place.
44. Click on View Animation in the top tool bar to check your animation. If it is pleasing to you, then we will now save. (If you wish to replace the ladder in another spot, undo the previous action and repeat directions again until you are satisfied).
45. File/Save As. When the Save As box appears, give your work a File name and leave Save as type to save as (*gif). Click Save. As the box changes, click Next, Next, Next and Finish.
This tutorial was tested by PamelaD and Evatexas. Thanks ladies!
If you are going to use this tutorial for stationery, cards or place the tutorial/tag on another site, I would appreciate you contacting me for permission, giving Arasimages credit for the original tutorial and if possible, a link back to my site. Thank you.
Copyright © Arasimages All Rights Reserved