
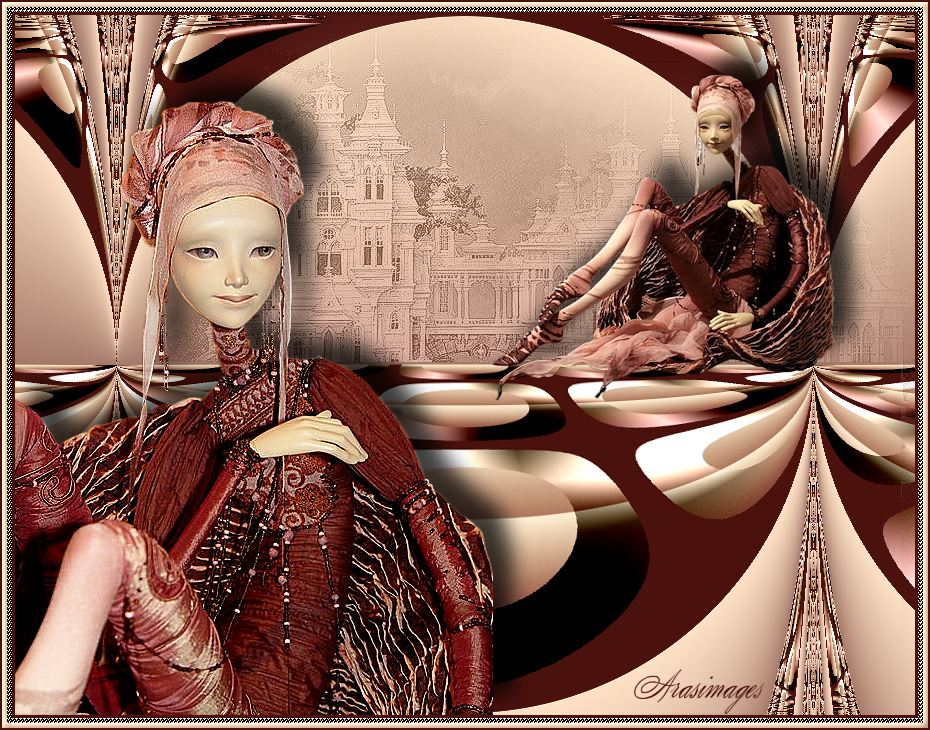
In the Castle of Dolls
For a Danish, Italian, Spanish, Dutch, and Russian translation, click on the flags.


For this tutorial you will need the materials in the zip file below.

Thanks go to PamelaD and EvaTexas of Arasimages for their lovely tubes used in this tutorial. You can find them and more on my Tubes link.
Unzip the materials into a working folder you have created on your desktop named In the Castle of Dolls. Please duplicate and close original tubes. Use the copies for your work so you will not lose the originals. Place the Pattern Copper Beads in your PSP/Patterns folder. I have used the plugins Mura'sMeister/Perspective Tiling, FF Gallery V/Sucking Toad and Virtual Photographer in this tutorial. It is assumed you have a working knowledge of PSP to follow these directions. I have used PSPX7 for this tutorial but other versions may be used. To work this tutorial, it is assumed you have some working knowledge of Paint Shop Pro.
Use the pointer below to mark your place along the way.

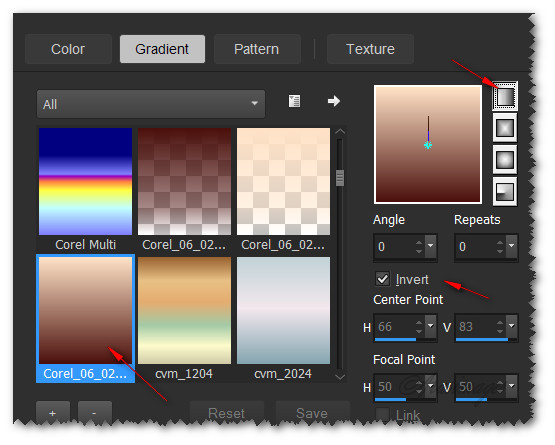
1. In Materials Palette, set Foreground to #ffe2c6, Background to #4b110d. Create a Gradient using these colors, Gradient Corel_06_029 (foreground/background), Style Linear, Angle 0, Repeats 0, Invert checked, Center Points/ Focal Points null.
2. New/New Image 900px by 720px. Flood fill with Gradient.
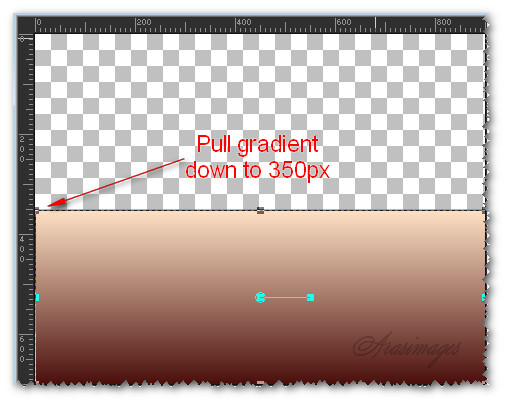
3. Using Pick tool, pull gradient down to 350px.
4. Flood fill the top transparent portion with Gradient.
5. Effects/OptikVerve Labs/Virtual Photographer. Click on Process.

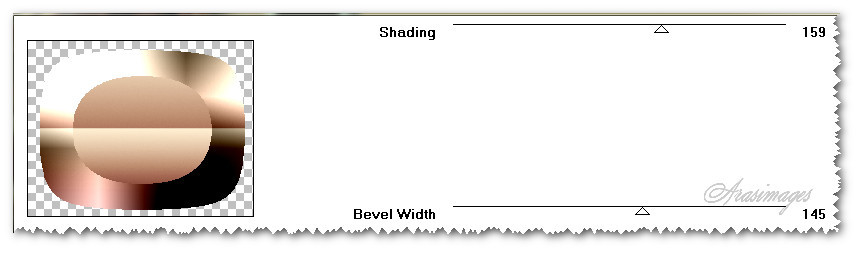
6. Effects/Filter Factory Gallery V/*Sucking Toad* Bevel IVa...
7. Flood fill the transparent areas with background color #4b110d.
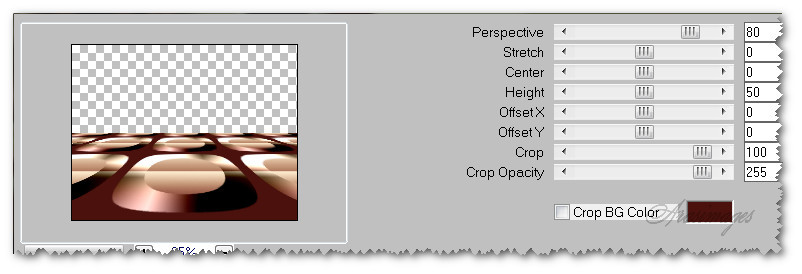
8. Effects/Mura'sMeister/Perspective Tiling.
9. Effects/Geometric Effects/Circle. Wrap checked.
10. Layers/New Raster Layer. Flood fill with Gradient.
11. Again apply Effects/Geometric Effects/Circle. Wrap checked.
12. Pull Layer 2 below Layer 1. Go back to Layer 1 to continue.
13. Open FairyCastle2.pspimage. Copy Misted layer/Paste as New Layer.
14. Pull toward left a little. Drop Opacity to 50. Set to Luminance (Legacy).
15. Effects/Edge Effects/Enhance.
16. Duplicate. Drop Opacity to 38.
17. Move image to right and down a little. Using Eraser tool, erase smudges in this area.
![]()
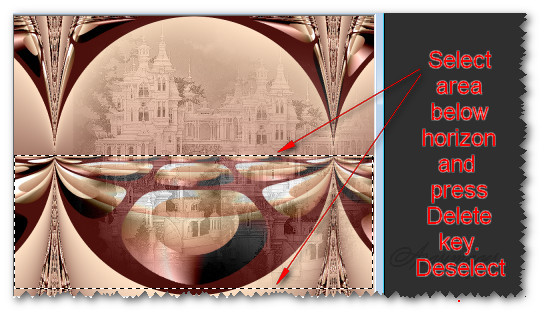
18. Merge/Merge Down. Using Selections tool set to Rectangle, Feather 0, select everything below the perspective horizon. Delete.
19. Selections/Select None.
20. Open ElegantDoll.psp image. Copy/Paste as New Layer.
21. Image/Resize/Resize 64%/Resize all layers unchecked.
22. Move doll into upper right corner.
23. Adjust/Sharpness/Sharpen.
24. Effects/3D Effects/Drop Shadow. Vertical -20, Horizontal 20, Opacity 75, Blur 30, color #000000.
25. Open ElegantDoll_A.psp image. Copy/Paste as New Layer.
26. Adjust/Sharpness/Sharpen. Sharpen/More.
27. Effects/3D Effects/Drop Shadow. Vertical -20, Horizontal 20, Opacity 75, Blur 30, color #000000.
28. Move doll into bottom left corner.
29. Image/Add Borders/Add 3px border, Symmetric checked, color #4b110d.
30. Image/Add Borders/Add 5px border, Symmetric checked, color #ffe2c6.
31. Using Magic Wand, select the 5px border.
32. In Materials Palette, change foreground to Copper Beads Pattern.
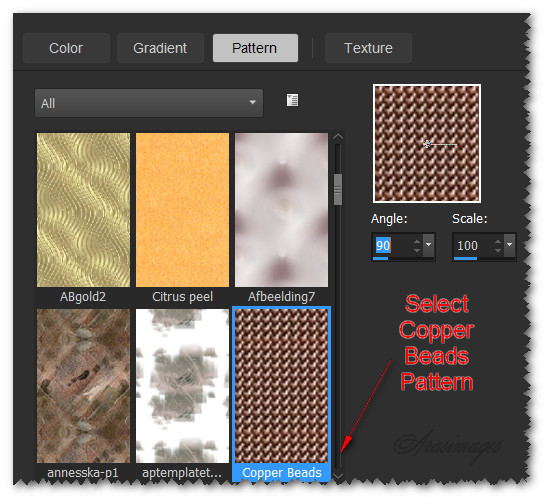
33. Flood fill the 5px border with Copper Beads Pattern.
34. Effects/Edge Effects/Enhance.
35. Selections/Select None.
36. Image/Add Borders/Add 5px border, Symmetric checked, color #ffe2c6.
37. Select 5px border with Magic Wand to activate it.
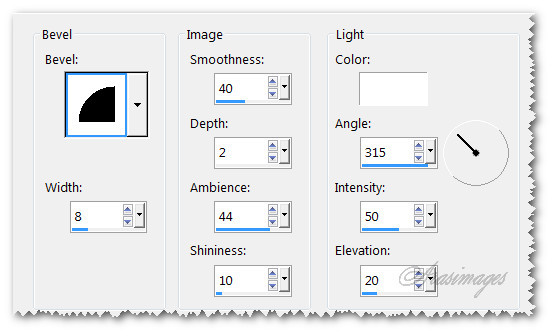
38. Effects/3D Effects/Inner Bevel.
39. Selections/Select None.
40. Image/Add Borders/Add 2px border, Symmetric checked, color #4b110d.
41. Layers/New Raster Layer. Sign your name or leave your watermark.
42. Merge/Merge Visible.
This tutorial was tested by PamelaD and Evatexas. Thanks ladies!
If you are going to use this tutorial for stationery, cards or place the tutorial/tag on another site, I would appreciate you contacting me for permission, giving Arasimages credit for the original tutorial and if possible, a link back to my site. Thank you.
Copyright © Arasimages All Rights Reserved