

Colorworld
For a Danish, Italian, Dutch, Spanish, Russian, German and Turkish translation, click on the flags.


For this tutorial you will need the materials in the zip file below.

Unzip the materials into a working folder you have created on your desktop named Colorworld. Please duplicate and close original tubes using the duplicates for your work. I have used the plugins Penta/color dot, Attacks/Border: Random-Polygone I, Simple/Top Left Mirror, Andromeda/Perspective and PSP effects in this tutorial. Place the ArasimagesColorworld Preset in the Andromeda Presets folder. (Perspective-Presets/andromeda/02Full Canvas/22Side Walls). Place the two Selections in the PSP Selections folder. Place 183-kris Mask into your PSP/Masks folder. Export the brush into your PSP/Brushes folder. It is assumed you have a working knowledge of PSP to follow these directions. I have used PSPX7 for this tutorial but other versions may be used. To work this tutorial, it is assumed you have some working knowledge of Paint Shop Pro.
Thanks go to PamelaD of Arasimages for her lovely tubes used in this tutorial.
Use the little parrot below to mark your place along the way.

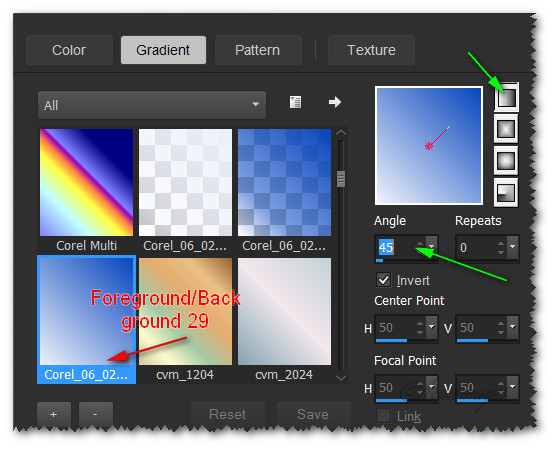
1. In Materials Palette, set Foreground to #0846db, Background to #edf1fa. Create Gradient using Style Linear, Repeats 0, Angle 45, Invert checked, center and focal points grayed out.
2. New/New Image 900px by 650px.
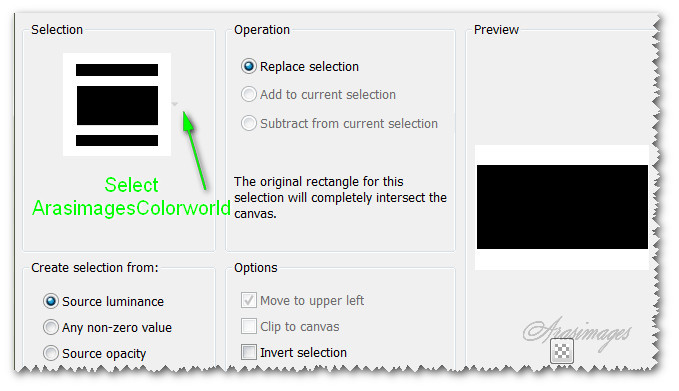
3. Selections/Load/Save Selection/Load Selection from Disk. Select ArasimagesColorworld selection from dropdown. Load.
4. Flood fill selection with Gradient.
5. Layers/New Raster Layer.
6. Flood fill selection with color #000000 (black).
7. Selections/Modify/Contract by 3px. Delete. Keep selected.
8. Drop down to first layer. Highlight it.
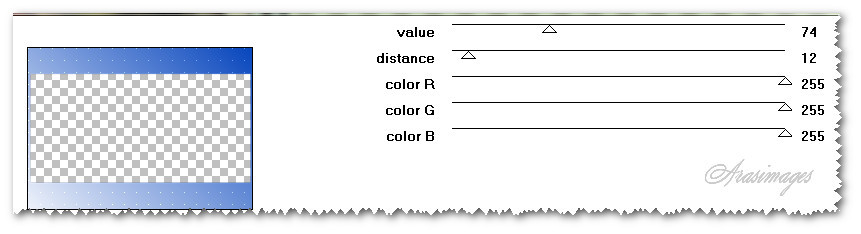
9. Effects/Penta/color dot.
10. Effects/Edge Effects/Enhance.
11. Effects/3D Effects/Drop Shadow. Vertical -17, Horizontal -8, Opacity 50, Blur 35, color #000000.
12. Effects/3D Effects/Drop Shadow. Vertical 17, Horizontal 8, Opacity 50, Blur 35, color #000000.
13. Go back to Raster 2 layer and highlight it. Selections/Select None.
14. Using Magic Wand, select inside the center rectangle. Flood fill with color #fde686.
15. Effects/3D Effects/Drop Shadow. Vertical -15, Horizontal -15, Opacity 50, Blur 30, color #000000.
16. Effects/3D Effects/Drop Shadow. Vertical 15, Horizontal 15, Opacity 50, Blur 30, color #000000.
17. Layers/New Raster Layer. Flood with color #000000.
18. Effects/Filter Attacks/Filter Attacks. Click on the button at center bottom. Then in the selections, click on the Border: Random-Polygone I, then the arrow at the bottom right. This is the default setting so you don't have to change anything on the right side settings.

19. Selections/Select None.
20. Effects/Penta/color dot. Use same settings as in Step #9.
21. Effects/Edge Effects/Enhance.
22. Layers/New Raster Layer. Flood fill with color #bc1300.
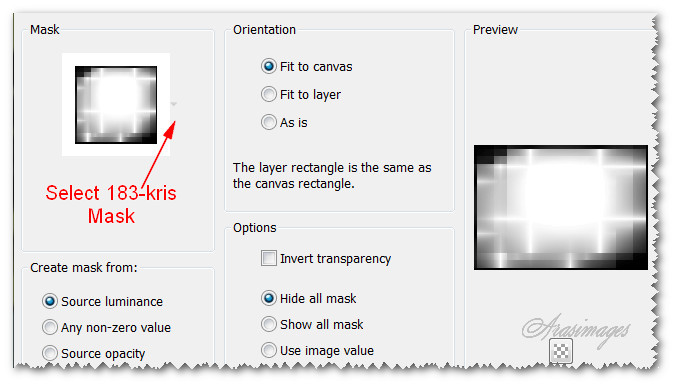
23. Layers/Load Save Mask/Load Mask from Disk. From drop down select 183-kris Mask. Load.
24. Merge/Merge Group.
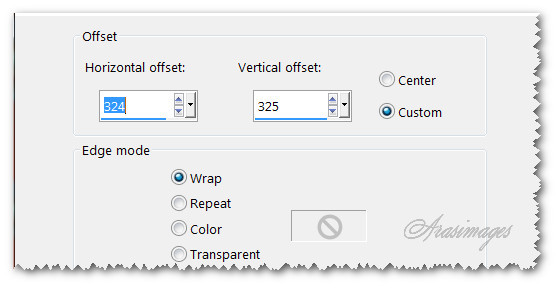
25. Effects/Image Effects/Offset.
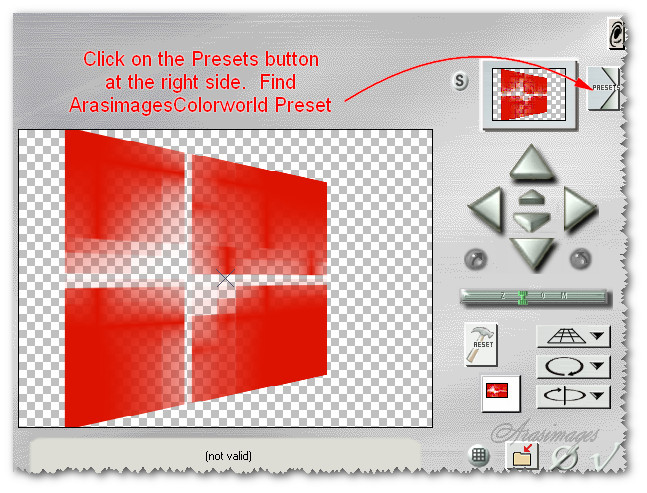
26. Effects/Andromeda/Perspective. Click on Presets to find the ArasimagesColorWorldPreset.pfp file. (Perspective-Presets/andromeda/02Full Canvas/22Side Walls).
27. Effects/Edge Effects/Enhance.
28. Effects/3D Effects/Drop Shadow. Vertical -15, Horizontal -15, Opacity 50, Blur 30, color #000000.
29. Effects/3D Effects/Drop Shadow. Vertical 15, Horizontal 15, Opacity 50, Blur 30, color #000000.
30. Open Macaw.pspimage. Copy/Paste as New Layer.
31. Effects/3D Effects/Drop Shadow. Vertical -15, Horizontal -15, Opacity 50, Blur 30, color #000000.
32. Move Macaw bird to the top left corner.
33. Adjust/Sharpness/Sharpen.
34. Duplicate. Image/Resize/Resize by 68%/Resize all layers unchecked.
35. Move under the first Macaw as seen in finished image. Pull layer under first Macaw layer.
36. Adjust/Sharpness/Sharpen.
37. Back to top layer, hightlight to continue.
38. Layers/New Raster Layer.
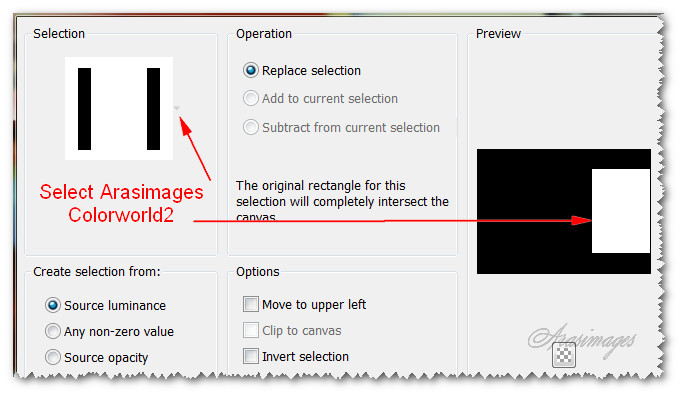
39. Selections/Load/Save Selection/Load Selection from Disk. Find ArasimagesColorworld2 selection from drop down box. Load.
40. Open Brighteyes.pspimage. Copy/Paste into Selection. Selections/Select None.
41. Adjust/Sharpness/Sharpen.
42. Effects/3D Effects/Drop Shadow. Vertical -15, Horizontal -15, Opacity 50, Blur 30, color #000000.
43. From Tool bar, select Paint Brush tool. Find cdsign_brush19. Settings as seen below.

44. Layers/New Raster Layer.
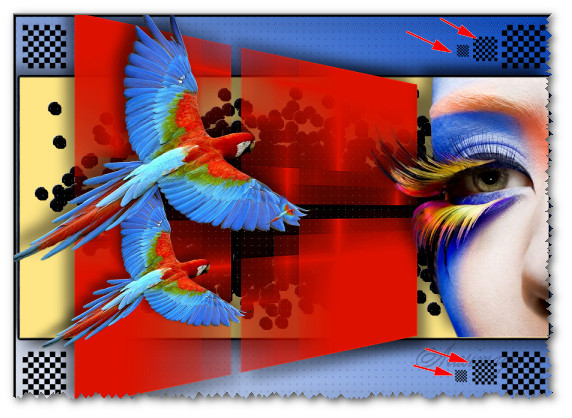
45. Using the color black #000000 in Background of Materials palette, stamp brush in upper left corner.
46. Effects/Simple/Top Left Mirror.
47. Change Size to 50. Stamp to the left of the upper right stamp and bottom right stamp. Change Size to 25. Stamp to the left of each of the other right side stamps.
48. Open SmallParrot.pspimage. Copy/Paste as New Layer.
49. Adjust/Sharpness/Sharpen.
50. Effects/3D Effects/Drop Shadow. Vertical -15, Horizontal -15, Opacity 50, Blur 30, color #000000.
51. Place SmallParrot in the woman's eye on the left side.
52. Duplicate twice. Place duplicated Macaw Parrots on each side toward the bottom where you will be making your text. You can move them into place later.
53. From Tool bar, select your Text tool. Choose Font Troutkings BTN, Size 72, Stroke width 0.0, Line style Solid, Kerning 75. Using Background color #fde686, type out the word "Colorworld".

54. Convert to Raster Layer.
55. Objects/Align/Horizontal Center. Place evenly in bottom large border.
56. Selections/Select All. Selections/Float. Selections/Defloat.
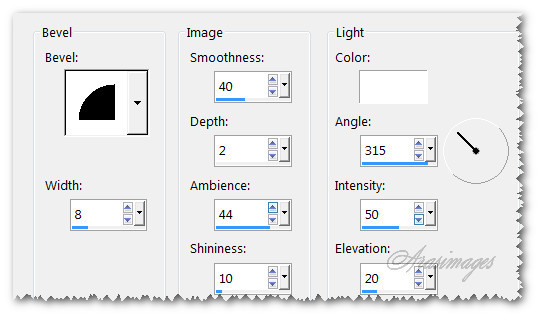
57. Effects/3D Effects/Inner Bevel.
58. Effects/3D Effects/Drop Shadow. Vertical 1, Horizontal 1, Opacity 100, Blur 2, color #000000.
59. Selections/Select None. Duplicate. Merge/Merge Down.
60. Click on the left little MacawParrot at the bottom. Image/Mirror. Place it to the left of the text. Move the right little MacawParrot to match the left side one.
61. Image/Add Borders/Add 5px border, Symmetric checked, color #fde686.
62. Click on 5px border with Magic Wand to activate it.
63. Effects/3D Effects/Inner Bevel. Use same settings as in Step #57.
64. Selections/Select None.
65. Sign your name or stamp watermark. Save as .jpg or .png file.
This tutorial was tested by PamelaD and Evatexas. Thanks ladies!
If you are going to use this tutorial for stationery, cards or place the tutorial/tag on another site, I would appreciate you contacting me for permission, giving Arasimages credit for the original tutorial and if possible, a link back to my site. Thank you.
Copyright © Arasimages All Rights Reserved