
Enchanted Forest
For a Danish, Italian, Dutch, Spanish and French translation, click on the flags.


For this tutorial you will need the materials in the zip file below.

Thanks go to PamelaD and EvaTexas of Arasimages for their lovely tubes used in this tutorial. You can find them and more new tubes on my Tubes link. Thanks also to Simone for her beautiful animations.
Unzip the materials into a working folder you have created on your desktop named Enchanted Forest. Please duplicate and close original tubes. Use the copies for your work so you will not lose the originals. Place Selection in your PSP/Selections folder. I have used the effects of PSP and the programs Sqirlz and Animation Shop in this tutorial. It is assumed you have a working knowledge of PSP to follow these directions. I have used PSPX6 for this tutorial but other versions may be used. To work this tutorial, it is assumed you have some working knowledge of Paint Shop Pro.
Use the fern below to mark your place along the way.

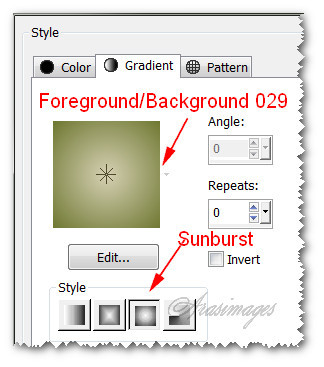
1. In Materials Palette, set Foreground to #d5d0b3, Background to #6e7731. Create a Gradient using these colors, Gradient Corel_06_029 (foreground/background), Style Sunburst, Angle 0, Repeats 0, Invert unchecked, Center Points/ Focal Points default.
2. New/New Image 850px by 700px. Flood fill with Gradient.
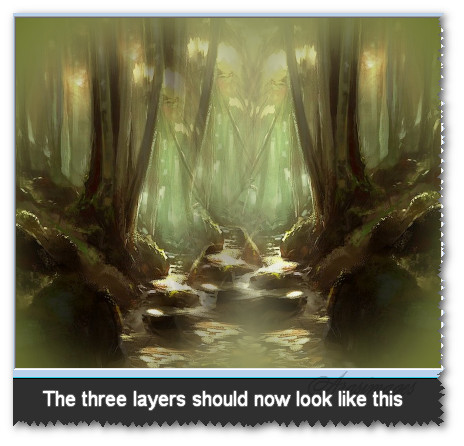
3. Open ForestStream.pspimage (misted layer). Copy/Paste as New Layer.
4. Image/Mirror. Place image to the left and up a little as seen below.

5. Paste again as New Layer. Place image to the right side as seen below.

6. Paste again as New Layer. Image/Mirror.
7. Place on left side of image all the way to the left border as seen below.
8. Layers/New Raster Layer.
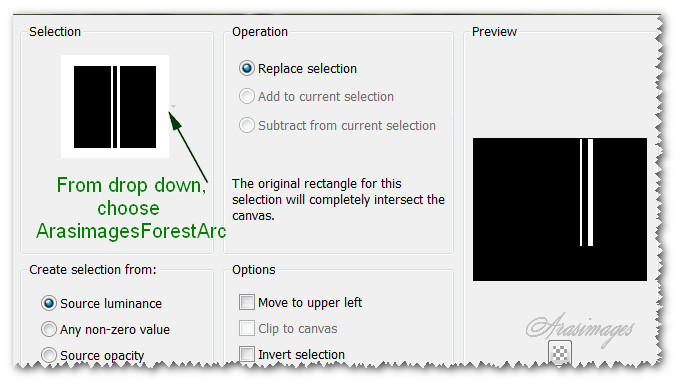
9. Selections/Load Save Selection/Load Selection From Disk. Select ArasimagesForestArc. Load.
10. Change Background color to #7e8c59. Flood fill Selection with Background color. Deselect.
11. Effects/Edge Effects/Enhance.
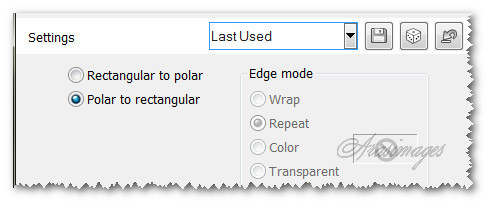
12. Effects/Distortion Effects/Polar Coordinates.
13. Duplicate. Image/Mirror.
14. Duplicate. Image/Flip.
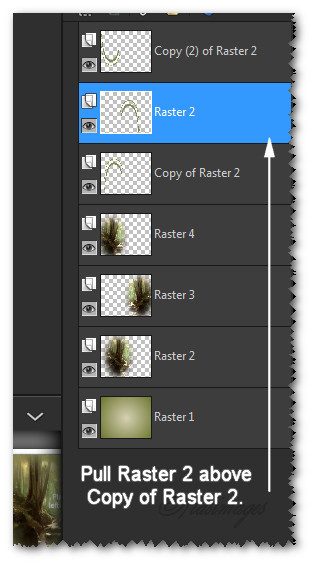
15. Pull Raster 2 above Copy of Raster 2.
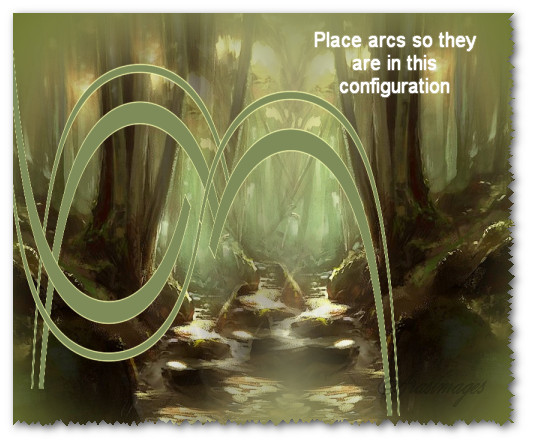
16. Arrange arcs so that they form this configuration.
17. Merge/Merge Down twice.
18. Effects/3D Effects/Drop Shadow. Vertical -14, Horizontal -8, Opacity 50, Blur 15, color #000000.
19. Open Doll_51.psp image. Copy Tubed layer/Paste as New Layer.
20. Image/Mirror.
21. Image/Resize/Resize by 74%/Resize layers unchecked.
22. Adjust/Sharpness/High Pass Sharpen.
23. Adjust/Sharpness/Sharpen.
24. Effects/3D Effects/Drop Shadow. Vertical --14, Horizontal -8, Opacity 50, Blur 15, color #000000.
25. Move Fairie to touch the left side of image so she is sitting in bottom of left arc.
26. Copy Doll_51 Tube again/Paste as New Layer.
27. Image/Resize/Resize by 52%/Resize all layers unchecked.
28. Adjust/Sharpness/High Pass Sharpen. Use same settings at Step #22.
29. Adjust/Sharpness/Sharpen.
30. Using Push Tool from Tool bar, Size set to 8, all other settings at default, push the Fairie's dress out on right side so it is not so straight edged.
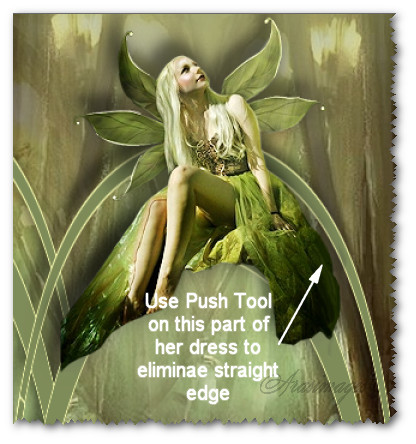
31. Effects/3D Effects/Drop Shadow. Vertical --14, Horizontal -8, Opacity 50, Blur 15, color #000000.
32. Place Fairie toward the top, sitting on the lower part of the arc in the center of image.
33. Copy Doll_51 Misted layer/Paste as New Layer.
34. Image/Mirror. Image/Resize/Resize by 42%/Resize all layers unchecked.
35. Place resized Fairie to the right side of tree on right.
36. Open Ferns_1.pspimage. Copy/Paste as New Layer.
37. Place in bottom right corner.
38. Adjust/Sharpness/Sharpen.
39. Open Ferns_02.pspimage. Copy/Paste as New Layer.
40. Adjust/Sharpness/Sharpen.
41. Move into bottom left corner.
42. Duplicate. Resize by 42%. Move above dark rock near right side of image as seen below.
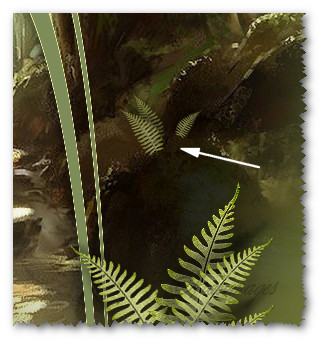
43. Drop Opacity to 67.
44. Place your watermark or sign your name at this point.
45. Image/Add Borders/Add 3px border, Symmetric checked, color #d5d0b3.
46. Save as a .jpg file called Enchanted Forest.
47. Open the program Sqirlz. File/Open the Enchanted Forest .jpg.
48. Click on the red circle at the top of the Tool bar on the left to start selecting the area where we will have water ring ripple animation.
49. Select carefully, click by click the area you want animated, then right click to connect the dashes. I encompassed the area under the lady and also on the right bottom corner by ferns in my final image. Note: You might find you will be doing this step a few times before you are satisfied with your selection.

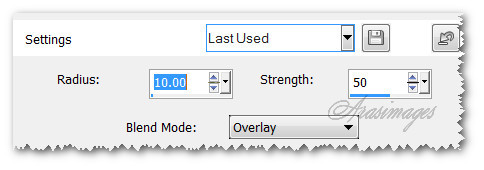
50. At the top tool bar, click on Basic Ripples. Change settings in Parameters box as seen below.


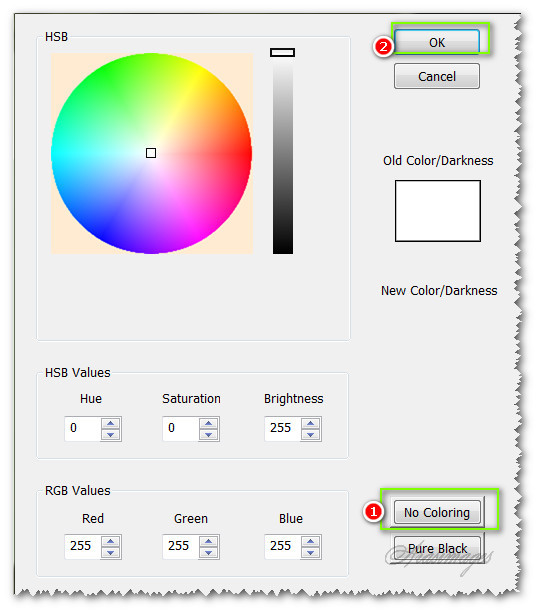
51. Click on Water Color/Darkness while you have the Set Parameters for Basic Ripples open. Click on No Coloring, then OK for clear water. Now close out the Set Parameters for Basic Ripples box.
52. At the top in the Tool bar, click on the yellow arrow to test your animation. If it is okay, then click on gif in the top tool bar to the right. This will now save your animation.
53. When you click on the gif, a box will appear telling you what your animation has, in this case basic ripples only.
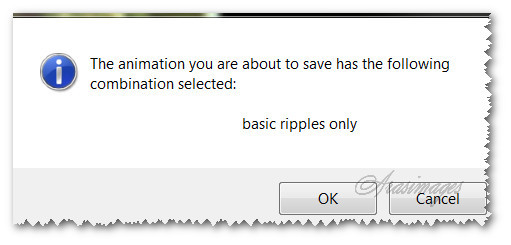
54. Click OK. The Save As box appears and you will direct where to save your work at the top, give the File name and Save as type. The name will be Enchanted Forest and save as GIF Files (*gif). Click OK.
55. Next, another box will appear where you can enter a frame rate. It is set to 15 default. I changed it to 10 for faster moving water. Click OK.
56. Now you can watch while the Saving Animation does its work. The Information box shows that your animation was saved at 856px by 706px. Click OK.
57. Now open Animation Shop. File/open Enchanted Forest. Click/highlight the first frame. Edit/Select All.
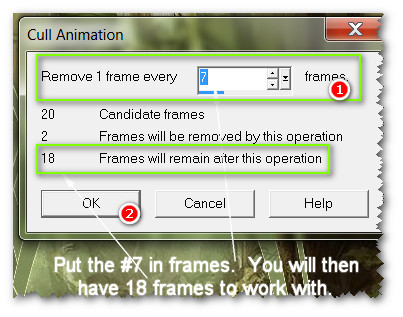
58. Animation/Cull Animation. Select 7 as your frame choice leaving 18 frames total.
59. File/Open SimoneAni515-MNG.mng file. Click/highlight the first frame. Edit/Select All. Copy.
60. Go back to the Enchanted Forest frames. In first frame, right click and Paste/Into Selected Frame in the upper left side above Fairie. Left click to set into place. Paste again into upper left corner having only some of the fireflies showing.
61. File/open SimoneAni514-MNG.mng file. Click/highlight the first frame. Edit/Select All. Copy.
62. Go back to the Enchanted Forest frames. In the first frame, right click and Paste/Into Selected Frame, placing the fireflies in upper right above Fairie. Left click to set in place.
63. Right click in first frame again and Paste/Into Selected Frame into area below and over the top center Fairie. Left click to set in place.
64. If you are not pleased with your placement, you can undo and repeat steps above until you are happy with your work. Now we will save it.
65. File/Save As. When the box appears, direct where to Save in (working folder), give the File name: Enchanted Forest and Save as type leave as a (*gif) file. Click Save.
66. As the boxes appear, simply click Next, Next, Next and Finish.
You are now finished with a double animated tutorial! Thank you for your interest in my work.
This tutorial was tested by PamelaD and Evatexas. Thanks ladies!
If you are going to use this tutorial for stationery, cards or place the tutorial/tag on another site, I would appreciate you contacting me for permission, giving Arasimages credit for the original tutorial and if possible, a link back to my site. Thank you.
Copyright © Arasimages All Rights Reserved