
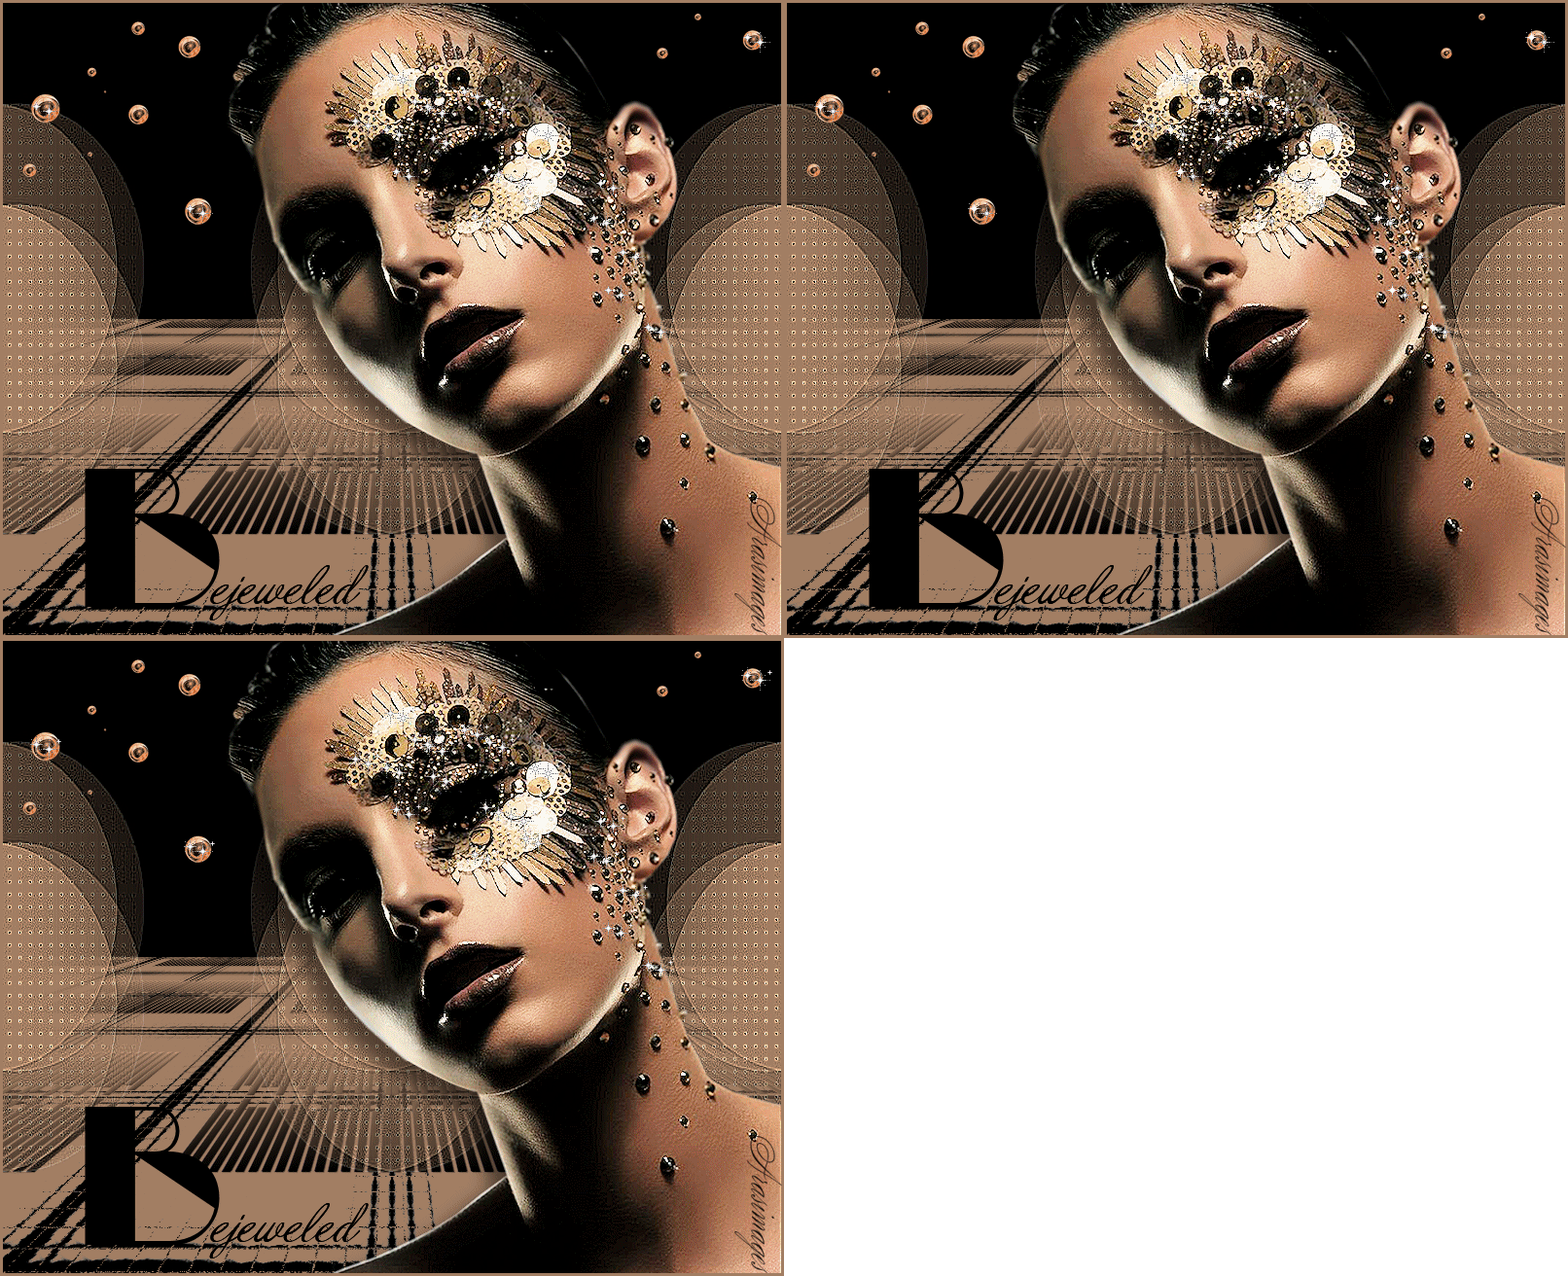
Bejeweled
For a Danish, Italian, Dutch, Spanish, French and Turkish translation, click on the flags.
For this tutorial you will need the materials in the zip file below.
Unzip the materials into a working folder you have created on your desktop named Bejeweled. Please duplicate and close original tubes. Use the copies for your work so you will not lose the originals. Place the Masks in your PSP/Mask folder. Place the Selection in the PSP/Selections folder. Place My Favorite Rounded Button Preset in PSP/Presets folder. I have used the plugins Mura'sMeister/Perspective, Bkg Designers sf10 IV/Instant Tile and the program Animation Shop in this tutorial. It is assumed you have a working knowledge of PSP to follow these directions. I have used PSPX7 for this tutorial but other versions may be used. To work this tutorial, it is assumed you have some working knowledge of Paint Shop Pro.
Use the little jewel below to mark your place along the way.

1. In Materials Palette, set Foreground to #000000, Background to #a27e62.
2. New/New Image 800px by 650px. Flood fill with Foreground color #000000.
3. Layers/New Raster Layer. Flood fill with Background color #a27e62.
4. Layers/Load Save Mask/Load Mask from disk. Select Mask 173. Load.
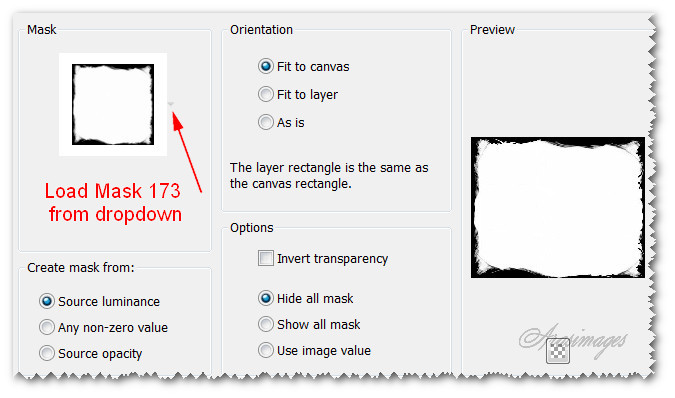
5. Merge/Merge Group.
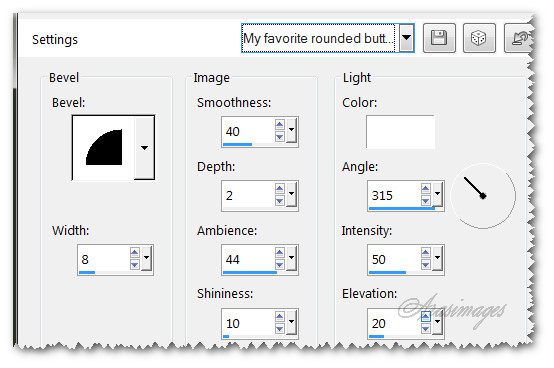
6. Effects/3D Effects/Inner Bevel. Use My Favorite Rounded Button Preset.
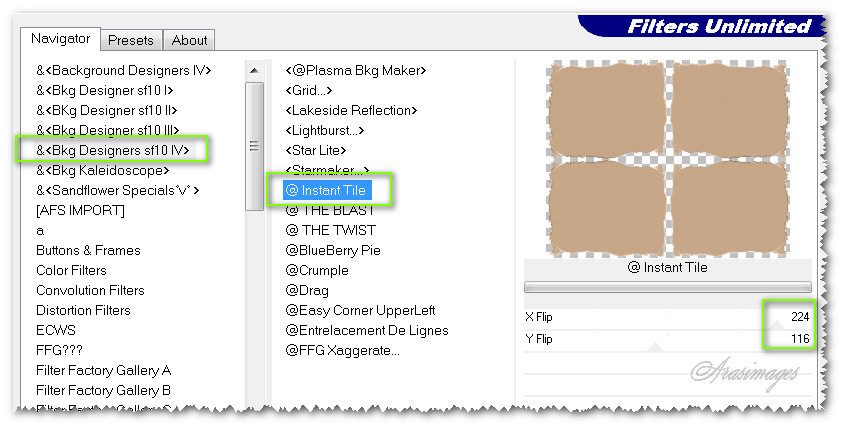
7. Effects/FiltersUnlimited or FiltersUnlimited2/Bkg Designers sf10 IV_Instant Tile.
8. Effects/Texture Effects/Mosiac-Glass.
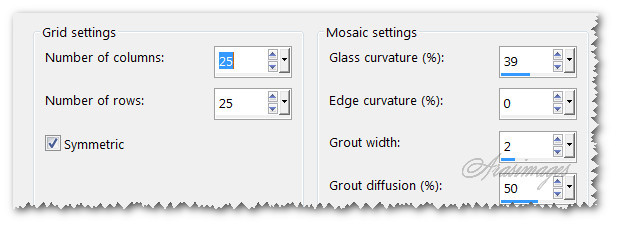
9. Layers/New Raster Layer.
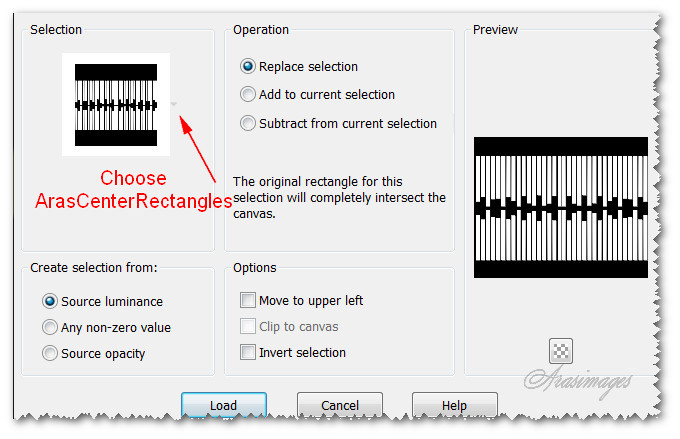
10. Selections/Load Save Selections/Load Selection from Disk. Choose ArasCenterRectangles Selections. Load.
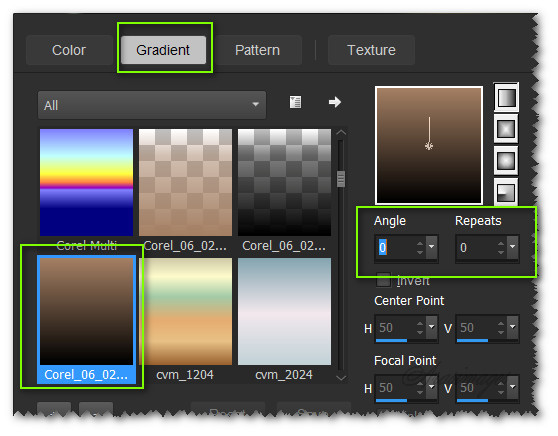
11. Create Gradient using Foreground/Background colors, Style Linear, Angle and Repeats set to 0, Invert unchecked, Center and Focal points grayed out. Flood fill Selection with Gradient. Selections/Select None.
12. Image/Resize/Resize by 78%/Resize all layers unchecked.
13. Merge/Merge Down.
14. Effects/Mura'sMeister/Perspective Tiling.

15. Layers/New Raster Layer. Flood fill with Background color #a27e62.
16. Layers/Load/Save Mask/Load Mask from Disk. Select Narah_Mask_0575. Load.
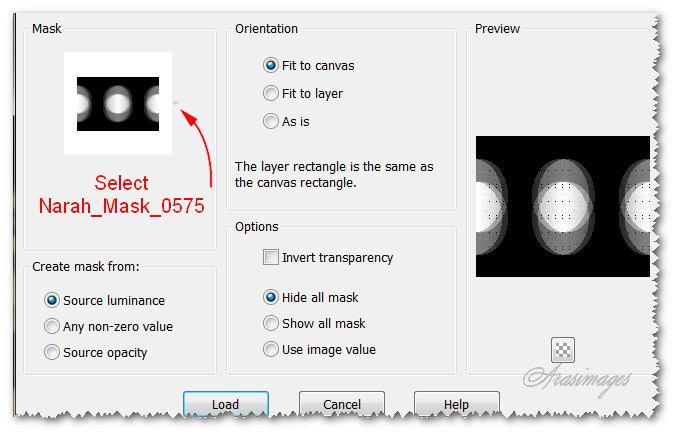
17. Merge/Merge Group.
18. Effects/Edge Effects/Enhance More.
19. Open 0_9641f_b198f775_XL.png. Copy/Paste as New Layer.
20. Image/Resize/Resize by 60%/Resize all layers unchecked.
21. Place to the left upper side of image.
22. Duplicate. Place to the upper right side of image.
23. Merge/Merge Down.
24. Effects/Edge Effects/Enhance.
25. Open Bejeweled.pspimage of lady. Copy/Paste as New Layer.
26. Image/Resize/Resize by 78%/Resize all layers unchecked.
27. Effects/Edge Effects/Enhance.
28. Effects/3D Effects/Drop Shadow. Vertical 14, Horizontal -15, Opacity 50, Blur 27, color #000000.
29. Adjust/Brightness and Contrast/Brightness/Contrast.
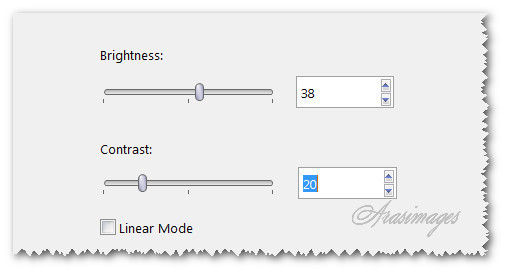
30. Place lady into bottom right corner.
31. From the tool bar, select the Text tool. Find the font Labyrinth, set to Size 200, Line style Solid, Stroke width 0.0.

32. Using the color #000000, type out the letter "B". Convert to Raster Layer.

34. Using the color #000000, type out the letters "ejeweled". Convert to Raster layer.
35. Duplicate. Merge/Merge Down.
36. Place the "B" and "ejeweled" letters so they line up correctly in bottom left corner area.
37. Merge/Merge Down.
38. Add your name or watermark if you wish.
39. Image/Add Borders/Add 3px border, Symmetric checked, color #a27e62.
40. Save your work as a .jpg file named Bejeweled.
41. Open Animation Shop. Click on File/Open and open the Bejeweled image.
42. Duplicate twice so you have 3 frames in all. Click inside first frame/Edit/Select All.
43. Open Star.gif. Edit/Select All. Copy.
44. Go back to your Bejeweled image. Right click inside first frame. Hover the star with your mouse over the place you want it to be, then left click onto place.
45. Repeat adding many stars to the areas of the jewels on her face and a few on her neck. Also place a star on two of the circles to her left and one to her right. See my finished image where they are sparkling.
46. To save your work, click on File/Save As. Save in: Your working folder. File name: Bejeweled. Save as type: leave as .(*.gif). Click on Save.
47. As the boxes change, keep clicking Next three times, then Finish. It has now been saved.
This tutorial was tested by PamelaD and Evatexas. Thanks ladies!
If you are going to use this tutorial for stationery, cards or place the tutorial/tag on another site, I would appreciate you contacting me for permission, giving Arasimages credit for the original tutorial and if possible, a link back to my site. Thank you.
Copyright © Arasimages All Rights Reserved


