
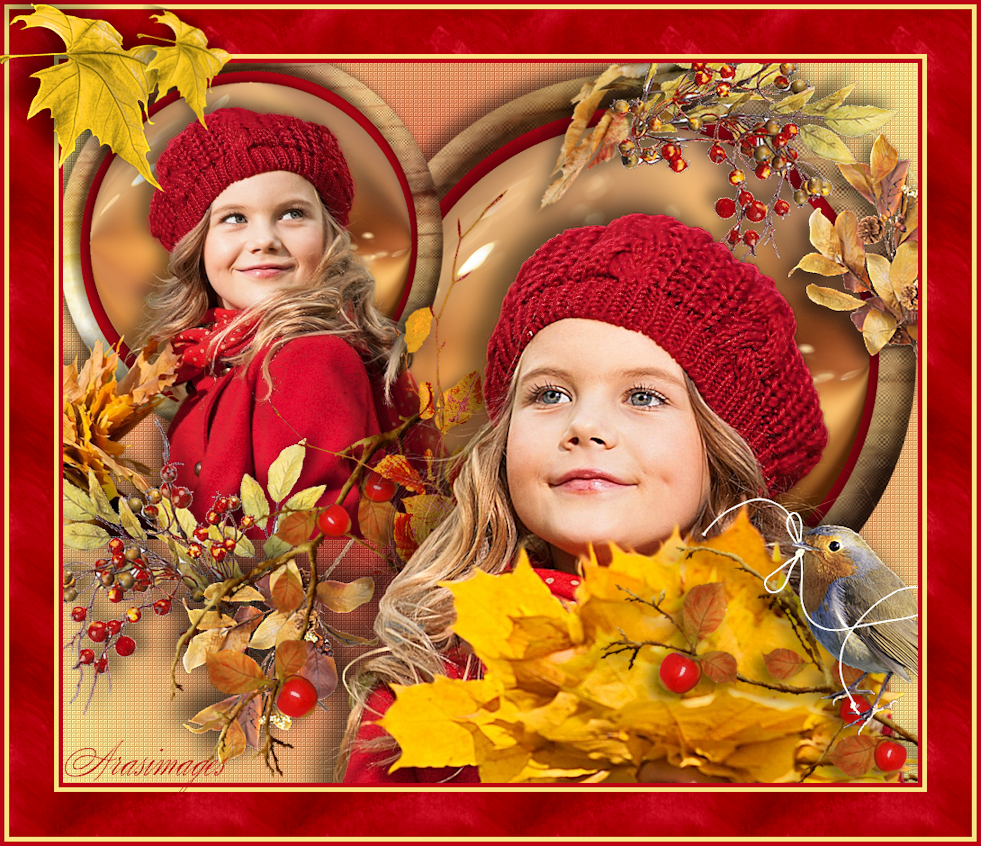
Painted Leaves of Fall
For Danish, Italian, Dutch, French, German, Spanish and Russian translation, click on the flags.


For this tutorial you will need the materials in the zip file below.

Thanks go to PamelaD of Arasimages for her lovely tubes, HJR_Designs, MDDesigns and the unknown tubers of the scraps used in this tutorial. You can find Pamela's tubes and hundreds more of new tubes on my Tubes link.
Unzip the materials into a working folder you have created on your desktop named Painted Leaves of Fall. Please duplicate and close original tubes. Use the copies for your work so you will not change the originals. I have used the plugins The Plugin Site/HyperTyle, Xero/Fritillary and the effects of PSP in this tutorial. I have used PSPX7 for this tutorial but other versions may be used. To work this tutorial, it is assumed you have some working knowledge of Paint Shop Pro.
Use the leaves below to mark your place along the way.
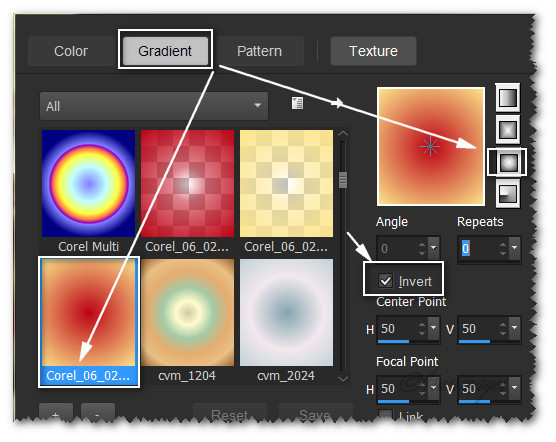
1. In Materials Palette, set Foreground to #fbe486, Background to #bd0416. Create a Gradient using these colors, Gradient Corel_06_029 (foreground/background), Style Sunburst, Angle 0, Repeats 0, Invert checked, Center Points/ Focal Points default.
2. New/New Image 950px by 800px. Flood fill with Gradient.
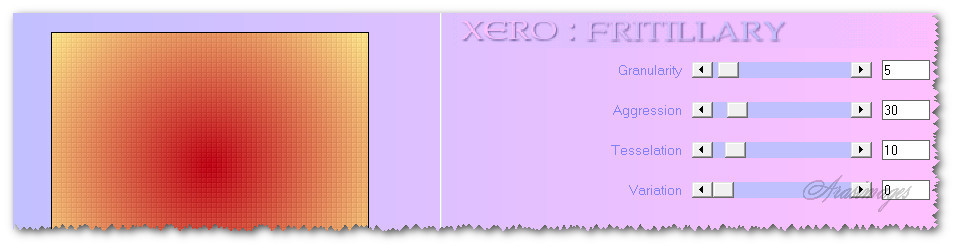
3. Effects/Xero/Fritillary.
4. Effects/Edge Effects/Enhance.
5. Layers/New Raster Layer. Flood fill with background color.
6. Effects/Geometric Effects/Circle.
7. Image/Resize/Resize by 72%/Resize all layers unchecked.
8. Layers/New Raster Layer. Selections/Select All.
9. Open 0_9aef8_2d6d2538-XXL.png. Copy/Paste into Selection.
10. Selections/Select None.
11. Effects/Geometric Effects/Circle. (Same setting as in Step #6).
12. Image/Resize/Resize by 66%/Resize all layers unchecked.
13. Effects/3D Effects/Drop Shadow. Vertical -8, Horizontal -11, Opacity 50, Blur 24, color #000000.
14. Merge/Merge Down.
15. Open 0_9b878_492b7bd0_XXL.Png. Copy/Paste as New Layer.
16. Image/Resize/Resize by 68%/Resize all layers unchecked.
17. Effects/3D Effects/Drop Shadow. Vertical -8, Horizontal -11, Opacity 50, Blur 24, color #000000.
18. Merge/Merge Down.
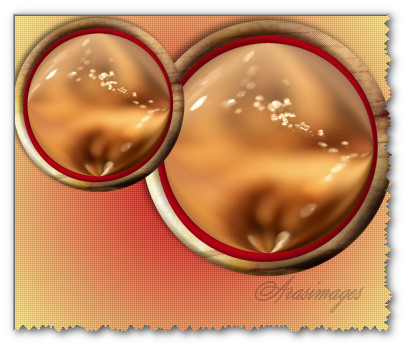
19. Place in upper right corner.
20. Duplicate. Image/Resize/Resize by 68%/Resize all layers unchecked.
21. Place in upper left corner, overlapping on the left side of larger circle. See example.
22. Open Precious_B.psp image. Copy TUBE layer/Paste as New Layer.
23. Image/Resize/Resize by 63%/Resize all layers unchecked.
24. Effects/3D Effects/Drop Shadow. Vertical -8, Horizontal -11, Opacity 50, Blur 24, color #000000.
25. Adjust/Sharpness/Sharpen.
26. Place over circle in upper left corner.
27. Open 0_9ae39_3d89b221_XL.png. Copy/Paste as New Layer.
28. Image/Resize/Resize by 58%/Resize all layers unchecked.
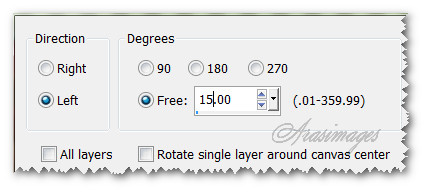
29. Image/Free Rotate/Rotate 15 degrees Left.
30. Effects/3D Effects/Drop Shadow. Vertical -8, Horizontal -11, Opacity 50, Blur 24, color #000000.
31. Adjust/Sharpness/Sharpen More.
32. Move leaves to right side of large circle on right side of image.
33. Paste leaves as New Layer again. Image/Flip.
34. Image/Resize/Resize by 58%/Resize all layers unchecked.
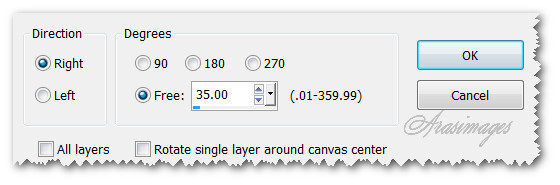
35. Image/Free Rotate/Rotate Right by 35 degrees.
36. Effects/3D Effects/Drop Shadow. Vertical -11, Horizontal -18, Opacity 55, Blur 35, color #000000.
37. Adjust/Sharpness/Sharpen More.
38. Place under Precious_B little girl.
39. Open 0_9b8a0_ad54bb6b_XXL.png. Copy/Paste as New Layer.
40. Image/Resize/Resize by 48%/Resize all layers unchecked.
41. Image/Flip.
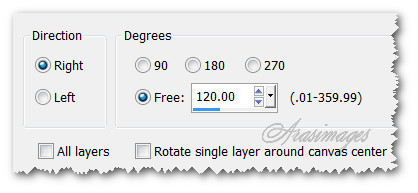
42. Image/Free Rotate/Rotate Right by 120 degrees.
43. Effects/3D Effects/Drop Shadow. Vertical -8, Horizontal 11, Opacity 50, Blur 24, color #000000.
44. Move over top of brown leaves.
45. Duplicate. Image/flip.
46. Image/Free Rotate Left by 90 degrees, All layers/Rotate single layer around canvas center unchecked.
47. Effects/3D Effects/Drop Shadow. Vertical -8, Horizontal 11, Opacity 50, Blur 24, color #000000.
48. Image/Flip. Move into bottom right corner.
49. Open MDDesigns_element80.pspimage. Copy/Paste as New Layer.
50. Change Foreground color of Gradient using #f1b025 to create a new Foreground Gradient. Using Color Changer, Tolerance 3, Edge Softness 22, click on top leaf to change part of the leaves to multi-colored. Yours may differ in color than mine as this is hard to do.
51. Effects/3D Effects/Drop Shadow. Vertical -8, Horizontal 11, Opacity 50, Blur 24, color #000000.
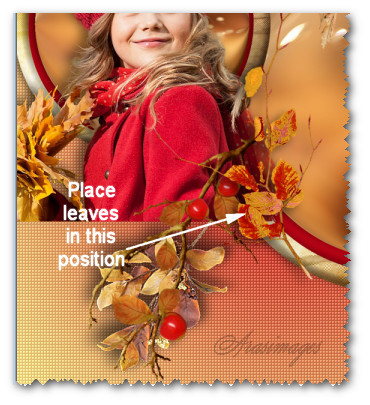
52. Move recolored leaves over the circle to the right of little girl.
53. Open 0_9b895_9b5abcc1_XXL.png. Copy/Paste as New Layer.
54. Image/Resize/Resize by 48%/Resize all layers unchecked.
55. Image/Free Rotate/Rotate 25 degrees Right, all layers/Rotate single layer unchecked.
56. Effects/3D Effects/Drop Shadow. Vertical -8, Horizontal 11, Opacity 50, Blur 24, color #000000.
57. Move leaf to the top right corner over circle.
58. Pull below Raster 4 layer (brown leaves on right) at right side of circle.
59. Go back to top layer to continue.
60. Open 0_9ae38_a4f8e858_XL.png. Copy/Paste as New Layer.
61. Image/Resize/Resize by 75%/Resize all layers unchecked.
62. Using Background color and Color Changer tool, Tolerance 3, Edge Softness 22, click a few times on the larger berries to darken them.
63. Effects/3D Effects/Drop Shadow. Vertical -8, Horizontal 11, Opacity 50, Blur 24, color #000000.
64. Adjust/Sharpness/Sharpen.
65. Image/Mirror.
66. Image/Free Rotate/Rotate left by 50 degrees, all layers/Rotate single layer unchecked.
67. Move the bunch of berries and leaves to the left side of the image so they cover the bottom edge of the little girl image.
68. Pull Raster 9 bunch of berries below Raster 4 brown leaves.
69. Duplicate. Image/Mirror. Pull duplicated layer to be the top layer and continue.
70. Image/Free Rotate/Rotate to the Right by 35 Degrees, all layers/Rotate single layer unchecked.
71. Move bunch of berries and leaves to the top right corner over the one hanging leaf.
72. Using Eraser tool, erase off the stem of the bunch of berries and leaves.
73. Open Precious_A.psp image of little girl. Copy/Paste as New Layer.
74. Image/Resize/Resize by 87%/Resize all layers unchecked.
75. Effects/3D Effects/Drop Shadow. Vertical -11, Horizontal -18, Opacity 55, Blur 35, color #000000.
76. Adjust/Sharpness/Sharpen.
77. Move little girl to bottom right side of image.
78. Go down to Copy of Raster 6 (branch with berries) and pull it upward so it is now the top layer.
79. Open 0_9b640_c2bce3e2_XXL.png of bird. Copy/Paste as New Layer.
80. Image/Resize/Resize by 20%/Resize all layers unchecked.
81. Effects/3D Effects/Drop Shadow. Vertical -11, Horizontal -18, Opacity 55, Blur 35, color #000000.
82. Adjust/Sharpness/Sharpen.
83. Move bird so it is standing on a berry in bottom right corner.
84. Open 0_9b89e_d98e375c_XXL.png of string. Copy/Paste as New Layer.
85. Image/Mirror. Image/Resize/Resize by 30%/Resize all layers unchecked.
86. Using Color Changer, color #fef7d4, Tolerance at 3, Edge Softness 22, click on the string until it is totally light in color.
87. Adjust/Sharpness/Sharpen More.
88. Place the string in the bird's beak. Using the Eraser tool set to Size 5, scrolling the image to 150%, erase the string from the bird's beak so it looks like it has it in its mouth.
89. Image/Add Borders/add 5px border, Symmetric checked, color #bd0416.
90. Image/Add Borders/add 5px border, Symmetric checked, color #fbe486.
91. Image/Add Borders/Add 50px border, Symmetric checked, color #bd0416.
92. Click in 50px border with Magic Wand to activate it.
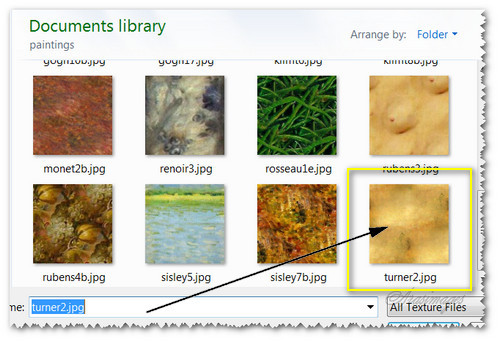
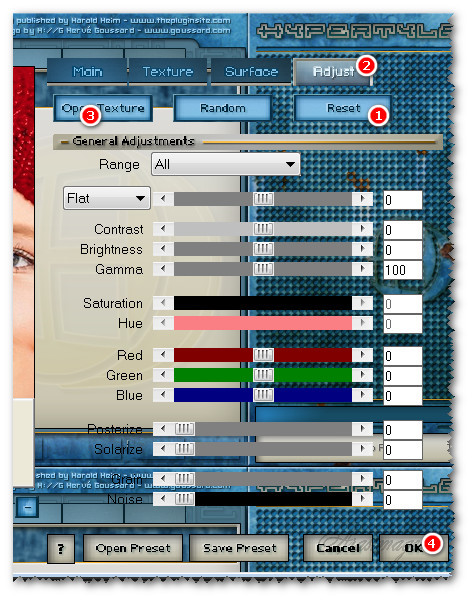
93. Effects/The Plugin Site/HyperTyle. Click on Reset. Click Adjust tab. Click on the Open Texture button and when page of textures comes up, click on Paintings/turner2.jpg. Then click on OK of main page of HyperTyle.
94. Selections/Select none.
95. Image/Add Borders/add 5px border, Symmetric checked, color #fbe486.
96. Image/Add Borders/add 5px border, Symmetric checked, color #bd0416.
97. Open HJR_AutumnLeaf001_03Nov2007.pspimage. Copy/Paste as New Layer.
98. Image/Resize/Resize by 35%/Resize all layers unchecked.
99. Image/Mirror. Image/Free Rotate/Rotate by 35 Degrees Right, all layers/Rotate single layer unchecked.
100. Move leaf to upper left corner.
101. Using Color Changer, Foreground color #fcc81d, Tolerance 3, Edge Softness 22, click on leaf several times to turn it to gold.
102. Effects/3D Effects/Drop Shadow. Vertical -11, Horizontal -18, Opacity 55, Blur 35, color #000000.
103. Adjust/Sharpness/Sharpen.
104. Duplicate. Image/Resize/Resize by 56%/Resize all layers unchecked.
105. Image/Free Rotate/Rotate by 15 Degrees Right, all layers/Rotate single layer unchecked.
106. Place duplicated leaf a little to the right of the first leaf in upper left corner.
107. Sign your name or leave your watermark if you wish. Merge/Merge Visible.
If you wish, you may resize the image at this point as it is very large. I resized mine by 90%.
This tutorial was tested by PamelaD and Evatexas. Thanks ladies!
If you are going to use this tutorial for stationery, cards or place the tutorial/tag on another site, I would appreciate you contacting me for permission, giving Arasimages credit for the original tutorial and if possible, a link back to my site. Thank you.
Copyright © Arasimages All Rights Reserved