
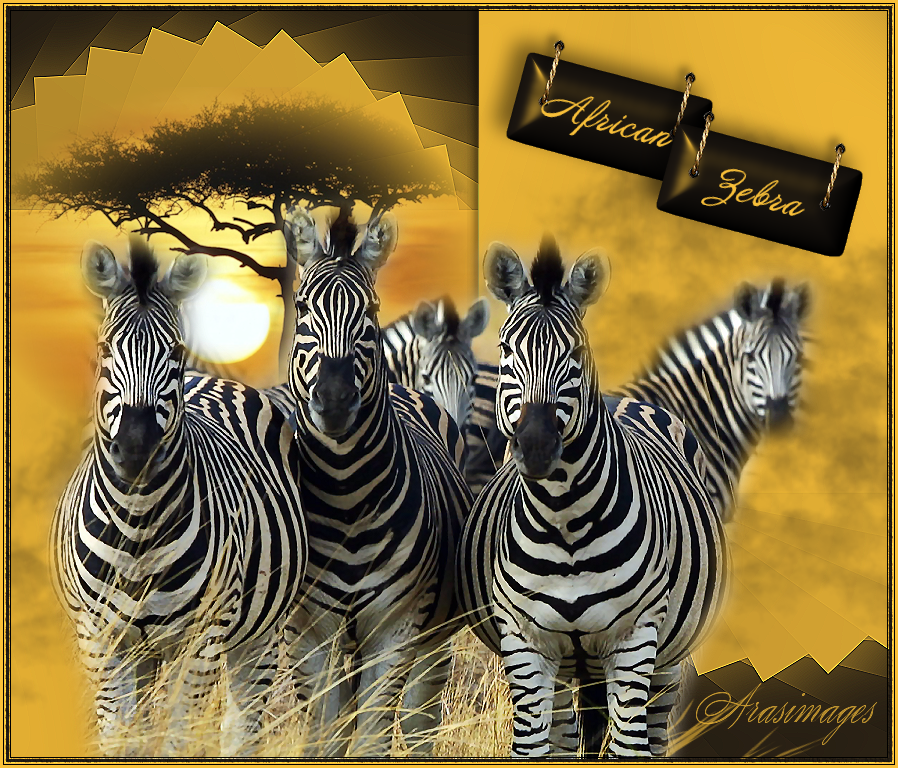
African Zebra
For an Italian, Danish, Dutch and Spanish translation, click on the flags.


For this tutorial you will need the materials in the zip file below.

Thanks go to Sorensen_Designs, to Evatexas of Arasimages and the unknown creators of the scraps for their beautiful work used in this tutorial.
Unzip the materials into a working folder you have created on your desktop named African Zebra. Please duplicate and close original tubes. Use the copies for your work so you will not lose the originals. Export the fog and grass brushes into your PSP/Brushes folder. Place ArasAngledTag Selection in your PSP/Selections folder. Click on the ArasimagesBevel.f1s file to install it into Alien Skin Eye Candy 5:Impact/Bevel. I have used the plugins Mura'sMeister/Copies, AAA Frames/Texture, VM Toolbox/MirrororriM and the Alien Skin Eye Candy 5: Impact/Bevel in this tutorial. It is assumed you have a working knowledge of PSP to follow these directions. I have used PSPX7 for this tutorial but other versions may be used. To work this tutorial, it is assumed you have some working knowledge of Paint Shop Pro.
Use the pinbelow to mark your place along the way.
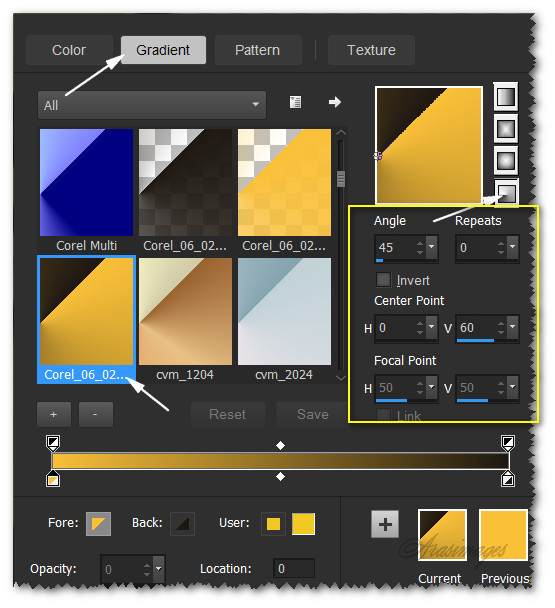
1. In Materials Palette, set Foreground to #f9c039, Background to #1f1913.
2. Create a Gradient using Foreground/Background colors, Corel_06_29 foreground/background gradient, Style Radial, Angle 45, Repeats 0, Invert unchecked, Center Point H 0, V 60, Focal Points grayed out.
3. New/New Image 880px by 750px. Flood fill with Gradient.
4. Adjust/Blur/Gaussian blur. Radius set to 74.
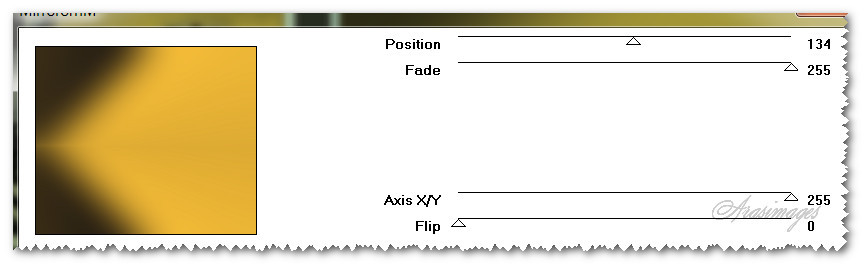
5. Effects/VM Toolbox/MirrororriM.
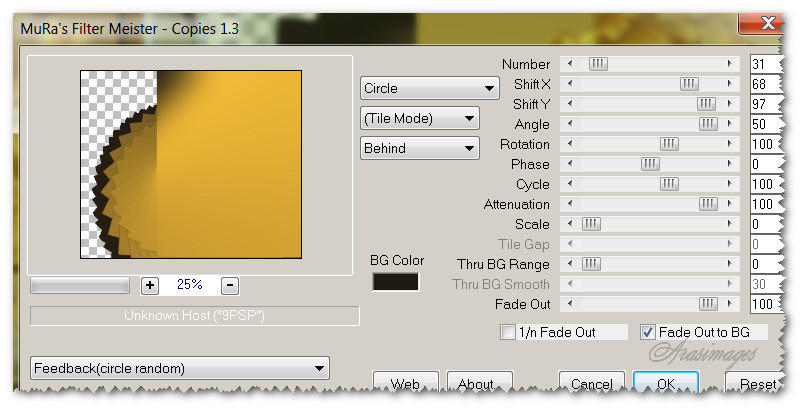
6. Effects/Mura'sMeister/Copies.
7. Effects/Edge Effects/Enhance.
8. Image/Free Rotate/Rotate to Left by 90 degrees.
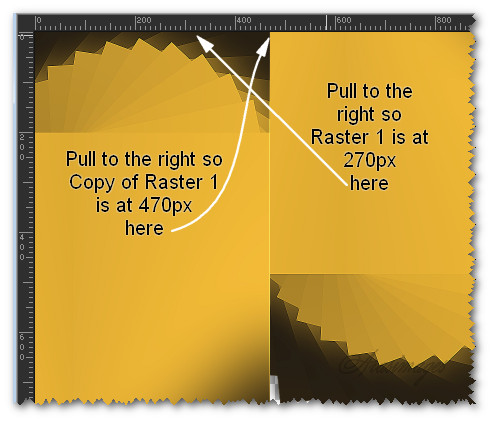
9. Pull to the right so left side is at 270px.
10. Effects/3D Effects/Drop Shadow. Vertical -12, Horizontal -12, Opacity 50, Blur 30, color #000000.
11. Duplicate. Image/Flip. Pull to the right and upward with right side of Copy of Raster 1 at 470px.
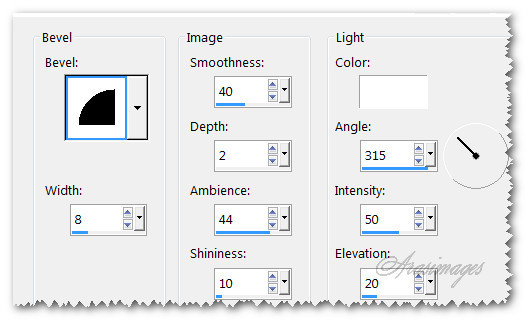
12. Effects/3D Effects/Inner Bevel.
13. Layers/New Raster Layer.
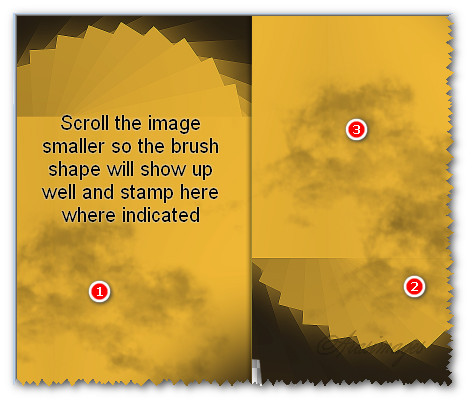
14. From Tool bar select the Paint brush tool. Find fog131 brush. Leave at default settings. Using Background color #1f1913, stamp as seen below. HINT: If you scroll the image smaller and hover the mouse over the image, the brush outline will show so you can more accurately stamp the image.

15. Open sunview161E.psp image. Copy/Paste as New Layer.
16. Image/Resize/Resize by 80%/Resize all layers unchecked.
17. Place sunview161 image to upper left corner.
18. Layers/New Raster Layer.
19. Selections/Load/Save Selection/Load Selection from Disk. From the drop down arrow, choose ArasAngledTag Selection. Load.
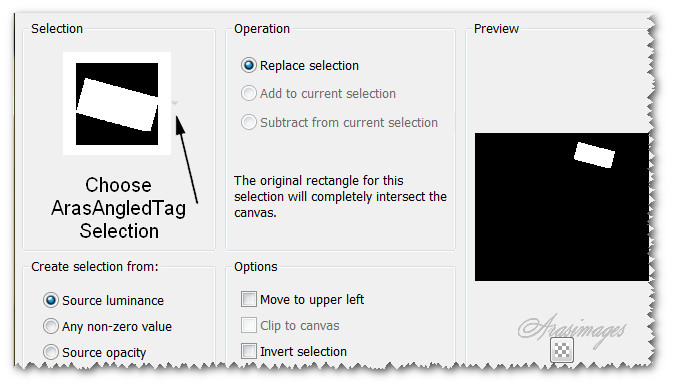
20. Flood fill with Background color #1f1913. Selections/Select None.
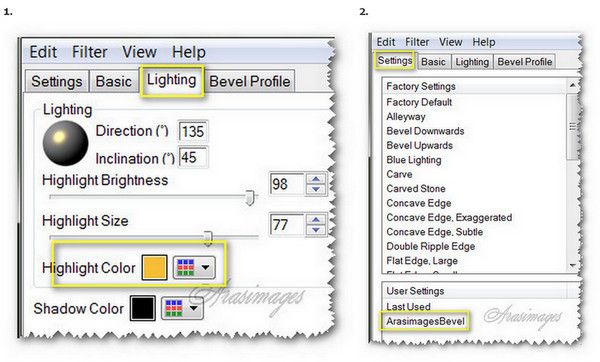
21. Effects/Alien Skin Eye Candy 5: Impact/Bevel. Under Lighting tab, select Highlight Color from your Foreground color. Choose the ArasimagesBevel under Settings Tab. Click OK.
22. Effects/3D Effects/Drop Shadow. Vertical -12, Horizontal -12, Opacity 50, Blur 30, color #000000.
23. Open 0_649e2_6102dbdc_XL.pspimage.
24. Image/Resize/Resize by 10%/Resize all layers unchecked.
25. Image/Rotate left by 75 Degrees. All layers checked.
26. Copy/Paste as New Layer on main image.
27. Effects/Edge Effects/Enhance. Place at the top left of the ArasAngledTag.
28. Duplicate. Place to the right top side of ArasAngledTag. Merge/Merge Down.
29. Effects/3D Effects/Drop Shadow. Vertical -6, Horizontal -6, Opacity 50, Blur 14, color #000000.
30. Merge/Merge Down. Duplicate and place duplicated tag toward right and down as shown below.

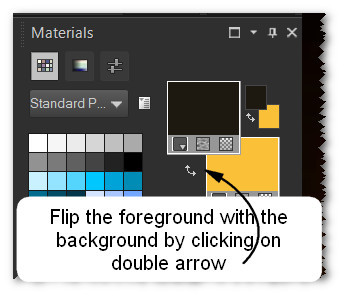
31. In Materials Palette, flip the Foreground color with the Background color by clicking on the double arrow.
32. From Tool bar, select the Text tool. Find AnnabelleJF and set the size to 36, Line style at Solid. Kerning 25, all other settings at default.

33. Type the word "African". Convert to Raster Layer.
34. Image/Free Rotate, Rotate by 15 degrees Right. All layers and Rotate singel layer unchecked.
35. Move the word in center of top tag. Repeat with the word "Zebra" and place in center of second tag.
36. Duplicate each word for brightness. Make sure you are on top layer to continue.
37. Layers/New Raster Layer.
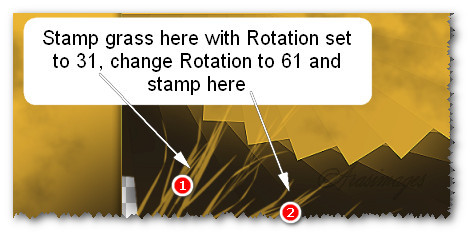
38. From Tool bar select the Paint Brush tool. Find grass brush, set Step to 1, Rotation 31, all the other setting leave at default.

39. Using the color #f9c039, right click in bottom right corner so grass bottom is not showing, stamping grass once. Change Rotation to 61 and stamp again with grass lower and to the right. See example below.
40. Open Sorensen_Designs Mist April 125-11.pspimage. Copy/Paste as New Layer.
41. Place Zebra toward the bottom and center them.
42. Adjust/Sharpness/Sharpen.
43. Image/Add Borders/Add 3px border, Symmetric checked, color #1f1913.
44. Image/Add Borders/Add 3px border, Symmetric checked, color #f9c039.
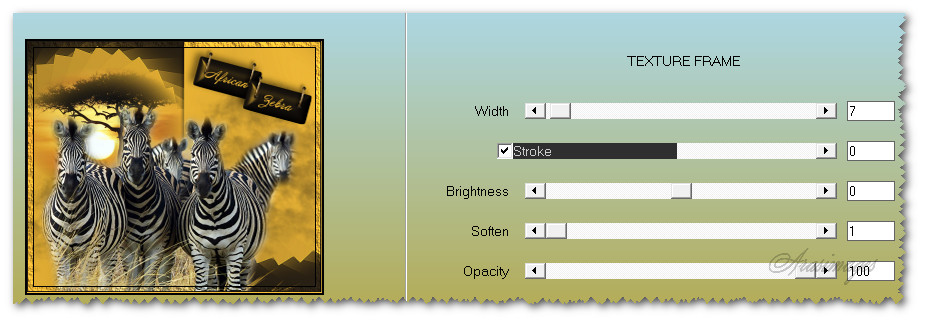
45. Effects/AAA Frames/Texture Frame.
46. Image/Add Borders/Add 3px border, Symmetric checked, color #f9c039.
47. Sign your name or leave your watermark if you wish. Save your work as African Zebra.jpg or .png.
This tutorial was tested by PamelaD and Evatexas. Thanks ladies!
If you are going to use this tutorial for stationery, cards or place the tutorial/tag on another site, I would appreciate you contacting me for permission, giving Arasimages credit for the original tutorial and if possible, a link back to my site. Thank you.
Copyright © Arasimages All Rights Reserved