Pathway to Nowhere
For a Danish, Spanish, Italian, Russian and Dutch translation, click on the flags.


For this tutorial you will need the materials in the zip file below.

Thanks go to Evatexas and PamelaD of Arasimages for the tubes used in this tutorial.
This tutorial was written using *. To work this tutorial, it is assumed you have some working knowledge of Paint Shop Pro.
Use the pin below to mark your place along the way.
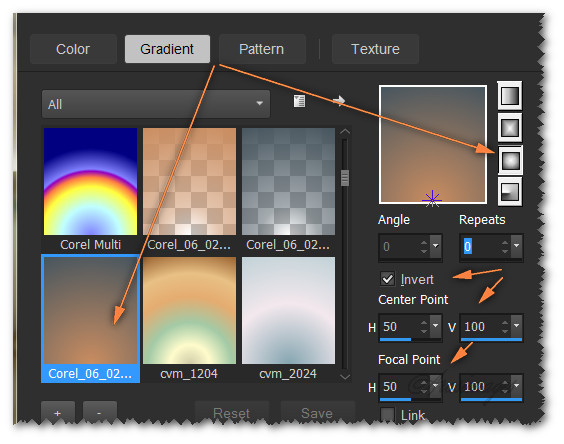
1. In Materials Palette, set Foreground to #48565f, Background to #ca8d60. Create a Gradient using these colors, Gradient Corel_06_029 (foreground/background), Style Sunburst, Angle 0, Repeats 0, Invert checked, Center Point Horizontal 50, Vertical 100/Focal Point Horizontal 50, Vertical 100.
2. New/New Image 750px by 600px. Flood fill with Gradient.
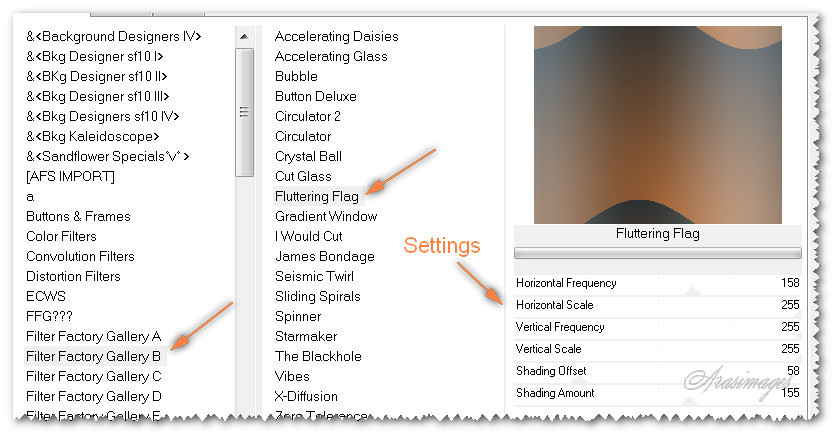
3. Effects/Filters Unlimited/Filter Factory B/Fluttering Flag.
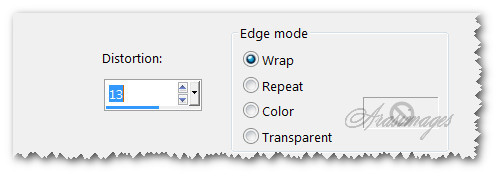
4. Effects/Geometric Effects/Perspective-Horizontal.
5. Effects/Filters Unlimited 2/Image Enhancement/Sunshine. Sunlight Effect and Intensity both set to 64.
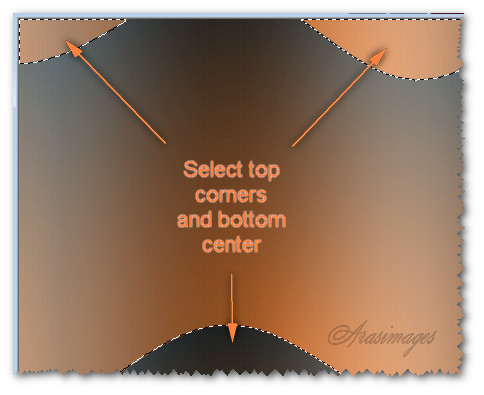
6. Using the Magic Wand, Mode Add (Shift), Match mode: RGB Value, Tolerance 30 or higher. Select the two top corners and bottom center.
7. Effects/3D Effects/Drop Shadow. Vertical 26, Horizontal -16, Opacity 50, Blur 58, color #000000.
8. Effects/3D Effects/Drop Shadow. Vertical -26, Horizonal 16, Opacity 50, Blur 58, color #000000.
9. Selections/Select None.
10. Layers/New Raster Layer. Selections/Select All.
11. Open Pathway.pspimage. Copy Misted layer/Paste into Selection. Selections/Select None.
12. Drop Opacity down to 50, set to Luminance (L).
13. Image/Mirror. Move down a little.
14. Adjust/Sharpness/Sharpen. Adjust/Sharpness/Sharpen More.
15. Effects/Edge Effects/Enhance.
16. Open SpringCool_A.pspimage. Copy/Paste as New Layer.
17. Image/Mirror.
18. Effects/3D Effects/Drop Shadow. Vertical -16, Horizontal -16, Opacity 50, Blur 32, color #000000.
19. Adjust/Sharpness/Sharpen.
20. Move lady to the right side so she fits into bottom right corner.
21. Open 0_73b52_41c16704_XL.pspimage (flowers). Copy/Paste as New Layer.
22. Image/Mirror. Image/Resize/Resize by 55%/Resize all layers unchecked.
23. Adjust/Sharpness/Sharpen.
24. Effects/3D Effects/Drop Shadow. Vertical 16, Horizonal 16, Opacity 50, Blur 16, color #000000.
25. Move into top left corner.
26. Duplicate. Image/Mirror.
27. Place in upper right corner over lady's hat.
28. Duplicate. Place in upper right corner/along side.
29. Open emka_AutumnTwilight_element.18.png. Copy/Paste as New Layer.
30. Adjust/Sharpness/Sharpen.
31. Effects/3D Effects/Drop Shadow. Vertical 16, Horizonal 16, Opacity 50, Blur 16, color #000000.
32. Place in upper left corner.
33. Duplicate. Place to right of first stem of leaves.
34. Duplicate. Image/Flip.
35. Place over lady in bottom right corner.
36. Duplicate. Image/Mirror.
37. Place in bottom area here.
38. Open SpringCool_B.pspimage. Copy/Paste as New Layer.
39. Image/Mirror.
40. Adjust/Sharpness/Sharpen.
41. Effects/3D Effects/Drop Shadow. Vertical 16, Horizonal 16, Opacity 50, Blur 16, color #000000.
42. Effects/3D Effects/Drop Shadow. Vertical -16, Horizonal -16, Opacity 50, Blur 16, color #000000.
43. Place lady in bottom left corner.
44. Copy/SpringCool_B.pspimage/Paste as New Layer again.
45. Image/Resize/Resize by 27%/Resize all layers unchecked.
46. Effects/3D Effects/Drop Shadow. Vertical -5, Horizonal -5, Opacity 50, Blur 16, color #000000.
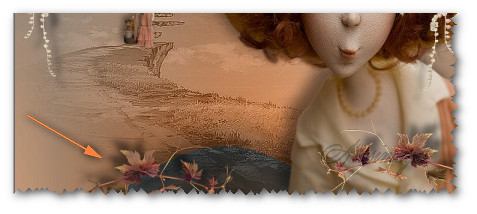
47. Adjust/Sharpness/Sharpen. Place at edge of path.
48. Open 0_68db1_5688d4eb_XL.png. Copy/Paste as New Layer.
49. Image/Resize/Resize by 60%/Resize all layers unchecked.
50. Adjust/Sharpness/Sharpen.
51. Effects/3D Effects/Drop Shadow. Vertical -5, Horizonal -5, Opacity 50, Blur 16, color #000000.
52. Place in upper right corner over flowers.
53. Image/Add Borders/Add 9px border to top, bottom and left side, 90px to right side, Symmetric not checked, color #ffffff.
54. Select border with Magic Wand.
55. In Materials Palette, change Gradient to Style Linear, Repeats 3, Angle 45, Invert stays checked.
56. Layers/New Raster Layer. Flood fill with new Gradient.
57. Selections/Invert.
58. Effects/3D Effects/Drop Shadow. Vertical 3, Horizontal 9, Opacity 50, Blur 14, color #000000.
59. Effects/3D Effects/Drop Shadow. Vertical 3, Horizontal 3, Opacity 50, Blur 14, color #000000.
60. Selections/Select None.
61. Image/Add Borders/Add 3px border, color #48565f, Symmetric checked.
62. Image/Add/Borders/Add 5px border, color #ca8d60, Symmetric checked.
63. From Tool bar, select the Text Tool. Find Font Venski Sad Two(Medium). Set to size 48, Bold, Sharp, Stroke width at 0.0, Line Style solid, Kerning at 75. Using color #ffefdf, type out the words "Pathway to Nowhere".


64. Using the center turn node, grab when the curser turns into double arrows and turn vertical. Move into widest part of border to the right.
65. Objects/Align/Vertical Center. Convert to Raster Layer.
66. Image/Add/Borders/Add 5px border, color #ffefdf, Symmetric checked.
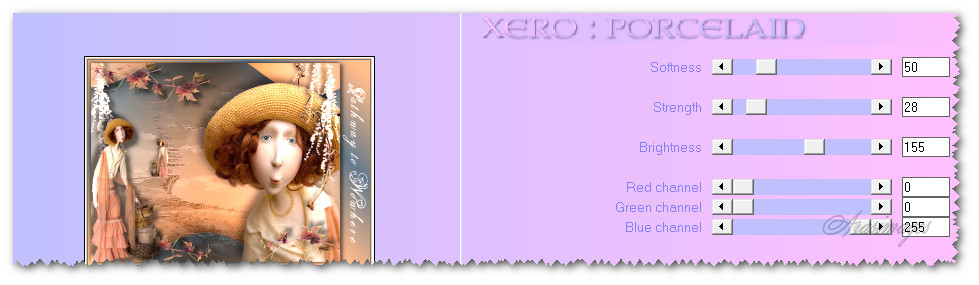
67. Effects/Xero/Porcelain.
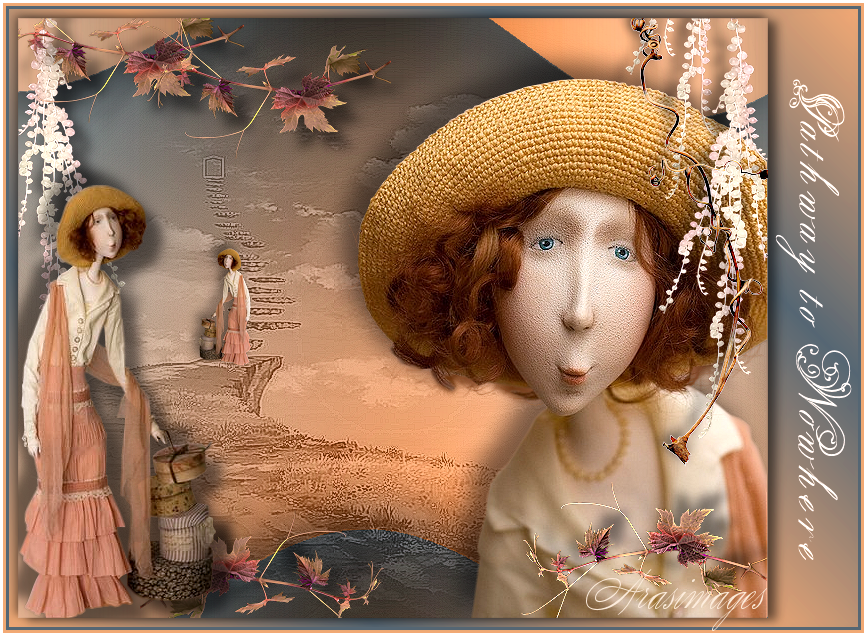
All finished!
This tutorial was tested by PamelaD and Evatexas. Thanks ladies!
If you are going to use this tutorial for stationery, cards or place the tutorial/tag on another site, I would appreciate you contacting me for permission, giving Arasimages credit for the original tutorial and if possible, a link back to my site. Thank you.
Copyright © Arasimages All Rights Reserved