
The Wonder of Winter's Cold
For a Spanish, Italian, Danish, Dutch and French translation, click on the flags.


For this tutorial you will need the materials in the zip file below.

Unzip the materials into a working folder you have created on your desktop named the Wonder of Winter's Cold. Please duplicate and close original tubes. Use the copies for your work so you will not lose the originals. Place the 20-20 Mask in your PSP/Masks folder. Export the Brush into your PSP/Brushes folder. I have used plugins Graphics Plus/Cross Shadow, Alien Skin Xenofex 2/Constellation, Funhouse/Heizenberg's Mirror/Uncertainty and Animation Shop for this tutorial. I have used PSPX7 for this tutorial but other versions may be used. To work this tutorial, it is assumed you have some working knowledge of Paint Shop Pro.
Use the snowflake below to mark your place along the way.

1. In Materials Palette, set Foreground to #823c42, Background to #351f2b.
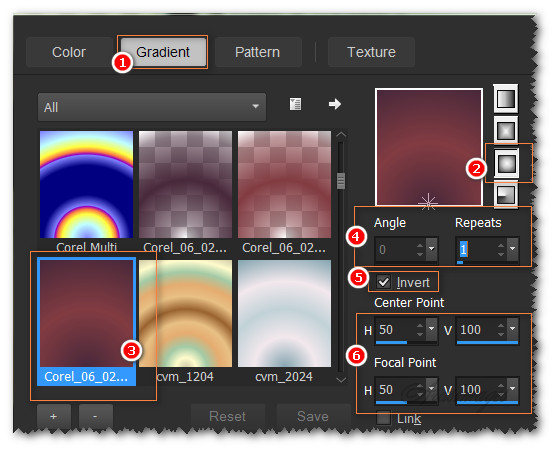
2. Create a Gradient in the Materials Palette using the above colors, Style Sunburst, angle (n/a), Repeats 1, Invert checked. Center and Focal Points-Horizontal set to 50, Vertical set to 100 in each.
3. New/New Image 900px by 800px. Flood fill with Gradient.
4. Effects/Graphics Plus/Cross Shadow.
5. Layers/New Raster Layer. Selections/Select All.
6. Open JHanna_107 background.jpg. Copy/Paste into Selection. Select None.
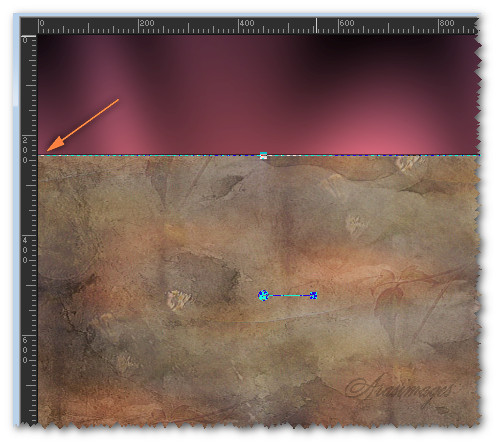
7. Set View to Rulers. Using Pick tool, pull down to 240px.
8. Uncheck Rulers/set Pick tool back to Move tool.
9. Objects/Align/Center in Canvas.
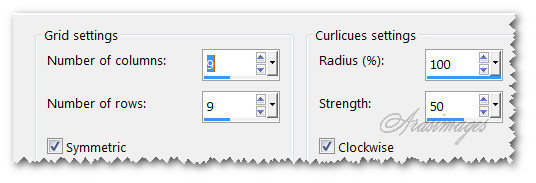
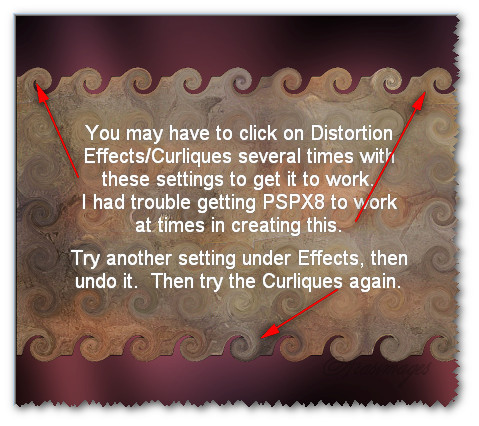
10. Effects/Distortion Effects/Curliques. Use Settings.
11. Set Foreground to #d2c298 to form new gradient using all other settings the same as before.
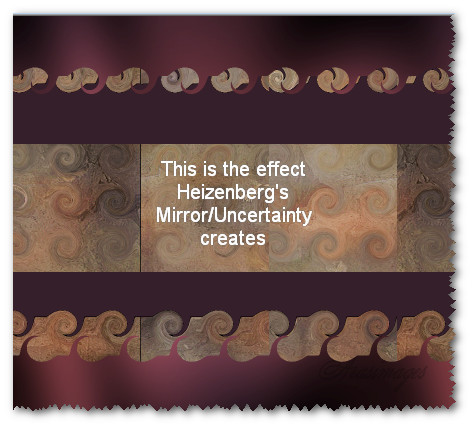
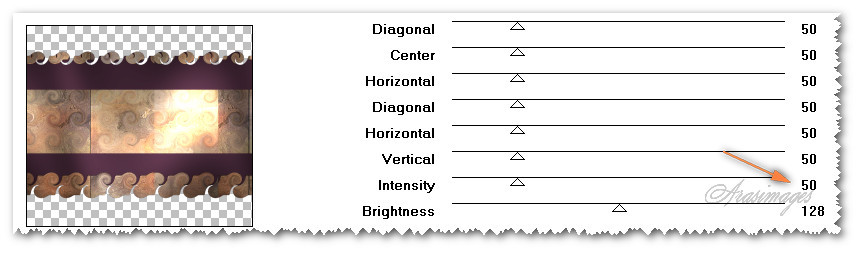
12. Effects/Funhouse/Heizenberg's Mirror/Uncertainty.

13. Effects/Graphics Plus/Cross Shadow.
14. Effects/Edge Effects/Enhance.
15. Effects/3D Effects/Drop Shadow. Vertical 31, Horizontal 47, Opacity 75, Blur 60, color #000000.
16. Effects/3D Effects/Drop Shadow. Vertical -31, Horizontal -47, Opacity 75, Blur 60, color #000000.
17. Layers/New Raster Layer.
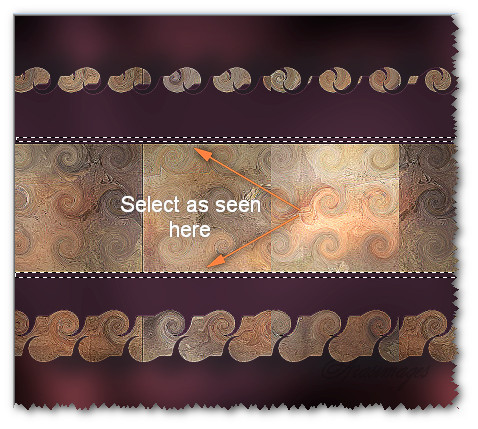
18. Using the Selections tool set to Rectangle, Mode: Add (Shift), Feather 0, Anti-alias checked, select a narrow rectangle at the top and bottom of the image center as seen in example below.
19. Flood fill with the current Gradient.
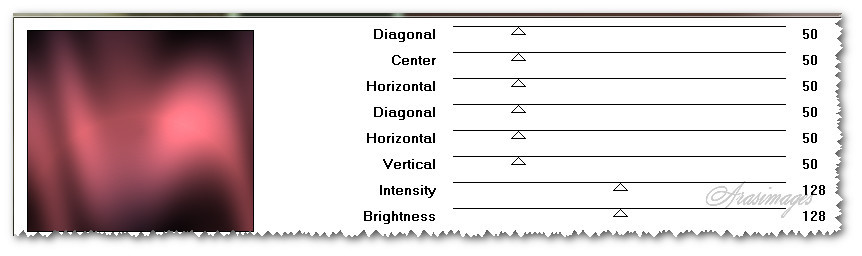
20. Effects/Graphic Plus/Cross Shadow with the Intensity set to 128. Selections/Select None.
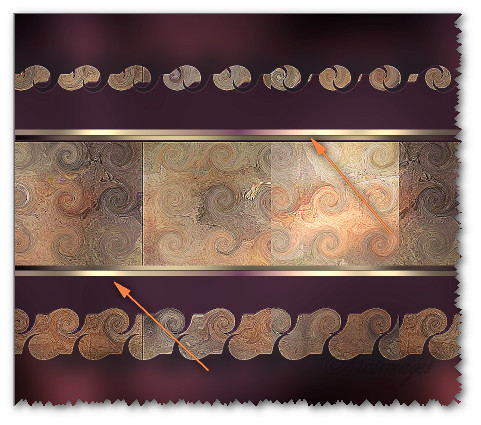
21. Duplicate. Image/Flip. Pull upward so the two narrow rectangles are as seen below.
22. Effects/Edge Effects/Enhance.
23. Open LittleWinterAngel.pspimage.
24. On the .pspimage, create a misted image by doing the following. Layers/Load/Save Mask/Load Mask from Disk. From the drop down, select 20-20. Load.

25. Merge/Merge Group. Copy your Mask you just created/Paste as New Layer on your working image.
26. The little girl will go in center of image.
27. Effects/Edge Effects/Enhance. Duplicate. Merge/Merge Down.
28. Layers/New Raster Layer.
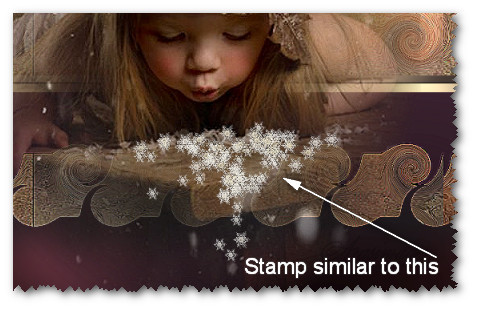
29. From the Tool bar, choose the Paint brush tool. Select the Snowflake31 Brush.


30. Change the Background color in the Materials Palette to #e0ded6. Using Size 24 and Size 11, right and left clicking, randomly stamping Background and Foreground (Gradient) to create snowflakes as I have done as seen below. Be random and have fun but do not stamp too many.
31. Drop Opacity down to 70. Effects/Edge Effects/Enhance More.
32. Open SmallSparkles.png. Copy/Paste as New Layer.
33. Move sparkles to upper left corner.
34. Effects/Edge Effects/Enhance.
35. Duplicate. Image/Mirror. Image/Flip.
36. Open LargeSparkles.png. Copy/Paste as New Layer.
37. Image/Mirror. Place in upper left corner over first sparkles.

38. Effects/Edge Effects/Enhance.
39. Duplicate. Image/Mirror. Image/Flip.
40. Move down just a few pixels so the sparkle won't be over little girl's mouth.
41. Image/Add Borders/Add 2px border, Symmetric checked, color #ffeec0.
ANIMATION OPTIONAL:
42. Duplicate the image twice having three layers in all.
43. Close off bottom and middle layers. Highlight top layer having it open.
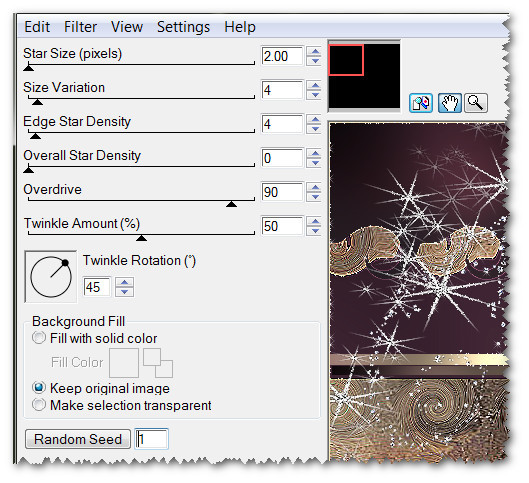
44. Effects/Alien Skin Xenofex 2/Constellation. Use settings below. Click OK.
45. Close off top layer. Open middle layer and highlight it.
46. Effects/Alien Skin Xenofex 2/Constellation. Click on Random Seed one time. Click OK.
47. Close off middle layer. Move to bottom layer, open and highlight it.
48. Repeat the Constellation by clicking on Random Seed once more. Click OK.
49. Open all layers and Save/As Animation Shop (*psp) file in your working folder giving it a name.
50. Open Animation Shop. File/Open the file you just saved.
51. Click on View Animation to see if you like it sparkling as it is. If you want the sparkles to go slower, hightlight the first frame, click Edit/Select All.
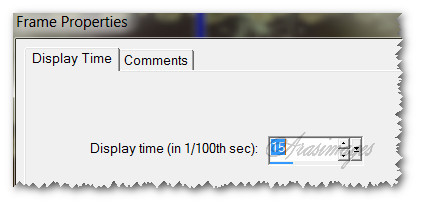
52. Click on Animation/Frame Properties. Set the Display time to 15.
53. To save your work, go to File/Save As. When the box comes up, give your work the name The Wonder of Winter's Cold, name your working folder in Save in and leave Save as type set to (*gif). Click Save. As the boxes come up, simply click Next, Next, Next and Finish.
You are now finished with your tutorial. I hope you enjoyed it!
This tutorial was tested by PamelaD. Thanks Pamela!
If you are going to use this tutorial for stationery, cards or place the tutorial/tag on another site, I would appreciate you contacting me for permission, giving Arasimages credit for the original tutorial and if possible, a link back to my site. Thank you.
Copyright © Arasimages All Rights Reserved