
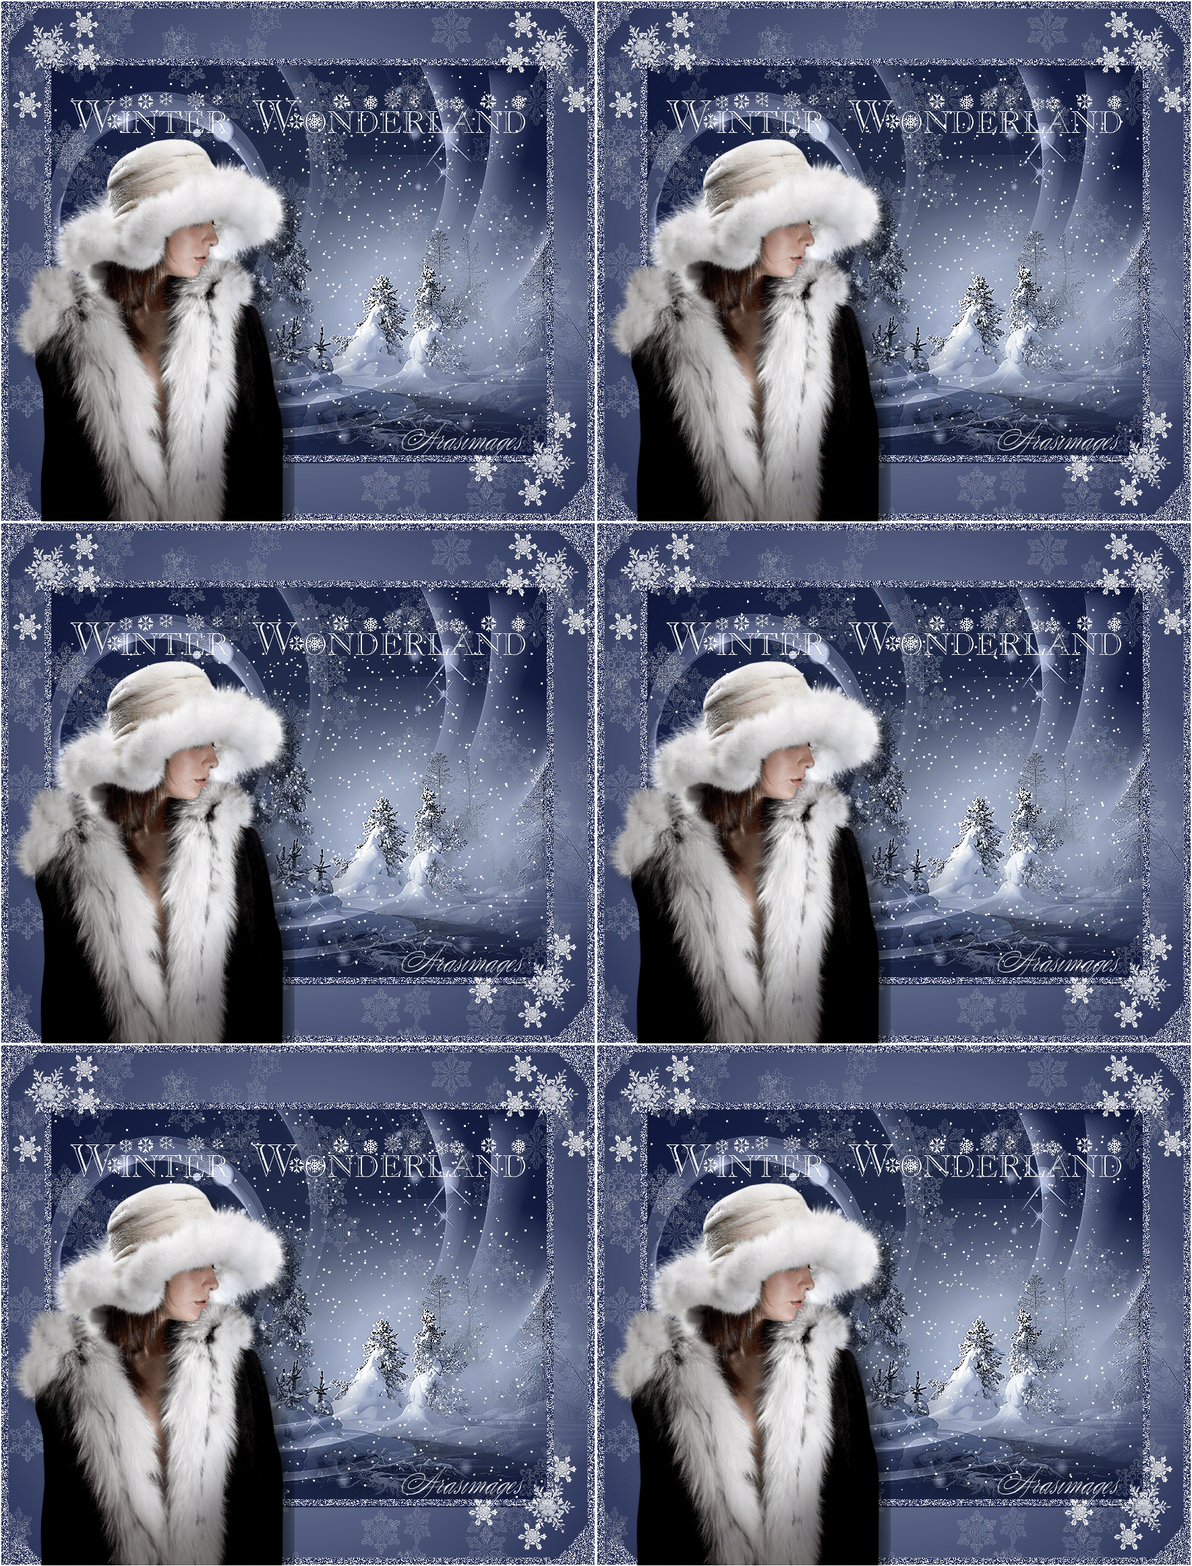
Winter Wonderland
For an Italian, German, Danish, Dutch, French and Spanish translation, click on the flags.
For this tutorial you will need the materials in the zip file below.
Unzip the materials into a working folder you have created on your desktop named Winter Wonderland. Please duplicate and close original tubes. Use the copies for your work so you will not lose the originals. Export Brushes #31 and #33 into your PSP/Brushes folder. Place the Font in your PSP/Fonts folder. Install it if it doesn't show up in your font dropdown. I have used the plugins Unplugged Effects/Snow, Creativity/Splatter and the program Animation Shop in this tutorial. (If you don't have Animation Shop, it can be found on the internet for free). It is assumed you have a working knowledge of PSP to follow these directions. I have used PSPX7 for this tutorial but other versions may be used. To work this tutorial, it is assumed you have some working knowledge of Paint Shop Pro.
Use the snowflake below to mark your place along the way.

1. In Materials Palette, set Foreground to #94a0ba, Background to #272f57.
2. Create a Gradient using Sunburst, Angle null, Repeats 0, Center and Focal Points all set to 50, Invert unchecked.
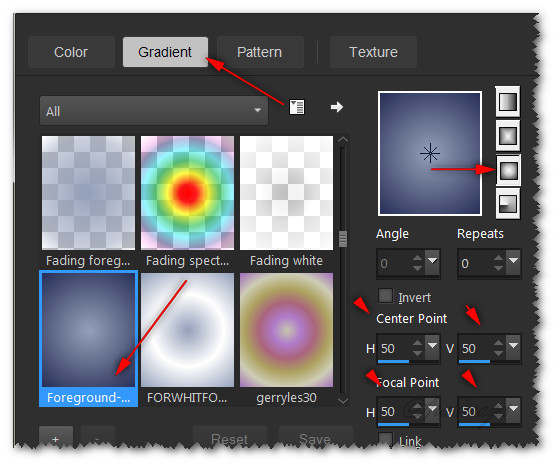
3. New/New Image 860px W by 750px H. Flood fill with Gradient.
4. Open Narah_mask_0546.jpg. Copy/Paste as New Layer.
5. Set Blend Mode to Luminance (L), lower Opacity down to 66.
6. Effects/Edge Effects/Enhance.
7. Layers/New Raster Layer.
8. Effects/Creativity/Splatter.
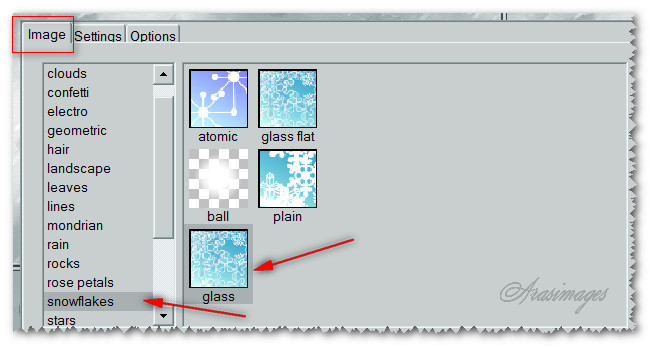
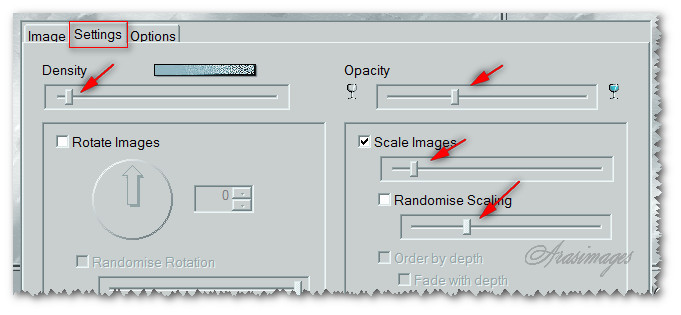
9. Effects/Edge Effects/Enhance.
10. Open Mysticwinter.pspimage. Copy/Paste as New Layer.
11. Move downward and toward the right border.
12. Effects/Edge Effects/Enhance.
13. Using Selections tool set to Rectangle, Add (Shift), Feather 0, Anti-alias checked, draw a rectangle around Raster 2 layer.
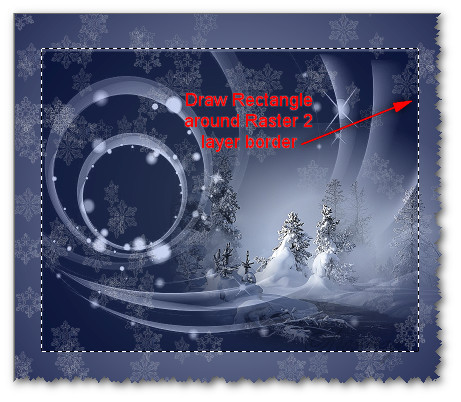
14. Layers/New Raster Layer. Flood fill with color #272f57.
15. Selections/Modify/Contrast by 10px. Press Delete Key once. Selections/Select None.
16. Using Magic Wand, select 10px border to activate it.
17. Effects/Unplugged Effects/Snow. Selections/Select None.

18. Select the Text tool, find the font Flakes, set to Size 68, Stroke width: 0.0, Kerning 0.

19. Change the background color to #f8f8f8. Type out the words "Winter Wonderland". Convert to Raster Layer.
20. Place at the top part of the image.
21. Objects/Align/Horizontal Center.
22. Image/Add Borders/Add 10px border, Symmetric checked, color #272f57.
23. Using Magic Wand, Tolerance 8, Feather 0, click on the 10px border to activate it. (The corners will be selected-this is not an error).
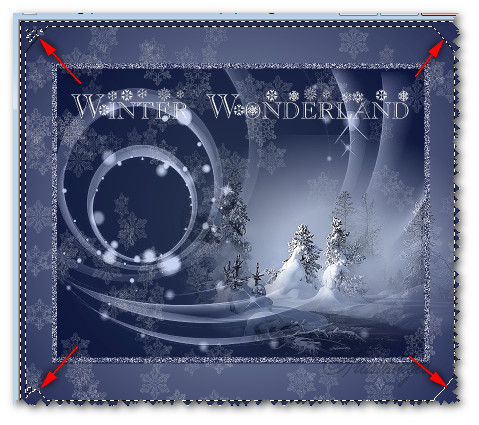
24. Effects/Unplugged Effects/Snow. Set to 81. (See Step #17)
25. Selections/Select None.
26. Layers/New Raster Layer.
27. Select the Paint Brush tool. Find Snowflake31. Set Size to 85, all other settings at default.

28. Right click in upper left corner, upper right corner and bottom right corner one time, color #f8f8f8.
29. Change Snowflake31 to Snowflake33, Size 46, all other settings at default.

30. Right click by the larger snowflakes in upper left and right corners and bottom right corner, color #f8f8f8. You may follow where I have placed mine or choose your own design.
31. Effects/Edge Effects/Enhance.
32. Image/Add Borders/Add 2px border, Symmetric checked, color #f8f8f8.
33. Save the image with the name Winter Wonderland.jpg in your working folder.
34. Open Gerry-Lady 203 - 4 januari 2009.pspimage. Copy/Paste as New Image.
35. Image/Mirror the new image.
36. Effects/3D Effects/Drop Shadow. Vertical 16, Horizontal 16, Opacity 50, Blur 27, color #000000.
37. Save this image named Top Layer as a .png file in your working folder.
38. Open Animation Shop. File/Open Winter Wonderland.jpg. Duplicate it until you have 35 frames in all.
39. Highlight the first frame. Edit/Select All.
40. File/Open Snow 2.gif. Highlight the first frame. Edit/Select All. Right click/Copy.
41. Go back to the Winter Wonderland image. Right click within the first frame. Paste/Into Selected Frame. Left click to set in place.
42. Paste within the center borders only, repeating three (3) times. Move slightly in each pasting so snow will be in different places.
43. Open Arassnowimage.gif. Highlight first frame. Edit/Select All. Right click/Copy.
44. Go back to the main Winter Wonderland image.
45. Right click within the first frame. Paste/Into Selected Frame. Left click to set in place. Place this snow at the right side of image so snow will appear thicker there. Repeat two times more on right, once in center. (The lady will be placed on the left side in next steps).
46. File/Open Top Layer.png of lady. Edit/Propagate Paste.
47. Right click/Copy. Go back to the main image. Right click within the first frame. Paste/Into Selected Frame. Place woman into the bottom left corner within the 2px border on the bottom. Make sure you leave the 2px outer border showing. Left click to set her in place.
48. File/Save As. When the Save As box comes up, select your working folder to save the image in, type out the File name as Winter Wonderland and leave Save as type (*gif). Click Save.
49. As the boxes come up, click Next three (3) times, then Finish. You are all done.
This tutorial was tested by PamelaD and Evatexas. Thanks ladies!
If you are going to use this tutorial for stationery, cards or place the tutorial/tag on another site, I would appreciate you contacting me for permission, giving Arasimages credit for the original tutorial and if possible, a link back to my site. Thank you.
Copyright © Arasimages All Rights Reserved


