
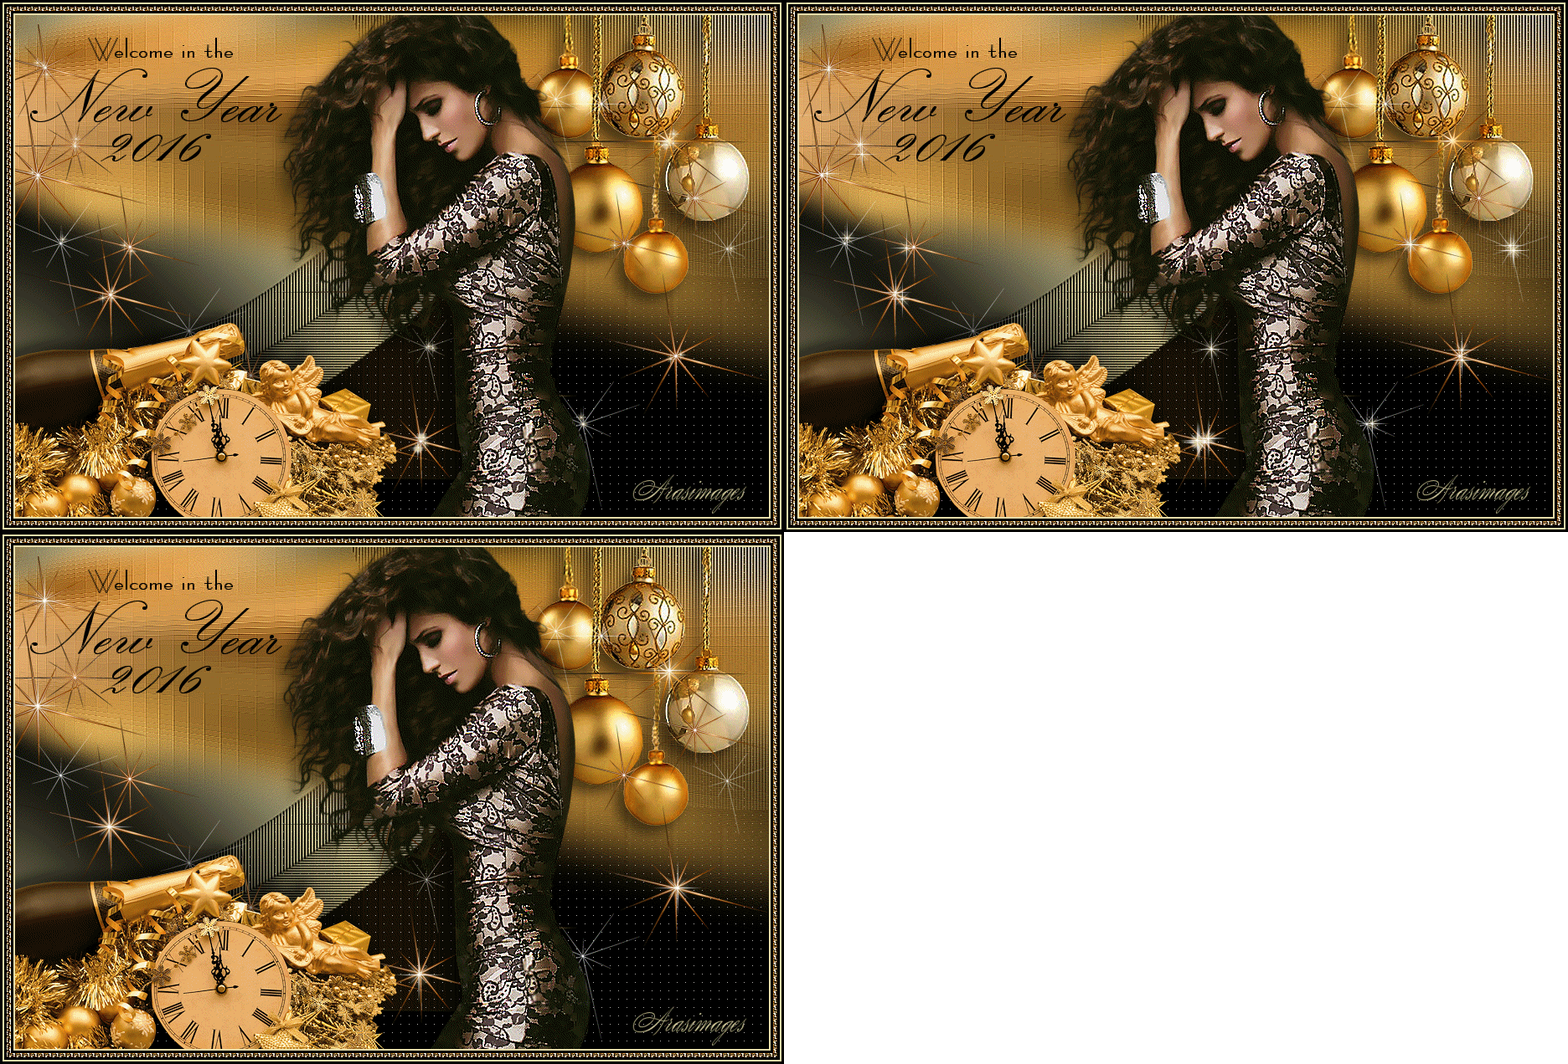
New Year 2016
For an Italian, Danish, German, French, Spanish and Dutch translation, click on the flags.
For this tutorial you will need the materials in the zip file below.
Thanks go to Maryse and to Bhyma and to Guismo for their lovely tubes used in this tutorial.
Unzip the materials into a working folder you have created on your desktop named New Year 2016. Please duplicate and close original tubes. Use the copies for your work so you will not lose the originals. Place the Mask in your PSP/Masks folder. Place the Pattern goldbeads in your PSP/Patterns folder. Export the Picture Tube in to your PSP/Picture Tube folder. I have used the plugins Penta.com/Color Dot in this tutorial. It is assumed you have a working knowledge of PSP to follow these directions. I have used PSPX8 for this tutorial but other versions may be used. To work this tutorial, it is assumed you have some working knowledge of Paint Shop Pro.
Use the stars below to mark your place along the way.
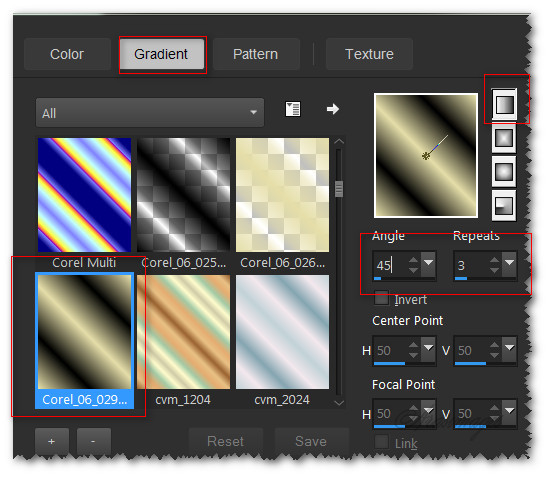
1. In Materials Palette, set Foreground to #e5dea9, Background to #000000. Create a Gradient using these colors, Gradient Corel_06_029 (foreground/background), Style Linear, Angle 45, Repeats 3, Invert unchecked, Center Points/ Focal Points null.
2. New/New Image 900px by 600px. Flood fill with Background color #000000.
3. Effects/Penta.com/Color Dot.

4. Adjust/Sharpness/Sharpen.
5. Adjust/Sharpness/High Pass Sharpen.
6. Layers/New Raster Layer. Flood fill with Gradient.
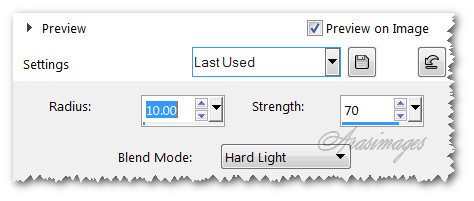
7. Adjust/Blur/Gaussian Blur. Set Radius to 38.
8. Layers/Load/Save Mask. Load Mask from Disk. Select Mask annesska-112. Load.
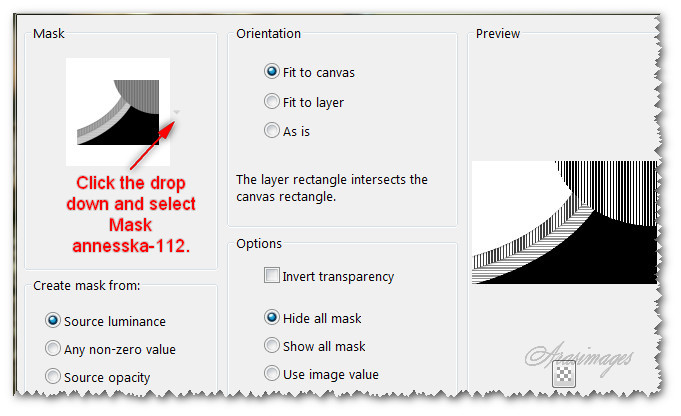
9. Merge/Merge Group.
10. Effects/Edge Effects/Enhance.
11. Open GoldenFlame.pspimage. Copy/Paste as New Layer.
12. Move to the right and upward so bottom right edge is near 415px.
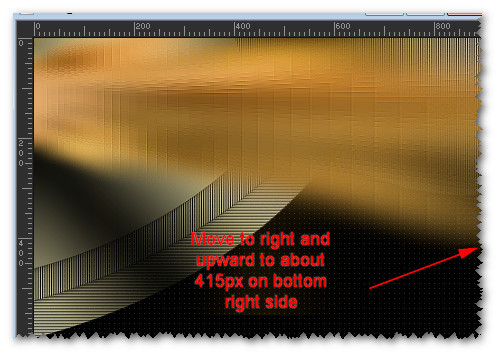
13. Effects/Edge Effects/Enhance.
14. Open bhyma_bolas_12_08.pspimage. Copy/Paste as New Layer.
15. Image/Resize/Resize by 74%/Resize all layers unchecked.
16. Effects/3D Effects/Drop Shadow. Vertical 10, Horizontal -10, Opacity 50, Blur 20, color #000000.
17. Move to upper right corner.
18. Adjust/Sharpness/Sharpen.
19. Open Stars_07.10.2015.pspimage. Copy/Paste as New Layer.
20. Open MR_Anahi.pspimage. Select around Maryse using Selections tool, press Delete key. Deselect.
21. Copy/Paste as New Layer.
22. Effects/3D Effects/Drop Shadow. Vertical 10, Horizontal -10, Opacity 50, Blur 20, color #000000.
23. Adjust/Sharpness/Sharpen.
24. Move down and to the right a little.
25. Open calguisnewyear18122011.pspimage.
26. Image/Resize/Resize by 30%/All layers unchecked.
27. Copy/Paste as New Layer.
28. Effects/3D Effects/Drop Shadow. Vertical -10, Horizontal -10, Opacity 50, Blur 20, color #000000.
29. Adjust/Sharpness/Sharpen.
30. Move into bottom left corner.
31. Image/Add Borders/Add 2px border, Symmetric checked, color #e5dea9.
32. Image/Add Borders/Add 3px border, Symmetric checked, color #000000.
33. Image/Add Borders/Add 5px border, Symmetric checked, color #e5dea9.
34. Using Magic Wand, set to Tolerance 5, Feather 0, click on 5px border to activate it.
35. In Materials Palette, set to Pattern, goldbeads, Angle 45, Scale 20.
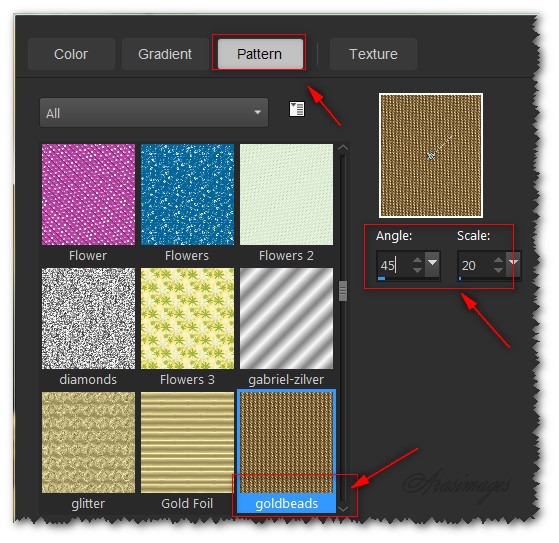
36. Flood fill the 5px border with goldbeads pattern.
37. Effects/Edge Effects/Enhance.
38. Selections/Select None.
39. Image/Add Borders/Add 3px border, Symmetric checked, color #000000.
40. Image/Add Borders/Add 2px border, Symmetric checked, color #e5dea9.
41. Image/Add Borders/Add 3px border, Symmetric checked, color #000000.
42. Close off foreground color. Select the Text tool, Font BernhardFashion BT (TT1051M_1.TTF), Size 30, Font style: Bold, color #000000, type out the words "Welcome in the".

43. Convert to Raster Layer.
44. Change the Font to Kunstler Script, Size 96, all other settings the same. Type out the words "New Year".

45. Convert to Raster Layer.
46. Using the same settings as in Step #44, type out the new year, in this case, "2016".
47. Convert to Raster Layer.
48. Adjust the text so they look similar to the example below.

49. Merge/Merge Visible.
50. Animation is optional. If you are going to make your finished image animated, then duplicate the image twice, having three layers in all.
51. Close off the bottom two layers. Highlight the top layer.
52. Select the Picture Tube tool, tub H Sparkle White Star. Set the Scale to 50.

53. Left click on larger stars. Close off top layer. Move to middle layer and highlight it.
54. Change Scale to 35. Left click a few stars 2 times or more each.
55. Close off middle layer. Move to bottom layer, open and highlight it.
56. Change the Scale to 20. Left click all of the stars a few times.
57. Open all layers. File/Save As. Save as PSP Animation Shop (*psp) in your working folder.
58. Open Animation Shop. Click on File/Open and find/open the saved file.
59. Click on the View Animation in the tool bar at the top to check your animation. If the stars are sparkling too fast, we can adjust that.

60. Click on first Frame. Edit/Select All.
61. Animation/Frame Properties. Change the speed to 15.
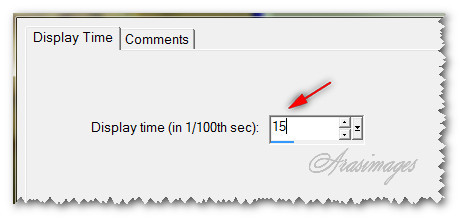
62. Click on View Animation again to see if you are satisfied with your work. If so we will now save it.
63. File/Save As. When the box comes up, give your tag a name (New Year 2016), direct where to save it and leave type (.gif) as is. Save.
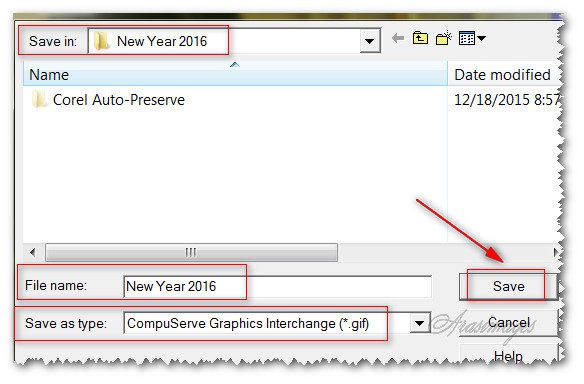
64. As the boxes change, click on the Next button three times, then on Finish.
65. Your image is now saved as a .gif file in your working folder.
Happy New Year to all who work this tutorial!
This tutorial was tested by PamelaD and Evatexas. Thanks ladies!
If you are going to use this tutorial for stationery, cards or place the tutorial/tag on another site, I would appreciate you contacting me for permission, giving Arasimages credit for the original tutorial and if possible, a link back to my site. Thank you.
Copyright © Arasimages All Rights Reserved


