
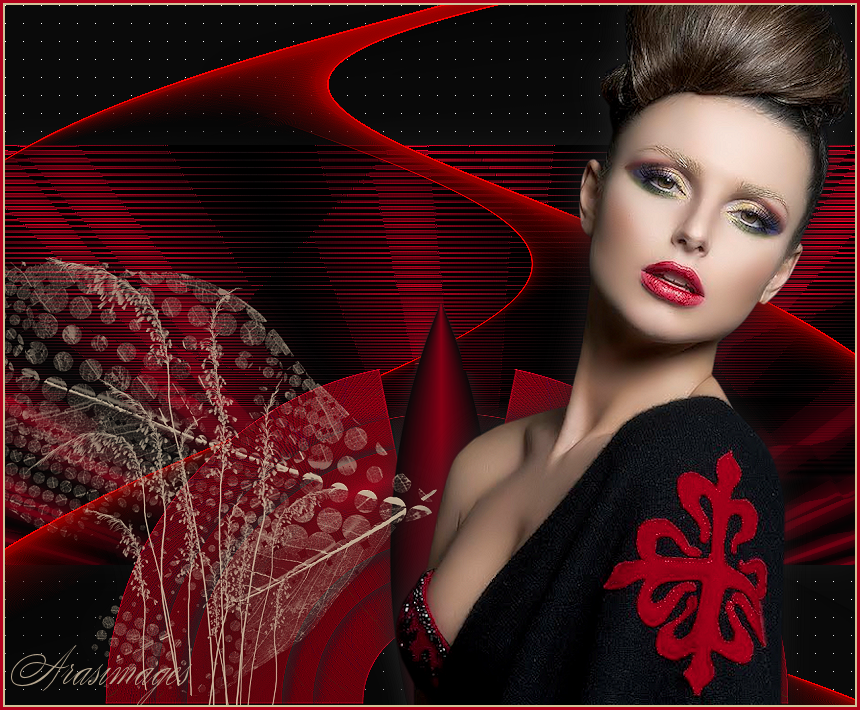
Abstract World
For an Italian, Danish, Spanish, German and Dutch translation, click on the flags.
For this tutorial you will need the materials in the zip file below.
Thank you K@rine_Dre@ms for the lovely tube used in this tutorial.
Unzip the materials into a working folder you have created on your desktop named Abstract World. Duplicate and close original tubes. Use the copies for your work so you will not lose the originals. Export the Brush into your PSP Brushes folder. Place the Selection into your PSP Selections folder. I have used the Plugins Flaming Pear/Flexify 2, FiltersUnlimited/Background Designers IV/sf10Slice N Dice, Filters Unlimited/VM Experimental/TeeWee, Mura'sMeister/Perspective Tiling, AbstractCurves and Penta/Color Dot for this tutorial. I have used PSPX8 and PSPX7 for this tutorial but other versions may be used. (Note: If any of you do not have the plugin AbstractCurves, my tester found it online for free. See information included in materials.) To work this tutorial, it is assumed you have some working knowledge of Paint Shop Pro.
Use the arrow below to mark your place along the way.

1. In Materials Palette, set Foreground to #850116 Background to #0a0a0a. Create a Gradient using these colors, Gradient Corel_06_029 (foreground/background), Style Linear, Angle 45, Repeats 3, Invert unchecked, Center Points/Focal Points not applicable.
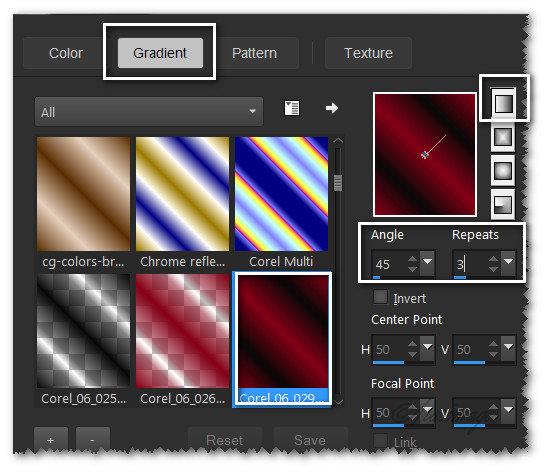
2. New/New Image 850px by 700px. Flood fill with Background color.
3. Effects/Penta/Color Dot.

4. Layers/New Raster Layer. Flood fill with Gradient.
5. Adjust/Blur/Gaussian Blur, Radius set to 15.
6. Effects/Filters Unlimited/&Background Designers IV/sf10 Slice N Dice.
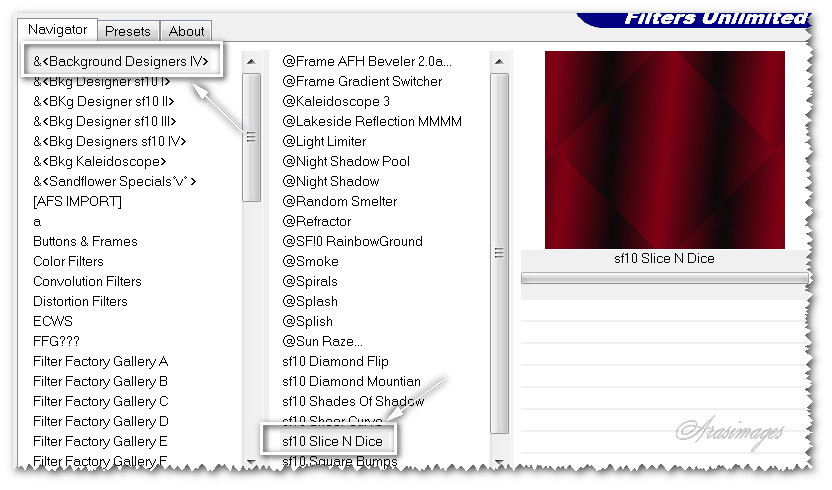
7. Effects/Edge Effects/Enhance.
8. Filters Unlimited/VM Experimental/TeeWee (or VM Experimental/TeeWee). Input Channel/Output Mode both at 0.

9. Effects/Edge Effects/Enhance.
10. Effects/Mura's Meister/Perspective Tiling.
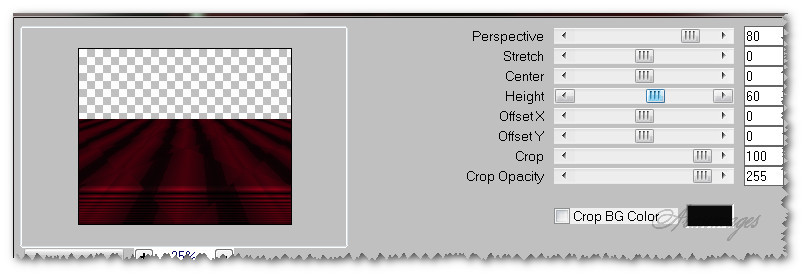
11. Image/Flip. Objects/Align/Center in Canvas.
12. Effects/3D Effects/Drop Shadow. Vertical 0, Horizontal 0, Opacity 50, Blur 45, color #242424.
13. Layers/New Raster Layer.
14. Effects/AbstractCurves. I chose the style as you see in the example, the Curve color #8b0000, no Background color selected and clicked OK.
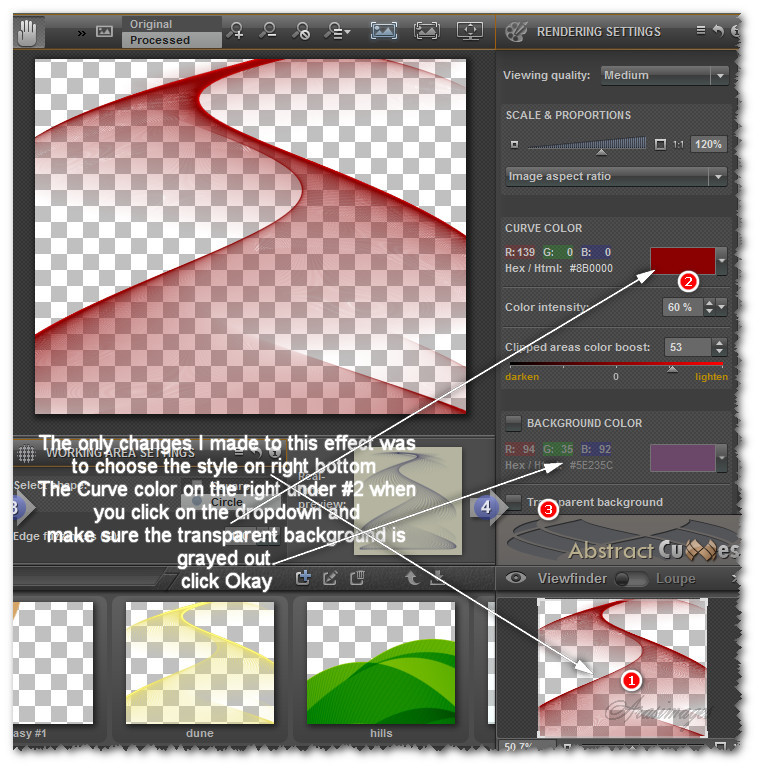
15. Effects/Edge Effects/Enhance.
16. Create a new gradient by changing the settings. Change Foreground color to #b3011e. Set Repeats to 90, Angle to 1, Invert checked, Style Radial, Center Points both to 68, Focal Point null.
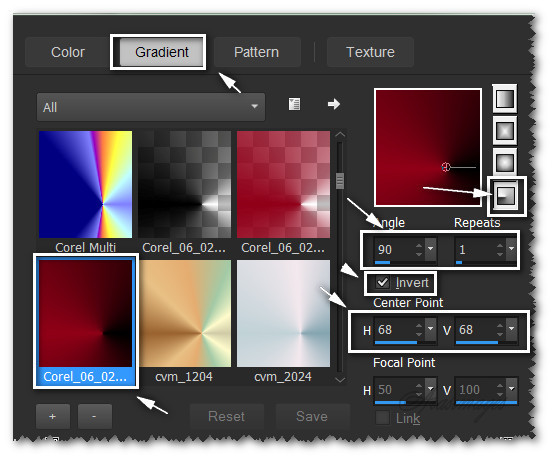
17. Layers/New Raster Layer. Flood fill with Gradient.
18. Adjust/Blur/Gaussian Blur, Radial set to 15.
19. Effects/Edge Effects/Enhance More.
20. Duplicate. Image/Mirror. Drop Opacity down to 50.
21. Merge/Merge Down. Effects/Edge Effects/Enhance More. Rename this layer "Boxes".
22. Selections/Load/Save Selection/Load Selection from Disk. Choose ArasimagesAbstract from drop down. Load.
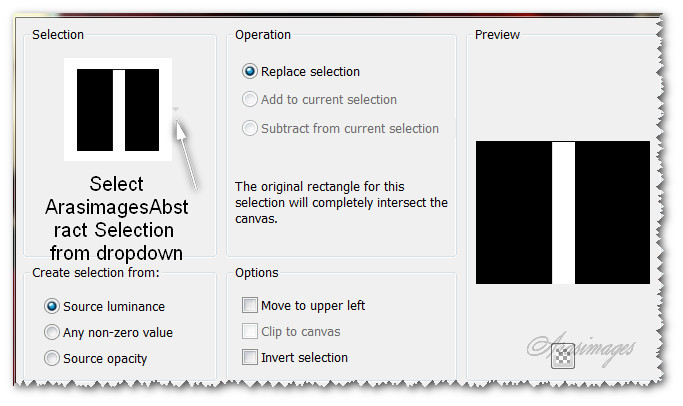
23. Layers New Raster Layer. Change gradient to Style Linear, Invert checked.
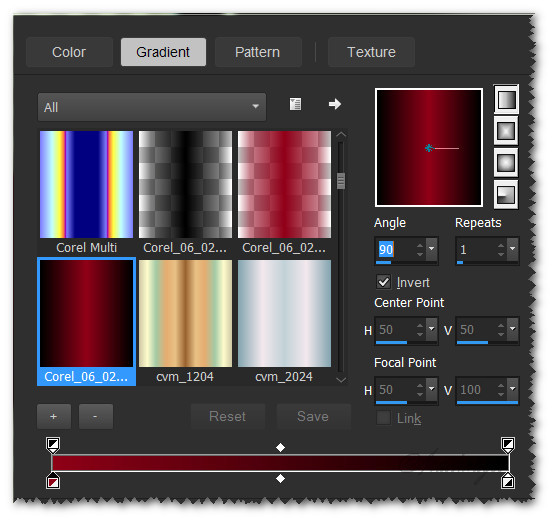
24. Flood fill Selected Rectangle with Gradient.
25. Effects/3D Effects/Drop Shadow. Vertical 0, Horizontal 0, Opacity 75, Blur 45, color #000000.
26. Effects/3D Effects/ Inner Bevel.
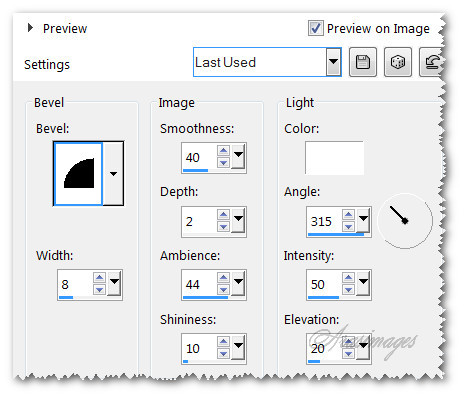
27. Drop down to Boxes layer. Press Delete key once.
28. Go back to top layer. Selections/Select None.
29. Effects/Flaming Pear/Flexify2/Werner. Use settings as seen below.
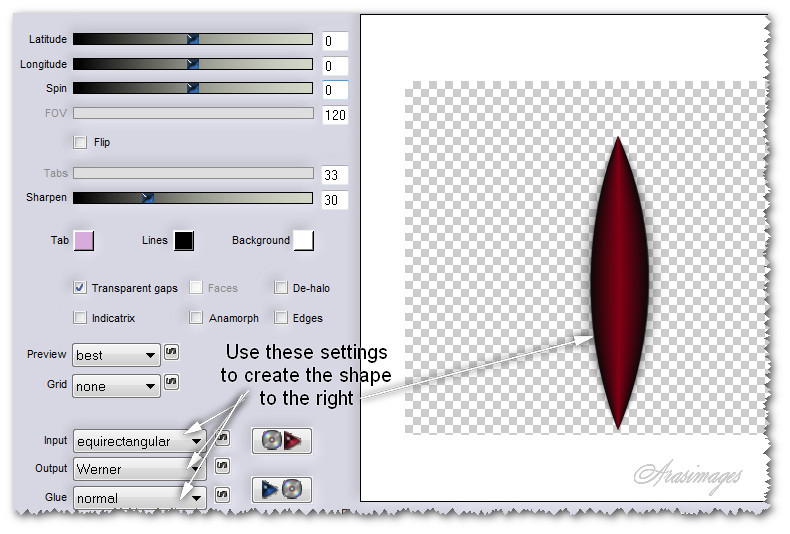
30. Image/Resize/Resize by 80%/Resize all layers unchecked. Close off Werner layer.
31. Drop down to Boxes layer. Apply Flexify2 using settings as seen below.
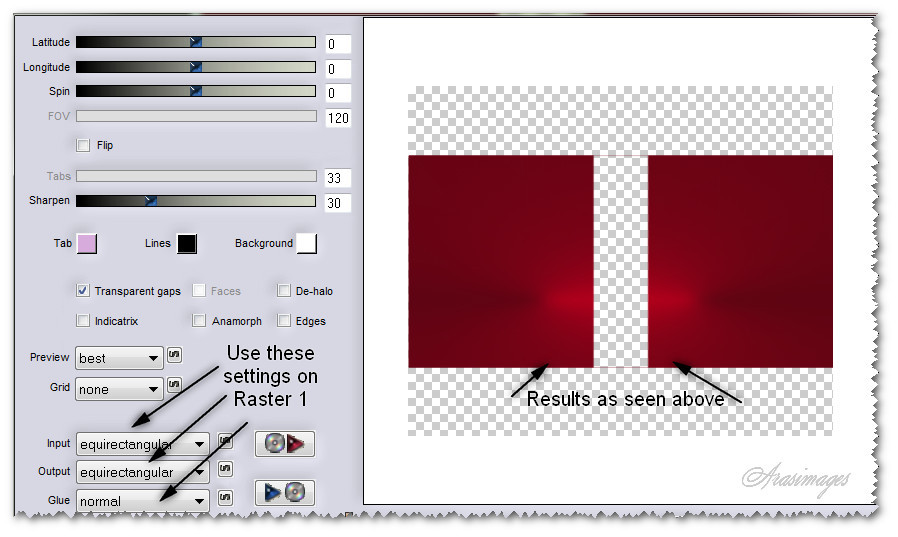
32. Duplicate. Repeat Flexify2 settings in Step 31. Repeat Drop Shadow in Step 25.
33. Duplicate. Repeat Flexify2 settings in Step 31. Repeat Drop Shadow in Step 25.
34. Merge Down 2 times. Effects/Edge Effects/Enhance.
35. Effects/Flexify 2/Half-polar in Output, all other settings the same as in Step #33.
36. Image/Flip. Open Werner Raster 2 layer and adjust layers if necessary. See example in Step #38 for placement.
37. Merge Raster 2 layer with Boxes layer. Move to bottom center of main image.
38. Using Selections/Freehand selection, select around the extra lines on each side of half polar image. Delete. Deselect.

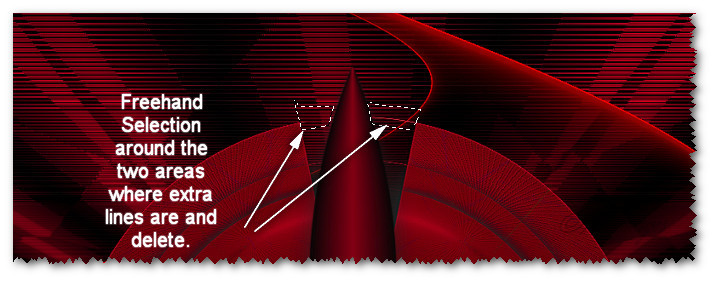
39. In Materials Palette, change the Background color to #bdac94.
40. Layers/New Raster Layer.
41. From the Tool bar, select the Paint brush tool. Choose the brush Stalks. Set the Size to 600 and right click to stamp the brush Stalks on the new layer on bottom left side.

42. Duplicate. Merge/Merge Down.
43. Effects/3D Effects/Drop Shadow. Vertical 0, Horizontal -3, Opacity 75, Blur 45, color #000000.
44. Adjust/Sharpness/Sharpen.
45. Open _Karine_dreams_Pretty_Woman_2717_Fevrier_2014.pspimage. Copy/Paste as New layer.
46. Image/Mirror. Effects/3D Effects/Drop Shadow. Vertical -2, Horizontal -2, Opacity 75, Blur 45, color #000000.
47. Place woman to bottom and right side of image.
48. Adjust/Sharpness/Sharpen.
49. Activate the Color Changer. Have the color #b3011e in Foreground box. Left click on the patch of her gown in the red emblem to make it a deeper red (optional).
50. Image/Add Borders/Add 2px border, Symmetric checked, color #d2c298.
51. Image/Add Borders/add 3px border, Symmetric checked, color #b3011e.
Thank you for working my tutorial.
This tutorial was tested by PamelaD and Evatexas. Thanks ladies!
If you are going to use this tutorial for stationery, cards or place the tutorial/tag on another site, I would appreciate you contacting me for permission, giving Arasimages credit for the original tutorial and if possible, a link back to my site. Thank you.
Copyright © Arasimages All Rights Reserved


