
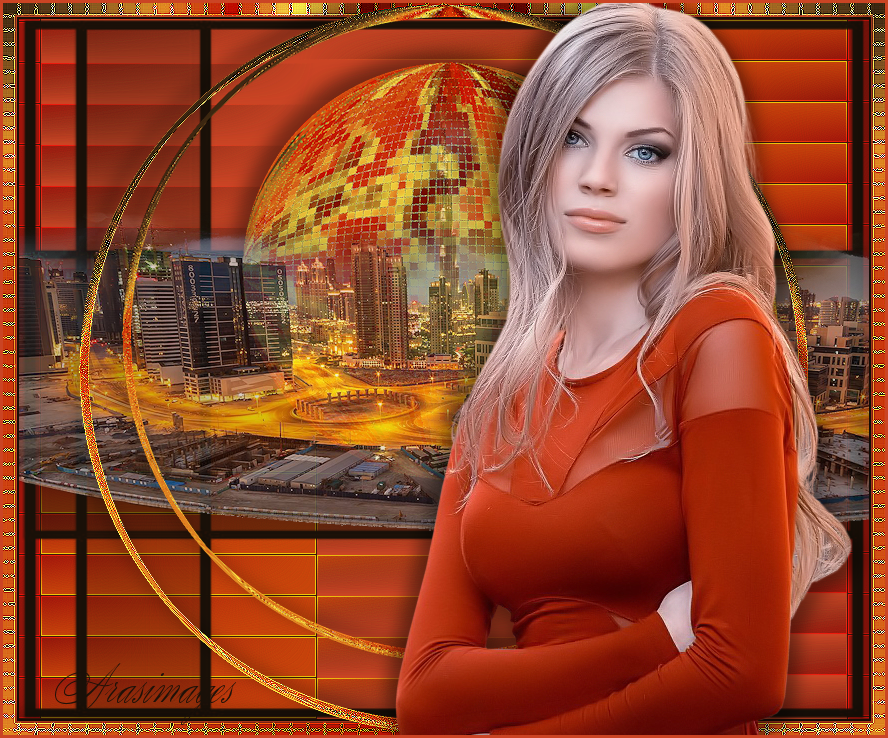
Orange Moon Rising
For an Italian, Danish, Dutch, German and Spanish translation, click on the flags.


For this tutorial you will need the materials in the zip file below.

Thanks go to Maryse and to Nikita for their lovely tubes used in this tutorial.
Unzip the materials into a working folder you have created on your desktop named Orange Moon Rising. Please duplicate and close original tubes. Use the copies for your work so you will not lose the originals. Place Mask in PSP/Masks folder. Place the Gradient in your PSP/Gradient folder. It is assumed you have a working knowledge of PSP to follow these directions. I have used the plugins Filters Unlimited/<&Background DesignsIV>/@Randomsmelter, Abstract Curves/Abstractions12-Fantasy 1 and Carolain and Sensibility/CS_BRectangles in this tutorial. I have used PSPX7 but most PSP programs can be used. To work this tutorial, it is assumed you have some working knowledge of Paint Shop Pro.
Use the moon below to mark your place along the way.

1. In Materials Palette, set Foreground to #cb4424, Background to #191008.
2. New/New Image 850px by 700px. Flood fill with foreground color.
3. Layers/New Raster Layer.
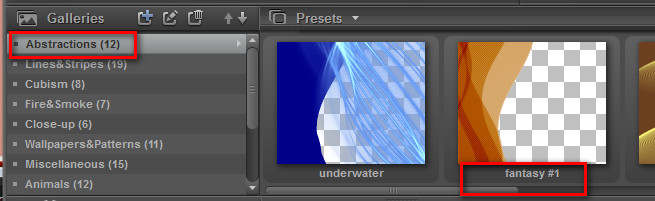
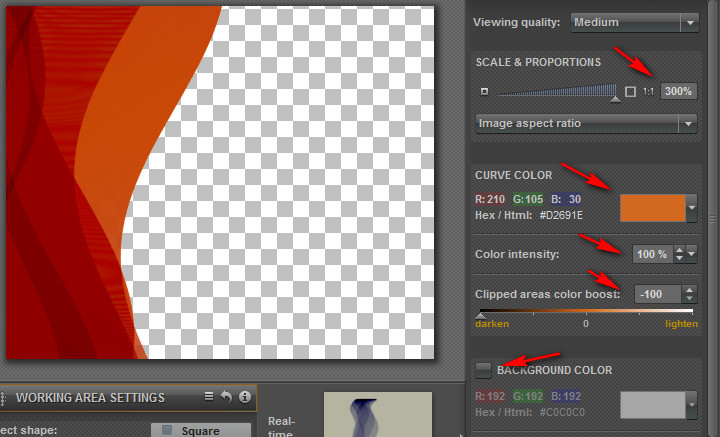
4. Effects/Abstract Curves/Abstractions12-Fantasy#1.
5. Image/Mirror.
6. Effects/3D Effects/Drop Shadow. Vertical -10, Horizontal -10, Opacity 40, blur 15, color #000000.
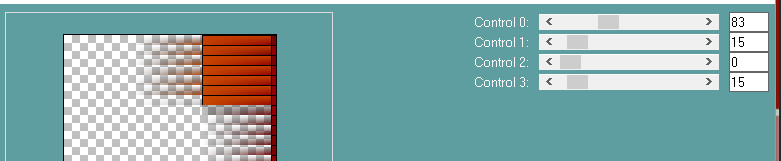
7. Effects/Carolaine and Sensibility/CS_BRectangles.
8. Effects/Edge Effects/Enhance More. Drop Opacity to 70.
9. Duplicate. Image/Mirror. Image/Flip.
10. Layers/New Raster Layer. Flood fill with background color.
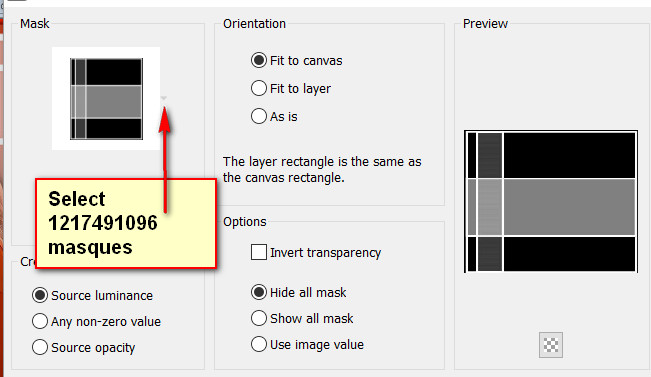
11. Layers/Load/Save Mask/Load Mask from disk. Select Mask 1217491096-masques. Load.
12. Merge/Merge Group.
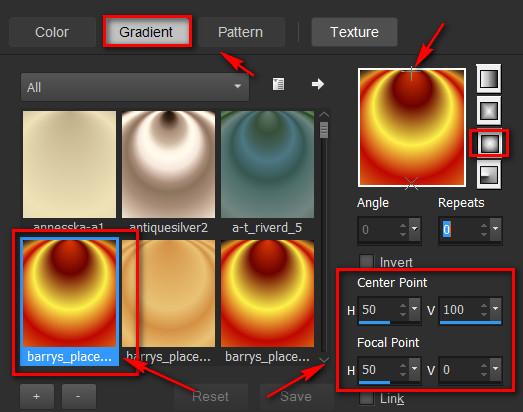
13. In Materials Palette, switch Foreground color to Gradient/barry's place2 with settings as seen below .
14. Layers/New Raster Layer. Flood fill with Gradient.
15. Adjust/Blur/Gaussian blur. Radius set to 30.
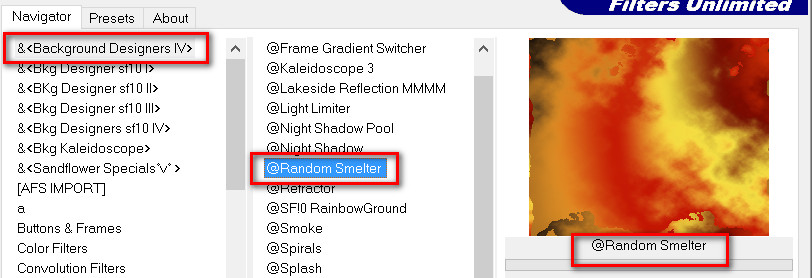
16. Effects/Filters Unlimited/&Background Designers IV/@Random Smelter.
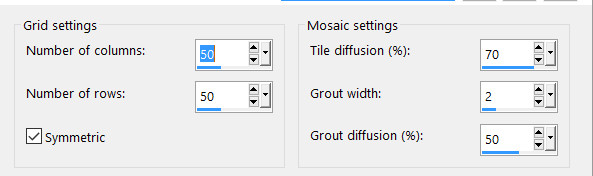
17. Effects/Texture Effects/Mosiac-Antique.
18. Effects/Edge Effects/Enhance.
19. Image/Mirror. Effects/Geometric Effects/Circle. Transparent checked.
20. Image/Resize/Resize by 60%/Resize all layers unchecked.
21. Effects/3D Effects/Drop Shadow. Vertical -10, Horizontal -10, Opacity 40, Blur 24, color #000000.
22. Move upwards toward top of image/center.
23. Open 1293040365.paysages_nikita.pspimage. Copy/Paste as New Layer.
24. Using the Selections tool set to Rectangle, Replace, Feather 0, select around Nikita's watermark and press Delete key. Deselect.
25. Pull down and to the right a little so tower in center is centered against the moon. Lower Opacity to 77.
26. Effects/3D Effects/Drop Shadow. Vertical -10, Horizontal -10, Opacity 40, Blur 25, color #000000.
27. Adjust/Sharpness/Sharpen.
28. Image/Add Borders/add 2px border, Symmetric checked, color #191008.
29. Image/Add Borders/Add 2px border, Symmetric checked, color #cb4424.
30. Image/Add Borders/Add 12px border, Symmetric checked, color #191008.
31. Activate 12px border using Magic Wand. Layers/New Raster Layer.
32. Flood fill the 12px border with Gradient.
33. Repeat Step #17. (Texture/Mosiac-Antique).
34. Effects/Edge Effects/Enhance.
35. Effects/Geometric Effects/Circle.
36. Copy Floating Selection. Selections/Defloat. Deselect.
37. Effects/Edge Effects/Enhance.
38. Effects/3D Effects/Drop Shadow. Vertical -10, Horizontal -10, Opacity 40, Blur 24, color #000000.
39. Paste as New layer. (Circle copy still in memory).
40. Image/Resize/Resize by 90%/All layers unchecked.
41. Repeat Step #38 (drop shadow). Move to top of image over larger circle.
42. Open MR_Jeanne.pspimage. Using the Selections tool set to Rectangle, Replace, Feather 0, select around Maryse's watermark and press Delete key. Deselect.
43. Copy/Paste as New Layer.
44. Effects/3D Effects/Drop Shadow. Vertical -10, Horizontal -10, Opacity 40, Blur 24, color #000000.
45. Effects/3D Effects/Drop Shadow. Vertical 10, Horizontal 10, Opacity 40, Blur 24, color #000000.
46. Place her toward the right side of image.
47. Image/Add Borders/Add 3px border, Symmetric checked, color #cb4424.
Thank you for working my tutorial.
This tutorial was tested by PamelaD and Evatexas. Thanks ladies!
If you are going to use this tutorial for stationery, cards or place the tutorial/tag on another site, I would appreciate you contacting me for permission, giving Arasimages credit for the original tutorial and if possible, a link back to my site. Thank you.
Copyright © Arasimages All Rights Reserved