Springtime
For an Italian, French Danish, Spanish and Dutch translation, click on the flags.


For this tutorial you will need the materials in the zip file below.

Thanks go to PamelaD of Arasimages and various unknown tubers of scraps for their tubes used in this tutorial. If any of these are yours, I would be happy to give you recognition.
Unzip the materials into a working folder you have created on your desktop named Springtime. Please duplicate and close original tubes. Use the copies for your work so you will not lose the originals. I have used the plugins AP [Distort]/Distort/-ShiftMesh and AAA Frames/Texture Frames and the Effect/Art Media/Brush Strokes in this tutorial. It is assumed you have a working knowledge of PSP to follow these directions. I have used PSPX8 for this tutorial but other versions may be used. To work this tutorial, it is assumed you have some working knowledge of Paint Shop Pro.
Use the little rabbit below to mark your place along the way.
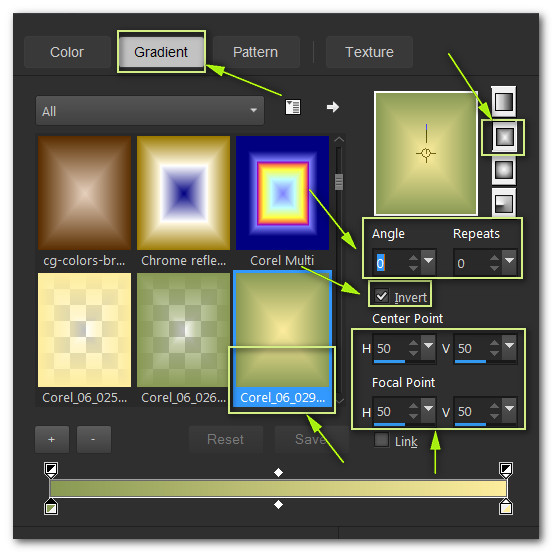
1. In Materials Palette, set Foreground to #889953, Background to #fded9d. Create a Gradient using these colors, Gradient Corel_06_029 (foreground/background), Style Rectangular, Angle 0, Repeats 0, Invert checked, Center Points/ Focal Points all set to 50
2. New/New Image 900px by 820px. Flood fill with Gradient.
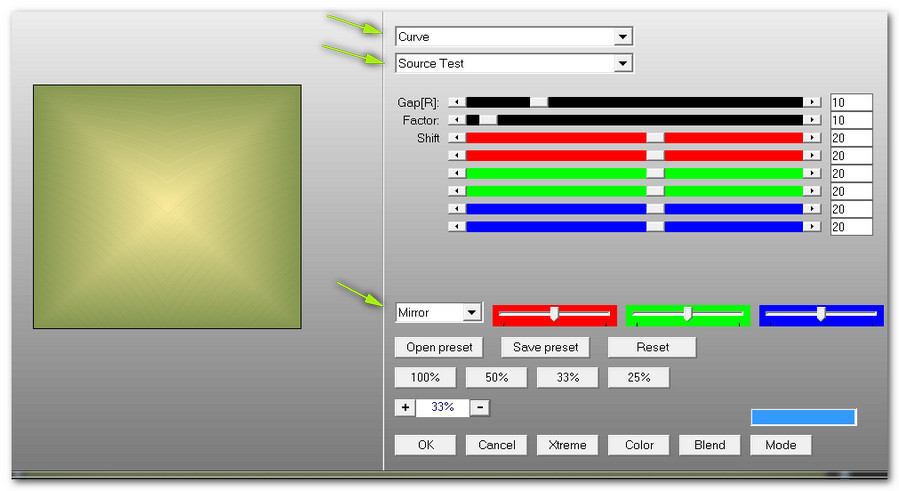
3. Effects/AP [Distort]/Distort-ShiftMesh. Use settings below.
4. Effects/Edge Effects/Enhance.
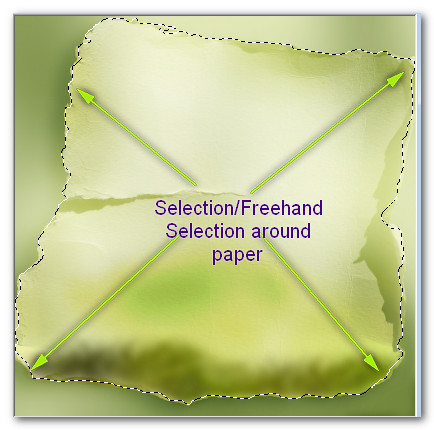
5. Open 0_98886_62d3b7f1_XL.png. Using the Selections tool, Freehand Selection/Replace/Feather 0, select around the paper. Copy.
6. On the working image, Paste as New Layer.
7. Using Eraser tool, erase any areas you may have missed to make a nice edge.
8. Selections/Select All. Float/Defloat.
9. Layers/New Raster Layer.
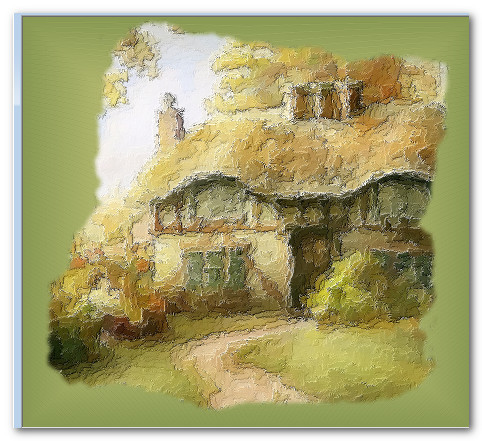
10. Open 0_a3970_11c037bd_XXL.jpg. Background/Promote Background layer. Copy/Paste into Selection. Deselect.
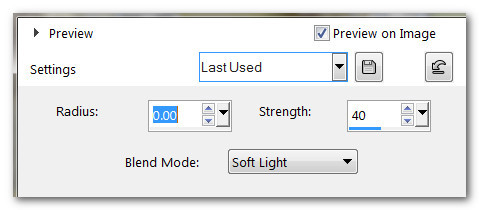
11. Adjust/Sharpness/High Pass Sharpen.
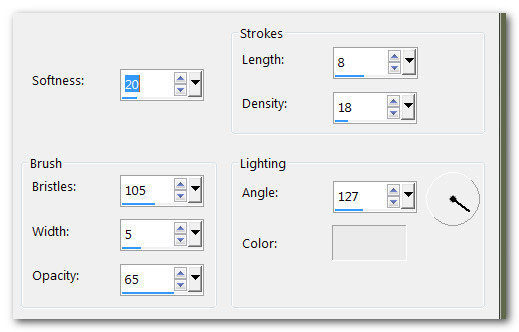
12. Effects/Art Media Effects/Brush Strokes.
13. Drop Opacity down to 54.
14. Effects/3D Effects/Drop Shadow. Vertical -15, Horizontal -15, Opacity 75, Blur 25, color #000000.
15. Effects/3D Effects/Drop Shadow. Vertical 15, Horizontal 15, Opacity 75, Blur 25, color #000000.
16. Open 0_a5669_8b7ad548_M.png of frame. Copy/Paste as New Layer.
17. Using Selections tool set to Rectangle, Replace, Feather 0, select inside of frame.
18. Layers/New Raster Layer.
19. Open 0_a3970_11c037bd_XXL.png. Copy/Paste into Selection.
20. Effects/AP [Distort]/Distort-ShiftMesh. Use default settings. Deselect.
21. Merge/Merge Down. Apply Drop Shadow as in Step #15.
22. Open 0_a5669_8b7ad548_M.png of frame. Copy/Paste as New Layer.
23. Using Selections tool set to Rectangle, Replace, Feather 0, select inside of frame.
24. Layers/New Raster Layer.
25. Open bootsDaffs_zps61f216ae.gif. Copy/Paste into Selection. Deselect.
26. Drop Opacity to 85. Apply Drop Shadow as in Step #15.
27. Adjust/Sharpness/Sharpen.
28. Effects/AP [Distort]/Distort-ShiftMesh. Use default settings.
29. Merge/Merge Down.
30. Effects/3D Effects/Drop Shadow. Vertical 15, Horizontal 15, Opacity 75, Blur 25, color #000000.
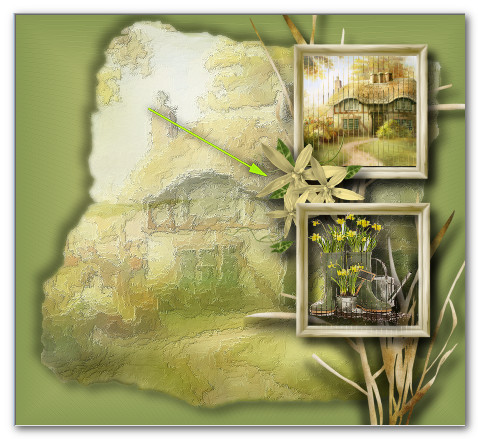
31. Open 0_a6beb_c137a1b9_L.png. Apply Drop Shadow as in Step above. Copy/Paste as New Layer.
32. Move to behind top frame in upper right corner.
33. Duplicate. Image/Mirror. Move down below bottom frame into bottom right corner.
34. Effects/3D Effects/Drop Shadow. Vertical 15, Horizontal 15, Opacity 75, Blur 25, color #000000.
35. Open 0_a5665_33bb2afe_M.png of flowers. Copy/Paste as New Layer.
36. Apply same drop shadow. Move between two frames.
37. Adjust/Sharpness/Sharpen.
38. Open 0_961f3_524ce4fe_XL.png swirl. Copy/Paste as New Layer.
39. Pull below bottom frame layer. Move to the left side of image and to the top so it is touching top border.
40. Go back to top layer.
41. Open 0_ebda5e_7edb88b3.L.png of flowers/stems. Copy/Paste as New Layer.
42. Image/Mirror. Apply drop shadow as in Step #34.
43. Adjust/Sharpness/Sharpen. Repeat.
44. Move into upper left corner.
45. Duplicate. Image/Mirror. Image/Flip. Place in upper right corner.
46. Open Tube_329.pspimage of little girl doll. Copy/Paste as New Layer.
47. Effects/3D Effects/Drop Shadow. Vertical -15, Horizontal 15, Opacity 75, Blur 40, color #000000.
48. Adjust/Sharpness/Sharpen.
49. Image/Resize/Resize by 80%/Resize all layers unchecked.
50. Move into bottom left corner to fit.
51. Open Doll_215.pspimage. Copy/Paste as New Layer.
52. Image/Resize/Resize by 66%/Resize all layers unchecked.
53. Image/Mirror. Effects/Edge Effects/Enhance.
54. Effects/3D Effects/Drop Shadow. Vertical 15, Horizontal 15, Opacity 75, Blur 25, color #000000.
55. Move into bottom right corner over frame.
56. Open 0_a5657_4e508943_M.png of single flower. Copy/Paste as New Layer.
57. Adjust/Sharpness/Sharpen. Apply drop shadow as in Step 54.
58. Place in bottom right corner over rabbit.
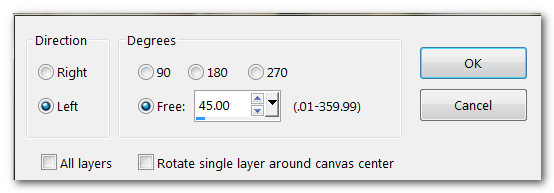
59. Duplicate. Image/Free Rotate. Left by 45 degrees.
60. Place to the left of rabbit.
61. Open 0_a5bf0_d2e91980_L.png of leaves. Copy/Paste as New Layer.
62. Adjust/Sharpness/Sharpen.
63. Apply drop shadow as in Step #54. Move to bottom right corner.
64. Image/Add Borders/Add 2px border, Symmetric checked, color #e2dec0.
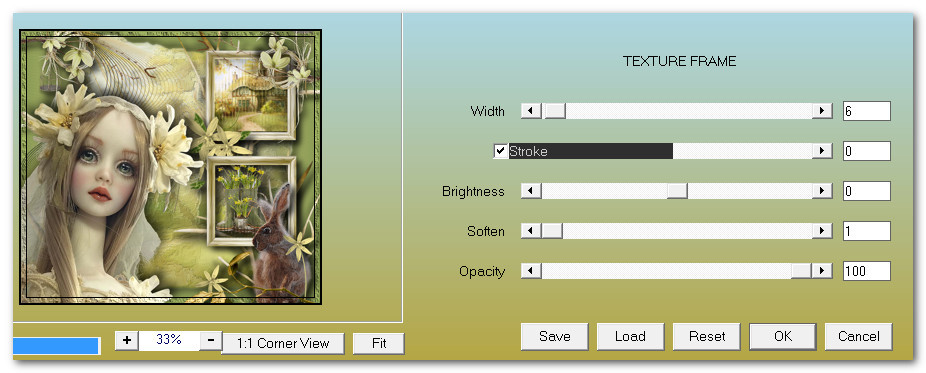
65. Effects/ AAA Frames/Texture Frame. Set Width to 6, all other settings remain the same. Click OK.
66. You may sign your name if you wish at this point. Merge/Merge Visible if necessary.
This tutorial was tested by PamelaD and Evatexas. Thanks ladies!
If you are going to use this tutorial for stationery, cards or place the tutorial/tag on another site, I would appreciate you contacting me for permission, giving Arasimages credit for the original tutorial and if possible, a link back to my site. Thank you.
Copyright © Arasimages All Rights Reserved