
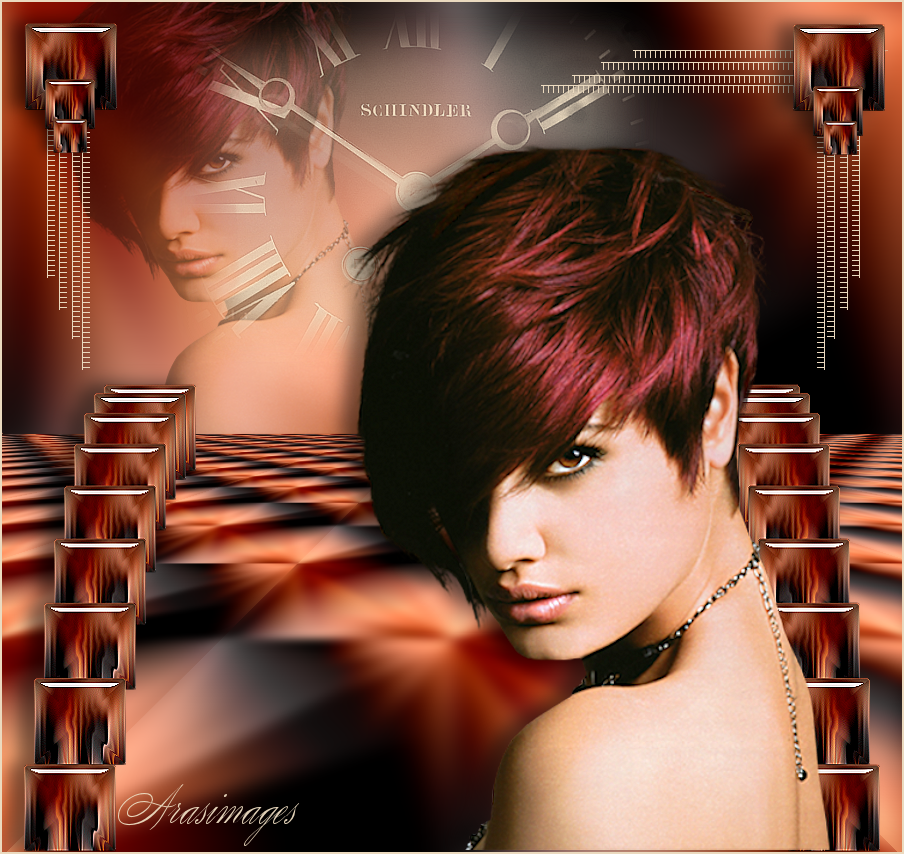
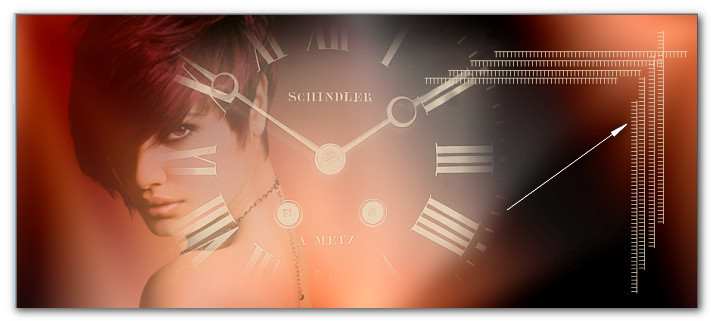
Time for Love
For a Danish, Italian, French, Spanish, German and Dutch translation, click on the flags.


For this tutorial you will need the materials in the zip file below.

Thanks go to Patries for the lovely woman used in this tutorial and to the unknown tuber of the clock.
Unzip the materials into a working folder you have created on your desktop named Time for Love. Please duplicate and close original tubes. Use the copies for your work so you will not lose the originals. Place the hbgbrush-old207005.PspBrush into your PSP/Brushes folder. Place the ArasimagesGlassButtons Preset into your PSP/Alien Skin Eye Candy 5: Impact folder. I have used the plugin Alien Skin Eye Candy 5: Impact/Glass and Mura's Meister/Perspective and Copies in this tutorial. It is assumed you have a working knowledge of PSP to follow these directions. I have used PSPX8 for this tutorial but other versions may be used. To work this tutorial, it is assumed you have some working knowledge of Paint Shop Pro.
Use the button below to mark your place along the way.

1. In Materials Palette, set Foreground to #ebdabf, Background to #000000.
2. New/New Image 900px by 850px.
3. Selections/Select All.
4. Open Background/Copy. Paste into Selection.
5. Selections/Select None. Duplicate.
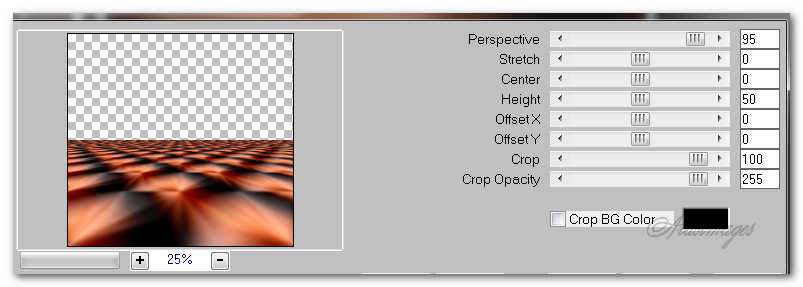
6. Effects/Mura'sMeister/Perspective.
7. Open 1Patries_VR264-Fashionredhair_7-6-09.psp.
8. Copy/Paste as New Layer.
9. Drop Opacity down to 40. Place woman in upper left corner so she sits on the horizon.
10. Open clockbrushimage.pspimage. Copy/Paste as New Layer.
11. Using Color changer, change color to #ebdabf.
12. Adjust/Sharpness/Sharpen.
13. Layers/New Raster Layer.
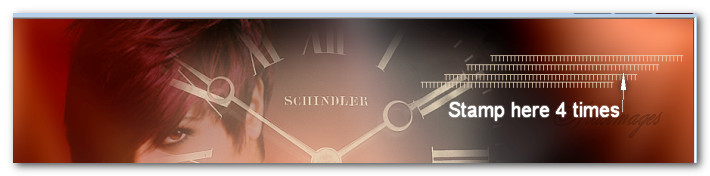
14. From the tool bar, select the Paint Brush tool. Find hbgbrush-old207 005.PspBrush. Use settings as seen below.

15. Using color #ebdabf, left click to stamp four rows as seen here.
16. Duplicate. Image/Mirror.
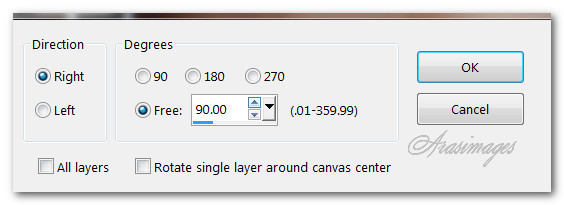
17. Image/Free Rotate right by 90 degrees.
18. Move to the upper right corner as seen below.
19. Duplicate. Image/Mirror to other side of image.
20. New/New Image 92px by 87px. Selections/Select All.
21. Open Background.png. Copy/Paste into Selection. Selections/Select None.
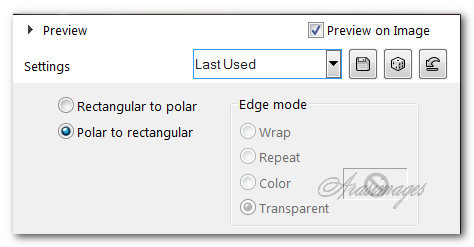
22. Effects/Distortion Effects/Polar Coordinates.
23. Effects/Edge Effects/Enhance.
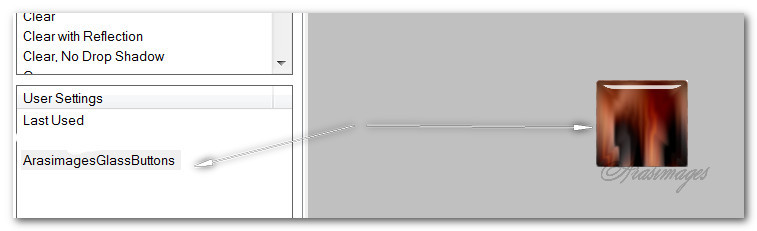
24. Effects/Alien Skin Eye Candy 5: Impact/Glass. Select the ArasimagesGlassButtons which will show under User Settings.
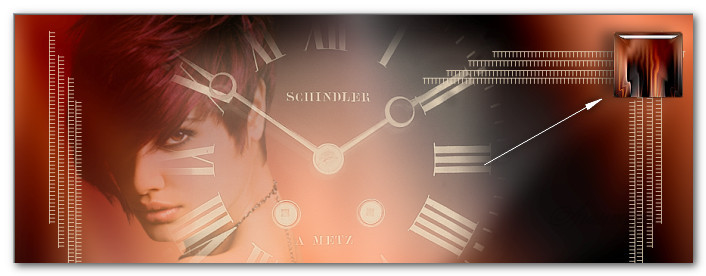
25. Copy/Paste as New Layer on your main working image. Leave it positioned where it is pasted.
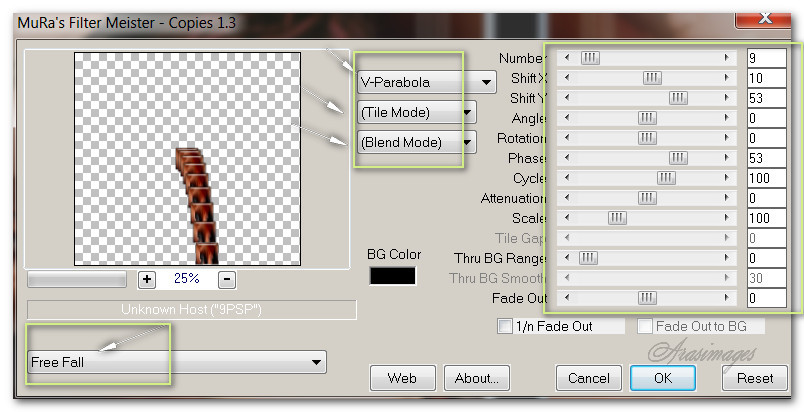
26. Effects/Mura's Meister/Copies. Use settings below.
27. Place in bottom right corner.
28. Effects/Edge Effects/Enhance.
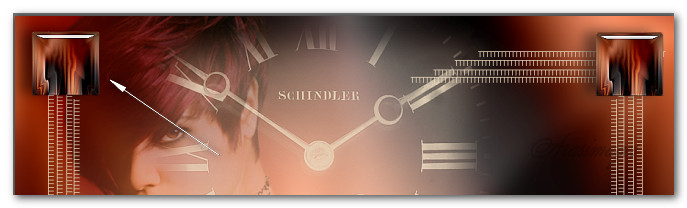
29. Duplicate. Image/Mirror to bottom left corner.
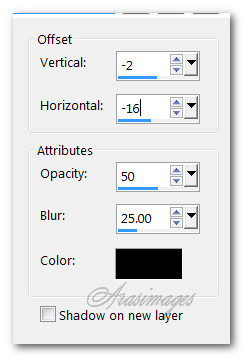
30. Effects/3D Effects/Drop Shadow. Vertical -02, Horizontal -16, Opacity 50, Blur 25, color #000000.
31. Go back to the layer of first freefall squares and apply the same drop shadow as above. Return to the top layer to continue.
32. Paste as New Layer again (Glass button).
33. Effects/3D Effects/Drop Shadow. Vertical -02, Horizontal -16, Opacity 50, Blur 25, color #000000.
34. Place in upper top corner over stamped lines.
35. Duplicate. Move the duplicated copy to upper left corner over lines.
36. New/New Raster Layer 50px by 50px. Selections/Select All.
37. Paste/Paste into Selection (GlassButton). Deselect.
38. Copy/Paste as New Layer on main image.
39. Effects/Edge Effects/Enhance.
40. Effects/3D Effects/Drop Shadow. Vertical -02, Horizontal -16, Opacity 50, Blur 25, color #000000.
41. Place in upper right corner slightly over bottom of larger button.
42. Duplicate. Move to the upper left corner slightly over bottom of larger button.
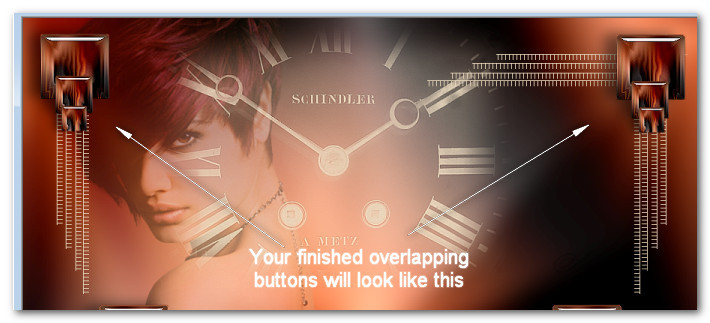
43. Duplicate. Image/Resize/Resize by 68%/Resize all layers unchecked.
44. Place at bottom of left middle glass button overlapping a bit.
45. Duplicate. Place in upper right corner slightly over bottom of middle button as you did on the left side. Your buttons all in place should look like this example below.
46. Open 1Paries_VR264-Fashionredhair-7-6-09.pspimage. Copy/Paste as New Layer.
47. Image/Resize/Resize by 143%/Resize all layers unchecked.
48. Adjust/Sharpness/Sharpen.
49. Effects/3D Effects/Drop Shadow. Vertical -02, Horizontal -16, Opacity 50, Blur 25, color #000000.
50. Image/Add Borders/Add 2px border, Symmetric checked, color #ebdabf.
51. Add your name if you wish on a new layer. Merge/Merge Visible.
This tutorial was tested by PamelaD and Evatexas. Thanks ladies!
If you are going to use this tutorial for stationery, cards or place the tutorial/tag on another site, I would appreciate you contacting me for permission, giving Arasimages credit for the original tutorial and if possible, a link back to my site. Thank you.
Copyright © Arasimages All Rights Reserved