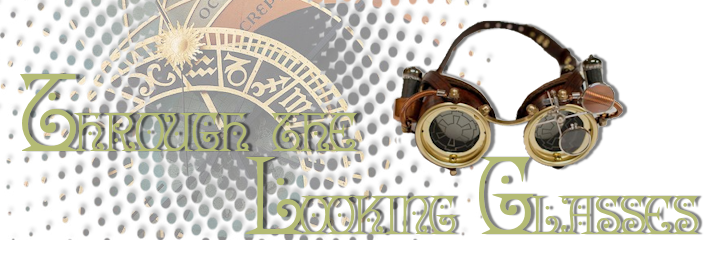
Through the Looking Glasses
For a Spanish, Danish, Italian, Dutch and French translation, click on the flags.


For this tutorial you will need the materials in the zip file below.

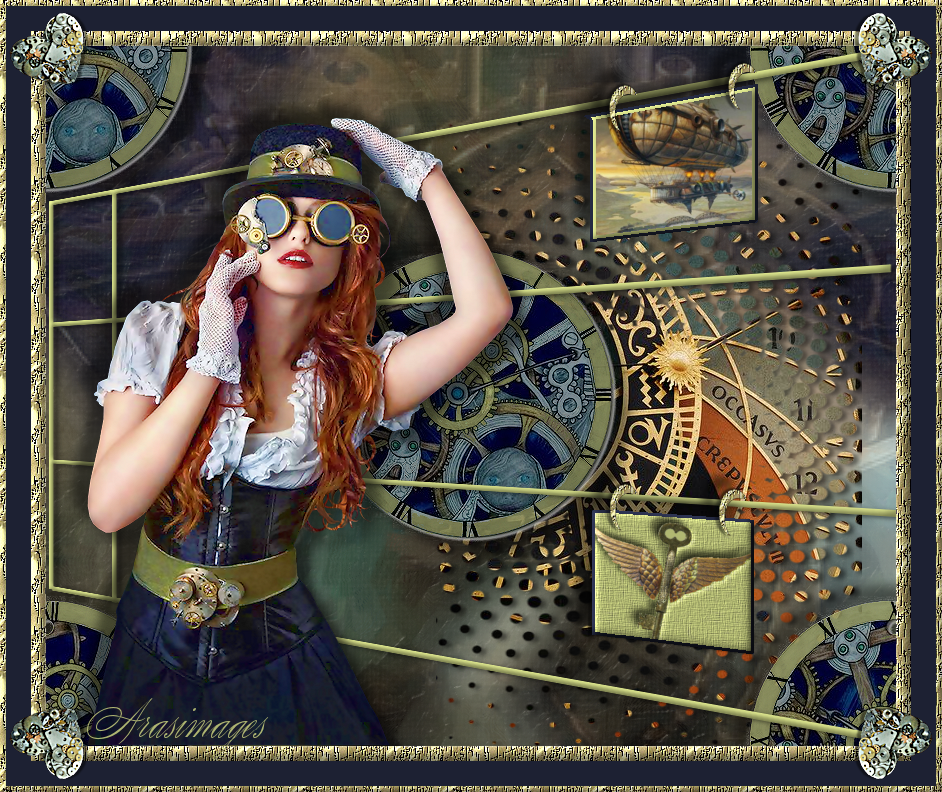
Thanks go to LisaT and to Danimage for the great Steampunk tubes used in this tutorial and to the unknown tubers whose tubes I've used.
Unzip the materials into a working folder you have created on your desktop named Through the Looking Glasses. Please duplicate and close original tubes. Use the copies for your work so you will not lose the originals. Place the Preset in the Alien Skin Snap Art/Settings/Paint folder. Place the Selection in your PSP/Selections folder. Place the Narah Mask in your PSP/Masks folder. Place the Steffi14.jpg in to your PSP/Patterns folder. I have used the plugin Alien Skin Snap Art/Oil Paint and Simple/Top Left Mirror in this tutorial. It is assumed you have a working knowledge of PSP to follow these directions. I have used PSPX8 for this tutorial but other versions may be used. To work this tutorial, it is assumed you have some working knowledge of Paint Shop Pro.
Use the little heart below to mark your place along the way.

1. In Materials Palette, set Foreground to #b4bb74, Background to #1d2133.
2. New/New Image 850px by 700px.
3. Selections/Select All. (CTRL+A)
4. Open 8bfb50ca0a30fd0becc172f8a4db501b.jpg_(fish). Copy/Paste into Selection.
5. Selections/Select None.
6. With the Flood fill tool set to Tolerance of 20, right click in gray areas at the top of image to change to dark blue. Left click in bottom areas of gray to change areas to green.

7. Adjust/Blur. Gaussian Blur. Set Radius to 23.

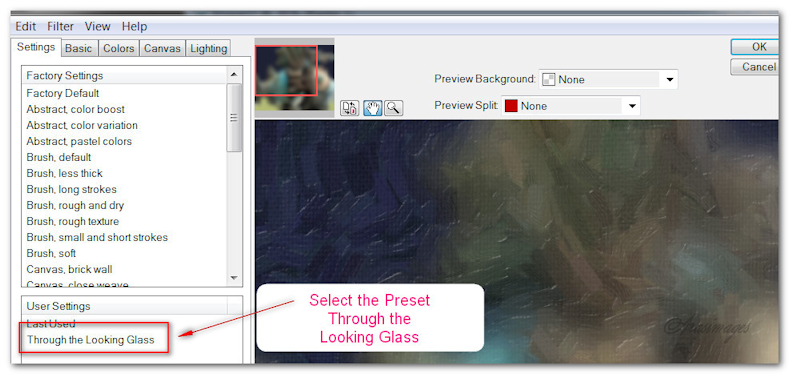
8. Alien Skin Snap Art/Oil Paint. Use preset supplied in materials.
9. Layers/New Raster Layer. Selections/Select All.
10. Open img-thing.jpg. Copy/Paste into Selection.
11. Selections/Select None. (CTRL+D). Drop Opacity down to 20.
12. Effects/Edge Effects/Enhance.
13. Open c2ab1e08550b1d1eeead9e2edd872c35.pspimage. Copy/Paste as New Layer.
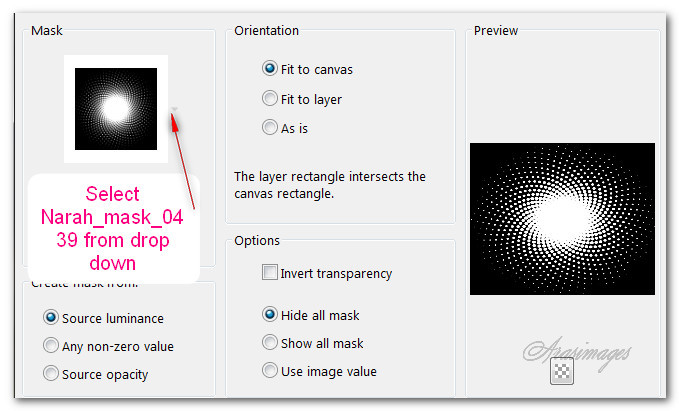
14. Layers/Load/Save Mask. Load Mask from Disk. Select the Narah-mask_0439. Load.
15. Merge/Merge Group. Move to right side of image. (Adjust to right of center Gear after Gears have been applied in Step #18).
16. Drop Opacity down to 90.
17. Effects/3D Effects/Drop Shadow. Vertical 2, Horizontal 5, Opacity 50, Blur 7, color #000000.
18. Open Gears.png. Copy/Paste as New Layer.
19. Effects/3D Effects/Drop Shadow. Vertical 15, Horizontal 15, Opacity 50, Blur 15, color #000000.
20. Effects/3D Effects/Drop Shadow. Vertical -15, Horizontal -15, Opacity 50, Blur 15, color #000000.
21. Adjust/Sharpness/Sharpen.
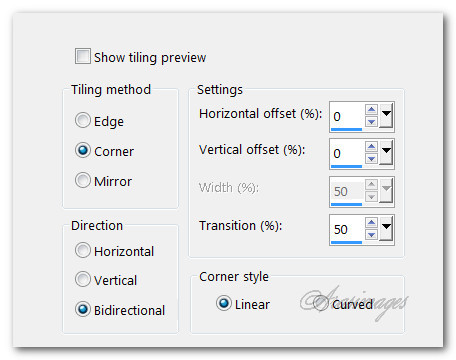
22. Effects/Image Effects/Seamless Tiling.
23. Layers/New Raster Layer.
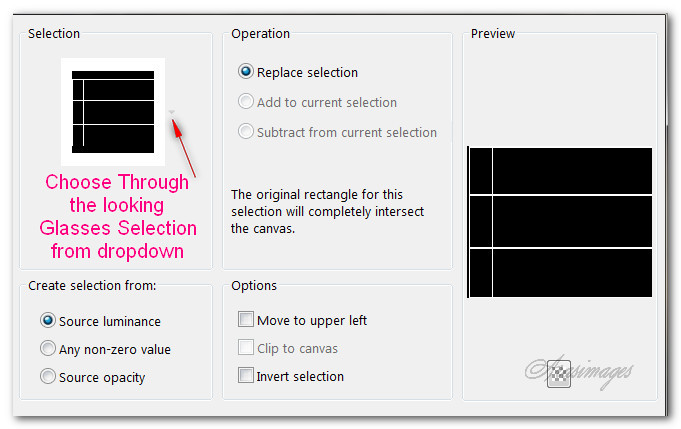
24. Selections/Load/Save Selection/Load Selection from Disk. Select ThroughTheLookingGlass selection from the dropdown. Load.
25. Flood fill Selection with Foreground green color.
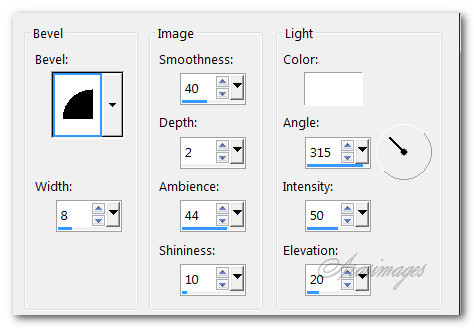
26. Effects/3D Effects/Inner Bevel.
27. Selections/Select None.
28. Effects/Geometric Effects/Perspective-Horizontal.
29. Effects/3D Effects/Drop Shadow. Vertical 2, Horizontal 5, Opacity 50, Blur 7, color #000000.
30. Open femmes_0227_lisat.png. Copy/Paste as New Layer.
31. Image/Resize/Resize by 82%/Resize all layers unchecked.
32. Erase Lisa's watermark. Move toward left side of image.
33. Effects/3D Effects/Drop Shadow. Vertical 15, Horizontal 15, Opacity 50, Blur 15, color #000000.
34. Effects/3D Effects/Drop Shadow. Vertical -15, Horizontal -15, Opacity 50, Blur 15, color #000000.
35. Adjust/Sharpness/Sharpen.
36. From tool bar, choose Selections/Freehand Selection/set Point to Point/Add (Shift)/Feather0.

37. Using the selections tool, select a rectangle between the two upper lines in upper right corner.
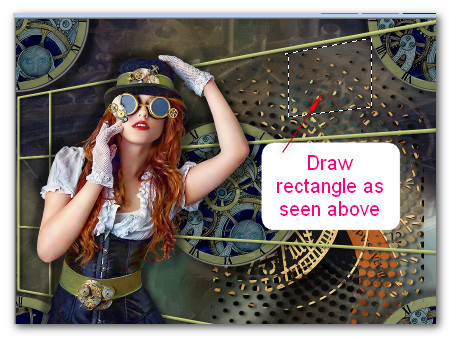
38. Layers/New Raster Layer.
39. Open BalloonScene.png. Copy/Paste into Selection. Keep selected.
40. Layers/New Raster Layer. Flood fill with background color #1d2133.
41. Selections/Modify/Contract by 3px. Press Delete key once.
42. Flood fill with Foreground color #b4bb74.
43. Selections/Modify/Contract by 3px. Press Delete key once.
44. Selections/Modify/Expand by 6px.
45. Effects/3D Effects/Inner BeveInnerBevelonSelection.jpg" alt="">
46. Selections/Select None. Merge/Merge Down.
47. Effects/3D Effects/Drop Shadow. Vertical -15, Horizontal -15, Opacity 50, Blur 15, color #000000.
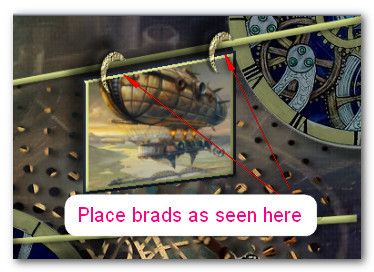
48. Open Picture Brad.png. Copy/Paste as New Layer.
49. Move to top left of rectangle picture as a hook.
50. Duplicate/Move to right side of balloon picture.
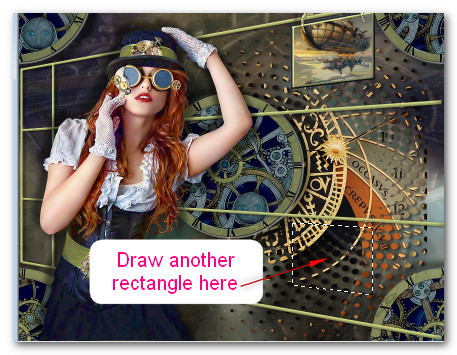
51. Using the same settings as the first rectangle, draw another rectangle between third line down and bottom line as seen in example below.
52. Layers/New Raster Layer.
53. Open Greenbackground.png. Copy/Paste into Selection. Keep selected.
54. Flood fill with background color #1d2133.
55. Selections/Modify/Contract by 3px. Press Delete key once.
56. Selections/Modify/Expand by 3px.
57. Merge/Merge Down.
58. Effects/3D Effects/Inner Bevel.
59. Selections/Select None.
60. Effects/3D Effects/Drop Shadow. Vertical -15, Horizontal -15, Opacity 50, Blur 15, color #000000.
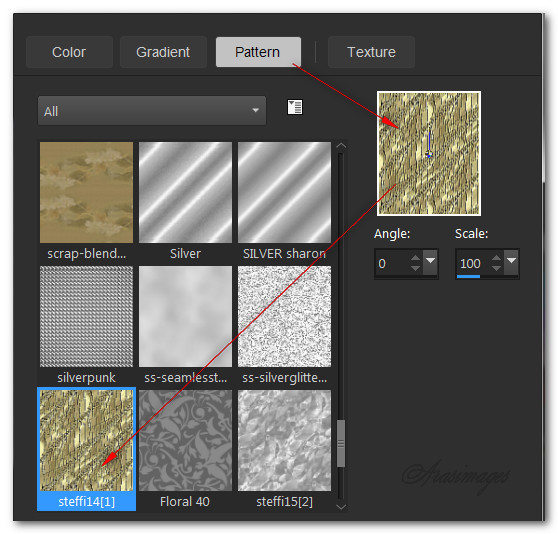
61. Open the PictureBrad.png and Copy/Paste as New Layer. Place at the left top of the lower rectangle. Duplicate and place to the top right of the image like you did before.
62. Place a drop shadow on each PictureBrad using Vertical 0, Horizontal -4, Opacity 50, Blur 2, color #000000.
63. Make sure you are on the top layer to continue.
64. Image/Add Borders/Add 15px border, Symmetric checked, color #ffffff.
65. Activate the 15px border with the Magic Wand.
66. In Materials Palette, select Steffi14.jpg pattern. Flood fill the 15px border with pattern.
67. Effects/3D Effects/Inner Bevel. Use same Inner Bevel as before.
68. Selections/Select None.
69. Image/Add Borders/Add 25px border, Symmetric checked, color #1d2133.
70. Image/Add Borders/Add 6px border, Symmetric checked, color #b4bb74.
71. Activate 6px border with Magic Wand. Flood fill with pattern Steffi14.
72. Effects/3D Effects/Inner Bevel. Use same Inner Bevel as before.
73. Selections/Select None.
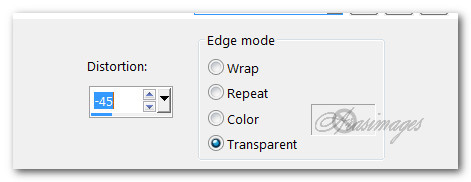
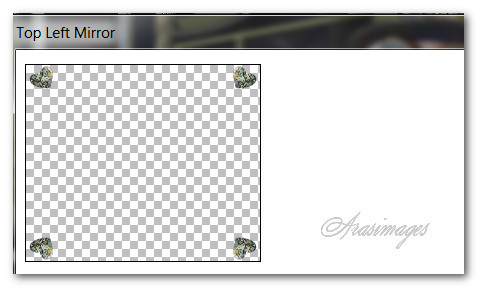
74. Open tube danimage coeur steampunk.pspimage of heart. Copy/Paste as New Layer.
75. Image/Resize/Resize by 20%/Resize all layers unchecked.
76. Adjust/Sharpness/Sharpen More.
77. Effects/3D Effects/Drop Shadow. Vertical 0, Horizontal 4, Opacity 50, Blur 2, color #000000.
78. Place in upper left corner over first frame.
79. Effects/Simple/Top Left Mirror.
80. Add your name if you wish on a new layer. Merge/Merge Visible.
This tutorial was tested by PamelaD and Evatexas. Thanks ladies!
If you are going to use this tutorial for stationery, cards or place the tutorial/tag on another site, I would appreciate you contacting me for permission, giving Arasimages credit for the original tutorial and if possible, a link back to my site. Thank you.
Copyright © Arasimages All Rights Reserved