
Stop and Smell the Poppies
For a Danish, Spanish, Italian and French translation, click on the flags.


For this tutorial you will need the materials in the zip file below.

Thanks go to K@rine for the lovely woman used in this tutorial and to Odette for the lovely poppy flowers.
Unzip the materials into a working folder you have created on your desktop named Stop and Smell the Poppies. Please duplicate and close original tubes. Use the copies for your work so you will not lose the originals. Place the Selections in your PSP/Selections folder. Place the Lost in a Poppy Field.PspGradient in your PSP/Gradients folder. I have used the plugins Graphics Plus/Cross Shadow, Filter Factory Q/Flecktone, Alien Skin Xenofex 2/Constellation and Krusty's FX Vol.II 1.1/Generator P Flower in this tutorial. I have used the program Animation Shop for the animation. It is assumed you have a working knowledge of PSP to follow these directions. I have used PSPX8 for this tutorial but other versions may be used. To work this tutorial, it is assumed you have working knowledge of Paint Shop Pro.
Use the pen below to mark your place along the way.
1. In Materials Palette, set Foreground to #880f0a, Background to #d49677.
2. Create a gradient using the above colors, Style Linear, Angle and Repeats both set to 0, Invert unchecked, Center and Focal Points null.
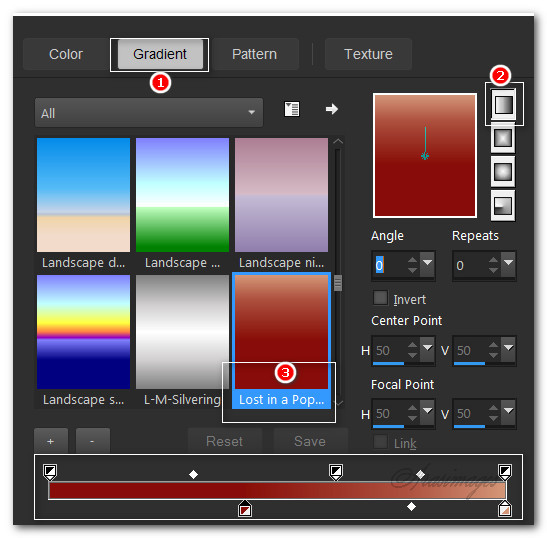
3. In Materials Palette under Gradient, choose Lost in a Poppy Field gradient.
4. New/New Image 900px by 600px.
5. Flood fill with chosen gradient on Raster 1.
6. Layers/New Raster Layer.
7. Flood fill with chosen gradient on Raster 2.
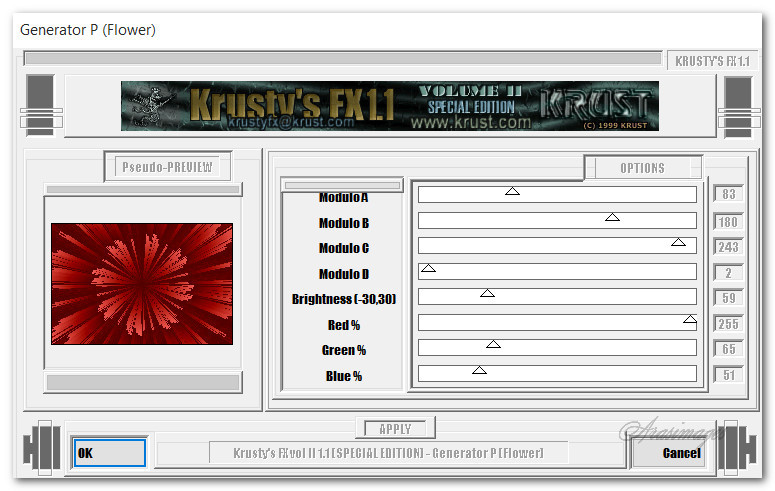
8. Effects/Krysty's FX Vol I.I/GeneratorP/Flower.
9. Effects/Edge Effects/Enhance. Drop Opacity down to 40%.
10. Layers/New Raster Layer.
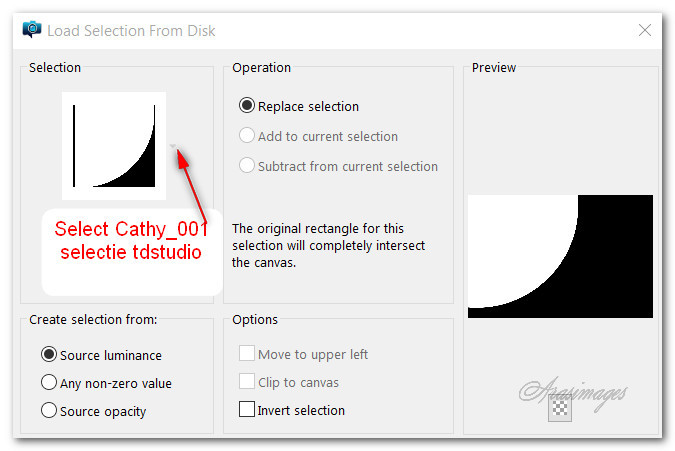
11. Selections/Load/Save Selections/Load Selection from Disk. Load.
12. Selections/Invert. In Materials Palette, check Invert. Flood fill with Gradient.
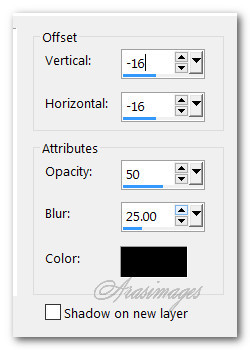
13. Effects/3D Effects/Drop Shadow. Vertical -16, Horizontal -16, Opacity 50, Blur 25, color #000000. Note: This will be the drop shadow used throughout this tutorial unless specified differently.
14. Selections/Select None.
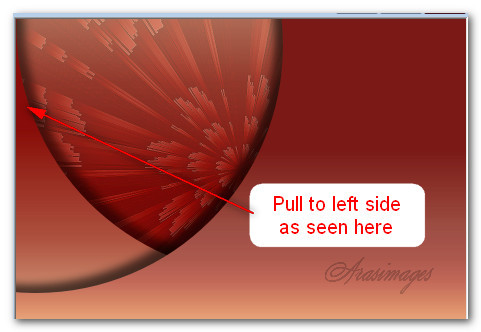
15. Duplicate. Image/Mirror. Move Copy of Raster 3 down below Raster 3 and pull to the left side of image as seen below.
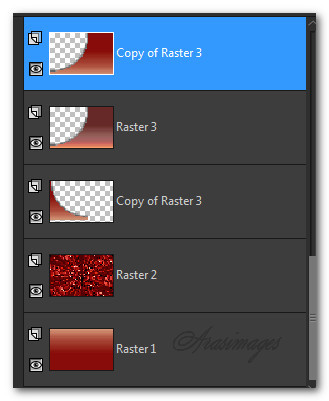
16. Go back to Raster 3. Duplicate. Drop Opacity down to 58 on duplicated layer.
17. Go back to Raster 3 again.
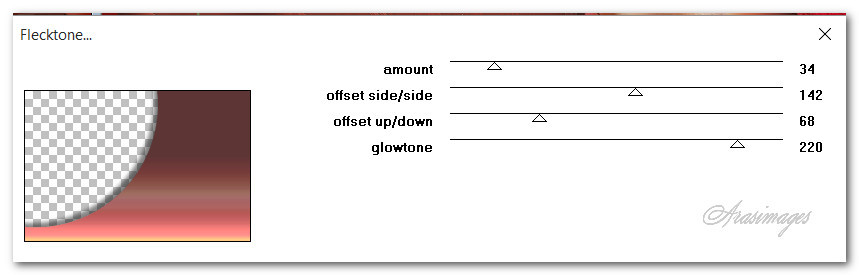
18. Effects/Filter FactoryQ/Flecktone. Use settings as seen below.
19. Your layers should appear as seen below.
20. Go back to top layer to continue.
21. Open 120206081148951629400208.pspimage. Copy/Paste as New Layer.
22. Image/Resize/Resize by 65%/Resize all layers unchecked.
23. Image/Mirror.
24. Using the same drop shadow as before, apply drop shadow on this layer.
25. Using Eraser tool, erase the text off the flower layer. Pull below Raster 3 and to the left side.
26. Go back to the top layer to continue.
27. Open Poppy Three.png. Copy/Paste as New Layer.
28. Apply drop shadow. Move to left side of image toward the top corner.
29. Adjust/Sharpness/Sharpen.
30. Open Poppy Two.png. Copy/Paste as New Layer.
31. Apply drop shadow. Adjust/Sharpness/Sharpen.
32. Move just below and to the right a little of the Poppy Three.
33. Open 0_9daa1_aaf47815_M.Png element. Copy/Paste as New Layer.
34. Image/Flip. Place in upper left corner.
35. Duplicate. Image/Mirror. Place next to the first element image so they touch. See below.
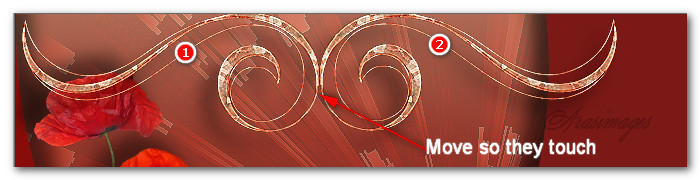
36. Merge/Merge Down. Apply drop shadow.
37. Effects/Edge Effects/Enhance.
38. Open K@rine_dreams_Pretty_Face_3364_Mars_2016.png of woman. Copy/Paste as New Layer.
39. Image/Resize/Resize by 90%/Resize all layers unchecked.
40. Apply drop shadow on woman. Move her to fit in right side of image.
41. Adjust/Sharpness/Sharpen.
42. Open 120206081148951629400208.png of flowers. Copy/Paste as New Layer.
43. Image/Resize/Resize by 65%/Resize all layers unchecked. Image/Mirror.
44. Apply drop shadow on flowers. Move into bottom right corner over woman.
45. Adjust/Sharpness/Sharpen.
46. Drop down in your layers palette to the layer of the elements.
47. Duplicate. Image/Flip. Layers/Arrange/Bring to top. Move to the bottom and to right so right side goes over the small flower.
48. Open Poppy One.png. Copy/Paste as New Layer.
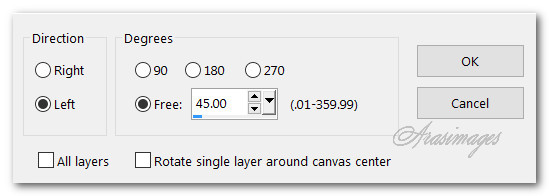
49. Image/Free Rotate/Rotate 45 degrees, Left.
50. Apply drop shadow. Move above left part of element at bottom.
51. Adjust/Sharpness/Sharpen.
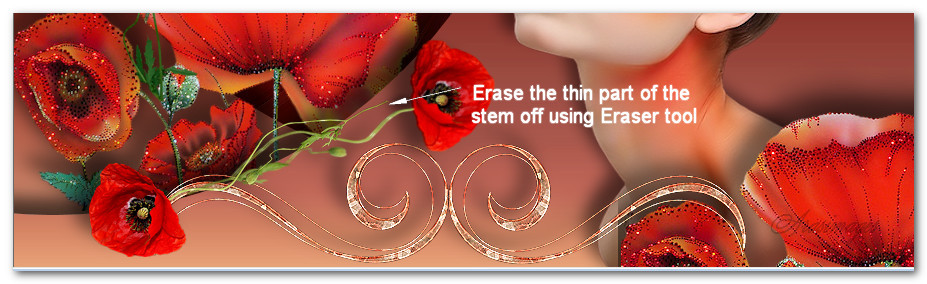
52. Paste as New Layer again (Poppy One). Apply drop shadow, Sharpen as you did in Step #51, Image/Mirror and place in bottom left corner with stems meeting the other Poppy One.
53. Using the Eraser too, erase the thin end part of the stem.
54. Image/Add Borders/Add 2px border, Symmetric checked, Color #000000.
55. Image/Add Borders/Add 20px border, Symmetric checked, Color #d49677.
56. Activate the 20px border with Magic Wand.
57. Layers/New Raster Layer.
58. Change Gradient to Angle 45/Repeats 3, Invert checked. All other settings stay the same.
59. Flood fill 20px border with new Gradient.
60. Effects/Graphics Plus/Cross Shadow.

61. Selections/Select None.
62. Image/Add Borders/Add 2px border, Symmetric checked, Color #000000.
63. Image/Add Borders/Add 5px border, Symmetric checked, Color #ffffff.
64. Activate the 5px border with Magic Wand.
65. Layers/New Raster Layer.
66. Change Foreground color to #e7d3b3/Background color to #d49677, keep Style Linear, Angle 45/Repeats 3/Invert checked. Use Fore/background Corel_06_029. Focal point/Center Point Null.
67. Flood fill 5px border with new gradient.
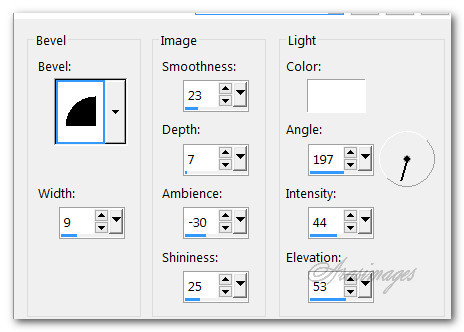
68. Effects/3D Effects/Inner Bevel.
69. Selections/Select None.
70. Add your name if you wish on a new layer. Merge/Merge Visible.
FOR ANIMATION.
71. Duplicate the image twice, having three layers in all. Close off bottom and center layer.
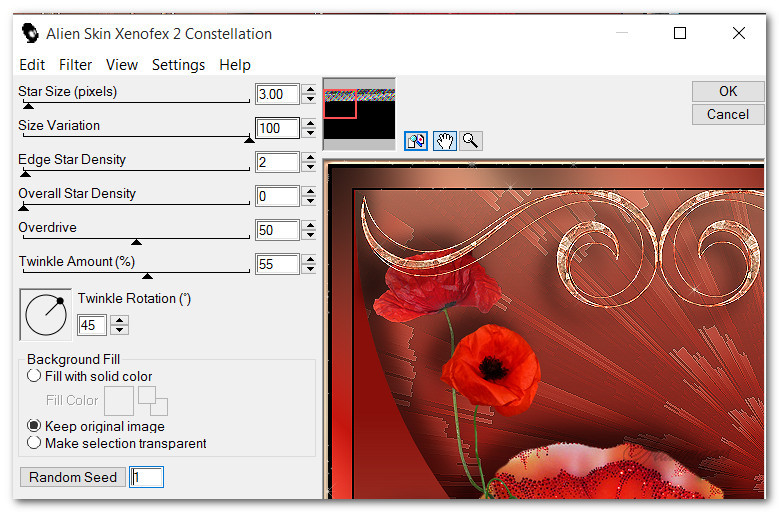
72. Having top layer highlighted, go to Effects/Alien Skin Xenofex 2/Constellation. Click OK.
73. Close off top layer. Open and highlight middle layer.
74. Repeat Constellation by clicking on Random Seed once. OK.
75. Close off middle layer. Open and highlight bottom layer.
76. Repeat Step #72. Open all layers.
77. File/Save As. Give your work a name and save it in your working folder as an Animation Shop (*psp) file.
78. Open Animation Shop. File/Open the file you just saved. Click on the View Animation button to see if your animation is as you like it. If so then we will now save it.
79. Edit/Select All. File/Save As. When the box comes up, give your work a name, identify where it will be saved and leave it set to save as a .gif file. Click on Save.
80. As the boxes appear, continue clicking on Next, Next, Next and Finish. Your work is now saved.
This tutorial was tested by PamelaD and Evatexas. Thanks ladies!
If you are going to use this tutorial for stationery, cards or place the tutorial/tag on another site, I would appreciate you contacting me for permission, giving Arasimages credit for the original tutorial and if possible, a link back to my site. Thank you.
Copyright © Arasimages All Rights Reserved