
On a Soft Rainy Day
For an Italian, Danish, Spanish, Dutch and French translation, click on the flags.


For this tutorial you will need the materials in the zip file below.

Thanks go to Colorel, to Corinne Vicaire and to PamelaD for their lovely tubes used in this tutorial. Thanks also to the unknown tubers for the scraps used.
Unzip the materials into a working folder you have created on your desktop named A Soft Rainy Day. Please duplicate and close original tubes. Use the copies for your work so you will not lose the originals. Place the Pattern WhiteBeads in your PSP/Patterns folder. Place the Tiles.jsl in to your Preset Shapes folder. I have used the plugins Filters Unlimited/BKG Kaleidoscope/xTile Maker 1.0 and PSP effects in this tutorial. I have used the program Sqirlz to create the animated rain. This is a free program you can find on the internet at xiverpix.com. I have also used Animation Shop which is also a free program you can find on the internet. It is assumed you have a working knowledge of PSP to follow these directions. I have used PSPX8 but most PSP programs can be used. To work this tutorial, it is assumed you have some working knowledge of Paint Shop Pro.
Use the flower below to mark your place along the way.

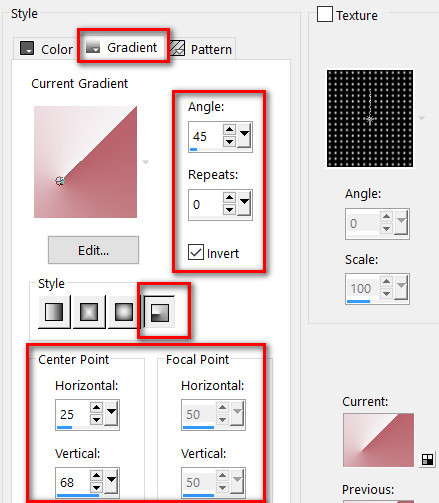
1. In Materials Palette, set Foreground to #f6f4f6, Background to #a66b65. Set to Gradient, Style Radial, Angle 45/Repeats 0/Invert checked. Center Points/Horizontal set to 25, Vertical 68. Focal Point Horizontal and Vertical Null.
2. New/New Image 860px by 800px. Flood fill with Gradient.
3. Adjust/Blur/Gaussian Blur. Set Radius to 35.
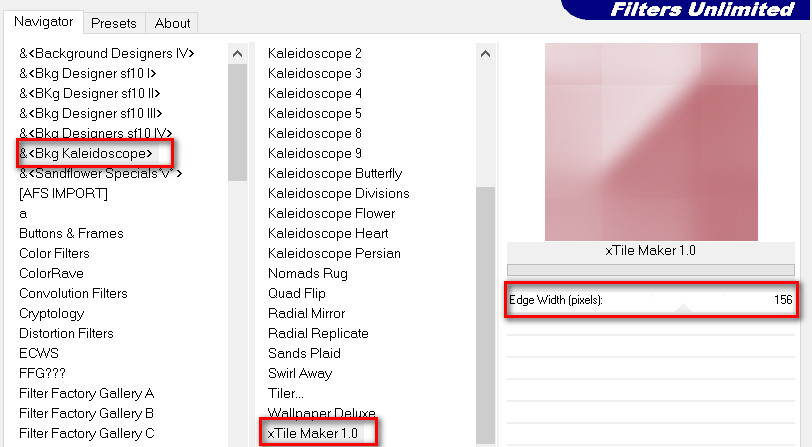
4. Filters Unlimited/&BKG KaleidoscopeTile Maker 1.0.
5. Effects/Edge Effects/Enhance. Repeat.
6. From the Tool bar, select the Preset Shapes tool. Select the Preset Shapes/Tile .jsl (J).

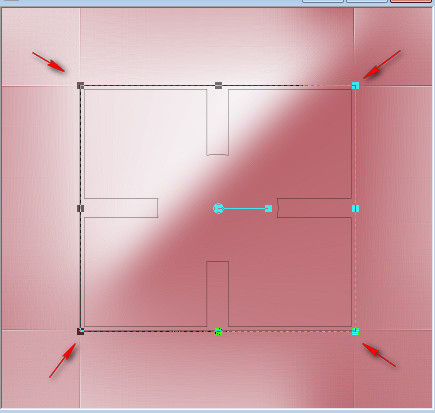
7. Draw out a "square" in the center of the image following the lines as seen below.
8. Convert to Raster Layer.
9. Click on the Preset Shape using Magic Wand to activate it.
10. Open whitewindow-colorel.png. Copy/Paste into Selection.
11. Effects/3D Effects/Inner Bevel.
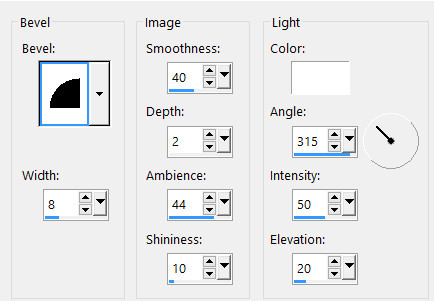
12. Effects/3D Effects/Drop Shadow. Vertical 10, Horizontal -11, Opacity 50, Blur 24, color #000000.
13. Layers/New Raster Layer. Flood fill with Gradient.
14. Adjust/Blur/Gaussian Blur. Radius 35.
15. Image/Mirror.
16. Selections/Modify/Contract by 10px. Delete.
17. Selections/Modify/Expand by 10px.
18. Effects/3D Effects/Inner Bevel as in Step #11.
19. Selections/Deselect.
20. Adjust/Sharpness/Sharpen.
21. Repeat Inner Bevel as in Step #11.
22. Open whitewindow-colorel.png. Copy/Paste as New Layer.
23. Image/Resize/Resize by 120%/Resize all layers unchecked.
24. Move to the top of image. Drop Opacity down to 50.
25. Open 0_9b577_a55dc940_M.png of umbrella. Copy/Paste as New Layer.
26. Image/Resize/Resize by 125%/Resize all layers unchecked.
27. Image/Mirror. Adjust/Sharpness/Sharpen.
28. Effects/3D Effects/Drop Shadow. Vertical -11, Horizontal -11, Opacity 45, Blur 35, color #000000.
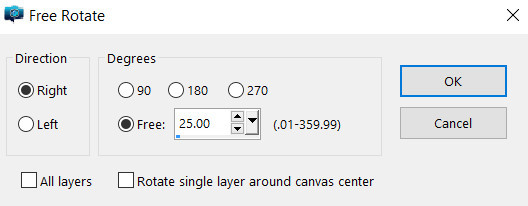
29. Image/Free Rotate. Rotate Right by 25 Degrees.
30. Place umbrella in upper right corner.
31. Open Tube_330.pspimage of woman. Image/Mirror.
32. Copy/Paste as New Layer. From the Tool bar, select the Soften tool and drag it from left to right to soften the left edge of woman image.
33. Effects/3D Effects/Drop Shadow. Vertical -20, Horizontal -10, Opacity 40, Blur 50, color #000000.
34. Effects/3D Effects/Drop Shadow. Vertical 20, Horizontal 10, Opacity 40, Blur 50, color #000000.
35. Adjust/Sharpness/Sharpen.
36. Move her to fit into bottom right corner.
37. Open 0_f7c89_49e07b87_M.png of flower. Copy/Paste as New Layer.
38. Image/Flip. Image/Free Rotate/Rotate Left by 75 degrees, bottom two boxes unchecked.
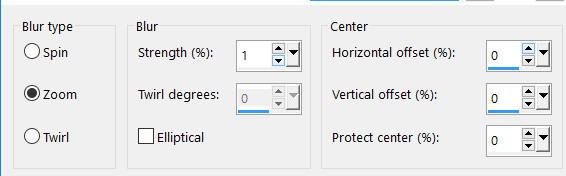
39. Adjust/Blur/Radial Blur.
40. Effects/3D Effects/Drop Shadow. Vertical -9, Horizontal -13, Opacity 40, Blur 30, color #000000.
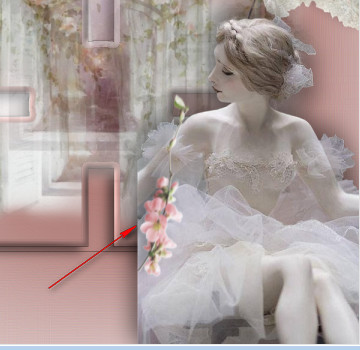
41. Drop Opacity down to 90. Place flower at the left edge of lady as seen below.
42. Open 0_9b577_a55dc940_M.png of umbrella. Copy/Paste as New Layer.
43. Image/Free Rotate/Rotate Left by 22 degrees, boxes on bottom unchecked.
44. Effects/3D Effects/Drop Shadow. Vertical -9, Horizontal -13, Opacity 40, Blur 30, color #000000.
45. Adjust/Sharpness/Sharpen. Pull downward. You may have to adjust later.
46. Open Mist corinne.vicaire - chat 01 23.02.11.pspimage. Copy/Paste as New Layer.
47. Image/Resize/Resize by 52%/Resize all layers unchecked.
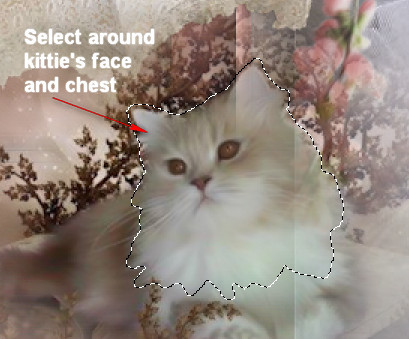
48. Using the Selection tool set Point to Point, Mode Replace, Feather 3, draw around kittie's face and fur below its chin. COPY. Selections None.
49. On layer of kitty, apply the Adjust/Blur/Radial Blur as in Step #39. Drop Opacity down to 69.
50. Paste as New Layer the kittie's face (still in memory from the COPY step).
51. Place over the Layer 7 kitty's face, matching well. Place kitty and face at the bottom center of image below umbrella.
52. Adjust/Sharpness/Sharpen on selected kitty's face. Do not Merge Down.
53. Drop down to layer of flower. Copy.
54. Go back to top layer to continue. Paste as New Layer.
55. Image/Mirror.
56. Place to the left of kitty.
57. Open 0_a5143_f549d0e3_M.png of ribbon. Copy/Paste as New Layer.
58. Effects/3D Effects/Drop Shadow. Vertical -9, Horizontal -13, Opacity 40, Blur 30, color #000000.
59. Adjust/Sharpness/Sharpen. Place ribbon at top of umbrella.
60. Image/Add Borders/Add 3px border, Symmetric checked, color #c4bc00.
61. Activate 3px border with Magic Wand by clicking within the border.
62. Layers/New Raster Layer.
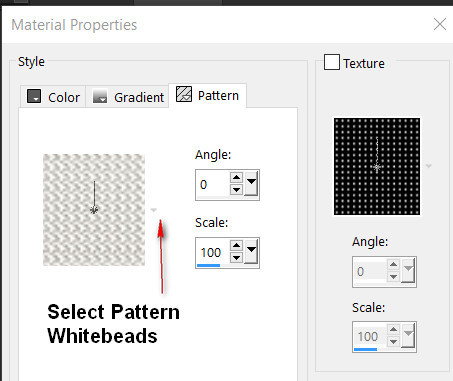
63. In Materials Palette, select the Pattern Whitebeads. Flood fill the 3px border.
64. Effects/Edge Effects/Enhance. Deselect.
65. Image/Add Borders/Add 30px border, Symmetric checked, color #c4bc00.
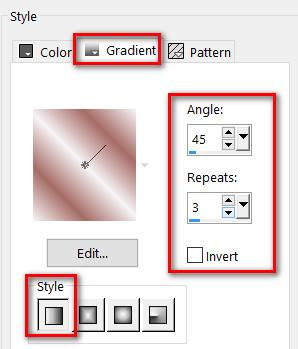
66. Change the foreground back to the original color #f6f4f6. Create a Gradient using original colors, Style Linear, Angle 45, Repeats 3, Invert unchecked. All other setting not applicable.
67. Using Magic Wand, click within the 30px border to activate it.
68. Layers/New Raster Layer. Flood fill with Gradient. Deselect.
69. Repeat Steps #60 through #64.
70. Sign your name in bottom right corner if you wish. Merge/Merge Visible.
71. Save image as On a Soft Rainy Day Main Image.jpg in your working folder.
72. Open the program Sqirlz. File/Open the On a Soft Rainy Day image you saved.
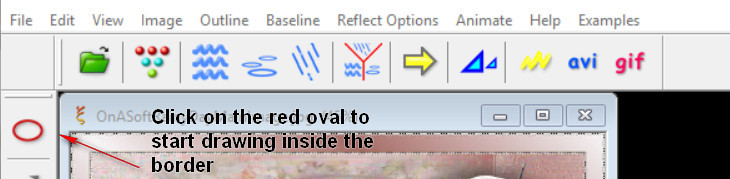
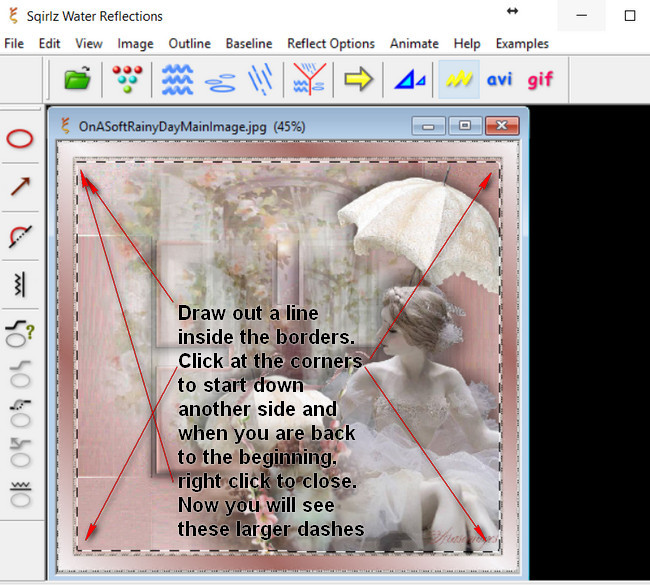
73. Click on the red Oval to the left to begin selecting the area for rain. Left click INSIDE borders, starting with upper left corner. Continue to upper right corner, click the mouse and continue down the right side to bottom right corner, click and continue to left bottom corner, click and continue to top left corner. Right click to close and you will now see the larger dashes. This is where your rain will be contained INSIDE the borders.
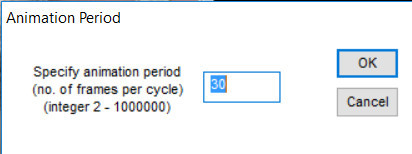
74. First, click on the triangle of dots in the tool bar under Image. Set the specified animation period to 30.
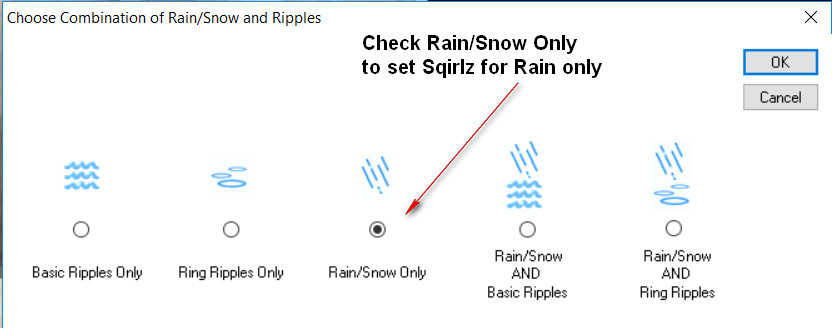
75. Second, click on the big red Y under Reflect Options. Set to Rain/Snow only. Click OK.
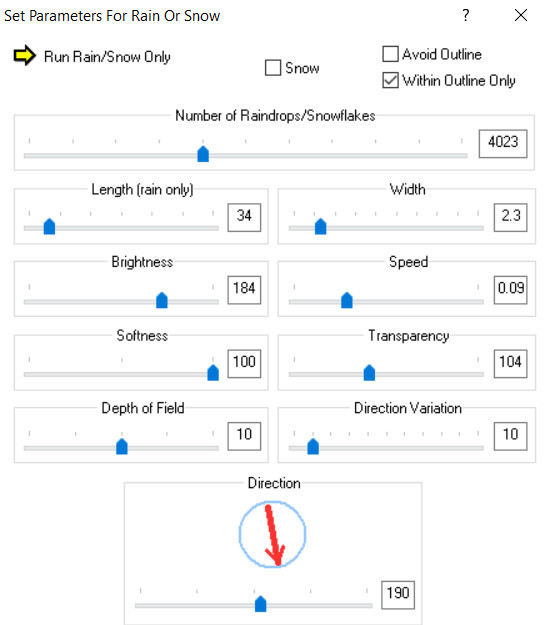
76. Third, click on the rain image below Baseline. Set the Parameters for Rain or Snow as seen below.
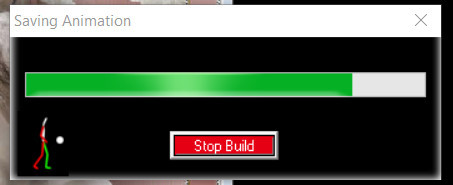
77. Click on the big yellow arrow and you will see your animation. If you are satisfied with it, then click on the red gif at the right side of the tool bar. You will see a box come up and just click OK. Now you see another box for Save As. Name where you are saving it and give your work the file name "On a Soft Rainy Day" and leave it set to save as a .gif file. Click Save.
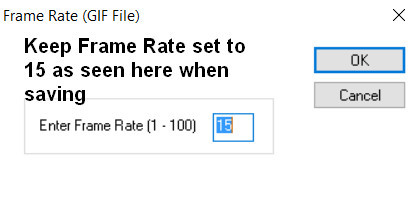
78. When the Frame Rate appears, leave it set to 15 and click OK. Your build is now starting and will tell you when it is finished. Click OK.
79. Click on the yellow arrow and make sure you have your rain correct.
80. Open Animation Shop. File/Open your On a Soft Rainy Day.gif image.
81. Click on first frame/Edit/Select All.
82. File/Open OnaSoftRainyDay.png file of brush, flowers and text. Edit/Propagate Paste. Right click/Copy.
83. Go back to your main working image with 30 frames. Right click within the first frame/Paste/Into Selected Frame.
84. Place the words and flowers to the left side of the image as seen in the original tutorial image. Left click to set into place.
85. Click on the View Animation button in the tool bar at the top and check your animation. If it is as you wish, then we will now save your work.
86. File/Save As. When the box appears, Save in: (Name where it will be saved), File name: (Give it the proper name), and leave Save as type at .gif. Click Save.
87. As the new boxes appear, continue to click Next, Next, Next and Finish. Now your work has been saved!
88. Congratulations! You have done a hard animated tutorial. Thanks so much for working so hard.
This tutorial was tested by PamelaD and Evatexas. Thanks ladies!
If you are going to use this tutorial for stationery, cards or place the tutorial/tag on another site, I would appreciate you contacting me for permission, giving Arasimages credit for the original tutorial and if possible, a link back to my site. Thank you.
Copyright © Arasimages All Rights Reserved