
Washed Ashore
For an Italian, Danish, Dutch, Spanish, French and German translation, click on the flags.


For this tutorial you will need the materials in the zip file below.

Thanks go to Maryse, Suzi Sgai, Marian and Deiter and the unknown tubers for their lovely tubes used in this tutorial.
Unzip the materials into a working folder you have created on your desktop named Washed Ashore. Please duplicate and close original tubes. Use the copies for your work so you will not lose the originals. Place Corel_09_043_.Psp Frame in your PSP Picture Frames folder. (Check to see if it is already there first). Place White beads.jpg (pattern) in your PSP Files/Patterns folder. I have used the plugins Eye Candy 4000/Jiggle and PSP effects in this tutorial. Also I have used Animation Shop for the animation. You can find this free program on the Internet. It is assumed you have a working knowledge of PSP to follow these directions. I have used PSPX8 but most PSP programs can be used. To work this tutorial, it is assumed you have some working knowledge of Paint Shop Pro.
Use the Bubble below to mark your place along the way.

1. In Materials Palette, set Foreground to #fefaf7, Background to #308da1. Create a Gradient using Corel_06_029 (Foreground/Background), Style Sunburst, Repeats 0. Invert unchecked. Center Points/Focal Points all at 50.
2. New/New Image 860px by 700px. Flood fill with Gradient.
3. Open 0_64cc0_eb0a7d83_XL.png. Copy.
4. Layers/New Raster Layer. Selections/Select All.
5. Paste into Selection. Selections None.
6. Blend Mode set to Luminance.
7. Open 0_7c5c2_d1e1c734_XL.png. Copy.
8. Layers/New Raster Layer. Selections/Select All.
9. Paste into Selection. Selections/Select None.
10. Blend Mode set to Luminance. Opacity set to 45.
11. Effects/Edge Effects/Enhance.
12. Open 0_7822c_273084c2_XL.png. Copy/Paste as New Layer.
13. Open mds2982 Waves.pspimage. Copy/Paste as New Layer.
14. Pull downward to about 400px.
15. Using Pick tool, stretch sides to meet with sides of working image.
16. Set Blend Mode to Luminance.
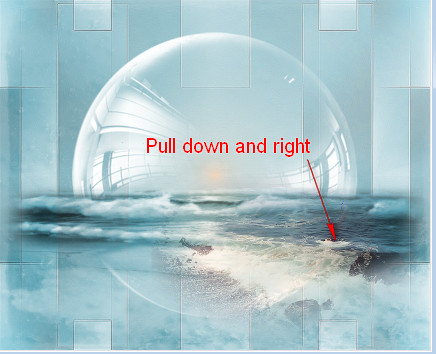
17. Open SS_10.pspimage. Copy/Paste as New Layer.
18. Pull down and to the right.
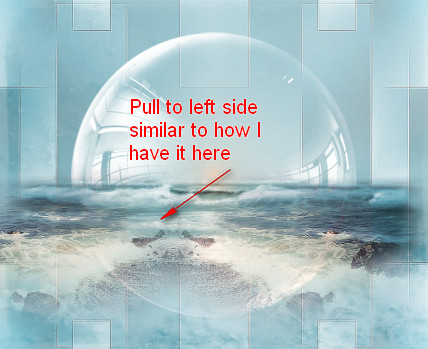
19. Duplicate. Image/Mirror.
20. Pull to the left.
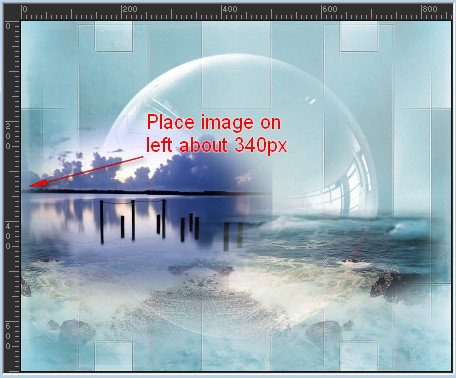
21. Open SS_172.pspimage. Copy/Paste as New Layer.
22. Move to the left side of image to about 340px.
23. Duplicate. Image/Mirror. Merge/Merge Down.
24. Using the Selections tool set to Rectangle, Mode: Add(Shift), Feather 2, select the bottom portion of the image just under the dark horizon. Delete. Deselect.
25. Set Blend Mode to Luminance.
26. Open MR_Beautiful Mermaid.png. Copy/Paste as New Layer.
27. Using Selections tool set as in Step #24, select around the watermark "Maryse". Press Delete. Deselect.
28. Place Mermaid downward so her hair is in the dark horizon.
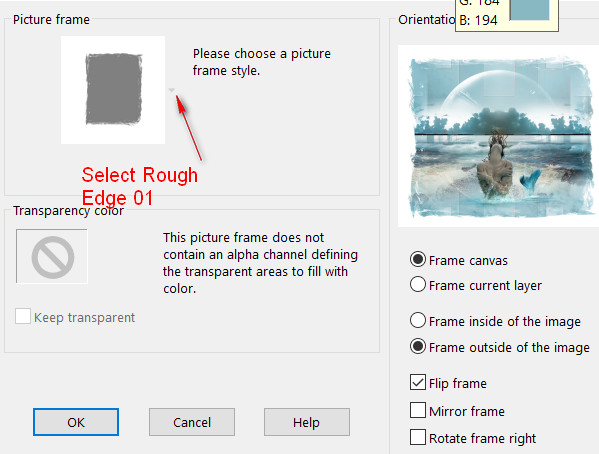
29. Image/Picture Frame. Select Edge Rough 01 frame. Apply.
30. With Magic Wand, select the outer white edge with these settings.

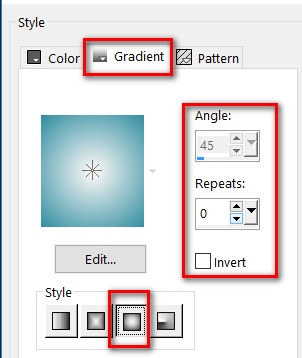
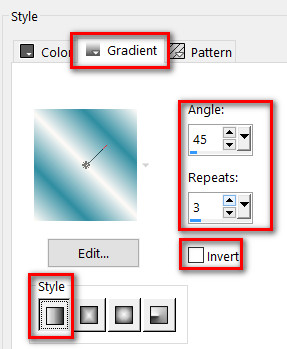
31. In Materials Palette, change Gradient to Style Linear, Angle 45/Repeats 3, Invert unchecked.
32. Flood fill new layer with Gradient.
33. Effects/3D Effects/Drop Shadow. Vertical 10, Horizontal 10, Opacity 50, Blur 25, color #404040.
34. Effects/3D Effects/Drop Shadow. Vertical -10, Horizontal -10, Opacity 50, Blur 25, color #404040.
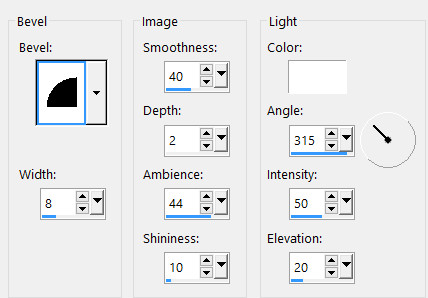
35. Effects/3D Effects/Inner Bevel.
36. Selections/Select None.
37. Image/Add Borders/Add 5px border, Symmetric checked, color #000000.
38. Activate 5px border with Magic Wand using settings as before.
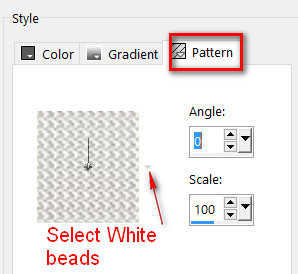
39. In Materials Palette, choose the Pattern White beads.jpg.
40. Flood fill the 5px border with the Pattern White Beads.
41. Effects/Edge Effects/Enhance. Deselect.
42. Image/Add Borders/Add 2px border, Symmetric checked, color #fefaf7.
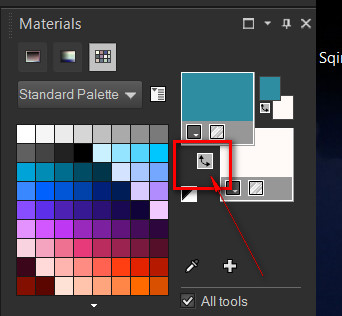
43. In Materials Palette, switch Foreground with Background by clicking on small double arrows.
44. From Tool bar select the Text tool. Choose the font Sloop Script Three, set size to 100, Stroke width 0.0, Line style: solid. Type the words "Washed Ashore".

45. Convert to Raster Layer.
46. Objects/Align/Horizonal Center.
47. Check placement of text. Align vertically if necessary.
48. Effects/3D Effects/Drop Shadow. Vertical 2, Horizontal -10, Opacity 100, Blur 16, color #000000.
49. Sign your name at this point if you wish. Merge/Merge Visible.
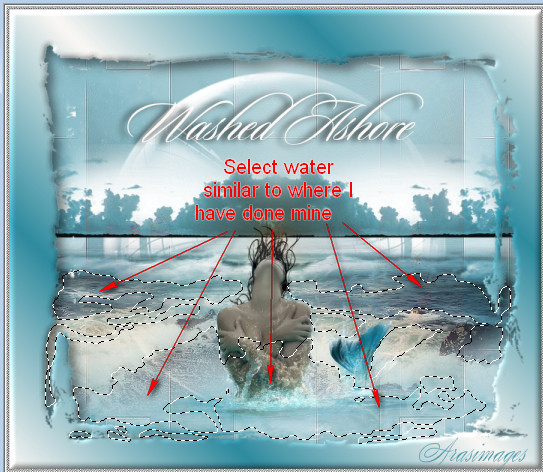
50. From the tool bar, choose the Selections/Freehand Selection with these settings and draw around the water we want to animate. Feel free to select the water in different areas than I have if you wish.

51. For Animation: Duplicate the image 4 times, having 5 layers in all. Rename the layers from 1 to 5.
52. Close off all layers except top layer 5, keeping it highlighted.
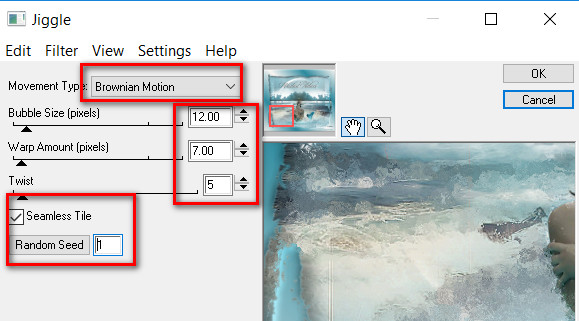
53. Effects/Eye Candy 4000/Jiggle/Brownian Motion, Seamless Tile checked.
54. Apply the first settings as seen below on layer 5.
55. Close off layer 5. Move down to layer 4, highlight and open. Effects/Jiggle. Click on Random setting/Apply.
56. Close off layer 4. Move down to layer 3, highlight and open. Effects/Jiggle. Click on Random setting/Apply.
57. Close off layer 3. Move down to layer 2, highlight and open. Effects/Jiggle. Click on Random setting/Apply.
58. Close off layer 2. Move down to layer 1, highlight and open. Effects/Jiggle. Click on Random setting/Apply.
59. Selections/Select None. Open all layers.
60. File/Save As/PSP Animation Shop (*psp) file named Washed Ashore.
61. Open Animation Shop program. File/Open the saved Washed Ashore file.
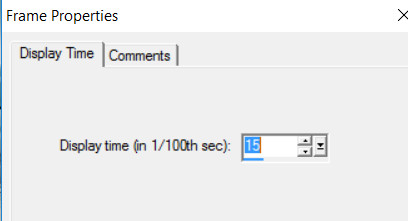
62. Edit/Select All. Click on Animation/Frame Properties. Set from 10 to 15.
63. Click on the View Animation button at the top to check your animation. If it looks as you want it to, then we will now save.
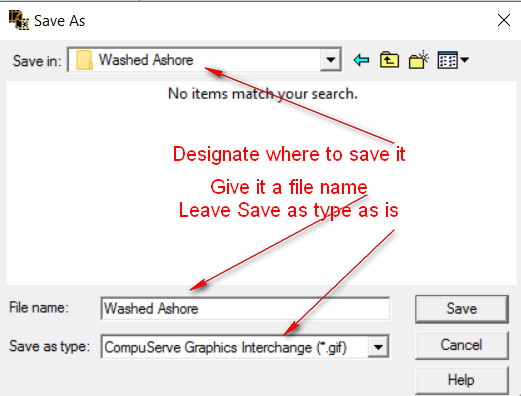
64. File/Save As. When the box comes up, name where you will save it (your working folder), give the file its name and leave the Save as .gif as is. Save.
65. As the boxes appear, click Next, Next, Next and then Finish. Your animation tag is now saved.
66. Thank you for working my tutorial. I hope you enjoyed it.
This tutorial was tested by PamelaD and Evatexas. Thanks ladies!
If you are going to use this tutorial for stationery, cards or place the tutorial/tag on another site, I would appreciate you contacting me for permission, giving Arasimages credit for the original tutorial and if possible, a link back to my site. Thank you.
Copyright © Arasimages All Rights Reserved