
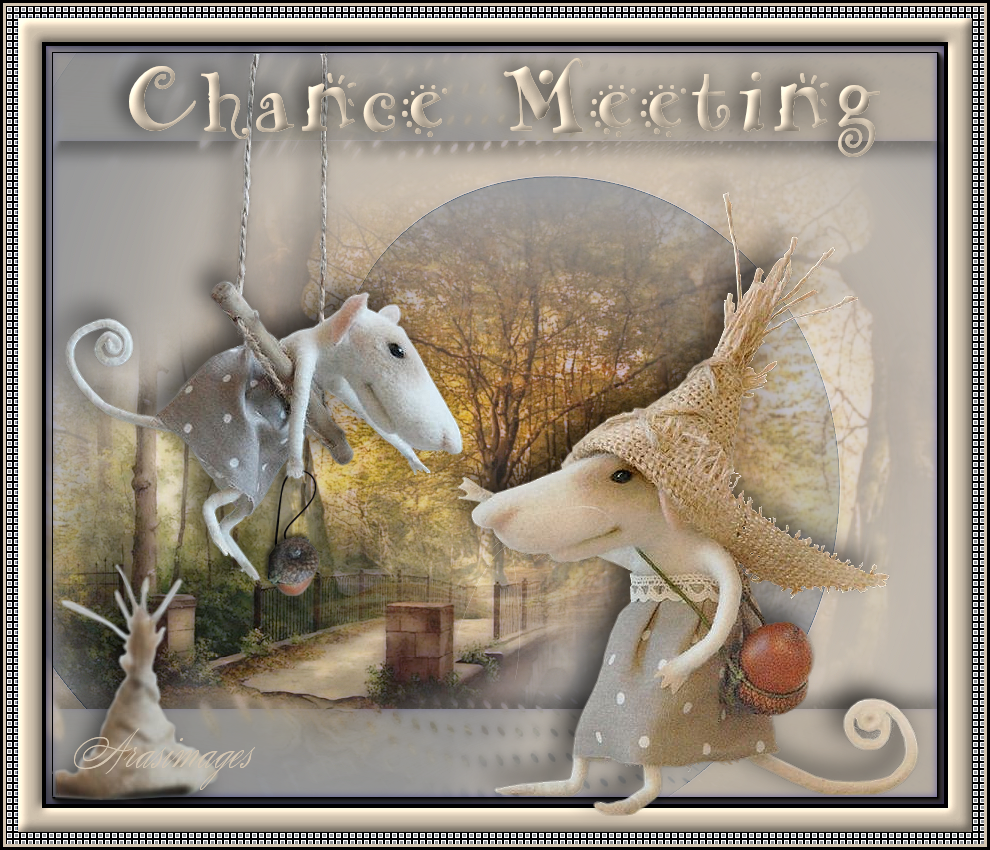
Chance Meeting
For a Spanish, Dutch, Italian, German, French and Danish translation, click on the flags.
For this tutorial you will need the materials in the zip file below.
Thanks go to PamelaD for the wonderful mice tubes, to Suzi Sgai and to Marian and Deiter and Luz Cristina for their lovely background tubes used .
Unzip the materials into a working folder you have created on your desktop named Chance Meeting. Please duplicate and close original tubes. Use the copies for your work so you will not lose the originals. I have used the plugins Tymoes/gridmaker, Filter Forge 2, Filters Unlimited2/Frames Textures, Color Effects 3.0, Filter AAA Frames and Xero/Porcelain. It is assumed you have a working knowledge of PSP to follow these directions. I have used PSPX8 for this tutorial but other versions may be used. To work this tutorial, it is assumed you have some working knowledge of Paint Shop Pro.
Use the acorn below to mark your place along the way.

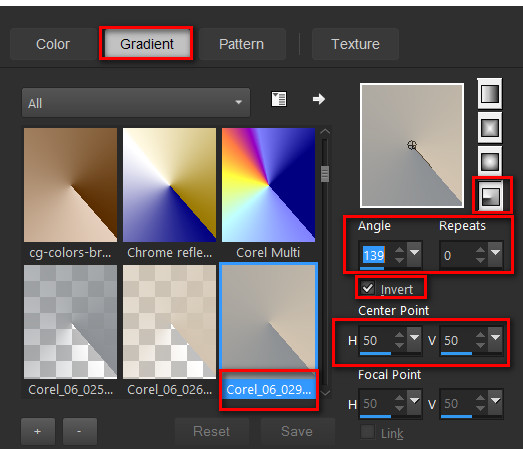
1. In Materials Palette, set Foreground to #d2c4b0, Background to #8c9094. Create a Gradient using these colors, Gradient Corel_06_029 (foreground/background), Style Radial, Angle 139, Repeats 0, Invert checked, Center Points set to 50, Focal Points null.
2. New/New Image 900px by 760px. Flood fill with Gradient.
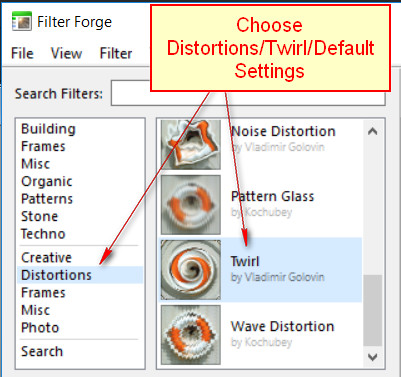
3. Effects/Filter Forge/Filter Forge 2/Distortions/Twirl. All other settings at Default. Apply.
4. Effects/Edge Effects/Enhance.
5. Layers/New Raster Layer. Selections/Select All.
6. Open SS-57.pspimage. Copy/Paste into Selection. Selections/Select None.
7. Image/Mirror. Pull to right side.
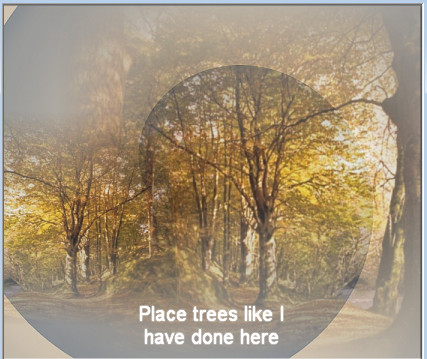
8. Paste again as New Layer. Pull to left side as seen here.
9. Merge/Merge Down.
10. Effects/Filters Unlimited 2/Frames Textured/Frame 01. Reset and use the default settings seen below. Apply.
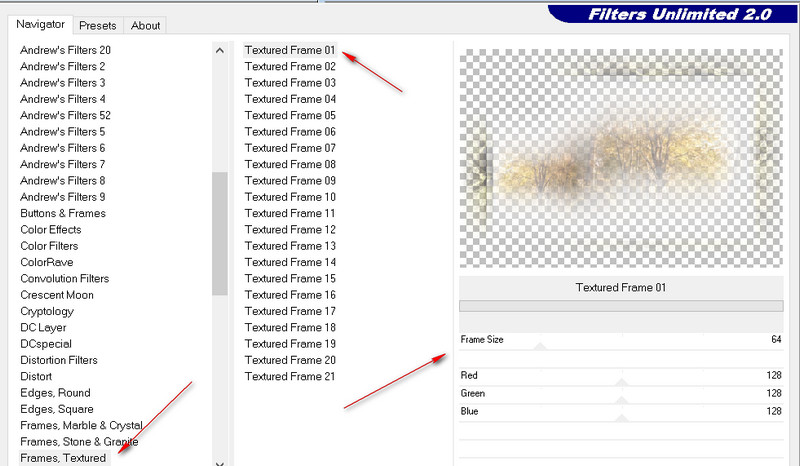
11. Set Opacity down to 71.
12. Using Selections tool set to Rectangle, Feather 0, Mode: Add (Shift), Anti-alias checked, select around the top rectangle.
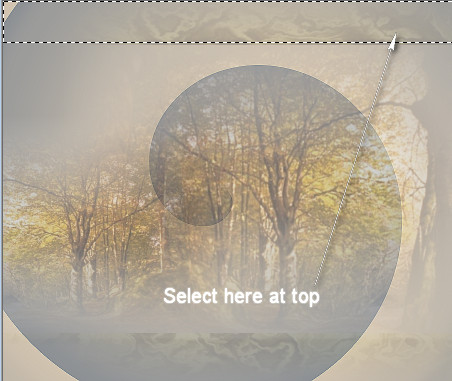
13. Layers/New Raster Layer. Flood fill with Gradient.
14. Adjust/Blur/Gaussian Blur. Radius set to 28.
15. Effects/Nik Software/Color Effects Pro 3.0 Complete/Darken/Lighten Center. Use settings as seen below.
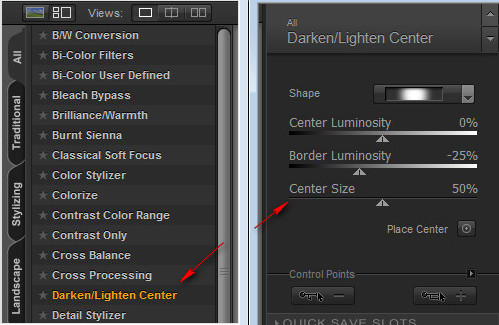
16. Effects/3D Effects/Drop Shadow. Vertical 12, Horizontal -3, Opacity 40, Blur 23 color #000000.
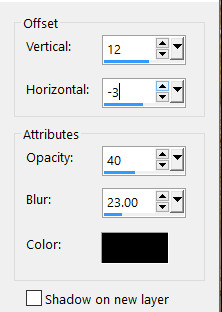
17. Selections/Select None.
18. Open Narah-mask_0524.jpg. Image/Flip.
19. Back to main working image. Layers/New Mask Layers/From Image.
20. When Add Mask From Image box appears, from drop down select the Narah mask. Click OK.
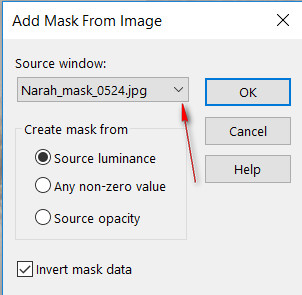
21. Merge/Merge Group.
22. Adjust/Sharpen/High Pass Sharpen.
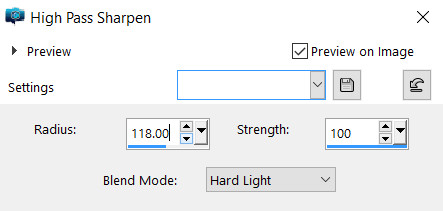
23. Duplicate. Image/Flip.
24. Open SS_57.pspimage. Copy/Paste as New Layer.
25. Open 1656-luzcristina.pspimage. Copy/Paste as New Layer.
26. Move image downward to bottom and to the left side above bottom rectangle. (See my finished image for placement).
27. Move this layer between the top and bottom rectangle layers.
28. Merge/Merge Visible.
29. Effects/AAA Frames/Foto Frame.
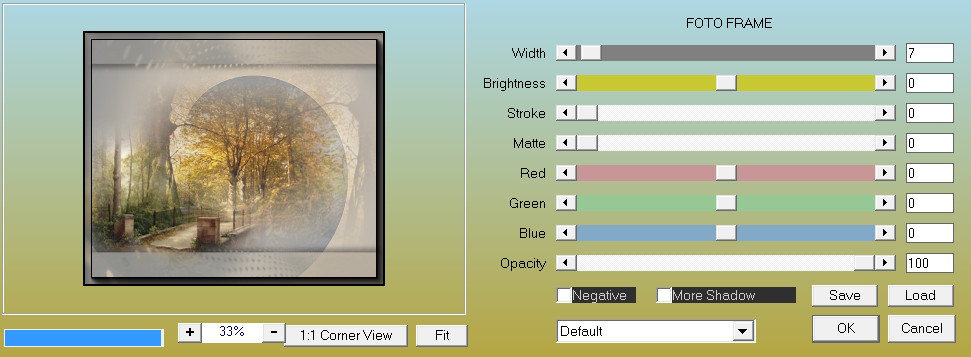
30. Effects/Xero/Porcelain.
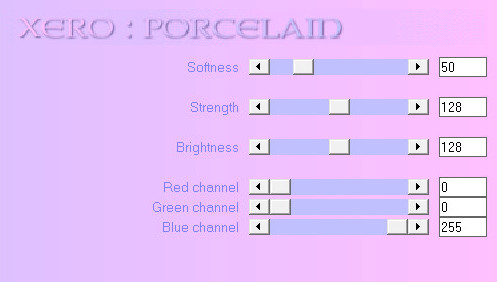
31. Open Mouse2.pspimage. (Keep image open). Copy hat layer/Paste as New Layer.
32. Place at the bottom left corner.
33. Adjust/Sharpness/High Pass Sharpen as in Step #22.
34. Effects/3D Effects/Drop Shadow. Vertical 12, Horizontal -12, Opacity 60, Blur 34, Color #000000.
35. Copy TUBE layer. Paste as New Layer.
36. Place to the left side and upward so the swing ropes are at the top of the image.
37. Effects/3D Effects/Drop Shadow. Vertical -12, Horizontal -12, Opacity 60, Blur 34, Color #000000.
38. Adjust/Sharpness/Sharpen.
39. Copy Acorn layer. Paste as New Layer.
40. Image/Resize by 75%/Resize all layers unchecked.
41. Image/Free Rotate/Rotate to the Right by 90 degrees.
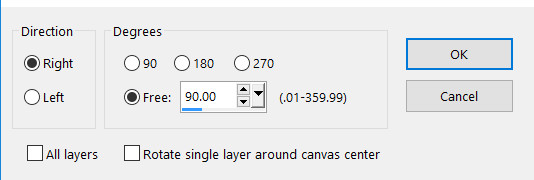
42. Place so the left mouse is holding the acorn as a purse.
43. Effects/3D Effects/Drop Shadow. Vertical -3, Horizontal -3, Opacity 60, Blur 6, Color #000000.
44. Using the Eraser tool set to size 14, click on the left mouse's hand to take off acorn purse handle.
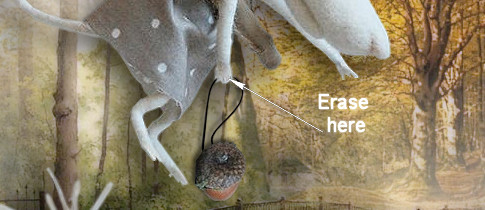
45. Image/Add Borders/Add 3px border, color #000000.
46. Image/Add Borders/Add 24px border, color #d2c4b0.
47. Select 24px border with Magic Wand.
48. Effects/3D Effects/Inner Bevel.
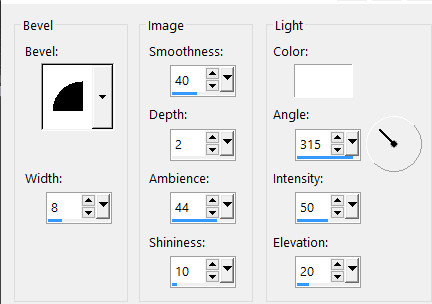
49. Selections/Select None.
50. Image/Add Borders/Add 12px border, color #000000.
51. Select 12px border with Magic Wand.
52. In Materials Palette, change the Gradient to Style Linear, Angle 45, Repeats 3, Invert unchecked, Center/Focal Points all grayed out at 50.
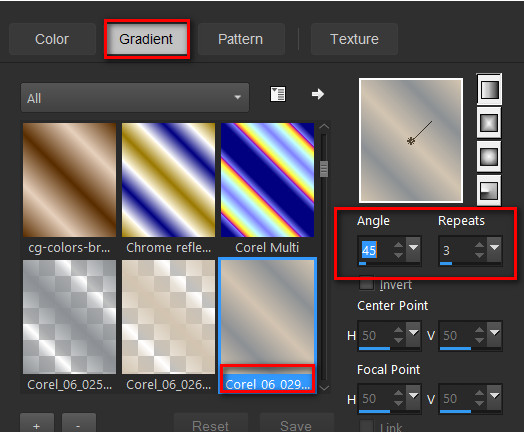
53. Flood fill 12px border with Gradient.
54. Effects/Tymeos/Gridmaker.
55. Effects/Edge Effects/Enhance.
56. Selections/Select None.
57. Image/Add Borders/Add 3px border, Symmetric checked, color #d2c4b0.
58. Image/Add Borders/Add 3px border, Symmetric checked, color #000000.
59. Open Mouse1.pspimage. Copy/Paste as New Layer.
60. Effects/3D Effects/Drop Shadow. Vertical -13, Horizontal -13, Opacity 60, Blur 34, Color #000000.
61. Adjust/Sharpness/Sharpen.
62. Place Mouse1 in bottom right corner so her hand is almost touching first Mouse hand.
63. From Tool bar, select the Text tool. Find Font AR HERMANN, set to Size 100. Type out the words "Chance Meeting" using Foreground color #d2c4b0, Kerning: 25.

64. Convert to Raster Layer. Objects/Align/Horizontal Center. Adjust so words are toward the top of image.
65. Selections/Select All. Selections/Float. Selections/Defloat.
66. Effects/3D Effects/Inner Bevel. Selections/Select None.

67. Effects/3D Effects/Drop Shadow. Vertical -4, Horizontal -8, Opacity 65, Blur 30, color #000000.
68. Place your name or watermark if you wish. Merge/Merge Visible.
This tutorial was tested by PamelaD and Evatexas. Thanks ladies!
If you are going to use this tutorial for stationery, cards or place the tutorial/tag on another site, I would appreciate you contacting me for permission, giving Arasimages credit for the original tutorial and if possible, a link back to my site. Thank you.
Copyright © Arasimages All Rights Reserved


