
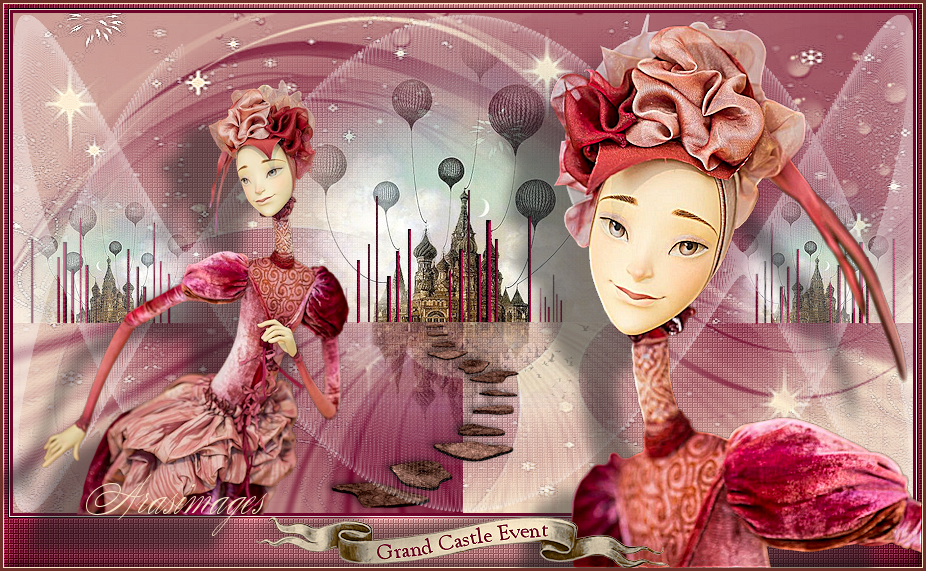
Grand Castle Event
For a Dutch, Italian, French, Danish, Spanish and German translation, click on the flags.


For this tutorial you will need the materials in the zip file below.

Thanks go to PamelaD and Evatexas from Arasimages Tubes for their work used in this tutorial. Thanks too, to the unknown tubers or creators of the elements used.
Unzip the materials into a working folder you have created on your desktop named Grand Castle Event. Please duplicate and close original tubes. Use the copies for your work so you will not lose the originals. Place the Masks in your PSP/Masks folder. Put the Ziggys.cfg file in your Sinedots II folder. I have used the plugins Xero/Fritillary, DC Layer/Mergency II, Dragonfly/Sinedots II and Mura's Meister/Perspective in this tutorial. I have used PSPX8 and PSPX7 for this tutorial but other versions may be used. To work this tutorial, it is assumed you have some working knowledge of Paint Shop Pro.
Use the Stick Pin below to mark your place along the way.

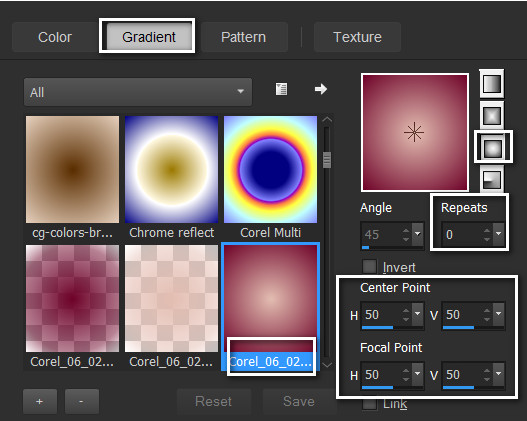
1. In Materials Palette, set Foreground to #e3bdb1, Background to #6e0329. Create a Gradient using these colors, Gradient Corel_06_029 (foreground/background), Style Sunburst, Angle 0, Repeats 0, Invert unchecked, Center Points H 50/V 50/ Focal Points H 50, V 50.
2. New/New Image 900px by 500px. Flood fill with Gradient.
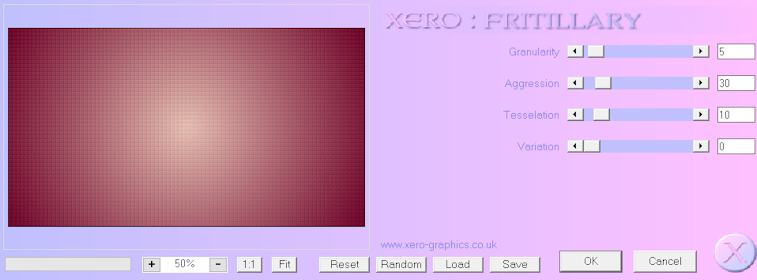
3. Effects/Xero/Fritillary.
4. Effects/Edge Effects/Enhance.
5. Layers/New Raster Layer. Change Foreground color to #f9e7ca. Flood fill with color #f9e7ca.
6. Effects/DC Layer/Mergency II/Fade Out set to 169.
7. Layers/New Raster Layer. Flood fill with background color #6e0329.
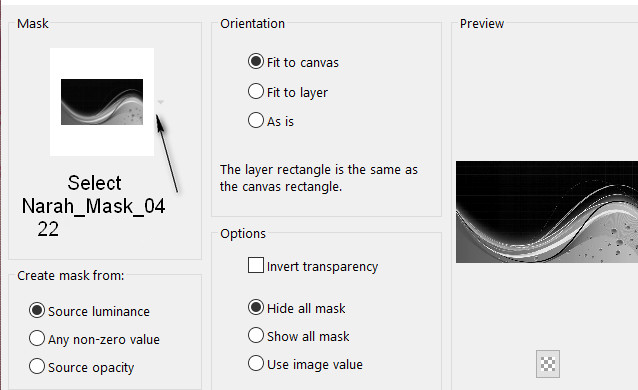
8. Layers/Load/Save Mask. Load Mask From Disk/Select Narah_Mask_0422 from drop down. Load.
9. Merge/Merge Group. Image/Flip.
10. Layers/New Raster Layer.
11. Flood fill with color #fceacb.
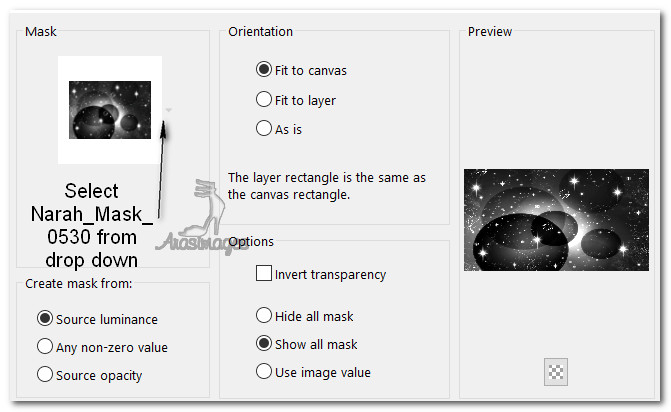
12. Layers/Load/Save Mask. Load Mask from Disk. Select Narah_Mask_0530 from drop down. Load.
13. Merge/Merge Group. Effects/Edge Effects/Enhance.
14. Layers/New Raster Layer. Flood fill with Background color #6e0329.
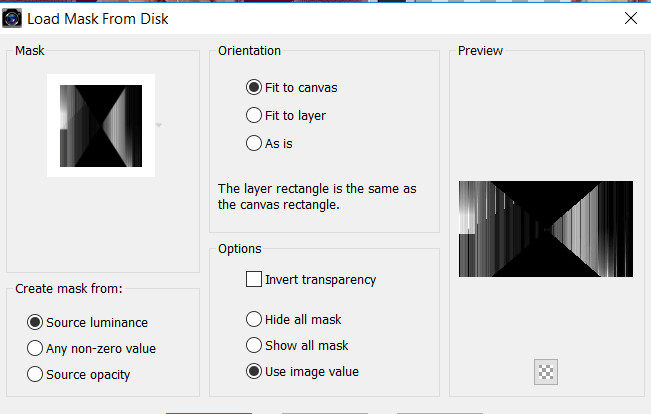
15. Layers/Load/Save Mask. Load Mask from Disk. Select Mask _1217491052_masques. Load.
16. Merge/Merge Group.
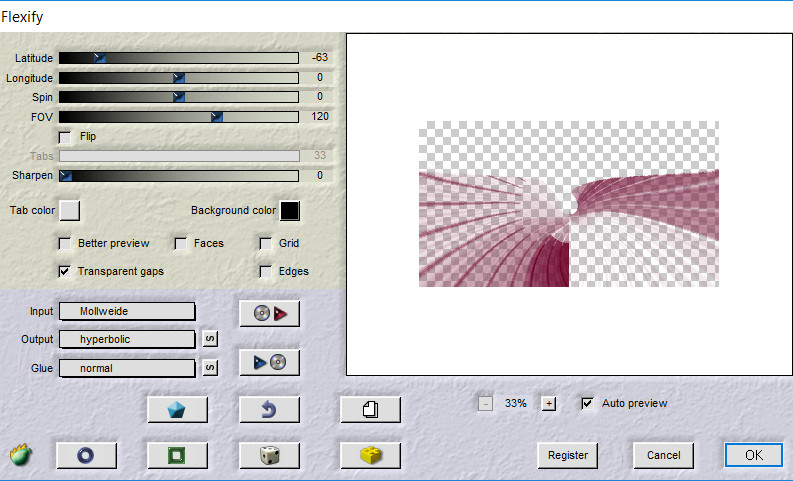
17. Effects/Flaming Pear/Flexify.
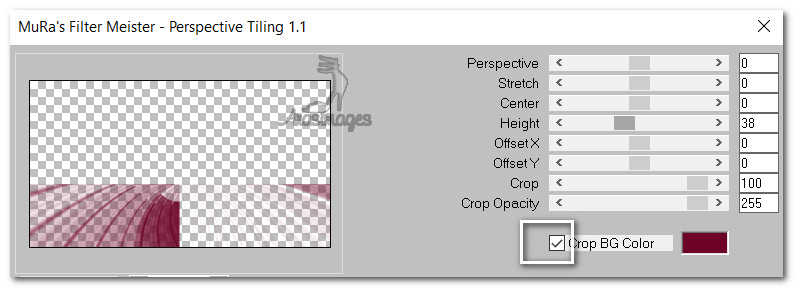
18. Effects/Mura's Meister/Perspective Tiling.
19. Open BalloonsCastle.pspimage. Highlight misted layer.
20. Image/Resize/Resize by 65%/Resize all layers checked.
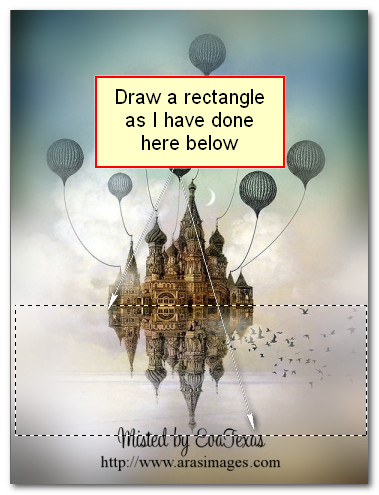
21. Using the Selections tool set to Rectangle, Add(Shift), Feather 0, draw a rectangle from center of castle to below the reflection of the top as seen below.
22. Copy. Go back to the working image and Paste as New Layer.
23. Pull down so castle reflection is below border line of perspective layer.
24. Lower Opacity down to 50.
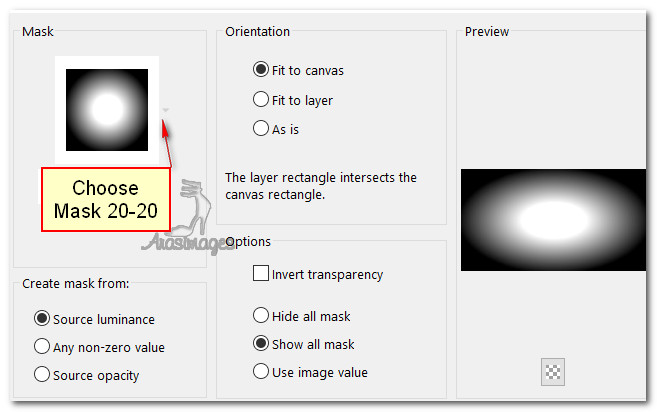
25. Layers/Load/Save Mask/Load Mask from Disk. Select Mask_20-20 from drop down. Load.
26. Merge/Merge Group.
27. Go back to the castle tube. Press Delete key once. Deselect.
28. Copy. Go back to the main working image and Paste as New Layer. (Top portion of castle).
29. Repeat Mask 20-20 on the castle top portion. Merge/Merge Group.
30. Adjust/Sharpness/Sharpen.
31. Position top castle so it rests on the border line above its reflection.
32. Duplicate. Resize/Resize by 50%/Resize all layers unchecked.
33. Move resized castle to the right side of image even with center castle.
34. Adjust/Sharpness/Sharpen. Duplicate. Image/Mirror.
35. Open 0_99670_4fbbdf12_XL.pspimage (duplicated/resized/recolored) stepping stones. Copy/Paste as New Layer.
36. Place in front of the center castle door to bottom of working image.
37. Open CastleWalls.png. Copy/Paste as New Layer.
38. Place on horizon centered in front of main castle.
39. Duplicate. Image/Resize/Resize by 80%/Resize all layers unchecked.
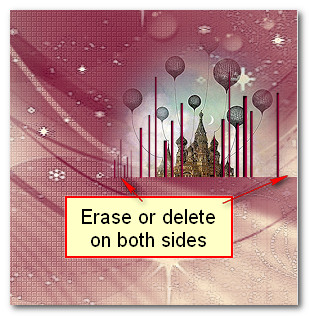
40. Move to right side of image over smaller castle. Using Eraser tool or Selection tool, erase (or delete and deselect) the small outer CastleWalls.
41. Duplicate. Image/Mirror.
42. Layers/New Raster Layer.
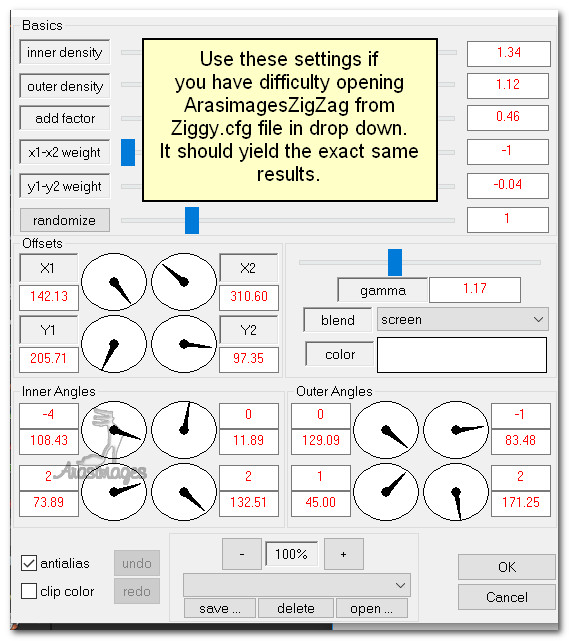
43. Effects/Dragonfly/Sinedots II/Ziggys.cfg/ArasimagesZigZag. Click Open button and find the Ziggys.cfg. Click on it and then click the dropdown arrow and select ArasimagesZigZag preset. Click OK. Or if you have difficulty, use the settings as seen below to achieve the same results.
44. Drop the Opacity down to 43.
45. Image/Add Borders/Add 3px Border, Symmetric Checked, color #6e0329.
46. Image/Add Borders/Add 1px Border, Symmetric Checked, color #fceacb.
47. Image/Add Borders/Add 5px Border on top and sides, 50px on bottom, Symmetric unhecked, color #6e0329.
48. Activate border with Magic Wand by clicking inside it.

49. Flood fill with original Gradient.
50. Effects/Xero/Frittilary set to Default (5/30/10/0).
51. Effects/Edge Effects/Enhance.
52. Effects/3D Effects/Inner Bevel.

53. Selections/Select None.
54. Image/Add Borders/Add 1px Border, Symmetric Checked, color #fceacb.
55. Open Tube_254.pspimage. Copy/Paste as New Layer.
56. Image/Resize/Resize by 50%/Resize all layers unchecked.
57. Adjust/Sharpness/Sharpen.
58. Effects/3D Effects/Drop Shadow. Vertical 37, Horizontal -50, Opacity 50, Blur 19, color #000000.
59. Place doll lady toward left at the bottom on top of the border.
60. Open Tube_252.pspimage of doll lady. Copy/Paste as New Layer.
61. Image/Resize/Resize by 60%/Resize all layers unchecked.
62. Adjust/Sharpness/Sharpen. Adjust/Sharpness/Sharpen More.
63. Effects/3D Effects/Drop Shadow. Vertical 37, Horizontal -50, Opacity 50, Blur 19, color #000000.
64. Place doll lady to the right at the bottom right corner, being careful not to cover the outer 1px border.
65. Open 0_a37fb_a4646852_XXL.Png of banner.
66. Close off bottom box in Materials Palette. Change foreground color to #000000. Using the Pen tool from the tool bar, Line style solid, Width 1.00, Anti-alias checked and using settings below, click a row of nodes keeping in line with the curvature of the banner. Apply.


67. Open Background (bottom) box in materials palette, close Foreground box.
68. Layers/New Vector Layer.
69. Select the font Goudy Old Style, (not a default font and is included in materials), Size 22, Stroke width: 0.0, color #6e3029, place the cursor on the center of the line you just drew with the nodes. When you see a "T" with a curved line under it, begin to type the words "Grand Castle Event". The words should follow the line if you have done the steps correctly.

70. Convert to Raster Layer. Objects/Align/Horizontal Center.
71. Move down one layer and delete the layer that has the line drawn on it. Merge/Merge Visible.
72. Copy. Paste as New Layer on the main working image. Center on bottom wide border.
73. Adjust/Sharpness/Sharpen.
74. Effects/3D Effects/Drop Shadow. Vertical -8, Horizontal -8, Opacity 40, Blur 23, color #000000.
75. Leave your watermark if you wish.
76. Image/Add Borders/Add 2px border, Symmetric checked, color #6e3029.
This tutorial was tested by PamelaD, Evatexas and SonjiaS. Thanks ladies!
If you are going to use this tutorial for stationery, cards or place the tutorial/tag on another site, I would appreciate you contacting me for permission, giving Arasimages credit for the original tutorial and if possible, a link back to my site. Thank you.
Copyright © Arasimages All Rights Reserved