
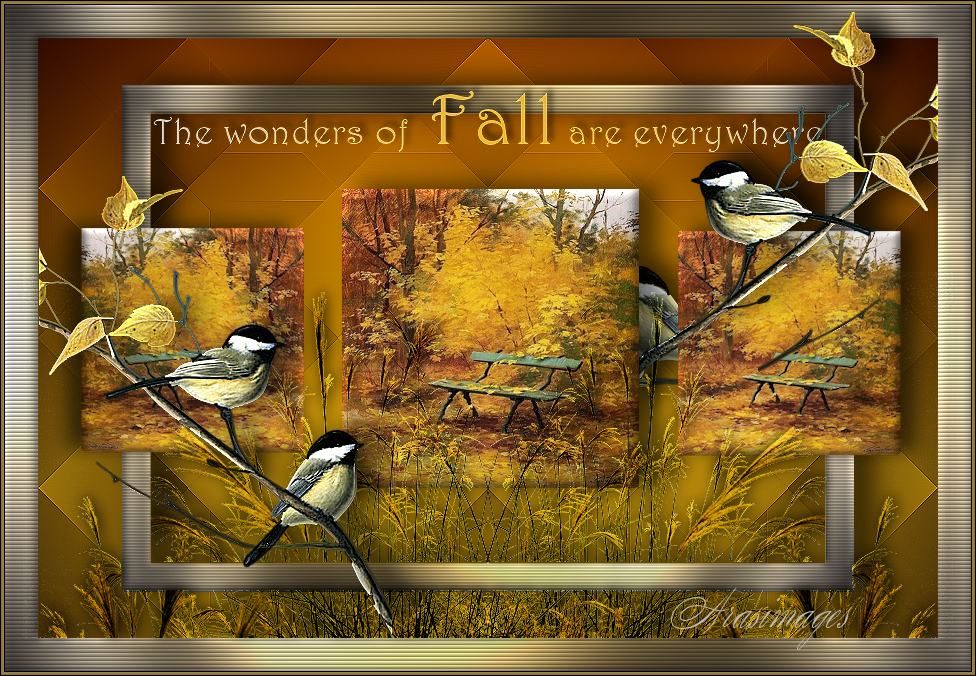
Wonders of Fall
For an Italian, French, German, Spanish, Danish and Turkish translation, click on the flags.


For this tutorial you will need the materials in the zip file below.

Thank you H@nne for the bird tube and thanks to PamelaD of Arasimages for her beautifully tubed grasses.
Unzip the materials into a working folder you have created on your desktop named Wonders of Fall. Please duplicate and close original tubes. Use the copies for your work so you will not lose the originals. Place the Selection in your Selections folder. I have used the plugins Mehdi/Sorting Tiles, AAA Frames/Frame Works, Harry's Filters/DOWN-M~1.HFP, Graphics Plus/Cross Shadow and NiK Software/Color Efex Pro 3.0 Complete/Bi-Color for this tutorial. To work this tutorial, it is assumed you have working knowledge of Paint Shop Pro.
Use the bookmark below to mark your place along the way.
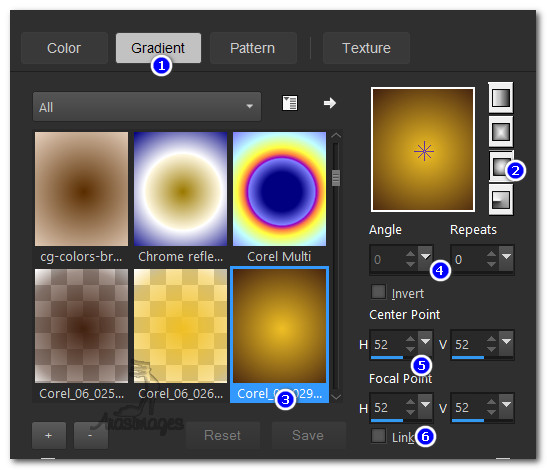
1. In Materials Palette, set Foreground to #ebb72d, Background to #221108. Create a Gradient using these colors, Gradient Corel_06_029 (foreground/background), Style Sunburst, Angle 0, Repeats 0, Invert unchecked, Center Points H 52/V 52/ Focal Points H 52, V 52.
2. New/New Image 900px by 600px. Flood fill with Gradient.
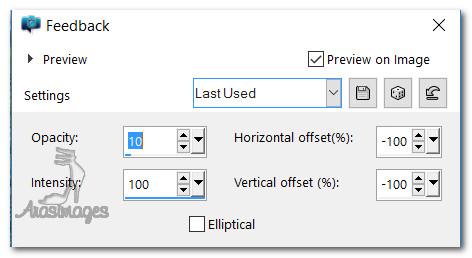
3. Effects/Reflection Effects/Feedback.
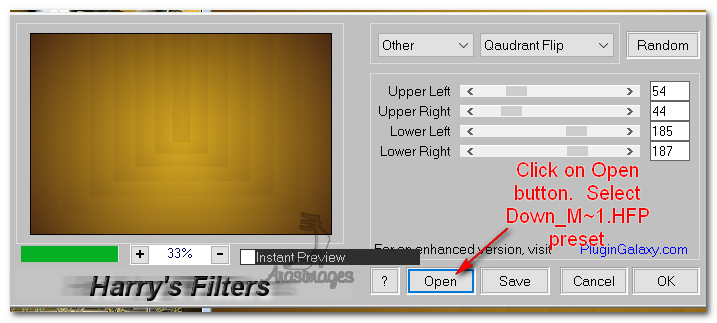
4. Effects/Harry's Filters/DOWN_M~1.HFP. (Or down_Mirror.hfp, Brightness 0, Layer mode Normal/255. Your versions may vary.)
5. Effects/Edge Effects/Enhance.
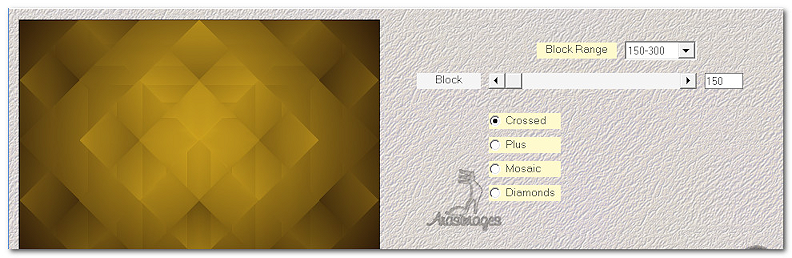
6. Effects/Mehdi/Sorting Tiles.
7. Effects/Edge Effects/Enhance.
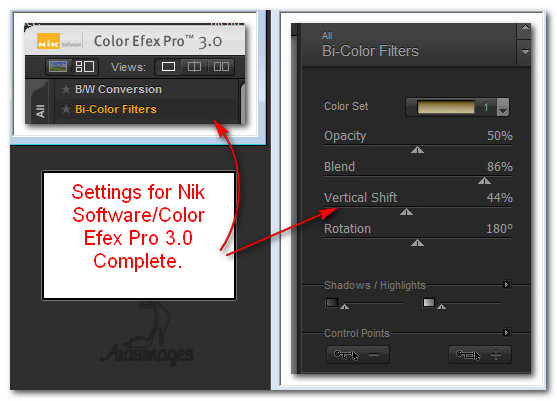
8. Effects/Nik Software/Color Efex Pro.3.0 Complete/Bi-Color Filters set as seen below.
9. Image/Add Borders/Add 38px border, Symmetric checked, color #ebb72d.
10. Change Background color in Materials Palette to c0c0c0.
11. Click on 38px border with Magic Wand to activate it.

12. Layers/New Raster Layer. Flood fill with Gradient made using new background color.
13. Effects/Graphic Plus/Cross Shadow. First 6 settings at 50, last two at 128 (default) settings.
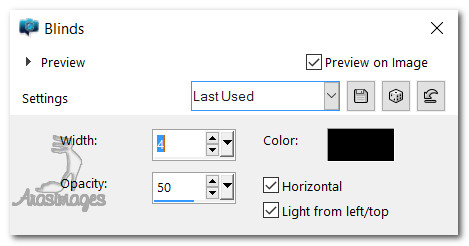
14. Effects/Texture Effects/Blinds. Color #221108.
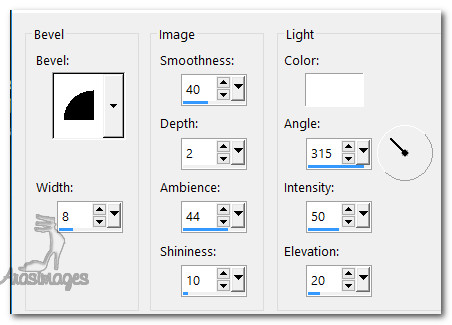
15. Effects/3D Effects/Inner Bevel. Selections/Select None.
16. Duplicate layer. Image/Mirror.
17. Image/Resize/Resize by 75%/Resize all layers unchecked.
18. Effects/3D Effects/Drop Shadow. Vertical -5, Horizontal 19, Opacity 60, Blur 35, color #000000.
19. Open H@nne_Birds2027.pspimage. Copy/Paste as New layer.
20. Image/Mirror. Move birds into upper right corner.
21. Repeat drop shadow of #18 on birds.
22. Adjust/Sharpness/Sharpen.
23. Pull bird layer beneath inner border layer. Go back to border layer at the top to continue.
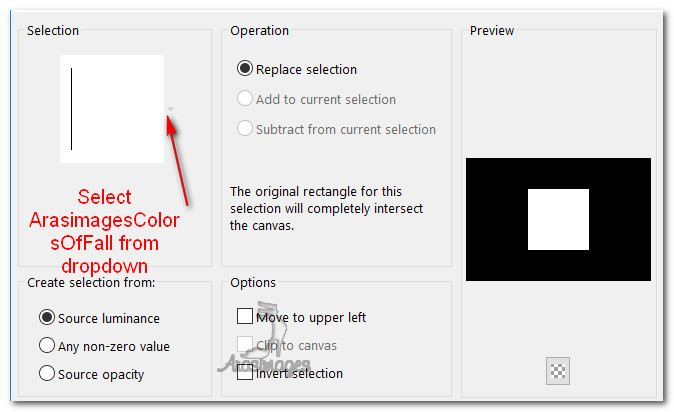
24. Selections/Load/Save Selection/Load Selection from Disk. Choose ArasimagesColorsOfFall. Load.
25. Layers/New Raster Layer.
26. Open Fall Leaves Bench.pspimage. Copy/Paste into selection.
27. Effects/3D Effects/Inner Bevel.
28. Effects/3D Effects/Drop Shadow. Vertical -5, Horizontal 19, Opacity 60, Blur 35, color #000000.
29. Adjust/Sharpness/Sharpen. Selections/Select None.
30. Center in image.
31. Duplicate. Image/Resize/Resize by 75%/Resize all layers unchecked.
32. Move to right of center square over small inner frame. Duplicate. Image/Mirror.
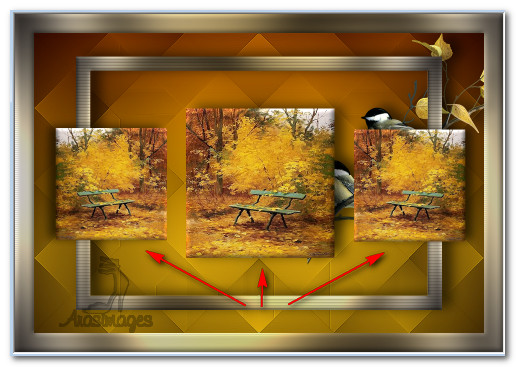
33. Adjust squares so they are as seen below.
34. Open cha415.pspimage. (Grasses). Copy/Paste as New Layer.
35. Place in bottom right corner of outer frame.
36. Duplicate. Image/Mirror. Merge/Merge Down.
37. Blend Mode/Hard Light. Adjust/Sharpness/Sharpen.
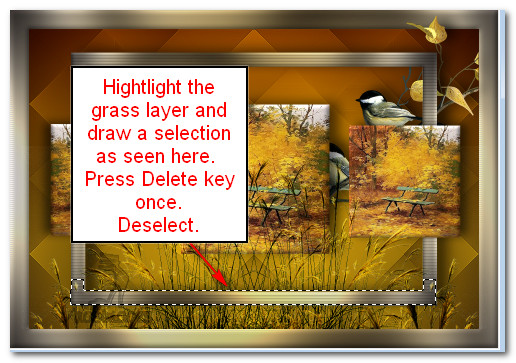
38. Stay on top grass layer and using Selections tool, select the bottom portion of grass in front of the inner frame. Press Delete key once. Deselect. Using Eraser tool, erase grass off the center box's bench. (Or use Selections tool).

39. Effects/3D Effects/Drop Shadow. Vertical -2, Horizontal 2, Opacity 60, Blur 20, color #000000.
40. Open H@nne_Birds2027.pspimage. Copy/Paste as New Layer.
41. Place on left side of image as seen in finished tutorial.
42. Effects/3D Effects/Drop Shadow. Vertical -5, Horizontal 19, Opacity 60, Blur 35, color #000000.
43. Adjust/Sharpness/Sharpen. Adjust/Sharpness/Sharpen More.
44. From tool bar select the font Harrington, Size 36, Stroke 0.0, Line style solid, Kerning 25. Gradient made with Foreground #ebb72d and Background #c0c0c0. Use small arrow to switch Foreground with Background so the Gradient is in Background box.

45. Type out the words "The wonders of Fall are everywhere". While still in Vector layer, highlight the word "Fall" and change size to 72.
46. Convert to Raster Layer. Objects/Align/Horizontal Center. Move downward so most of the words are below the top of the inner border.
47. Effects/3D Effects/Drop Shadow. Vertical -5, Horizontal 5, Opacity 60, Blur 9, color #000000.
48. Adjust/Sharpness/Sharpen.
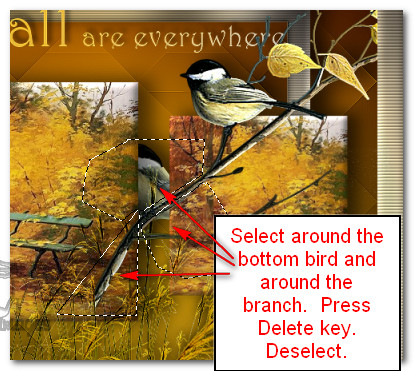
49. Again Paste birds as New Layer. Image/Mirror. Place over the first birds on the right side of image.
50. Using Freehand Selection tool, select around the bottom bird and branch in three places, press Delete key once and Deselect.

51. Effects/3D Effects/Drop Shadow. Vertical -5, Horizontal 19, Opacity 60, Blur 35, color #000000.
52. Adjust/Sharpness/Sharpen. Adjust/Sharpness/Sharpen More.
53. Add your watermark here if you wish. Merge/Merge Visible.
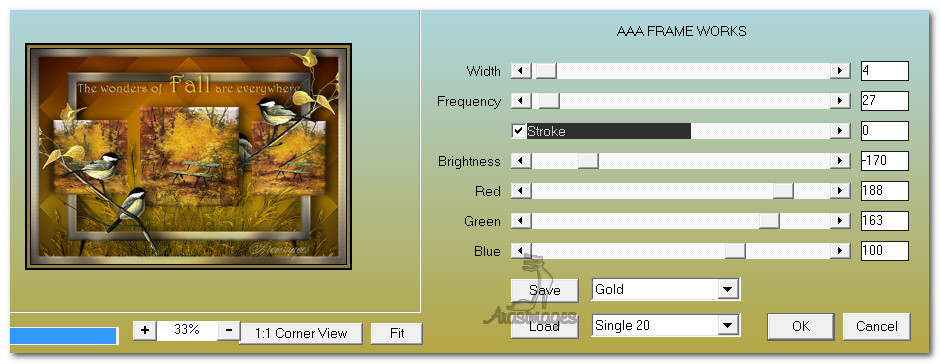
54. Effects/AAA Frames/Frame Works. Use settings below.
This tutorial was tested September 2016 by PamelaD and Evatexas. Thanks ladies!
If you are going to use this tutorial for stationery, cards or place the tutorial/tag on another site, I would appreciate you contacting me for permission, giving Arasimages credit for the original tutorial and if possible, a link back to my site. Thank you.
Copyright © Arasimages All Rights Reserved