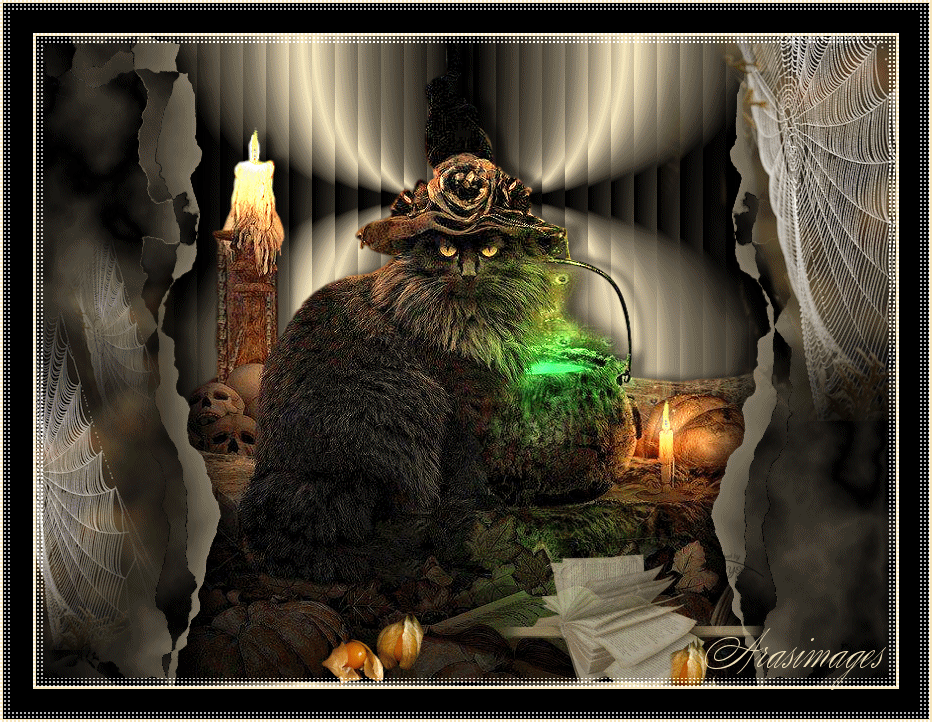
Boo Hiss
For a Spanish, Italian, Dutch, German, Danish and French translation, click on the flags.


For this tutorial you will need the materials in the zip file below.

Thanks go to Guismo and Maryse for the lovely tubes used in this tutorial.
Unzip the materials into a working folder you have created on your desktop named Boo-Hiss. Please duplicate and close original tubes. Use the copies for your work so you will not lose the originals. I have used the plugins Toadies/Bitches Crystal, Filter Forge/Filter Forge2/Bad Trip, Andromeda/Perspective and AFS IMPORT/sqborders2 . Place the Selection in your PSP Selections folder, the Preset_Lights_Boo Hiss.PspScript in your PSP Preset folder and the Boo Hiss Gradient in your PSP/Gradients folder. I have used PSPX9 for this tutorial but other versions may be used. To work this tutorial, it is assumed you have some working knowledge of Paint Shop Pro.
Use the nut below to mark your place along the way.

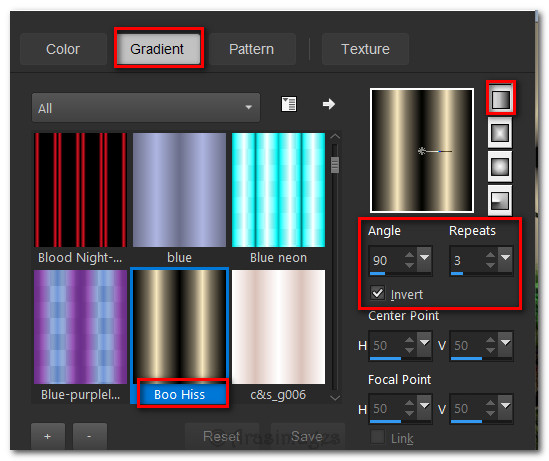
1. In Materials Palette, select the Boo Hiss Gradient provided and place in Foreground. Background set to #000000. Set Boo Hiss Gradient as seen below.
2. New/New Image 860px by 650px. Flood fill with Boo Hiss Gradient.
3. Effects/Geometric Effects/Circle/color #000000.
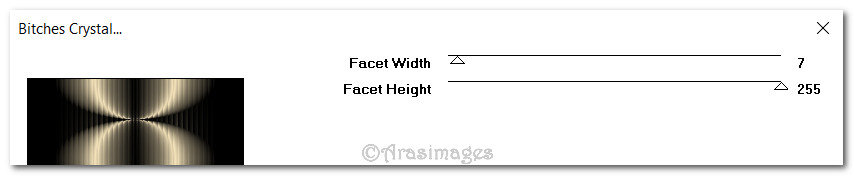
4. Effects/Toadies/BitchesCrystal.
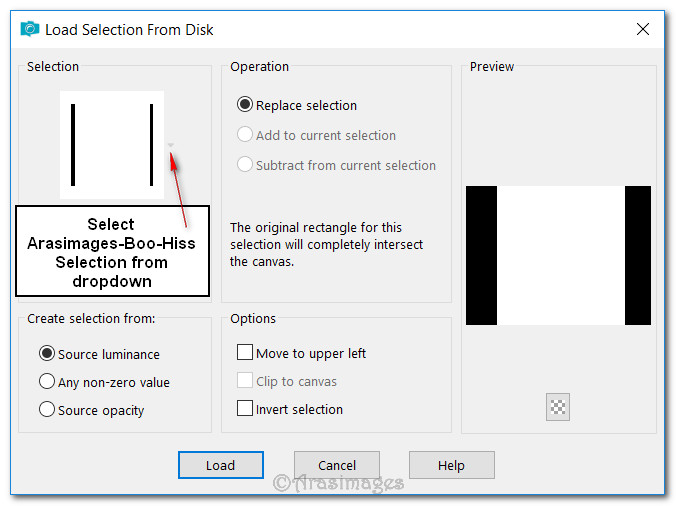
5. Selections/Load/Save Selection/Load Selection from Disk. Choose Arasimages-Boo-Hiss selection. Load.
6. Layers/New Raster Layer.
7. Open Cat in Hat.pspimage. Copy/Paste as New Image on workspace.
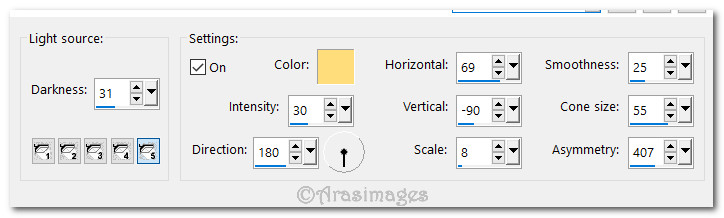
8. On New Image apply Effects/Illumination Effects/Lights. Use the Preset Boo Hiss provided for you with color #fddd7a.
9. Effects/3D Effects/Drop Shadow. Vertical -3, Horizontal 13, Opacity 56, Blur 10, color #000000.
10. Copy New Image/Paste into Selection on main image. Selections Invert.
11. Layers/New Raster Layer. Flood fill new raster layer with Boo Hiss Gradient.
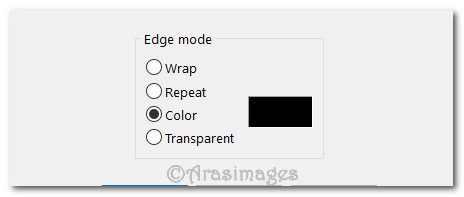
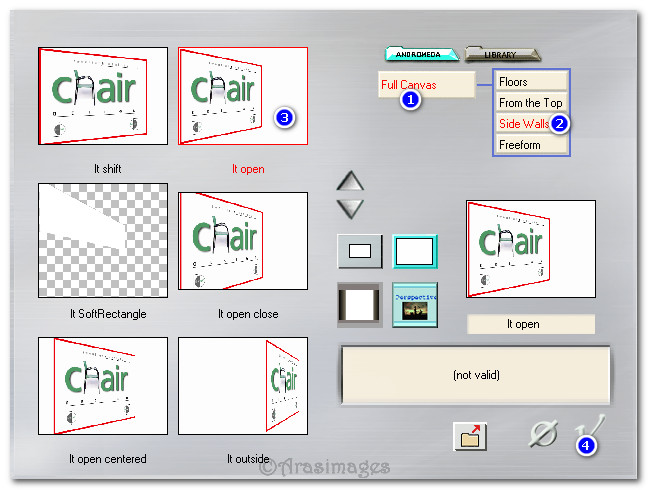
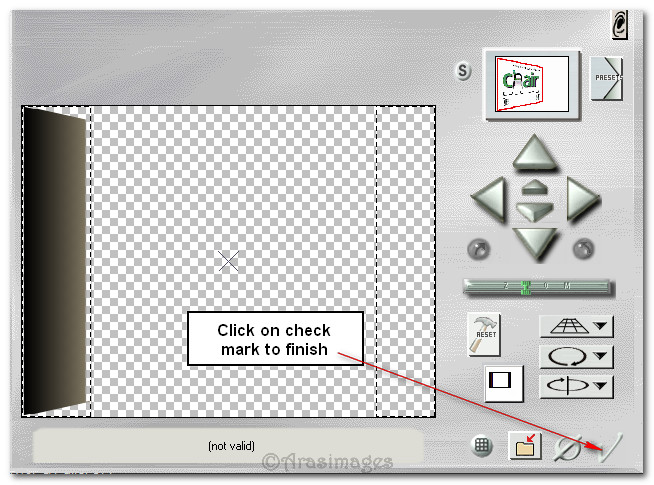
12. (Selection is still active). Effects/Andromeda/Perspective/Click on Preset in top right corner. Then click on check mark in bottom right corner.
13. Click on Full Canvas/SideWalls/Chair lt open then check mark in bottom right corner.
14. Selections/Select None.
15. Using the Selections tool set to Rectangle, Add (Shift), Feather 0, select around the little piece sticking out on bottom left side as seen in example below. Press Delete Key once. Selections/Select None.

16. Effects/3D Effects/Drop Shadow. Vertical 29, Horizontal 22, Opacity 50, Blur 33, color #000000.
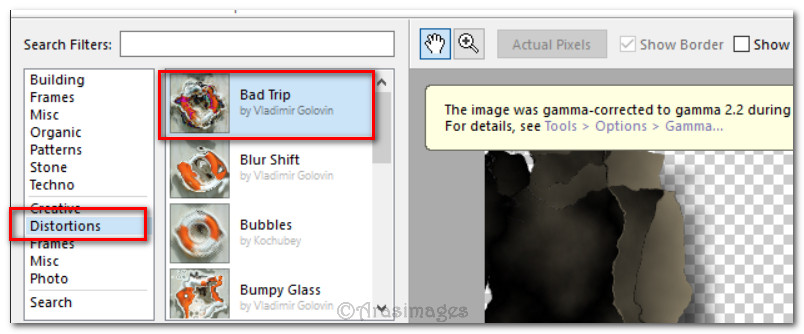
17. Effects/Filter Forge/Filter Forge 2. Set to Distortions/Bad Trip. Under Presets leave at Default. Apply.
18. Duplicate. Image/Mirror/(Mirror Horizontal in newer versions of PSP).
19. Open Spider Web.pspimage. Using Eraser tool, erase leaves from left side.
20. Copy/Paste as New Layer.
21. Image/Image/Resize/Resize by 75%/Resize all layers unchecked. Place in upper right corner.
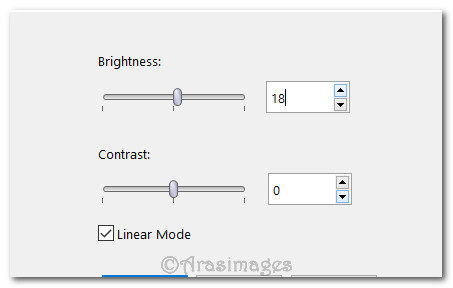
22. Adjust/Brightness and Contrast/Brightness/Contrast.
23. Duplicate. Image/Resize/Resize by 60%/Resize all layers unchecked.
24. Effects/3D Effects/Drop Shadow. Vertical -3, Horizontal 13, Opacity 56, Blur 10, color #000000.
25. Place in bottom left corner.
26. Duplicate. Image/Resize/Resize by 60%/Resize all layers unchecked.
27. Place above spider web on center left side. Lower Opacity down to 70.
28. Pull beneath larger spider web layer.
29. Go back to top layer to continue.
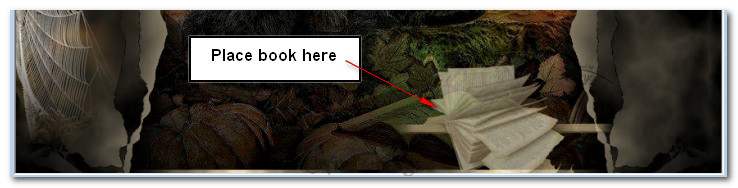
30. Open MR_Autumn Literary Leaves.pspimage. Erase all text from image. Copy/Paste as New Layer.
31. Image/Resize/Resize by 50%/Resize all layers unchecked.
32. Move book toward right side and down so leaves are not showing.
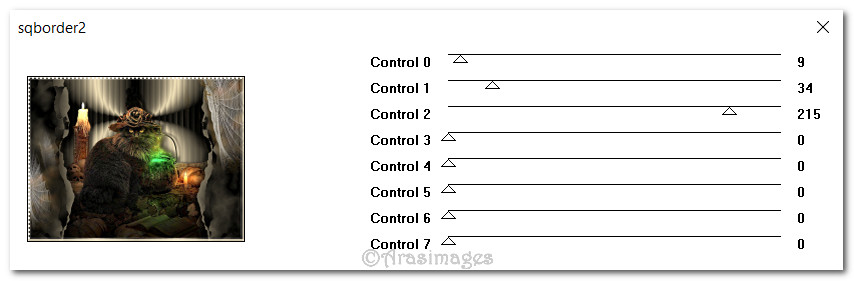
33. Open calguislampion23102012.pspimage of nuts. Copy/Paste as New Layer.
34. Image/Resize/Resize by 25%/Resize all layers unchecked.
35. Place below the cat at the bottom of image.
36. Duplicate. Erase the left nut using Eraser tool or Selections tool. Move right nut toward right side of image over right side of book.

37. Image/Add Borders/Add 3px border, Symmetric checked, color #f8e7be.
38. Effects/[AFS IMPORT]/sqborder2.
39. Image/Add Borders/Add 30px border, Symmetric checked, Color #000000.
40. Image/Add Borders/Add 3px border, Symmetric checked, color #f8e7be.
41. Repeat [AFS IMPORT] effect as in Step #38.
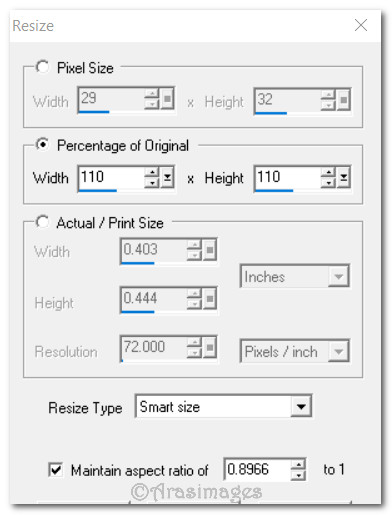
42. Sign your name or leave your watermark at this point if you wish. Save as .jpg image.
43. Copy the saved .jpg. Open Animation Shop and Paste as New Animation.
44. Duplicate the finished image 7 times having 8 frames in all.
45. Highlight the first frame. Edit/Select All.
46. Open Candle Flame.psp in Animation Shop. Edit/Select All.
47. Animation/Resize Animation. Select Percentage of Original at 110.
48. Animation/Replace Color. Make sure all of the frames are highlighted. Change the old color to #FFFFFF. Change New Color to #FFFF80. Click OK.
49. Copy. Go back to your main image. Make sure all 8 of the frames are highlighted. In the first frame, right click/Paste/Into Selection. Hover animated flame over the flame on the left. Left click to set into place over the flame. I chose to do it twice, first setting the flame on the candle top then again up a little higher for a larger flame.
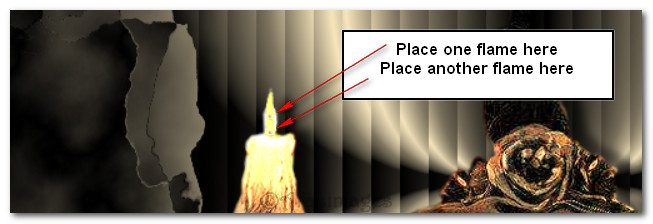
50. Repeat the same procedure for the second candle on the right of the Cat.
51. File/Save As. When the first box appears, give your work the name Boo Hiss. Direct where to save it at the top (working folder). Leave the file type the same. Save.

52. As the boxes appear, continue clicking on Next, Next, Next then Finish.
This tutorial was tested by PamelaD, Evatexas. Thanks ladies!
If you are going to use this tutorial for stationery, cards or place the tutorial/tag on another site, I would appreciate you contacting me for permission, giving Arasimages credit for the original tutorial and if possible, a link back to my site. Thank you.
Copyright © Arasimages All Rights Reserved