

Love is Just a Four Letter Word
For an Italian, French, Spanish, German, Dutch and Danish translation, click on the flags.


For this tutorial you will need the materials in the zip file below.

Thank you to FranieMargot and Maria Tereza F.P. for the beautiful tubes used in this tutorial.
Unzip the materials into a working folder you have created on your desktop named Love is Just a Four Letter Word. Please duplicate and close original tubes. Use the copies for your work so you will not lose the originals. Place the Selection in your Selections folder. Export brushes into your PSP/Brushes folder. Place the Pattern/White Beads in the PSP/Patterns folder. Place the Preset Smart Photo Fix in your PSP/Preset folder. I have used the plugins Filters Unlimited 2.0/Plugins AB 08/A Couple Of Copies, Please, Flaming Pear/Flood and Neology/Polarwaves for this tutorial. To work this tutorial, it is assumed you have working knowledge of Paint Shop Pro.
Use the arrow below to mark your place along the way.

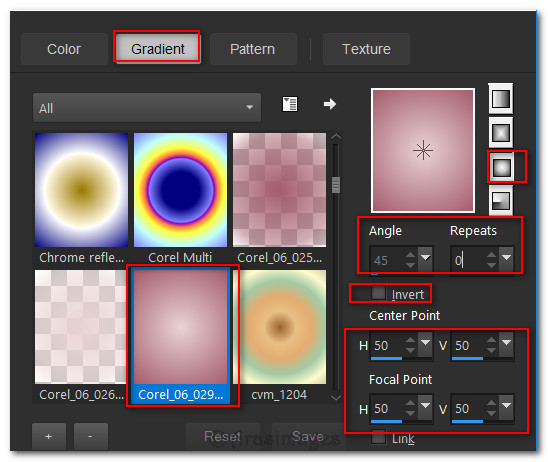
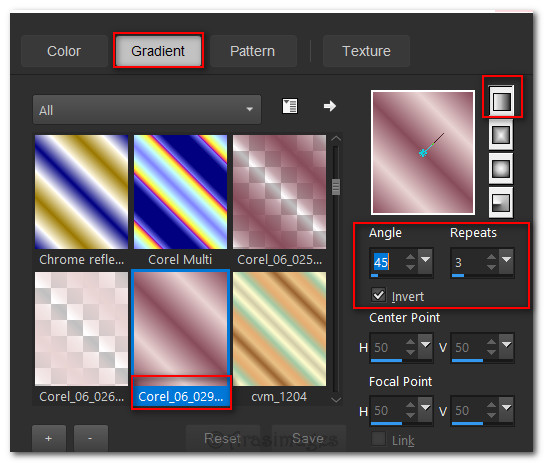
1. In Materials Palette, set Foreground to #e9d3d3, Background to #884c5a. Create a Gradient using these colors, Gradient Corel_06_029 (foreground/background), Style Sunburst, Angle 0, Repeats 0, Invert unchecked, Center Points H 50/V 50/ Focal Points H 50, V 50.
2. New/New Image 850px by 700px. Flood fill with Background color.
3. Open bg_blue.pspimage. Copy.
4. Layers/New Raster Layer. Selections/Select All. Paste into Selection. Selections/Select None.
5. Set Blend Mode to Luminance (Legacy).
6. Effects/Edge Effects/Enhance More.
7. Layers/New Raster Layer. Change Background color to #ffffff, find the Paint Brush tool/Brush ct_2a.PspBrush. Right click to stamp in center of image.

8. Effects/Edge Effects/Enhance.
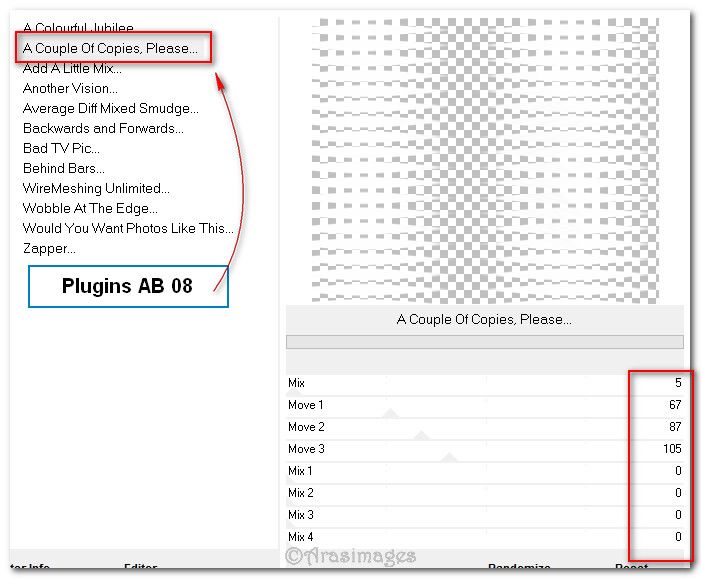
9. Effects/Filters Unlimited 2.0/AB 08/A Couple of Copies, Please.
10. Effects/Geometric Effects/Circle.
11. Lower Blend Mode down to 68.
12. Open mtfp_beautiful_roses.pspimage. Copy/Paste as New Layer.
13. Image/Resize/Resize all layers 82%/Resize all layers unchecked.
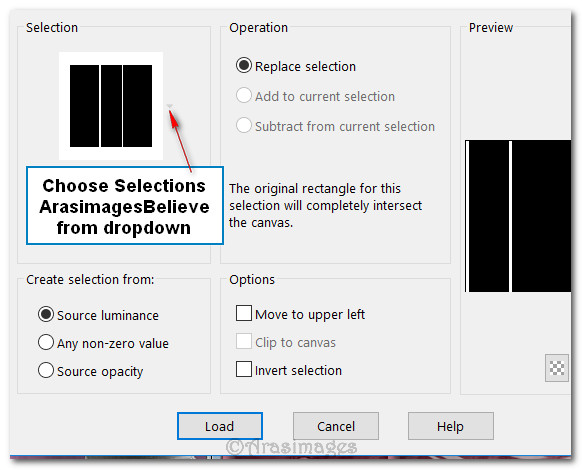
14. Adjust/Sharpness/Sharpen.
15. Effects/3D Effects/Drop Shadow. Vertical -22, Horizontal 34, Opacity 40, Blur 46, color #000000.
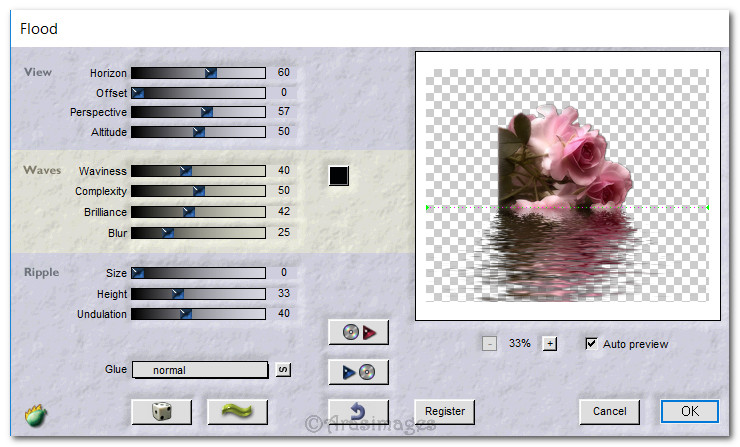
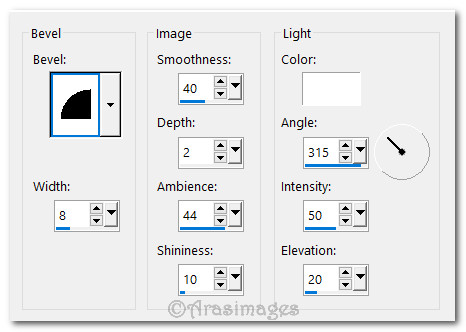
16. Effects/Flaming Pear/Flood.
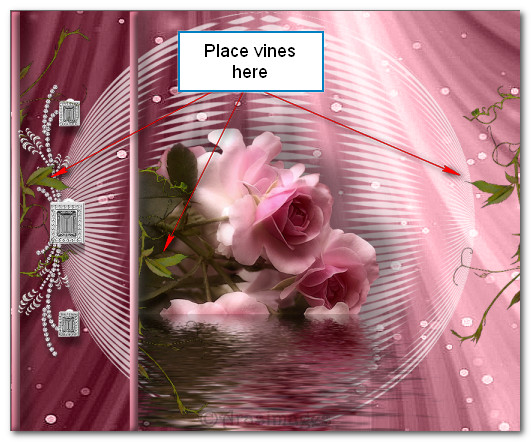
17. Pull roses downward so top petal is at 200px.
18. Layers/New Raster Layer.
19. Selections/Load/Save Selections/Load Selections from Disk. Select ArasimagesBelieve Selection from drop down. Load.
20. Flood fill with Gradient in Step #1.
21. Effects/3D Effects/Inner Bevel.
22. Effects/3D Effects/Drop Shadow. Vertical 0, Horizontal 15, Opacity 40, Blur 25, color #000000.
23. Selections/Select None.
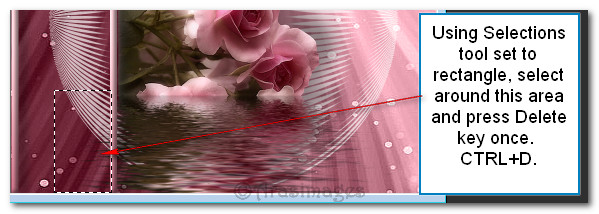
24. Highlight Raster 4 of water and using Selections tool, select around water on left side of right vertical bar and press Delete key once. Deselect.
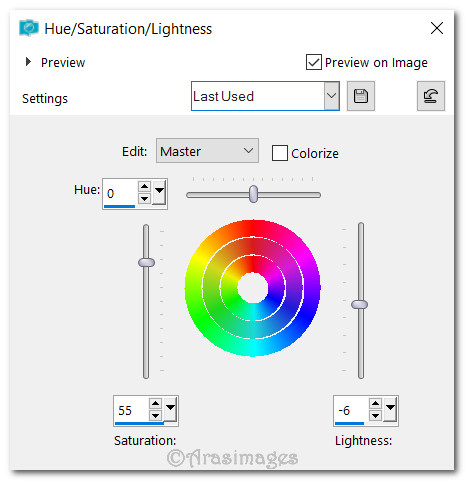
25. Go back to top layer to continue.
26. Open diam010.pspimage. Copy/Paste as New Layer.
27. Effects/3D Effects/Drop Shadow. Vertical 15, Horizontal 3, Opacity 40, Blur 13, color #000000.
28. Adjust/Sharpness/Sharpen. Move to left side of image.
29. Open trailing_vine.pspimage. Copy/Paste as New Layer.
30. Adjust/Hue and Saturation/Hue/Saturation/Lightness. Set as seen below.
31. Move to right side of outer vertical bar and up a little. Duplicate.
32. Image/flip. (Mirror-Vertical). Move to right side and down next to inner vertical bar.
33. Duplicate. Image/Mirror/Horizontal. Place vine to right side of image and upward a little.
34. Merge/Merge Down. Merge/Merge Down again.
35. Effects/3D Effects/Drop Shadow. Vertical 15, Horizontal 3, Opacity 40, Blur 13, color #000000.
36. Layers/New Raster Layer.
37. From the tool bar, select the Brush tool. Choose the brush agi_wb_love02 brush and use settings below. Stamp with color #e1e2e6 at the bottom center of image.

38. Effects/3D Effects/Drop Shadow. Vertical 15, Horizontal 28, Opacity 40, Blur 26, color #000000.
39. Adjust/Sharpness/Sharpen.
40. Image/Add Borders/Add 5px border, Symmetric checked, color #000000.
41. In Materials Palette, change foreground to Pattern/White Beads.
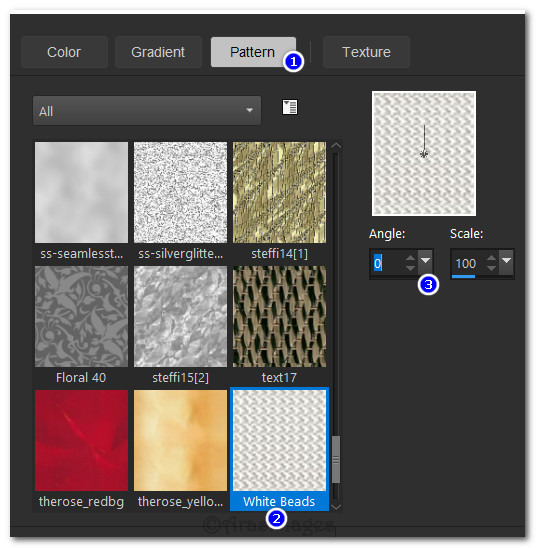
42. Using Magic Wand, select the 5px border and flood fill with White Beads Pattern.
43. Effects/Edge Effects/Enhance. Deselect.
44. Image/Add Borders/Add 2px border, Symmetric checked, color #5c0700.
45. Image/Add Borders/Add 40px border, Symmetric checked, color #ffffff.
46. In Materials Palette, change foreground to #e9d3d3/background to #884c5a. Create a Gradient using Foreground/Background Corel_06_29, Style Linear, Angle 45, Repeats 3, Invert checked.
47. Select the 40px border with Magic Wand. Flood fill with new Gradient.
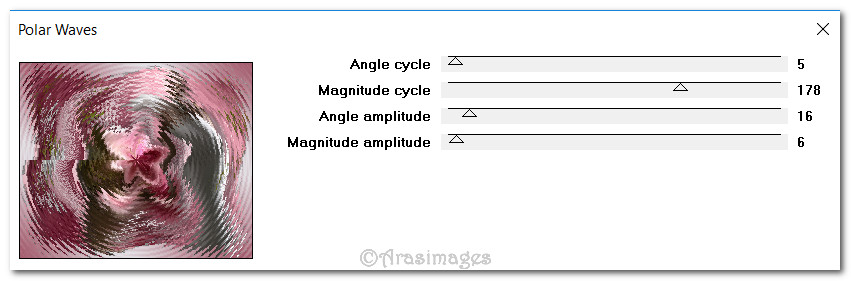
48. Effects/Neology/Polarwaves.
49. Adjust/Blur/Gaussian Blur. Radius set to 4. Selections/Select None.
50. Image/Add Borders/Add 5px border, Symmetric checked, color #000000.
51. In Materials Palette, change foreground to Pattern/White Beads.
52. Using Magic Wand, select the 5px border and flood fill with White Beads Pattern.
53. Effects/Edge Effects/Enhance. Deselect.
54. Open woman_391_franiemargot.pspimage. Copy/Paste as New Layer.
55. Image/Mirror. (Mirror/Horizontal).
56. Image/Resize/Resize by 144%/Resize all layers unchecked.
57. Effects/3D Effects/Drop Shadow. Vertical 15, Horizontal 28, Opacity 40, Blur 26, color #000000. Repeat this drop shadow.
58. Adjust/Smart Photo Fix. (Use Preset included in Materials).
59. Adjust/Sharpness/Sharpen.
60. Move lady toward right border and to bottom.
61. Image/Add Borders/Add 3px border, Symmetric checked, color #5c0700.
62. Image/Add Borders/Add 5px border, Symmetric checked, color #ffffff.
63. Select 5px border with Magic Wand to activate it. Flood fill with White Beads Pattern.
64. Effects/Edge Effects/Enhance. Deselect.
65. Add your name or watermark if you wish and save your file.
This tutorial was tested January 2017 by PamelaD and Evatexas. Thanks ladies!
If you are going to use this tutorial for stationery, cards or place the tutorial/tag on another site, I would appreciate you contacting me for permission, giving Arasimages credit for the original tutorial and if possible, a link back to my site. Thank you.
Copyright © Arasimages All Rights Reserved