

Love
For Italian, German, French, Dutch, Danish and Spanish translation, click on the flags.


For this tutorial you will need the materials in the zip file below.

Unzip the materials into a working folder you have created on your desktop named Love. Please duplicate and close original tubes. Use the copies for your work so you will not lose the originals. I have used plugins AP 03 [Photos/Colors]/Gradient-Corners, Filters Unlimited 2.0/Distortion/Cracked (You may have Distortion in your plugin list) and Filters Unlimited 2.0/AFS IMPORT/Mirrbevel.
Thank you to Maryse and PamelaD from Arasimages for the beautiful tubes used in this tutorial.
Use the heart below to mark your place along the way.

1. In Materials Palette, set Foreground to #000000, Background to #b10505. Create a Gradient in background using these colors, Gradient Corel_06_029 (foreground/background), Style Radial, Angle 26, Repeats 26, Invert unchecked, Center Points H 0/V 0, Focal Points H 50, V 50 but grayed out.

2. New/New Image 900px by 850px. Flood fill with Gradient.
3. Adjust/Blur/Gaussian Blur. Radius set to 26.
4. Effects/AP 03 [Photos/Colors]/Gradient-Corners. Change only where indicated in below example.
5. Image/Flip (Flip/Vertical).
6. Layers/New Raster Layer.
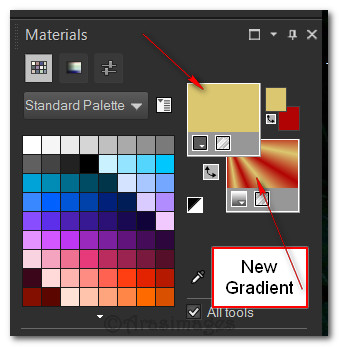
7. Change color of Foreground to #dbc770 which will make a new color Gradient in Background. Using new Gradient flood fill new layer.
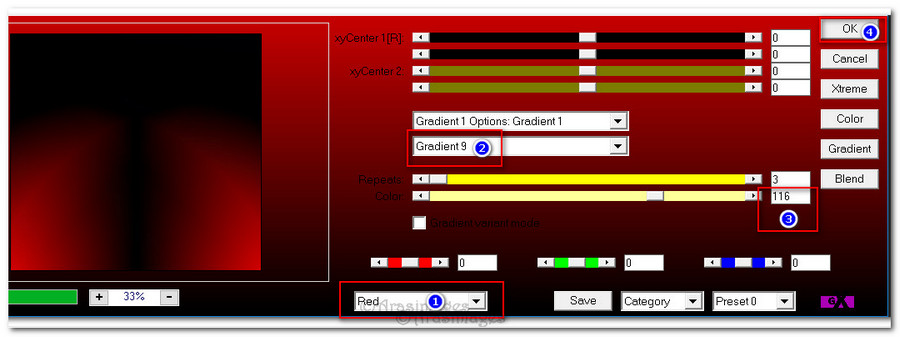
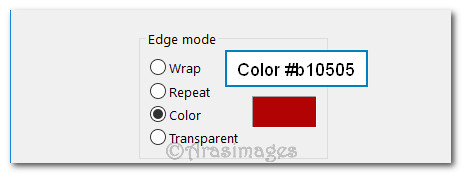
8. Effects/Geometric Effects/Circle. Set color to #b10505 and fill Color dot.
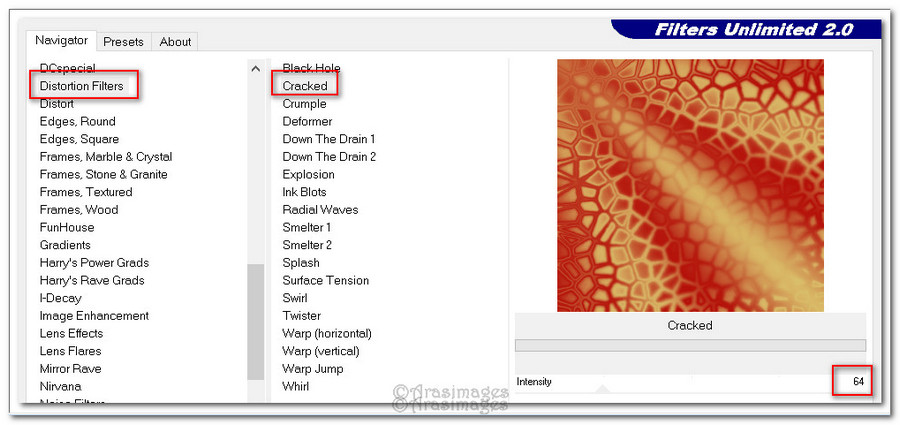
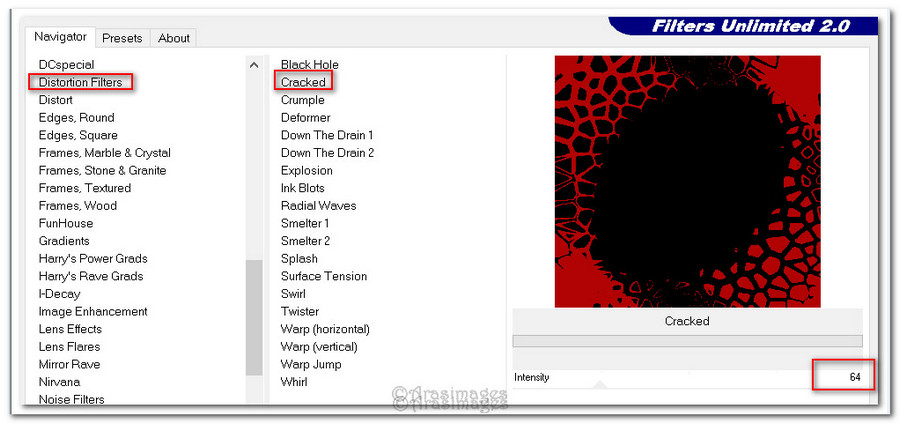
9. Effects/Filters Unlimited 2.0/Distortion Filters/Cracked. Intensity set to 64.
10. Image/Resize/Resize by 70%/Resize all layers unchecked.
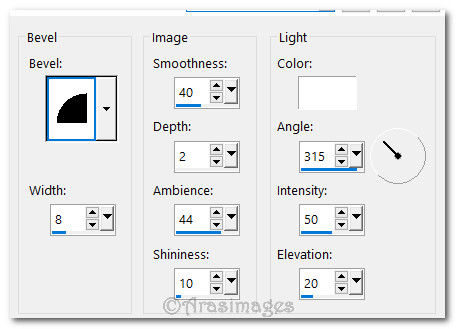
11. Effects/3D Effects/Inner Bevel.
12. Effects/3D Effects/Drop Shadow. Vertical -14, Horizontal -14, Opacity 50, Blur 15, color #000000.
13. Effects/3D Effects/Drop Shadow. Vertical 14, Horizontal 14, Opacity 50, Blur 15, color #000000.
14. Change color of Foreground back to #000000.
15. Layers/New Raster Layer. Flood fill with #000000.
16. Effects/Geometric Effects/Circle. Use color #b10505 (red) and fill Color dot.
17. Effects/Filters Unlimited 2.0/Distortion Filters/Cracked.
18. Image/Resize/Resize by 55%/Resize all layers unchecked.
19. Effects/3D Effects/Inner Bevel as in step 11.
20. Effects/3D Effects/Drop Shadow. Vertical -14, Horizontal -14, Opacity 50, Blur 15, color #000000.
21. Effects/3D Effects/Drop Shadow. Vertical 14, Horizontal 14, Opacity 50, Blur 15, color #000000.
22. Image/Add Borders 4px, Symmetric checked, color #dbc770.
23. Image/Add Borders 14px, Symmetric checked, color #000000.
24. Activate with Magic Wand by clicking inside 14px border.
25. Flood fill activated border with Gradient made in Step #14.
26. Effects/Filters Unlimited/Distortion Filters/Cracked set to 255.
27. Effects/3-D Effects/Drop Shadow Vertical 11, Horizontal 11, Opacity 75, Blur 30, color #000000.
28. Repeat drop shadow with Vertical -11, Horizontal -11, all the rest the same.
29. Effects/3-D Effects/Inner Bevel.
30. Selections/Select None.
31. Image/Add Borders 4 px, Symmetric checked, color #dbc770.
32. Image/Add Borders 14px, Symmetric checked, color #000000.
33. Image/Add Borders 34px, Symmetric checked, color #b10505.
34. Activate with Magic Wand by clicking inside 34px border.
35. Effects/Filters Unlimited 2.0/AFS IMPORT/MIRRBEVL, default settings of 128, 64 all the rest 0's.

36. Selections/Select None.
37. Image/Resize/Resize by 90%/Resize all layers checked.
38. Image/Add Borders/Add 5px border, Symmetric checked, color #000000.
39. Image/Add Borders/Add 2px border, Symmetric checked, color #dbc770.
40. Image/Add Borders/Add 5px border, Symmetric checked, color #000000.
41. Image/Add Borders/Add 2px border, Symmetric checked, color #dbc770.
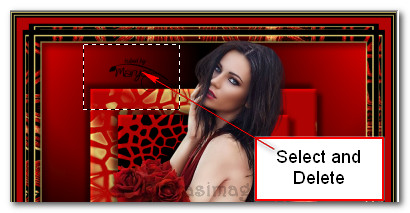
42. Open MR_Red Roses.png of lady. Copy/Paste as New Layer.
43. Use the Selections tool, select around Maryse watermark and delete. Deselect.
44. Effects/3D Effects/Drop Shadow. Vertical -25, Horizontal 25, Opacity 50, Blur 35, color #000000.
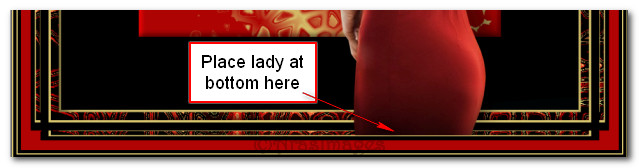
45. Move lady to the right side of image, above the gold inner border as seen below.
46. Adjust/Sharpness/Sharpen.
47. Open Love.pspimage of hearts and word Love. Copy/Paste as New Layer.
48. Image/Resize/Resize by 80%/Resize all layers unchecked.
49. Effects/3D Effects/Drop Shadow. Vertical -11, Horizontal 5, Opacity 50, Blur 35, color #000000.
50. Move the word Love and hearts to bottom left of image.
51. Open bc_valentine_swirl2.pspimage. Copy/Paste as New Layer.
52. Effects/3D Effects/Inner Bevel with settings as before.
53. Effects/3D Effects/Drop Shadow. Vertical -8, Horizontal 5, Opacity 100, Blur 19, color #000000.
54. Move heart to top left corner.
55. Layers/New Raster Layer. Add your name or watermark if you wish.
56. Merge/Merge Visible. Save your work as PSP Animation Shop (*psp) file.
57. Open Animation Shop. Open your saved file in it. Also open the hearts .gif floatie00295.
58. On your hearts floatie, clik on the first frame. Edit/Select All. Copy.
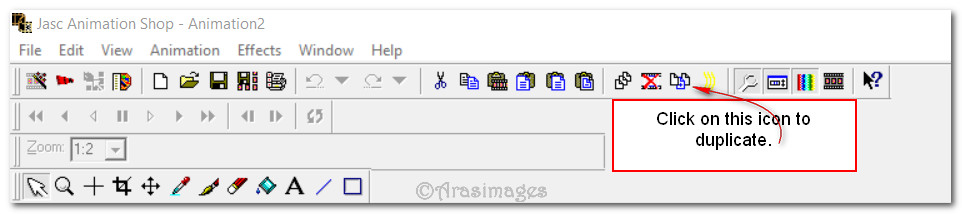
59. Now go to your saved image you created and duplicate it 8 times, having 9 frames in all.
60. Click in the first frame. Edit/Select All.
61. Right click in the FIRST frame of the main image. Paste/Into Selected Frame. Then place the copied hearts you can see where you want them and left click to set in place.
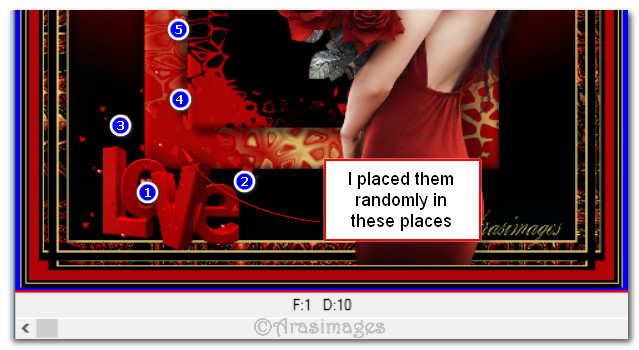
62. Repeat the pasting of hearts in the bottom left corner of the main image. I placed 5 of them on mine as well as one near her heart. Just be creative and see what you like best.
63. Click on the Animation button in the top tool bar and check your animation. If you don't like some of it, undo and repeat the pasting process until you are satisfied.
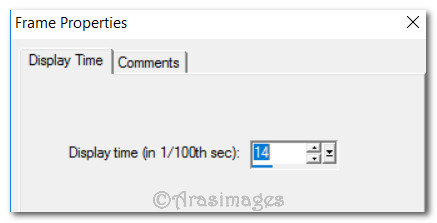
64. Click on Animation/Frame Properties. Change the number from 10 to 14 to slow the hearts down. HINT: The higher the number, the slower the animation.
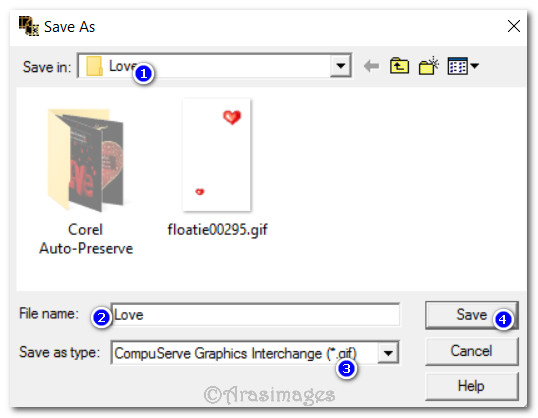
65. Now we will save our work. File/Save As. This Save As box will appear. Designate where you will save your file/Give it a File name and leave the Save as type as is. Click Save.
66. You will see four more boxes appear. Click Next, Next, Next and Finish on them as they come up.
67. Your animated file should now appear in your Love folder.
This tutorial was tested January 2017 by PamelaD and Evatexas. Thanks ladies!
If you are going to use this tutorial for stationery, cards or place the tutorial/tag on another site, I would appreciate you contacting me for permission, giving Arasimages credit for the original tutorial and if possible, a link back to my site. Thank you.
Copyright © Arasimages All Rights Reserved