
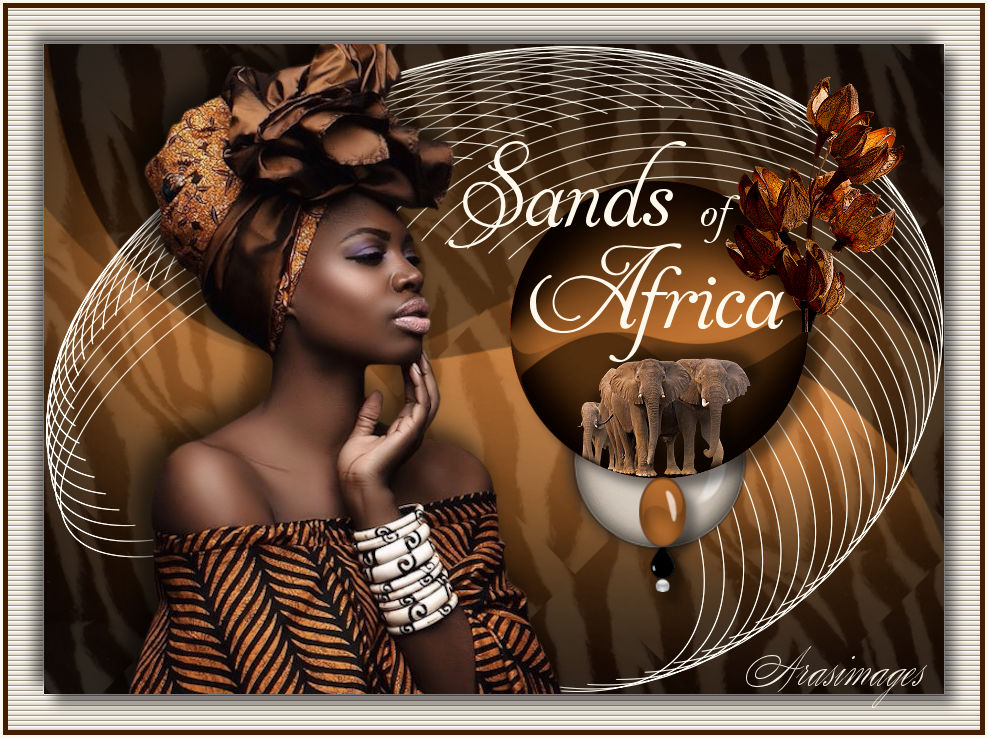
Sands of Africa
For a Dutch, Italian, Spanish, German, French and Danish translation, click on the flags.


For this tutorial you will need the materials in the zip file below.

Thank you to @nn, Yvonne and to www.K@rine-dreams@123.fr for the beautiful tubes used. Also thanks to Narah for her beautiful Mask.
Unzip the materials into a working folder you have created on your desktop named Sands of Africa. Please duplicate and close original tubes. Use the copies for your work so you will not lose the originals. Place the Pattern in your PSP/Patterns folder. Install the Font Aphrodite Pro.ttf in your Windows Font folder. I have used the plugins Dragonfly/Sinedots II and several of the PSPX9 effects for this tutorial.
Use the beads below to mark your place along the way.
1. In Materials Palette, set Foreground to #451e0e, Background to #fef9ec.
2. New/Raster Layer 900px by 650px. Selections/Select All.
3. Open Narah_mask_0451.jpg_recolored. Copy/Paste into Selection. Selections/Select None.
4 Layers/New Raster Layer.
5. Select Pattern/pa108 in Materials Palette. Angle 45/Scale 100.

6. Flood fill new layer with pattern. Drop Opacity down to 14.
7. Layers/New Raster Layer.
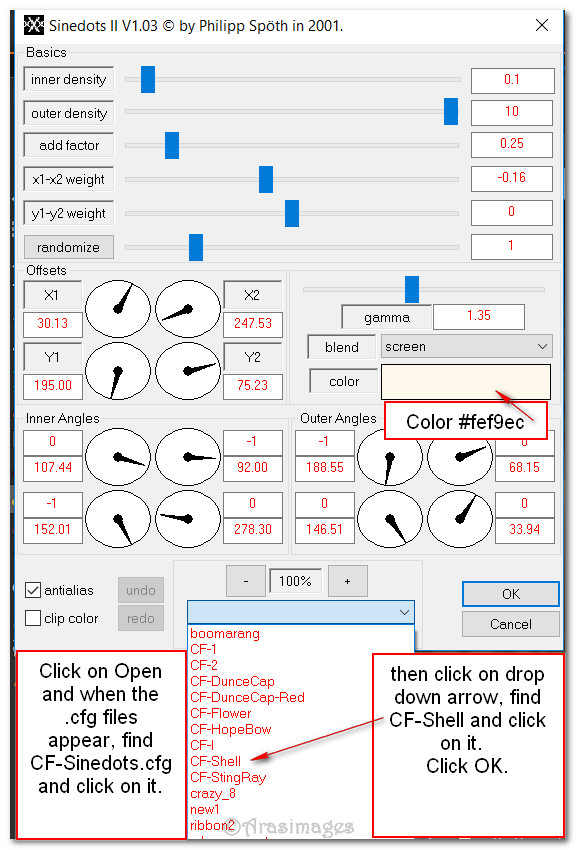
8. Effects/Dragonfly/SinedotsII. First click on Open and when the box of .cfg files appear, find CF-Sinedots.cfg and click on it. Then click on the drop down arrow and find CF-Shell. Click on it. Make sure your color is set to #fef9ec. Then click OK.
9. Open K@rine_dreams_Lady_Africa_3574_Septembre_2016.pspimage. Copy/Paste as New Layer.
10. Effects/3D Effects/Drop Shadow. Vertical -10, Horizontal -10, Opacity 50, Blur 28, color #000000. Repeat.
11. Move African lady to left side of image.
12. Drop down and highlight first layer. Duplicate. Layers/Arrange/Bring to Top.
13. Effects/Geometric Effects/Circle.
14. Image/Resize/Resize by 46%/Resize all layers unchecked.
15. Image/Flip/Flip Vertical.
16. Pull a little to the right.
17. Effects/3D Effects/Drop Shadow. Vertical 10, Horizontal 10, Opacity 50, Blur 15, color #000000.
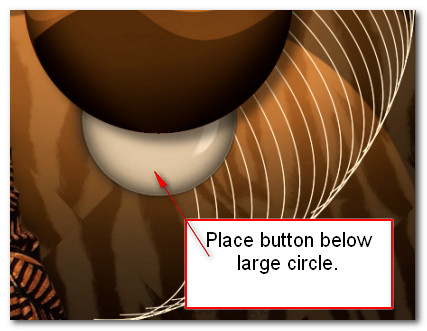
18. Open Button.Png file. Copy/Paste as New Raster Layer. Move button layer below Copy of Raster 1 layer. Center below the larger circle.
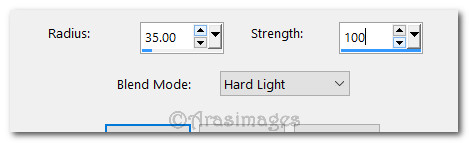
19. Effects/Sharpness/High Pass Sharpen.
20. Open Beads.Png. Copy/Paste as New Layer.
21. Effects/3D Effects/Drop Shadow. Vertical 10, Horizontal 10, Opacity 50, Blur 15, color #000000.
22. Place centered over Button that is showing. Go back to the top layer to continue.
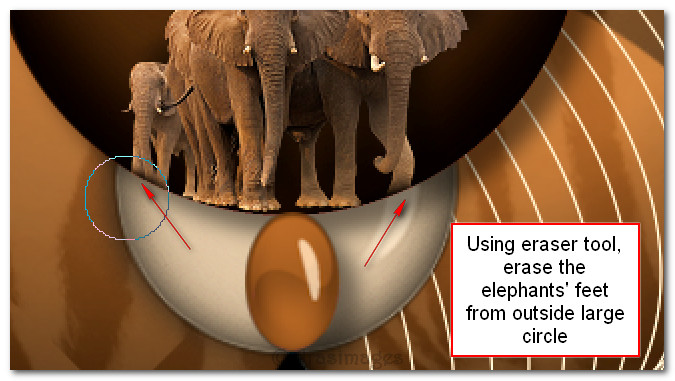
23. Open @nn_161007_dieren_233_olifanten_tdstudio_small.pspimage of Elephants. Copy/Paste as New Layer.
24. Image/Resize/Resize by 35%/Resize all layers unchecked.
25. Effects/3D Effects/Drop Shadow. Vertical -10, Horizontal 10, Opacity 50, Blur 15, color #000000.
26. Adjust/Sharpness/Sharpen.
27. Place Elephants at the bottom of the large circle. Use Eraser tool to erase their feet from outside the large circle.
28. Open Yvonne_bloem_11_21_oktober_2008.pspimage. Copy/Paste as New Layer.
29. Image/Resize/Resize all layers by 40%/Resize all layers unchecked.
30. Effects/3D Effects/Drop Shadow. Vertical 10, Horizontal 10, Opacity 50, Blur 15, color #000000.
31. Move flower to upper right corner with stem touching right center edge of large circle.
32. Adjust/Sharpness/Sharpen.
33. From the tool bar select text Aphrodite Pro, Size 72, font color #fef9ec, Stroke width 0.0./Line style solid. Type out the word "Sands". Convert to Raster Layer.

34. Using the same settings type out the word "Africa". Convert to Raster Layer.
35. Change the Size to 36 and type out the word "of". Convert to Raster Layer.
36. Arrange the words as seen below.

37. Image/Add Borders/Add 36px border, color #fef9ec, Symmetric checked.
38. Using Magic Wand, Mode set to Add(Shift), Match mode: RGB Value, Tolerance 10, Feather 0. Click on 36px border to select it.
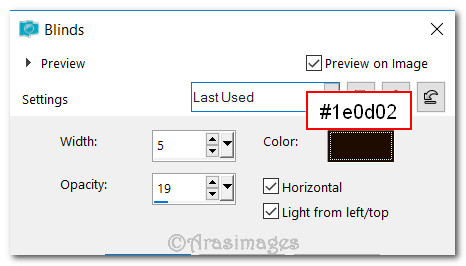
39. Effects/Texture Effects/Blinds.
40. Effects/Edge Effects/Enhance.
41. Selections/Invert.
42. Effects/3D Effects/Drop Shadow. Vertical -10, Horizontal -10, Opacity 55, Blur 20, color #000000.
43. Effects/3D Effects/Drop Shadow. Vertical 10, Horizontal 10, Opacity 55, Blur 20, color #000000.
44. Selections/Selections None.
45. Image/Add Borders/Add 5px border, color #451e0e, Symmetric checked.
46. Image/Add borders/Add 3px border, color #fef9ec, Symmetric checked.
47. Place your watermark or sign your name if you wish. Save as .jpg or .png file.
This tutorial was tested by PamelaD and Evatexas April 2017. Thanks ladies!
If you are going to use this tutorial for stationery, cards or place the tutorial/tag on another site, I would appreciate you contacting me for permission, giving Arasimages credit for the original tutorial and if possible, a link back to my site. Thank you.
Copyright © Arasimages All Rights Reserved