
Basking in Moonlight
For an Italian, Dutch, Spanish, Danish and French translation, click on the flags.


For this tutorial you will need the materials in the zip file below.

Thanks go to Maryse and to Sharlimar for their lovely tubes used in this tutorial.
Unzip the materials into a working folder you have created on your desktop named Basking in Moonlight. Please duplicate and close original tubes. Use the copies for your work so you will not lose the originals. Simply click on the .f1s Eye Candy files in Materials for them to install where they will show up for you to use. I have used the plugins AlienSkin Eye Candy 5/Impact/Perspective Shadow, Eye Candy 4000/Jiggle/Brownian Motion and AlienSkin Snap Art/Oil Paint. I also used Animation Shop. It is assumed you have a working knowledge of PSP to follow these directions. I have used PSPX9 for this tutorial but other versions may be used.
Use the scroll below to mark your place along the way.

1. In Materials Palette/Color, set Foreground to #ffffff, Background to #38425d.
2. New/New Image 900px by 700px. Flood fill with Background color.
3. Layers/New Raster Layer. Selections/Select All.
4. Open Tube2223_Night_Seems_misted_18_01_09.sdt.psp. Copy/Paste into Selection. Selections/Select None.
5. Set Blend Mode to Luminance (Legacy).
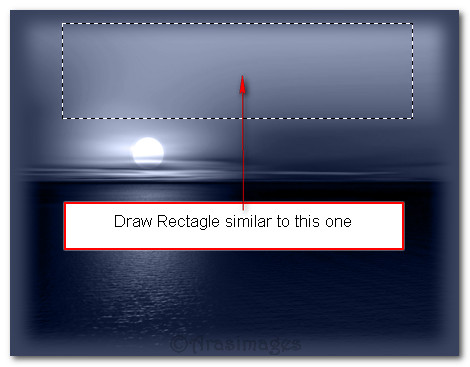
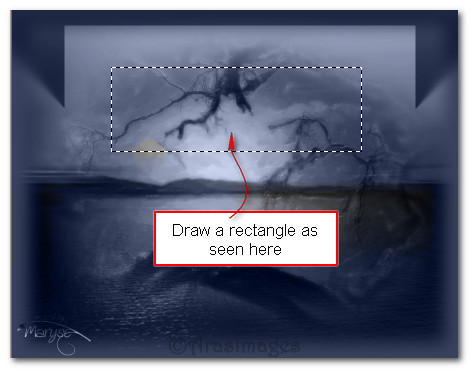
6. Using the Selections tool set to Rectangle,/Feather 0, select a portion of the image as seen below.
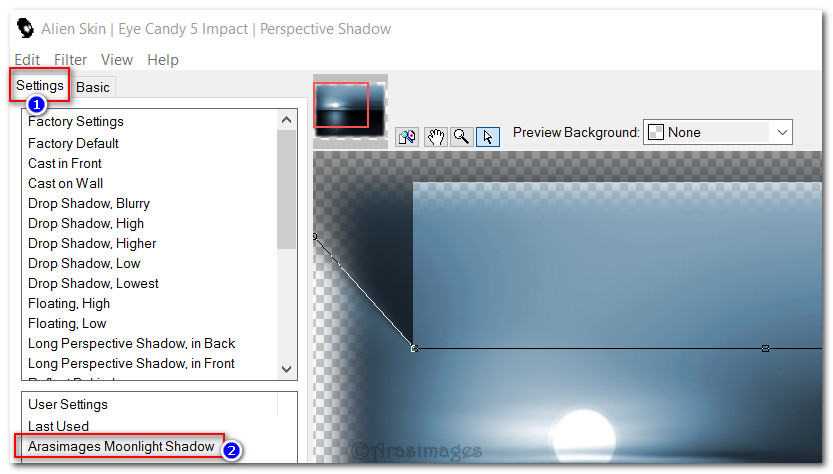
7. Effects/Alien Skin Eye Candy 5:Impact/Perspective Shadow. Settings/click on Arasimages Moonlight Shadow as seen in the first example and set Basic settings as seen in second example.

8. Selections/Select None.
9. Open MR_Sunset.png. Copy/Paste as New Layer.
10. Using Selections tool, select around Maryse's watermark. Press Delete key once. Deselect.
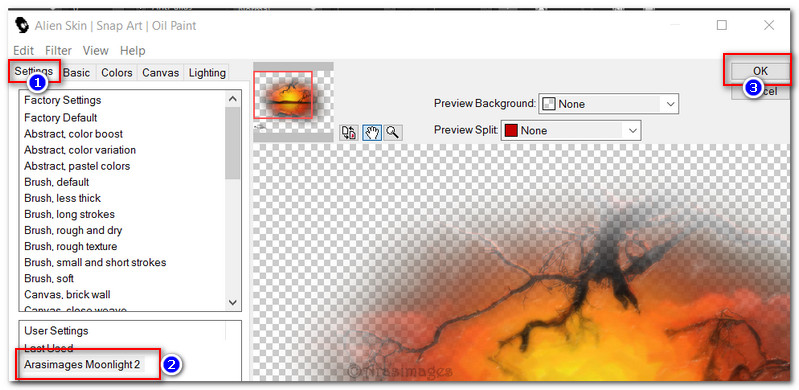
11. Effects/Alien Skin/Snap Art/Oil Paint. Click on Arasimages Moonlight 2 Settings, then OK.
12. Set Blend Mode to Luminance (Legacy).
13. Using Selections tool set to Rectangle, Feather 0, draw out a rectangle similar to example below.
14. Effects/Alien Skin Eye Candy 5:Impact/Perspective Shadow. Use same settings as you did in Step #7. Deselect.
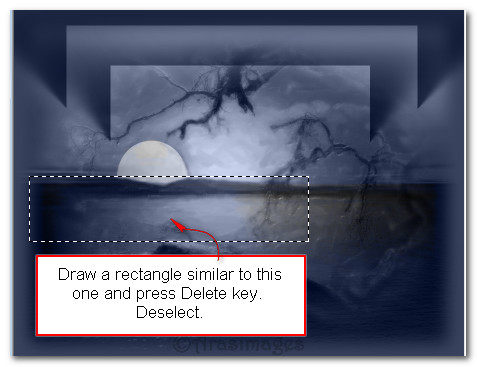
15. Open Moon.pspimage. Copy/Paste as New Layer. Place on the horizon below branches leaving the Opacity set to 46. Merge/Merge Down.
16. With Selections tool set to Rectangle, Feather 4, draw out a rectangle similar to what I have as seen below, press Delete key once. Deselect.
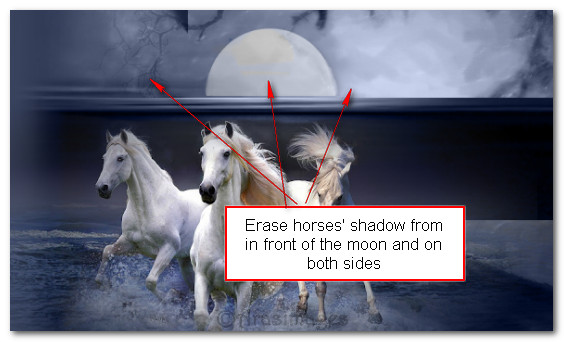
17. Open Misted Horses.pspimage. Copy/Paste as New Layer.
18. Place horses to the left so the horse's head is by the moon's left side near the horizon.
19. Using Eraser tool, erase the shadow of the horses away from the moon and on each side.
20. Drop Opacity to 95. Adjust/Sharpness/Sharpen.
21. Open MR_Oceana.png (woman). Using Eraser tool, erase or use the Selections tool, select and delete to eliminate Maryse's watermark.
22. Effects/3D Effects/Drop Shadow. Vertical -15, Horizontal -15, Opacity 45, Blur 25, color #000000.
23. Copy/Paste as New Layer. Place woman in bottom right corner to fit.
24. Adjust/Sharpness/Sharpen.
25. Open Deep Blue Swirl.pspimage. Copy/Paste as New Layer.
26. Image/Resize/Resize by 120%/Resize all layers unchecked.
27. Place Deep Blue Swirl in upper left corner.
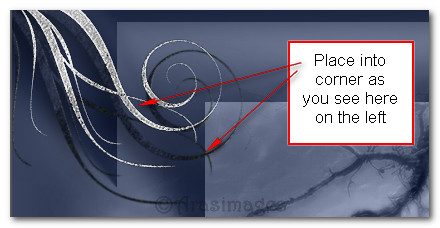
28. Open Silver Swirl.pspimage. Copy/Paste as New Layer.
29. Place Silver Swirl in upper left corner.
30. Effects/Edge Effects/Enhance. (See example below on where to place swirls).
31. Merge/Merge Down.
32. From text tool select Font Sloop Script Three, Size 72, Stroke 0.0, Stroke color #38425d, Font color #ffffff.

33. Type out the words "Basking in Moonlight". Convert to Raster Layer.
34. Move the text to the center of the inner perspective shadow.
TIP: Save your work at this point as .pspimage. Save often in case you need to go back and change anything.
35. Image/Add Borders/Add 1px border, Symmetric checked, color #ffffff.
36. Sign your name or leave your watermark if you wish.
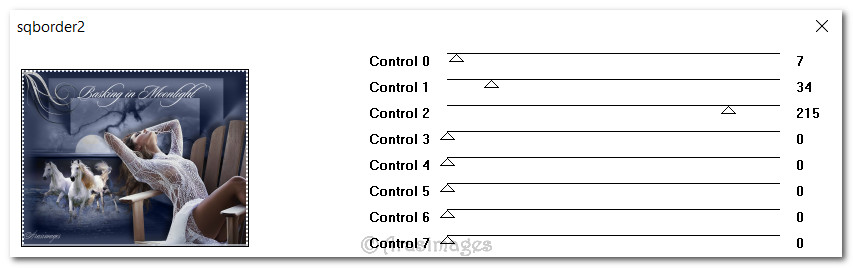
37. Effects/AFS IMPORT/sqborder2. Repeat.
ANIMATION OPTIONAL
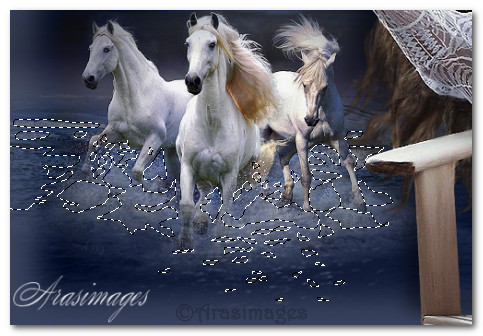
38. Expand your image to 150% for easier selection. Using the Freehand Selections tool set to settings as shown below, draw around the water you wish to animate. Here is where I have selected on my image but please feel free to select where you wish water movement. Left click to select, point to point, right click to close the area.
39. Duplicate 4 times having 5 layers in all. Close off all layers except the top layer.
40. Effects/Eye Candy 4000/Jiggle. Select Brownian Motion and settings as seen below. OK.

41. Close off top layer. Highlight and open next layer down. Effects/Eye Candy 4000/Jiggle. Click on Random Seed. OK.
42. Close off this layer. Highlight and open next layer down. Effects/Eye Candy 4000/Jiggle. Click on Random Seed. OK.
43. Close off this layer. Highlight and open next layer down. Effects/Eye Candy 4000/Jiggle. Click on Random Seed. OK.
44. Open and highlight bottom layer. Effects/Eye Candy 4000/Jiggle. Click on Random Seed. OK.
45. Selections/Select None.
46. Open all unopened layers. File/Save as/give your work a name (Basking in Moonlight) and save as file type PSP Animation Shop (*psp) in your working folder.
47. Open Animation Shop. File/Open your saved PSP Animation Shop (*psp) Basking in Moonlight image from your working folder.
48. Edit/Select All. Animation/Frame Properties-set at 15. (The higher the number, the slower the animation.)
49. Click on the Animation button in the top tool bar to see if your animation is working properly.
50. If it is as you wish, we will now save your work.
51. File/Save As. When the box comes up, give your work a name, type where to save it and click Save. Then click Next, Next, Next and Finish.
This tutorial was tested by PamelaD and Evatexas. Thanks ladies!
If you are going to use this tutorial for stationery, cards or place the tutorial/tag on another site, I would appreciate you contacting me for permission, giving Arasimages credit for the original tutorial and if possible, a link back to my site. Thank you.
Copyright © Arasimages All Rights Reserved