
Softness of Twilight
For a Danish, French, Italian, Spanish, German and Dutch translation, click on the flags.


For this tutorial you will need the materials in the zip file below.

Thank you K@rine, Patries and Nikita for the lovely tubes and the unknown tubers of the scraps used in this tutorial.
Unzip the materials into a new working folder you have created on your desktop named Softness of Twilight. Duplicate and close original tubes. Use the copies for your work so you will not lose the originals. Place the Pattern Cracked Paint.jpg into your PSP Files/Patterns folder. Place the Textura Texture into your PSP Files/Textures folder. I have used the Plugin Filters Unlimited 2.0/Distortion Filters/Swirl and PSP effects for this tutorial. I have used PSPX9 for this tutorial but other versions may be used.
Use the dandelion below to mark your place along the way.
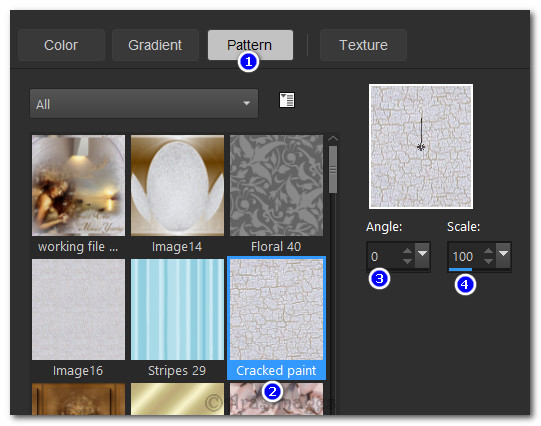
1. In Materials Palette, set Foreground to Pattern/Cracked paint. Angle 0/Scale 100. Background to #663d00.
2. New/New Image 736px by 766px. Flood fill with Pattern Cracked paint.
3. Effects/Geometric Effects/Circle. Transparent checked.
4. Using Magic Wand, select the circle. Selections/Invert.
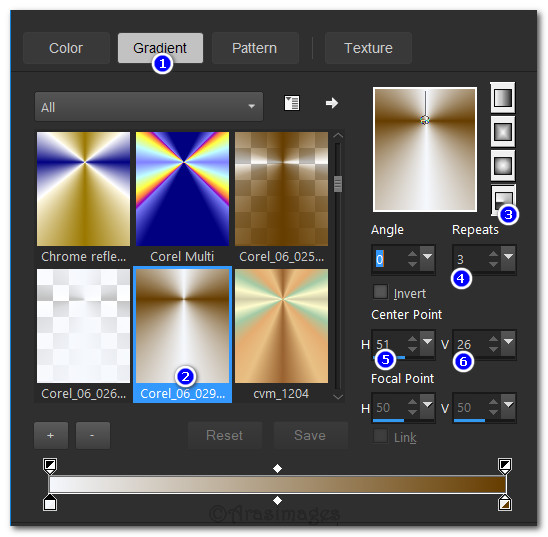
5. In Materials palette, change Foreground pattern to color #f8F7F2. Leave Background color set to #633d00. Create a Gradient using these colors, Gradient Corel_06_029 (foreground/background), Style Radial, Angle 0, Repeats 3, Invert unchecked, Center Points H-51/V-26/Focal Points all set to 50 (Grayed out).
6. Layers/New Raster Layer. Flood fill with Gradient inside the activated area.
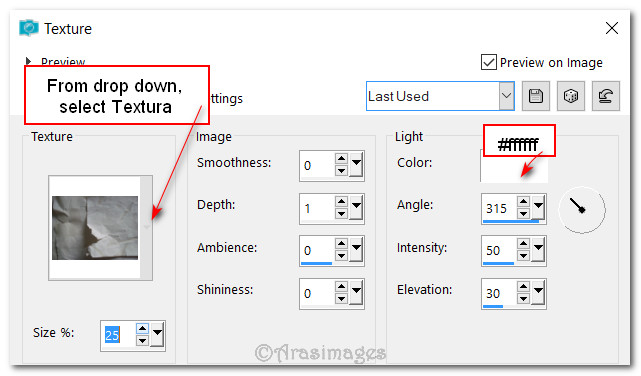
7. Effects/Texture Effects/Texture. Select Textura from drop down.
8. Effects/Edge Effects/Enhance.
9. Selections/Select None.
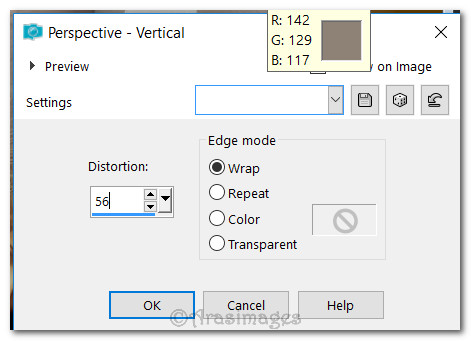
10. Drop down to Raster 1. Effects/Geometric Effects/Perspective-Vertical.
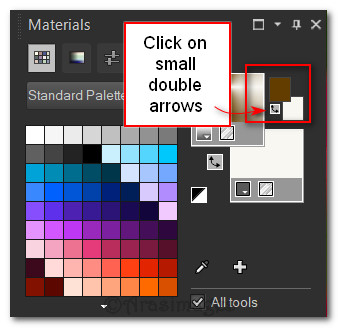
11. In Materials Palette, click on small double arrow to swap foreground with background.
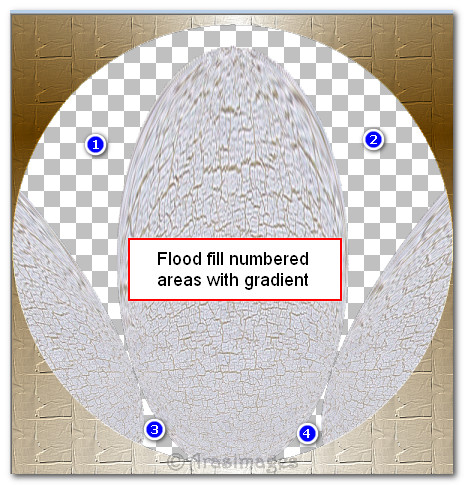
12. Flood fill transparent sections with changed Gradient.
13. Effects/3D Effects/Drop Shadow. Vertical -13, Horizontal -13, Opacity 60, Blur 20, color #633d00.
14. Go back to Raster 2.
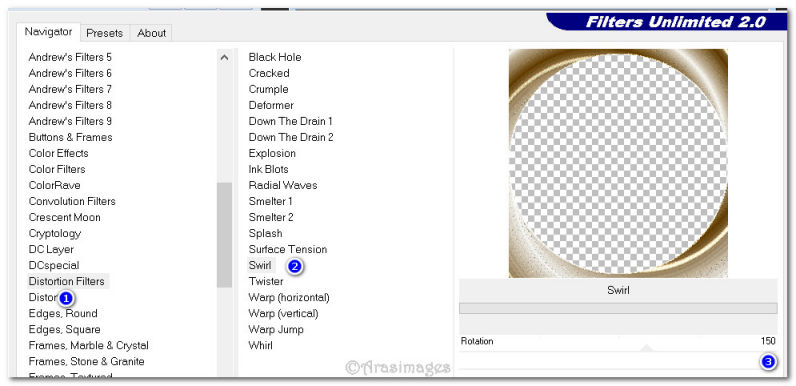
15. Effects/Filters Unlimited 2.0/Distortion-Filters/Swirl. Set Rotation to 150.
16. Open 1293040326_paysages_nikita.png of scene. Select around the watermark and delete. Deselect.
17. Copy/Paste as New Layer.
18. Image/Resize/Resize by 86%/Resize all layers unchecked.
19. Move toward right side of image.
20. Move Raster 2 above Raster 3.
21. Open Misted Light.png. Copy/Paste as New Layer.
22. Image/Resize/Resize by 68%/Resize all layers unchecked.
23. Move light to top middle so part of it is showing.
24. Open K@rine_dreams_Misted_Woman_3139_December_2015.pspimage. Copy/Paste as New Layer.
25. Place woman in bottom left corner.
26. Adjust/Sharpness/Sharpen.
27. Open 1Patries_paardenbloempluis-1-3-08.psp image. Copy/Paste as New Layer.
28. Effects/3D Effects/Drop Shadow. Vertical -13, Horizontal -13, Opacity 60, Blur 20, color #633d00.
29. Move dandelion to the right over the circle bottom.
30. Open Small Dandelion.Png. Copy/Paste as New Layer.
31. Place to the right of the larger Dandelion.
32. Duplicate. Move to the left of the larger Dandelion toward lady.
33. Duplicate. Image/Resize/Resize by 125%/Resize all layers unchecked.
34. Move resized dandelion between the large dandelion and smaller dandelion on the left.
35. Drop down to Raster 2 (outer circle layer).
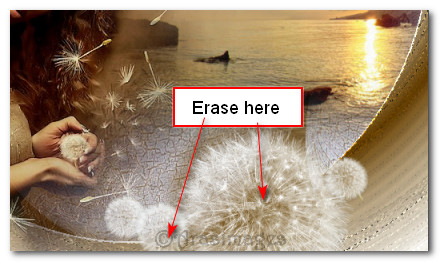
36. Using the Eraser tool, carefully erase the circle line from behind the small dandelion and the large dandelion. Go back to top layer to continue.
37. Image/Add Borders/Add 2px border, Symmetric checked, color #633d00.
38. Image/Add Borders/Add 2px border, Symmetric checked, color #f8F7F2. At this point, in Materials Palette, select Pattern and select your working image. Click OK.
39. Image/Add Borders/Add 45px border, Symmetric checked, color #633d00.
40. Select the 45px border with Magic Wand to activate it.
41. Layers/New Raster Layer.
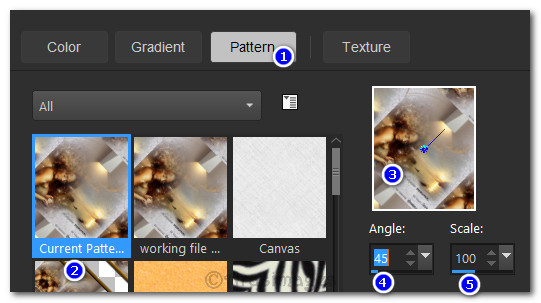
42. In Materials palette, select Pattern/Current Pattern.
43. Flood fill new layer with current pattern.
44. Adjust/Blur/Gaussian Blur. Radius of 7.
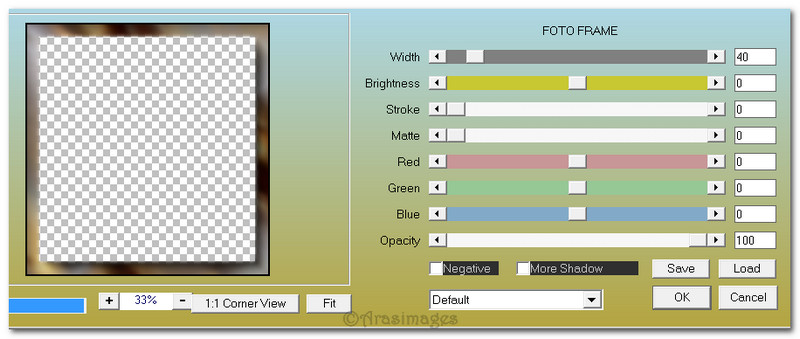
45. Effects/AAA Frames/Foto Frame.
46. Selections/Select None.
47. Image/Add Borders/Add 5 px border. Symmetric checked, color #f8f7f2.
48. Effects/AAA Frames/Foto Frame. Change top setting (Width) to 14.
49. Image/Add Borders/Add 2px border, Symmetric checked, color #f8f7f2.
50. Sign your name or leave your watermark if you wish. Merge/Merge Visible if necessary.
51. Save as .jpg or .png file named Softness of Twilight.
52. Animation Optional.
53. Copy your finished file named Softness of Twilight. Open Animation Shop. Paste as New Animation.
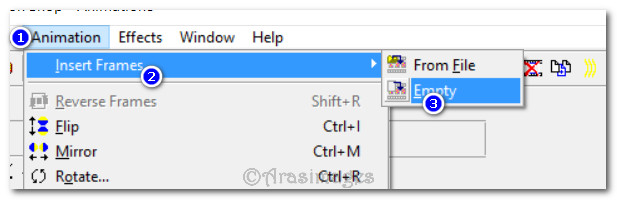
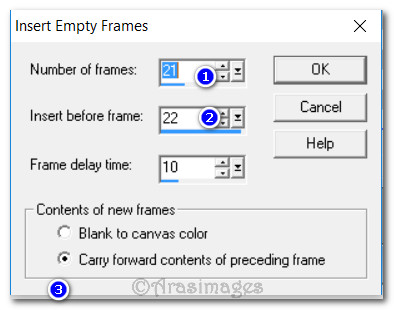
54. From the task bar at the top, select Animation/Insert Frames/Empty. Put 21 in the top space as the number of frames you will need to add, and 22 in the Insert before frame space. Leave Frame delay time set to 10. Place a dot in Carry forward contents of preceding frame. (See examples below if this method of duplication is new to you). Highlight the first frame. Edit/Select All.
55. File/Open Dandelion Animation by Barbara of Arasimages.psp file. Click on the first frame. Edit/Select All. (This highlights all of the frames). COPY.
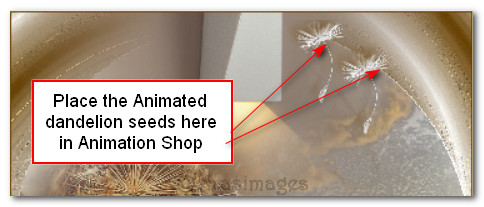
56. Go back to your main image with 22 frames and right click within the first frame. Paste/Paste into Selected Frame. Set the dandelions at the top as shown below. Left click to set them in place. All of your frames should now have the dandelions in them. If not, make certain all are highlighted as you go through the steps.
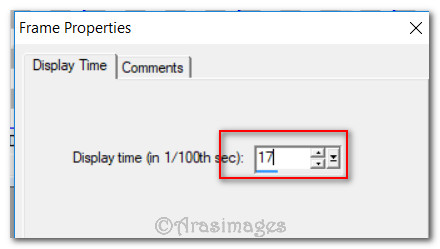
57. Animation/Frame Properties. Set the Display time at 17. Click OK. The higher the number the slower the dandelions will fall.
58. From the tool bar at the top of Animation Shop, select the View Animation button and click on it to view your animation. If it is not what you like, undo your animation work and start over. When you are satisfied with your work, then save.
59. File/Save As. When the Save As box appears, name where you are going to save it (working folder), give your work a name and leave it set to save as a .gif file. Save. As the boxes appear, continue to click on Next, Next, Next then Finish.
This tutorial was tested by PamelaD and Evatexas 09-02-17. Thanks ladies!
If you are going to use this tutorial for stationery, cards or place the tutorial/tag on another site, I would appreciate you contacting me for permission, giving Arasimages credit for the original tutorial and if possible, a link back to my site. Thank you.
Copyright © Arasimages All Rights Reserved