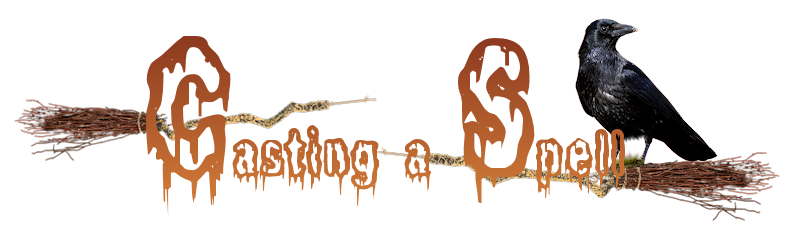
Casting a Spell
For Danish, Italian, Dutch, Spanish, French and German translations, click on the flags.


For this tutorial you will need the materials in the zip file below.

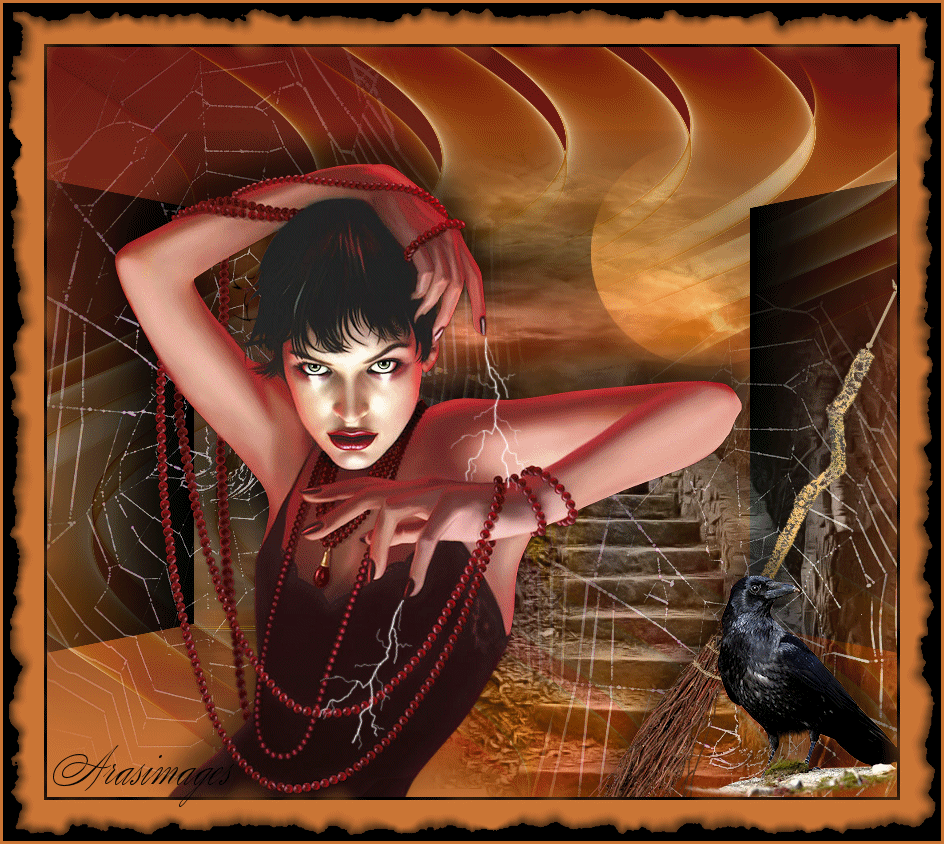
Thanks go to Nikita for the crow, broom and stairs, Macha for her moon tube and to Lori Rhae for the woman tube.
Unzip the materials into a working folder you have created on your desktop named Casting a Spell. Please duplicate and close original tubes using the copies for your work so you will not lose the originals. Place Mask in your PSP Files/Mask folder. Export the Brush into your PSP Files/Brushes folder. I have used the plugins AbstractCurves 1.1 and AlienSkin Xenofex 2/Burnt Edges in this tutorial. It is assumed you have a working knowledge of PSP to follow these directions. I have used PSP2018 for this tutorial but other versions may be used.
Use the little broom below to mark your place along the way.
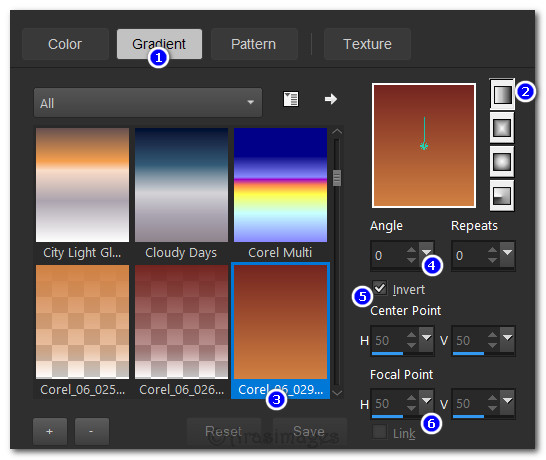
1. In Materials Palette, set Foreground to #691813, Background to #cc7636. Gradient/Corel_06_029 (Foreground/Background). Set the Style to Linear, Angle/Repeats 0, Center Points and Focal Points are null, Invert checked.
2. New/New Image 850px by 750px. Flood fill with Gradient.
3. Layers/New Raster Layer.
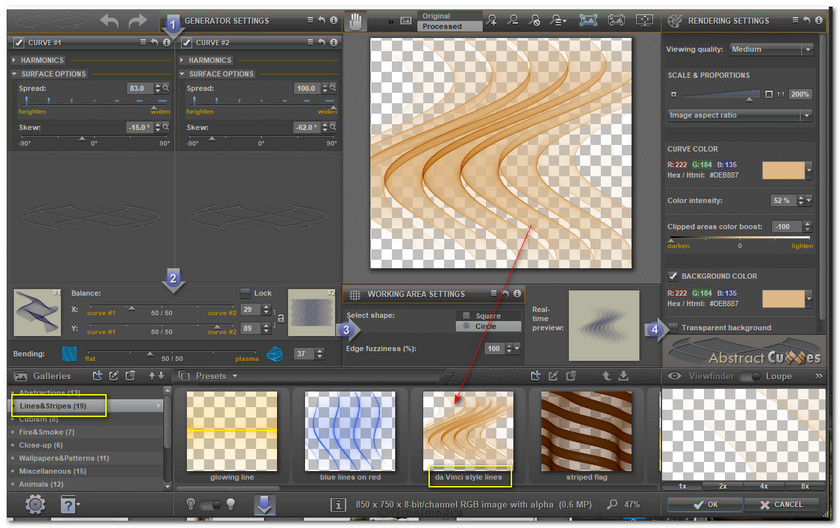
4. Effects/AbstractCurves. Select da Vinci style lines found under Lines&Stripes at bottom left of program. You may have to enlarge the tutorial page to see the settings. If you do not have this program I have included this layer in the materials.
5. Open Macha oct08 misted theislandofnoreturn.pspimage. Copy/Paste as New Layer.
6. Layers/New Raster Layer. Flood fill with #000000.
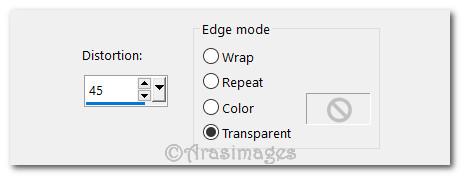
7. Effects/Geometric Effects/Perspective-Horizontal.
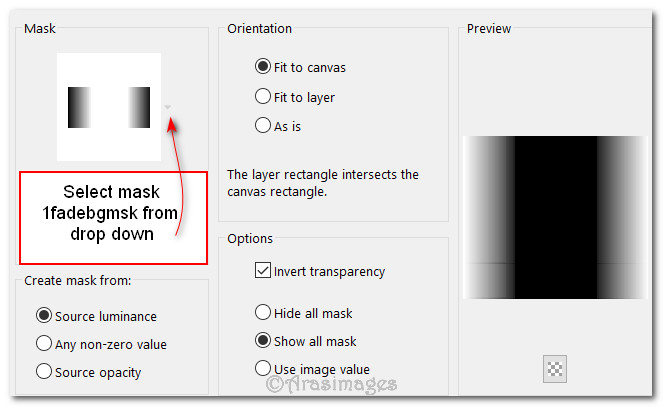
8. Layers/Load/Save Mask/Load Mask from Disk. Select Mask 1fadebgmsk from drop down. Load.
9. Merge/Merge Group.
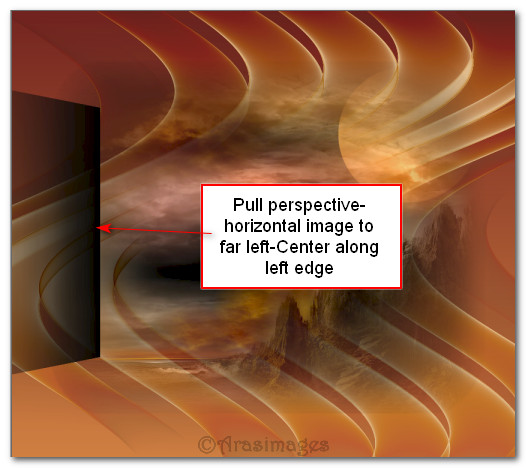
10. Pull geometric black image to the far left so only part of it shows. Center along left side.
11. Duplicate. Image/Mirror/Mirror Horizontal.
12. Open 1381043672_halloween_nikita.png of steps. Select around her watermark and delete. Deselect.
13. Copy/Paste as New Layer. Move to right bottom corner.
14. Lower Opacity down to 74. Luminance (Legacy).
15. Open 1381043701_halloween_nikita.png of cobweb. Select around her watermark and delete. Deselect.
16. Copy/Paste as New Layer. Move to bottom right corner.
17. Effects/Edge Effects/Enhance.
18. Duplicate. Move duplicated image toward center of left side.

19. Open 12283242554_halloween_nikita.png of broom. Select around her watermark and delete. Deselect.
20. Copy/Paste as New Layer.
21. Effects/3D Effects/Drop Shadow. Vertical -26, Horizontal 3, Opacity 50, Blur 31, color #000000.
22. Move broom into bottom right corner.
23. Open 13810437184_halloween_nikita.png of crow. Select around her watermark and delete. Deselect.
24. Copy/Paste as New Layer.
25. Image/Resize/Resize by 40%/Resize all layers unchecked.
26. Adjust/Sharpness/Sharpen. Move crow into bottom right corner.
27. Effects/3D Effects/Drop Shadow. Vertical -26, Horizontal 3, Opacity 50, Blur 31, color #000000.
28. Open Red Pearls by Arcturus_LR-07-14-09.pspimage of woman. Copy/Paste as New Layer.
29. Image/Resize/Resize by 84%/Resize all layers unchecked.
30. Adjust/Sharpness/Sharpen.
31. Effects/3D Effects/Drop Shadow. Vertical -26, Horizontal 3, Opacity 50, Blur 31, color #000000.
32. Image/Add Borders/Add 3px border, Symmetric checked, color #000000.
33. Image/Add Borders/Add 35px border, Symmetric checked, color #cc7636.
34. Image/Add Borders/Add 3px border, Symmetric checked, color #000000.
35. Image/Add Borders/Add 3px border, Symmetric checked, color #cc7636.
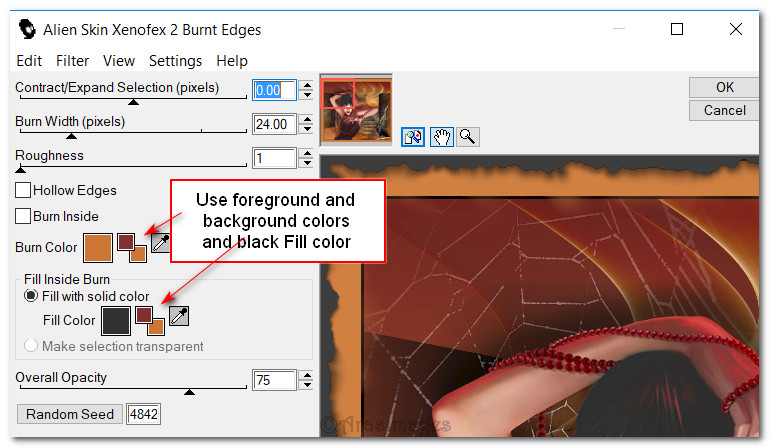
36. Effects/AlienSkin Xenofex 2/Burnt Edges.
37. Image/Add Borders/Add 3px border, Symmetric checked, color #cc7636.
38. Add your watermark or sign your name if you wish.
39. OPTIONAL ANIMATION INSTRUCTIONS BELOW.
40. Duplicate your working layer 9 times having 10 layers total.
41. Close off all but the top layer. Keep top layer active.
42. From the tool bar, select the Paint Brush tool/Lightening. Set the Rotation to 75, Size 118. See settings below for other settings.

43. In the Materials Palette, set the foreground color to #ffffff. Left click twice in the same spot from her top forefinger.
44. Close off top layer. Go down one layer, open and highlight it. Set the Size to 142, Rotation to 128 and double click three times at the end of her middle finger of lower hand. Close off layer.
45. Skip one layer and go down to the next layer, open and highlight.
46. Change the Rotation to 145, left click three times from forefinger of lower hand. Close off layer.
47. Go down to the next layer. Change rotation to 131 and left click three times in same spot from middle finger of lower hand. Close off layer.
48. Moving down, skip next layer, open and highlight next layer.
49. Change the Size to 156, Rotation to 89. Left click three times from ring finger on lower hand.
50. Change Rotation to 66, left click twice from top forefinger. Close this layer off.
51. Move down one layer, open and highlight.
52. Change Rotation to 79, Size to 120. Left click three times from ring finger of lower hand.
53. Change Rotation to 164. Left click three times from forefinger of bottom hand. Close off layer.
54. Skip next layer going down, open and highlight bottom layer.
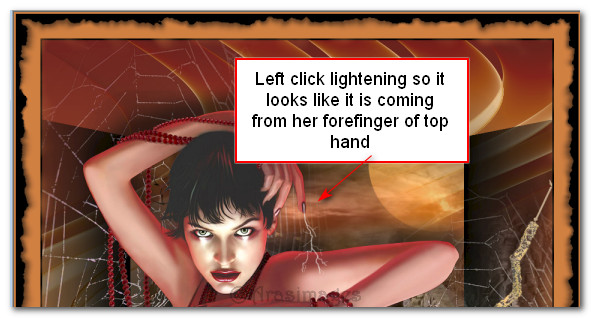
55. Change the size to 183 and Rotation to 110. Left click three times from little finger of lower hand. Change Rotation to 81. Left click three times from forefinger of top hand.
56. Open all layers. File/Save As. Save as PSP Animation Shop (*psp) file.
57. Open Animation Shop. File/Open saved file. Highlight first layer. Edit/Select All.
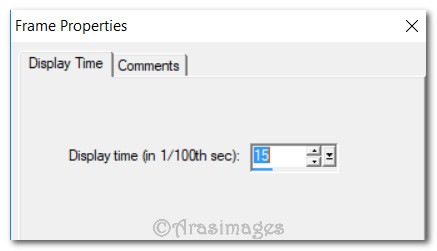
58. From top tool bar, click on Animation/Frame Properties. Set the Display time to 15. (The higher the number the slower the animation).
59. Click on the View Animation button at the top on the tool bar. Check the animation and if you like your work, then we will now save.
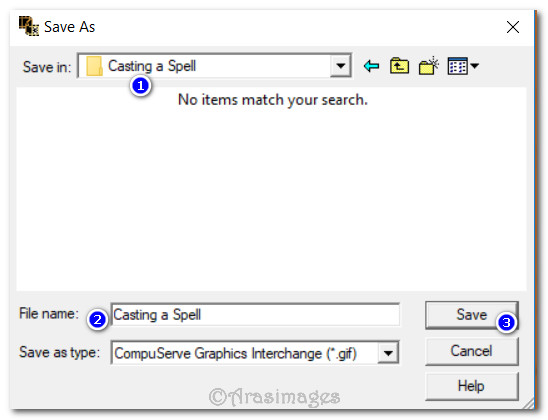
60. File/Save As. When the Save As box appears, direct where to save (Working folder is a good choice), give your file a name, leave Save as Type as is (*gif) and click Save.
61. As the boxes change, click on Next, Next, Next and Finish.
62. Your animated tutorial is now finished and saved.
This tutorial was tested by PamelaD and Evatexas October 2017. Thanks ladies!
If you are going to use this tutorial for stationery, cards or place the tutorial/tag on another site, I would appreciate you contacting me for permission, giving Arasimages credit for the original tutorial and if possible, a link back to my site. Thank you.
Copyright © Arasimages All Rights Reserved