
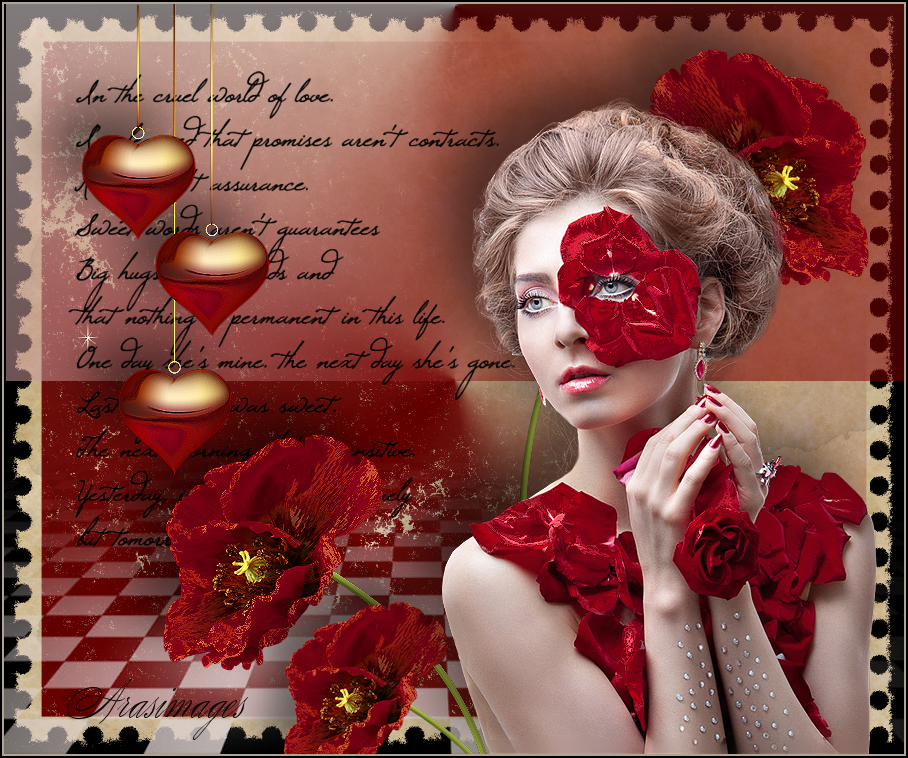
Red is for Valentines
For an Italian, German, Danish, Spanish, French and Dutch translation, click on the flags.


For this tutorial you will need the materials in the zip file below.

Thanks go to Cibi-Bijoux for the lady tube and various unknown tubers for the scraps.
Unzip the materials into a working folder you have created on your desktop named Red is for Valentines. Place the Gradient into your PSP files/Gradient folder and the Mask into your PSP Masks folder. Please duplicate and close original tubes using the copies for your work so you will not lose the originals. I have used the plugin Filter Forge 6 in this tutorial. It is assumed you have a working knowledge of PSP to follow these directions. I have used PSP2018 for this tutorial but other versions may be used.
Use the little pin below to mark your place along the way.

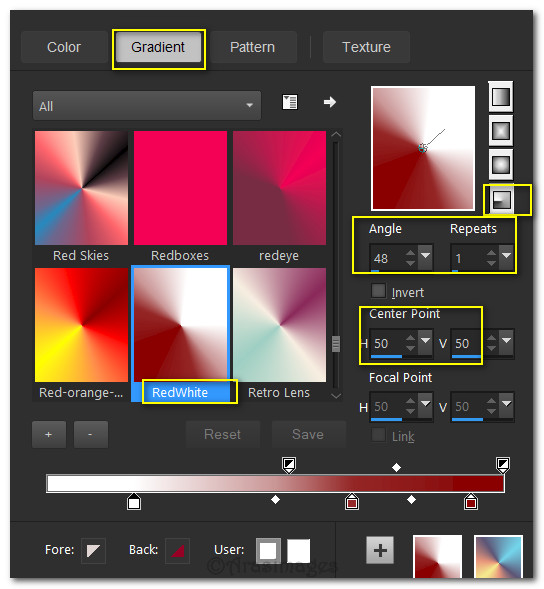
1. In Materials Palette, set Foreground to #ddd1cf, Background to #8c0219. Create a new Gradient using the following settings: Gradient. Radial/Angle 48. Repeats 1. Invert unchecked. Center Point H 50/V 50. Focal Points Null. Set the color slider as seen below and click OK to save OR...use the RedWhite Gradient supplied in Materials.
2. New/New Image 900px by 750px. Flood fill with Gradient.
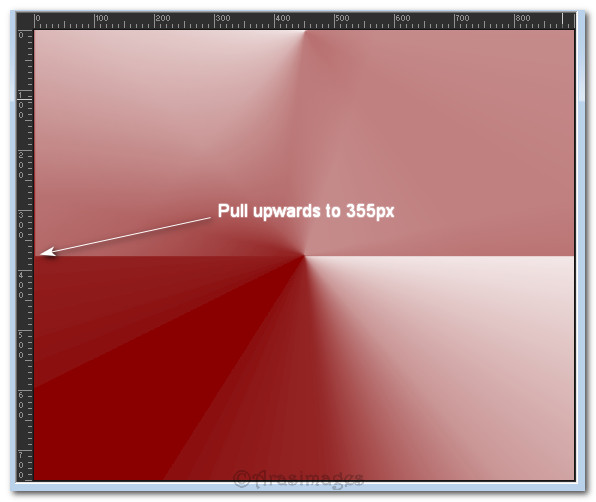
3. Duplicate. Drop Opacity down to 54 on duplicated layer. Pull layer upwards to 355px.
4. Image/Image Mirror/Mirror Horizontal. It should now look like the snapshot below.
5. Layers/New Raster Layer. Flood fill with Foreground color.
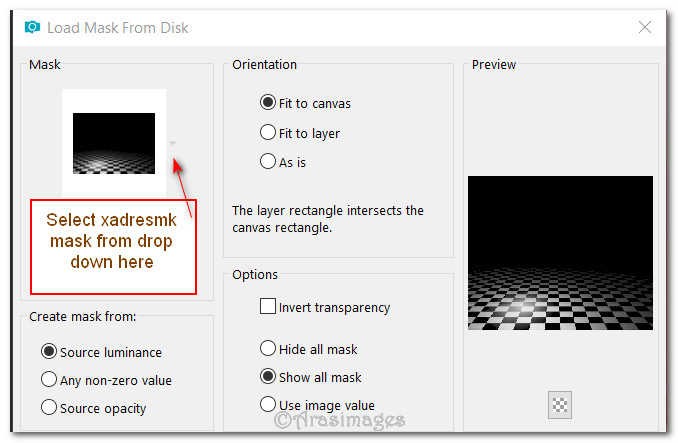
6. Layers/Load/Save Mask. Load Mask from Disk. Select Mask xadresmk from drop down. Load.
7. Merge/Merge Group. Move down to and activate Raster 1 Layer.
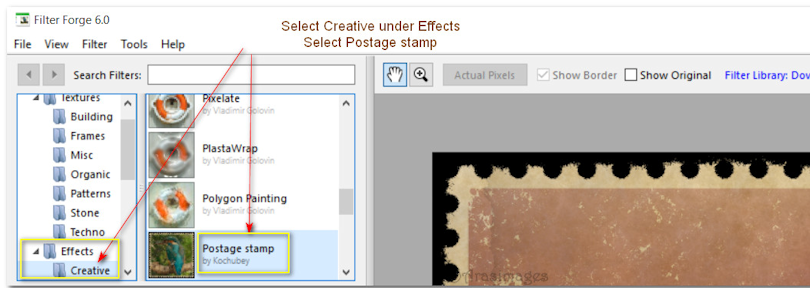
8. Effects/Filter Forge/Filter Forge 6. Use settings Effects/Creative and Postage Stamp.
9. Move up to top layer and activate to continue.
10. Open 0_9184d_2c138433_XL.pspimage. Copy/Paste as New Layer.
11. Image/Resize/Resize by 75%/Resize all layers unchecked.
12. Move into upper left corner.
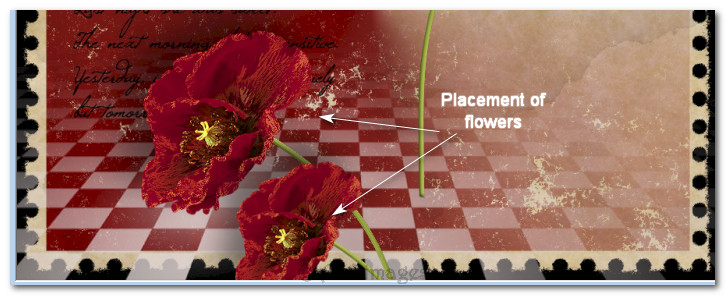
13. Open 0_9a5e7_75bd27d5_XL.png image of flower. Copy/Paste as New Layer.
14. Image/Mirror/Mirror Horizontal. Place in upper right corner.
15. Effects/3D Effects/Drop Shadow. Vertical -30, Horizontal -30, Opacity 50, Blur 70, color #000000.
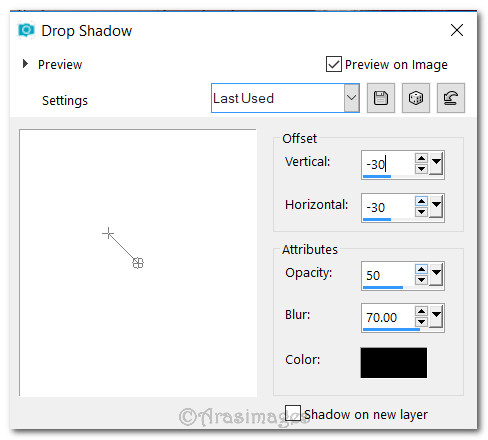
16. Paste as New Layer again. Place into bottom left corner. Apply drop shadow as in step #15.
17. Adjust/Sharpness/Sharpen.
18. Duplicate. Image/Resize/Resize by 75%/Resize all layers unchecked.
19. Place duplicated flower below and to the right of flower in bottom left corner.
20. Open 0_6c9ba_bcb7ef87_L.png image of hearts. Copy/Paste as New layer.
21. Effects/3D Effects/Drop Shadow. Vertical -30, Horizontal -30, Opacity 50, Blur 70, color #000000.
22. Effects/Edge Effects/Enhance.
23. Move into top left corner.
24. Open Petales_de_roses_CibiBijoux.pspimage of lady. Copy/Paste as New Layer.
25. Effects/3D Effects/Drop Shadow. Vertical -30, Horizontal -30, Opacity 50, Blur 70, color #000000.
26. Move lady into bottom right corner.
27. Adjust/Sharpness/Sharpen.
28. Image/Add Borders/Add 2px border, Symmetric checked, Color #ddd1cf.
29. Image/Add Borders/Add 2px border, Symmetric checked, Color #000000.
30. Sign your name or leave your watermark if you wish. Save as a .jpg or .png file.
This tutorial was tested by PamelaD and Evatexas January 2018. Thanks ladies!
If you are going to use this tutorial for stationery, cards or place the tutorial/tag on another site, I would appreciate you contacting me for permission, giving Arasimages credit for the original tutorial and if possible, a link back to my site. Thank you.
Copyright © Arasimages All Rights Reserved