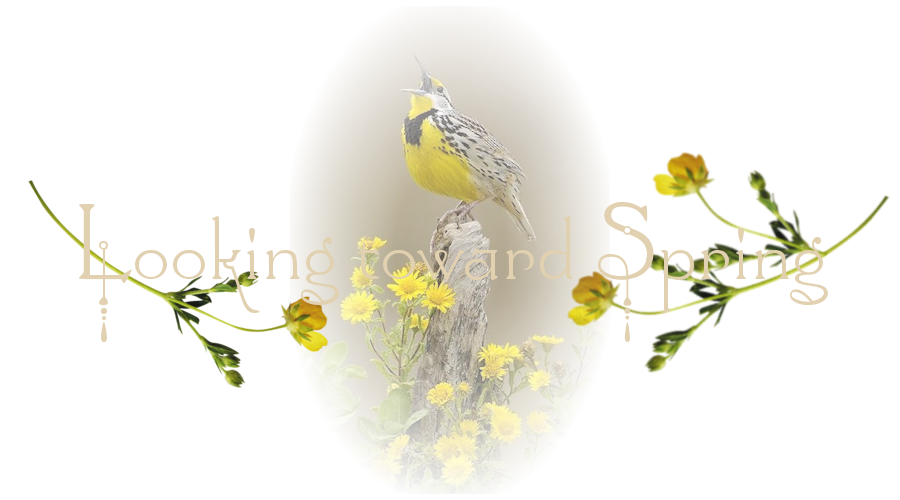
Looking Toward Spring
For an Italian, Spanish, Danish, Dutch, French and German translation, click on the flags.


For this tutorial you will need the materials in the zip file below.

Thanks go to the various unknown tubers for the lady tube and scraps.
Unzip the materials into a working folder you have created on your desktop named Looking toward Spring. Please duplicate and close original tubes using the copies for your work so you will not lose the originals. Place the Mask Nevoa in your PSP/Masks folder. I have used the plugins Harry's Filters/Artistic, Filters Unlimited/ Background Designers IV/sf10-Diamond Mountain and Freeware Filters/Tripoli in this tutorial. It is assumed you have a working knowledge of PSP to follow these directions. I have used PSP2018 for this tutorial but other versions may be used.
Use the little flower below to mark your place along the way.

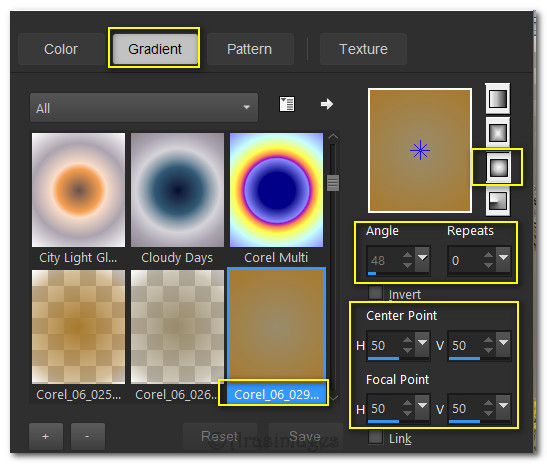
1. In Materials Palette, set Foreground to #918261, Background to #a06f20. Create a new Gradient using the following settings: Sunburst, Angle null/Repeats 0. Invert unchecked. Center and Focal Points H 50/V 50.
2. New/New Image 950px by 700px. Flood fill with Gradient.
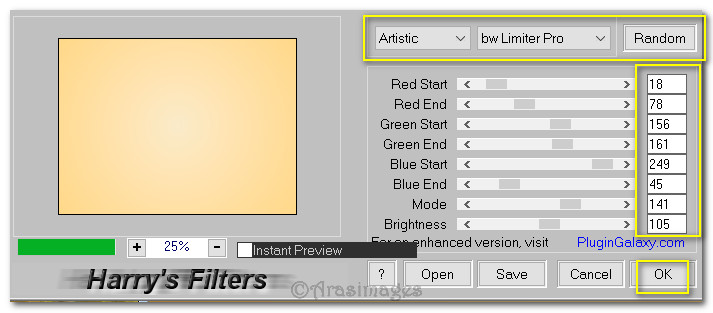
3. Effects/Harry's Filters/Harry's Filters/Artistic.
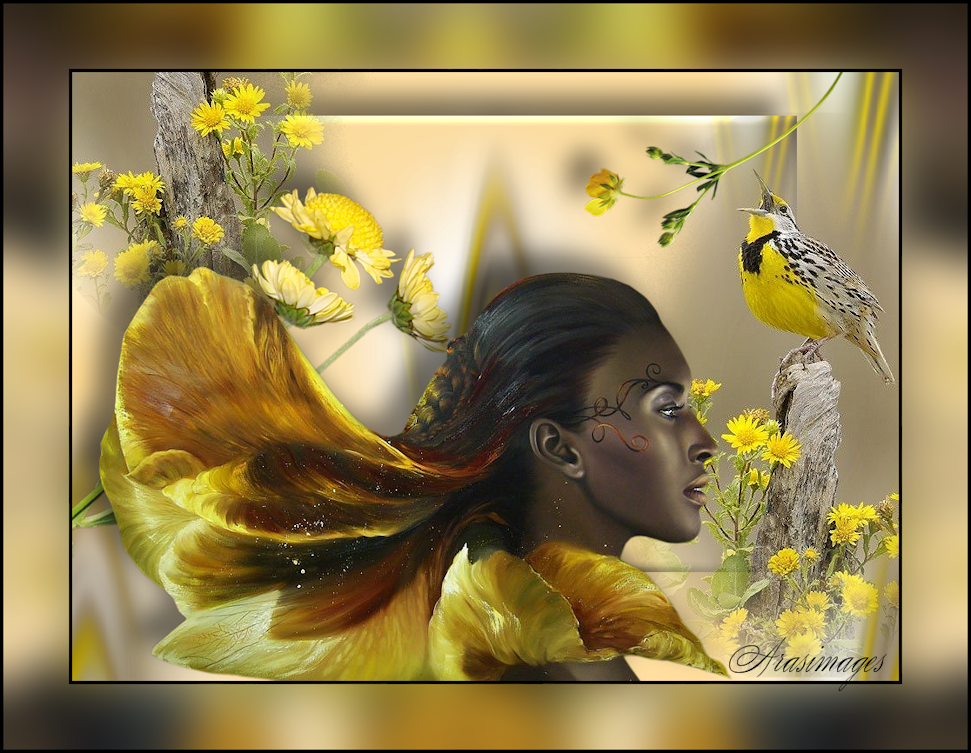
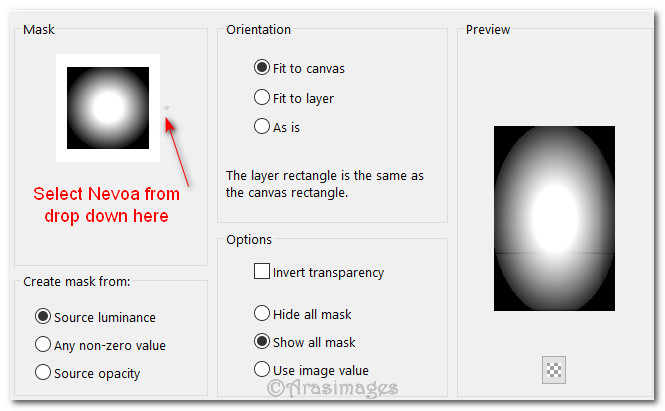
4. Open Meadowlark.png of bird. Layers/Load/Save Mask/Load Mask from Disk. Choose NEVOA from Drop Down. Load
5. Merge/Merge Group. Copy. Minimize as we will use it again.
6. Go back to working image. Paste as New Layer.
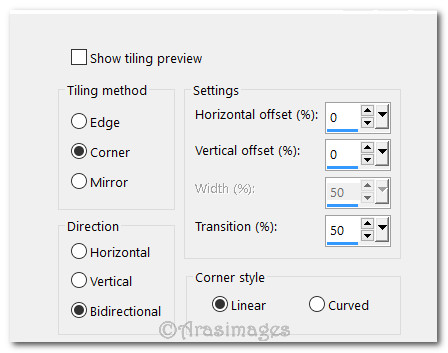
7. Effects/Image Effects/Seamless Tiling.
8. Adjust/Blur/Gaussian Blur. Radius 14.
9. Effects/Filters Unlimited/&Background Designers IV/sf10 Diamond Mountain.

10. Merge/Merge Down. Duplicate.
11. Image/Resize/Resize by 75%/Resize all layers unchecked.
12. Using Magic Wand, click on outer edge of Layer Raster 1 to activate it. Selections/Invert.
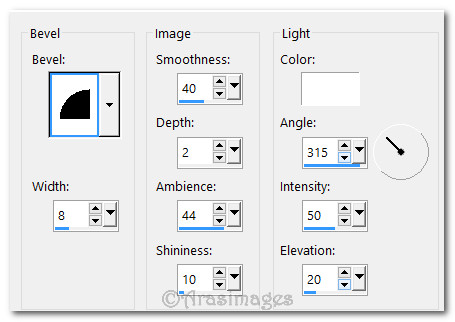
13. Effects/Inner Bevel.
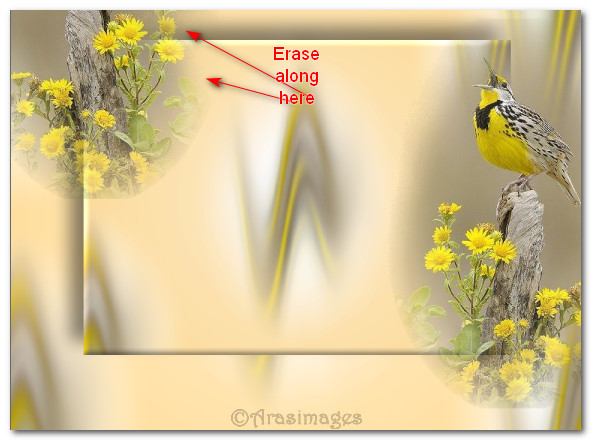
14. Effects/3D Effects/Drop Shadow. Vertical -23, Horizontal -23, Opacity 50, Blur 39, color #000000.
15. Deselect. Move upward to 50px from top.
16. Maximize Meadowlark. Copy/Paste as New Layer.
17. Duplicate. Merge/Merge Down.
18. Adjust/Sharpness/Sharpen. Move to right side of image.
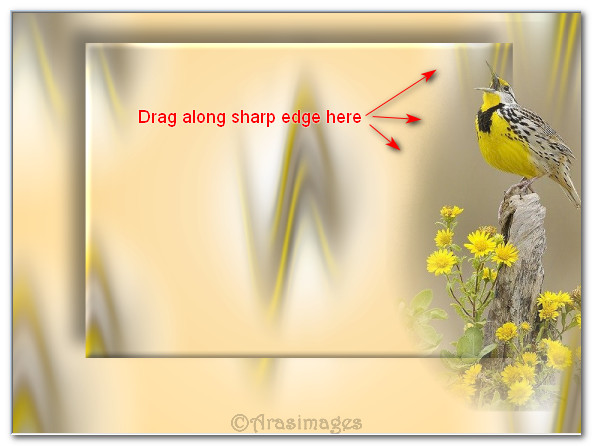
19. From Tool bar select Background Eraser. Change Hardness to 0, Density to 50. While holding down the Back key, Left click and drag to soften along sharp edge of Meadowlark's left side as seen below.

20. Duplicate Meadowlark. Image/Mirror/Mirror Horizontal. Place image into top left corner.
21. Select the Background Eraser once more and repeating directions for erasing in Step #19, erase some of the darkness along right side of flowers where shown below to soften the edge.
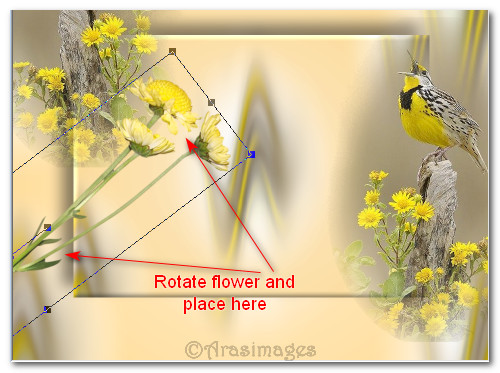
22. Open LargeFlower.png. Copy/Paste as New Layer.
23. Using the Pick tool, rotate the flower to the left so it is on an angle. Move into place in upper left corner near other flowers.
24. Effects/3D Effects/Drop Shadow. Vertical -23, Horizontal -23, Opacity 50, Blur 39, color #000000.
25. Adjust/Sharpness/Sharpen.
26. Open lvfjKGvuhgbzPQGkhnuAsdIBso8.png of woman. Copy/Paste as New Layer.
27. Place woman in bottom center and a little left in image.
28. Effects/3D Effects/Drop Shadow. Vertical -23, Horizontal -23, Opacity 50, Blur 39, color #000000.
29. Adjust/Sharpness/Sharpen.
30. Open SmallFlower.png. Copy/Paste as New Layer.
31. Image/Mirror/Mirror Horizontal. Image/Flip/Flip Vertical.
32. Effects/3D Effects/Drop Shadow. Vertical -23, Horizontal -23, Opacity 50, Blur 39, color #000000.
33. Adjust/Sharpness/Sharpen. Place in upper right corner.
34. Image/Add Borders/Add 4px border, Symmetric checked, color #000000.
35. Image/Add Borders/Add 75px border, Symmetric checked, color #918261.
36. Activate large border with Magic Wand.
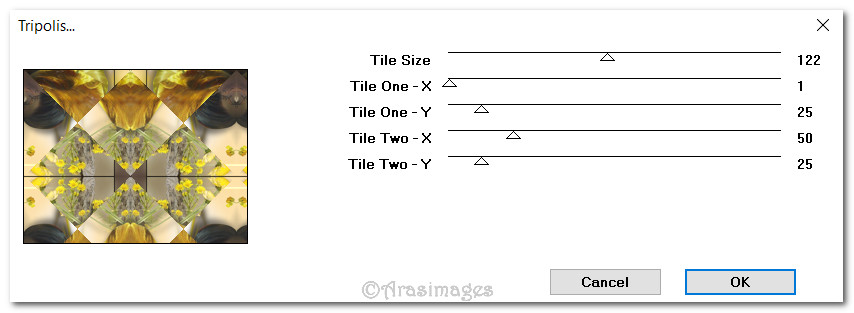
37. Effects/Freeware Filters/Tripoli.
38. Adjust/Blur/Gaussian Blur. Radius 27.
39. Selections/Select None.
40. Image/add Borders/add 4px border, Symmetric checked, color #000000.
41. Sign your name or leave your watermark if you wish. Save as a .jpg or .png file.
This tutorial was tested by PamelaD and Evatexas January 2018. Thanks ladies!
If you are going to use this tutorial for stationery, cards or place the tutorial/tag on another site, I would appreciate you contacting me for permission, giving Arasimages credit for the original tutorial and if possible, a link back to my site. Thank you.
Copyright © Arasimages All Rights Reserved