

Walking in my Garden
For a Dutch, Italian, Spanish, Danish, French and German translation, click on the flags.


For this tutorial you will need the materials in the zip file below.

Thanks go to Maryse for the lady tube and to Soleil for the various scraps.
Unzip the materials into a working folder you have created on your desktop named Walking in my Garden. Please duplicate and close original tubes using the copies for your work so you will not lose the originals. Place the Gradient in your PSP/Gradients folder. Place Mask in your PSP/Masks folder. I have used the plugins Abstract Curves, Carolaine and Sensibility/CS-Reflection and Carolain and Sensibility/CS-Lines, DCSpecial/Crystal and Filters Unlimited 2.0/Edges and Square/Square Edge 12 in this tutorial. It is assumed you have a working knowledge of PSP to follow these directions. I have used PSP2018 for this tutorial but other versions may be used.
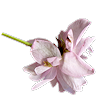
Use the little flower below to mark your place along the way.
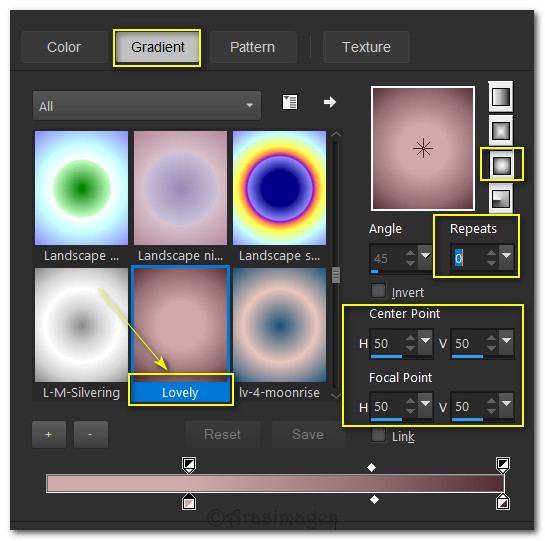
1. In Materials Palette, set Foreground to #cea2a4, Background to #49212b. Set the Gradient to the following settings using Gradient Lovely: Sunburst, Angle null/Repeats 0. Invert unchecked. Center and Focal Points H 50/V 50.
2. New/New Image 850px by 600px. Flood fill with Gradient.
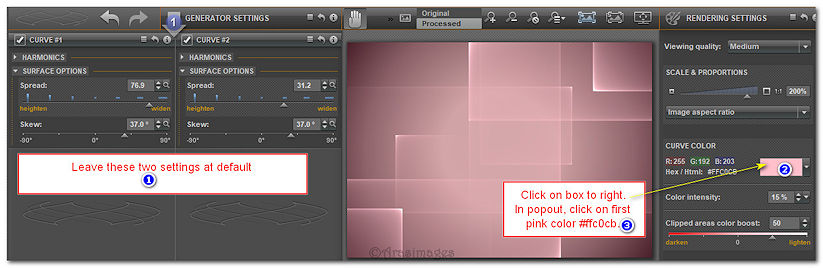
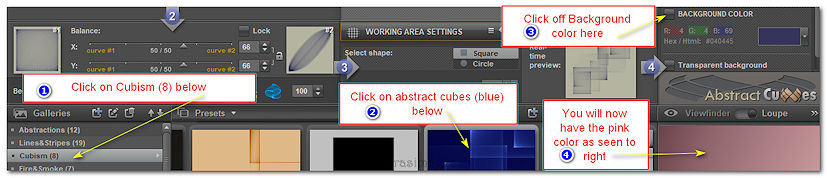
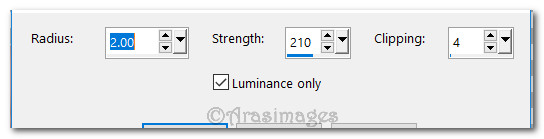
3. Effects/AbstractCurves. Leave numbers 1, 2 and 3 as default. On the right under Curve Color, click on the color rectangle. A box will pop out and click on the top left color. This will place #FFC0CB in the color box. Drop down to Backgrond color and make sure it is unchecked. Make sure Transparent background is unchecked under #4. At the bottom left choose Cubism (8). Use the arrows to find abstract cubes (blue) in bottom tray. The color in the box at the right should now be pink. Click OK. See the two snapshots below to show you where to click. Hint: To better view the examples below, scroll your page larger.
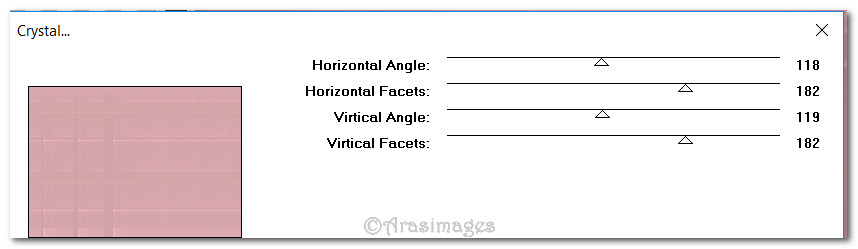
4. Effects/DCSpecial/Crystal.
5. Effects/Edge Effects/Enhance.
6. Layers/New Raster Layer. Change Background to color #8a966c. Right click to flood fill.
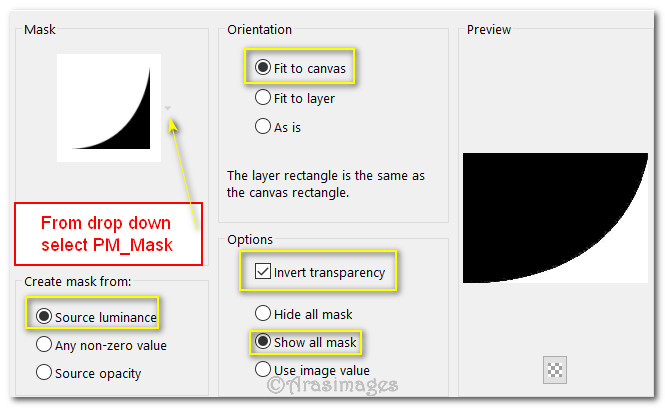
7. Layers/Load/Save Mask/Load Mask from Disk. From drop down select PM_Mask. Load.
8. Merge/Merge Group.
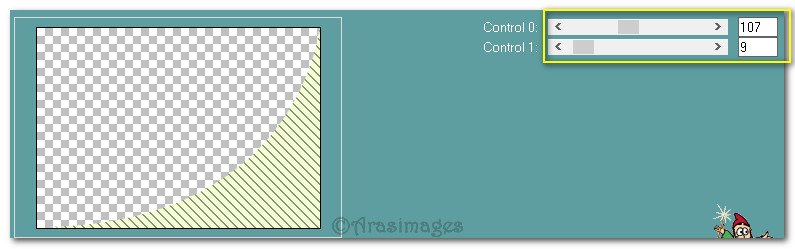
9. Effect/Carolaine and Sensibility/CS-DLines.
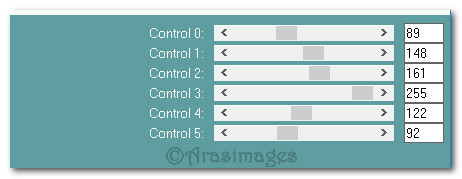
10. Effect/Carolaine and Sensibility/CS-Reflection.
11. Effects/3D Effects/Drop Shadow. Vertical -12, Horizontal -12, Opacity 50, Blur 30, color #000000.
12. Duplicate. Image/Mirror/Mirror Horizontal. Go down and activate Raster 1 to continue working.
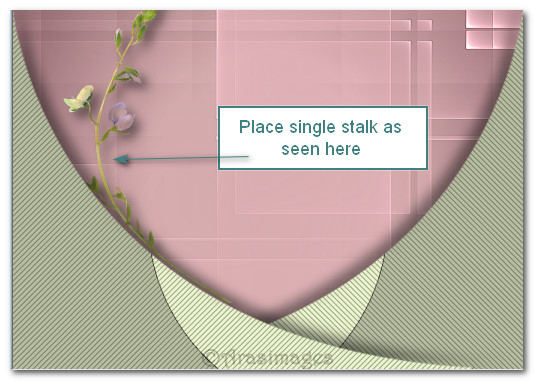
13. Open SingleStalk.png. Copy/Paste as New Layer.
14. Effects/3D Effects/Drop Shadow. Vertical -17, Horizontal 12, Opacity 40, Blur 30, color #000000.
15. Place in upper left corner. See snapshot of placement.
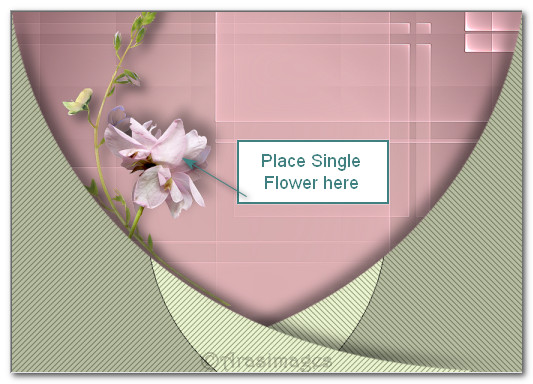
16. Open SingleFlower.png. Copy/Paste as New Layer.
17. Effects/3D Effects/Drop Shadow. Vertical -17, Horizontal 12, Opacity 40, Blur 30, color #000000.
18. Adjust/Sharpness/Sharpen.
19. Move to the right of SingleStalk.
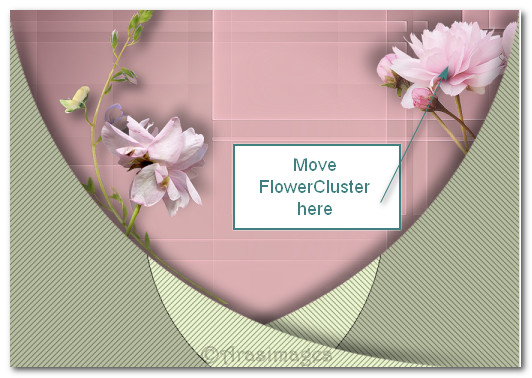
20. Open FlowerCluster.png. Copy/Paste as New Layer.
21. Effects/3D Effects/Drop Shadow. Vertical -15, Horizontal -17, Opacity 40, Blur 35, color #000000.
22. Adjust/Sharpness/Sharpen.
23. Move to upper right corner.
24. Activate the top layer. Open SingleStalk.png. Copy/Paste as New Layer.
25. Effects/3D Effects/Drop Shadow. Vertical -15, Horizontal -17, Opacity 40, Blur 35, color #000000.
26. Adjust/Sharpness/Sharpen.
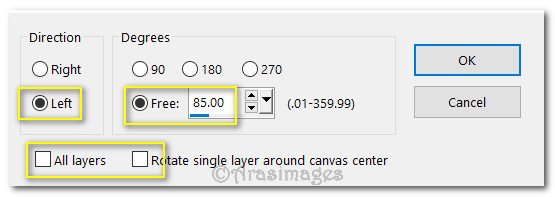
27. Image/Free Rotate. Rotate Left by 85%.
28. Place in center bottom along curves of green mask.
29. Open FlowerCluster.png. Copy/Paste as New layer. Image/Mirror/Mirror/Horizontal.
30. Effects/3D Effects/Drop Shadow. Vertical -15, Horizontal -17, Opacity 40, Blur 35, color #000000.
31. Adjust/Sharpness/Sharpen. Move to bottom right corner.
32. Open MR_Woman bunch of Flowers.pspimage. Copy/Paste as New Layer.
33. Select Maryse's watermark with Selection Tool, press Delete key once. Deselect.
34. Image/resize/Resize by 70%/Resize all layers unchecked.
35. Adjust/Sharpness/Sharpen.
36. Effects/3D Effects/Drop Shadow. Vertical -15, Horizontal 17, Opacity 40, Blur 30, color #000000.
37. Move this layer below the Mask Layers. Go to the top of the layer palette to continue.
38. Open SOLEIL_19_12_06_papier_bapier_brisa03.png. Using flood fill tool, left click on the paper image with the current Foreground Gradient. Copy/Paste as New Layer.
39. Image/Resize/Resize by 70%/Resize all layers unchecked.
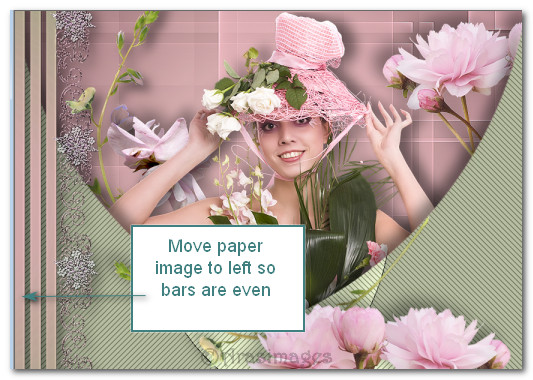
40. Pull paper image to left side until your lines all match in size. See snapshot below.
41. Adjust/Sharpness/Unsharp Mask.
42. Effects/3D Effects/Drop Shadow. Vertical 12, Horizontal 12, Opacity 50, Blur 25, color #000000.
43. Duplicate. Image/Mirror/Mirror Horizontal.
44. Open SingleFlower.png. Copy/Paste as New Layer.
45. Effects/3D Effects/Drop Shadow. Vertical -15, Horizontal -17, Opacity 40, Blur 35, color #000000.
46. Adjust/Sharpness/Sharpen. Move to left center along mask curve.
47. Open FlowerCluster.png. Copy/Paste as New layer.
48. Image/Resize/Resize by 70%/Resize all layers unchecked.
49. Adjust/Sharpness/Sharpen.
50. Effects/3D Effects/Drop Shadow. Vertical -15, Horizontal -17, Opacity 40, Blur 35, color #000000.
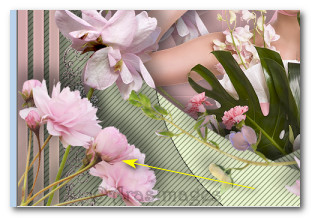
51. Using Pick Tool, center move node, adjust the flower so it sits on an angle as seen below.
52. Move to bottom left corner.
53. Drop down to the Group - Raster 2 of the green mask. Lower opacity down to 37. Scroll your image larger for more exact work. Using the Eraser tool or Selection tool set to Point to Point. Erase the mask off the lady's arm. Deselect. Raise the opacity back to normal.

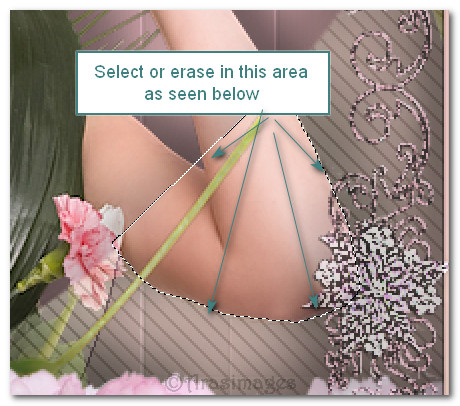
54. I also used the Eraser tool to erase the shadow on the rest of her arm above the selection.
55. Go to top of layers to continue.
56. Image/Add Borders/Add 3px border, Symmetric checked, color #30341f.
57. Image/Add Borders/Add 30px border,Symmetric checked, color #cea2a4.
58. Select wide border with Magic Wand.
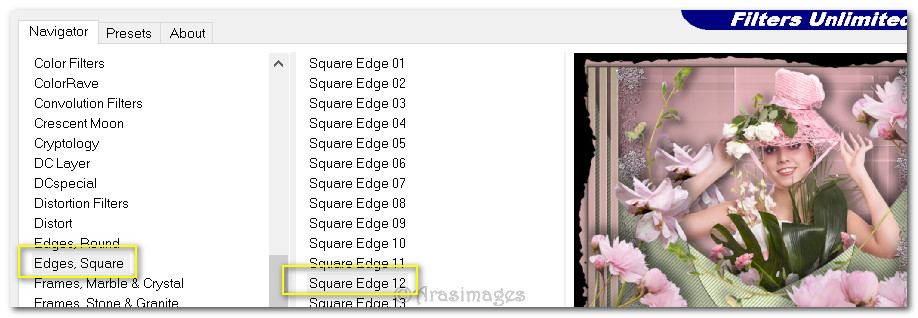
59. Effects/Filters Unlimited 2.0/Edges, Square/Square Edge 12. Apply.
60. Effects/3D Effects/Inner Bevel.

61. Flood fill the outer black edge with Background color #30341f. Deselect.
62. Sign your name or leave your watermark if you wish. Save as a .jpg or .png file.
This tutorial was tested by PamelaD and Evatexas February 2018. Thanks ladies!
If you are going to use this tutorial for stationery, cards or place the tutorial/tag on another site, I would appreciate you contacting me for permission, giving Arasimages credit for the original tutorial and if possible, a link back to my site. Thank you.
Copyright © Arasimages All Rights Reserved