Furry Friends
For a French, Italian, Danish, Spanish, Dutch and German translation, click on the flags.


For this tutorial you will need the materials in the zip file below.

Thanks go to Nikita for the animal tubes and to PamelaD for tubing the little girls found on the internet, and to the unknown tubers of the various scraps.
Unzip the materials into a working folder you have created on your desktop named Furry Friends. Please duplicate and close original tubes using the copies for your work so you will not lose the originals. Place Selection in your PSP/Selections folder. Export Arasimages_Grass_Clump.png into PSP Files/Brushes. It is assumed you have a working knowledge of PSP to follow these directions. The plugin AAA Frames/Textures has been used, all other effects are those of PSP itself. All drop shadows are the same except for one step. I have used PSP2018 for this tutorial but other versions may be used.
Use the little flower below to mark your place along the way.

1. In Materials Palette, set Foreground to #a1a554, Background to #c1b4d6.
2. New/New Image 990px by 650px. CTRL+A to select all.
3. Open 0_8ca95_c84caa04_XXL.png (Background). Copy/Paste into Selection. Deselect.
4. Layers/New Raster Layer. CTRL+A.
5. Open 0_6d2b9_b3b77f91_S.png. Copy/Paste into Selection. Deselect.
6. Lower Opacity down to 73. Effects/Edge Effects/Enhance.
7. Open 0_7822c_273084c2_XL.png of ball. Copy/Paste as New Layer.
8. Using Color Changer, right click to change color to #c1b4d6. Move ball down into bottom edge of image and to left.
9. Selections/Select All. Selections/Float. Selections/Defloat.
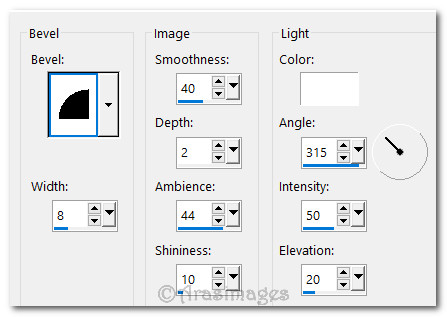
10. Effects/3D Effects/Inner Bevel.
11. CTRL+D to deselect.
12. Open 0_81668_2a95bea_L.png of brick road. Copy/Paste as New Layer.
13. Drop Opacity down to 64.
14. Open 0_8b04c_313e91fe_L.png of grass. Copy/Paste as New Layer.
15. Image/Resize/Resize by 80%/Resize all layers unchecked.
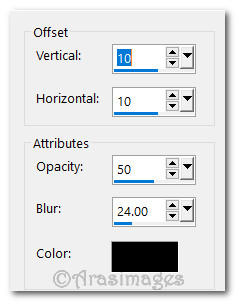
16. Effects/3D Effects/Drop Shadow. Vertical 10, Horizontal 10, Blur 50, Opacity 24, color #000000.
17. Drop Opacity down to 70. Move into bottom right corner leaving a little space between the grass bottom and edge of image.
18. Duplicate. Image/Mirror/Mirror Horizontal. Move into bottom left corner a little lower than the one on right side.
19. Layers/New Raster Layer.
20. Selections/Load/Save Selections/Load Selection from Disk. Select ArasimagesFurryFriends Selection from drop down and Load.
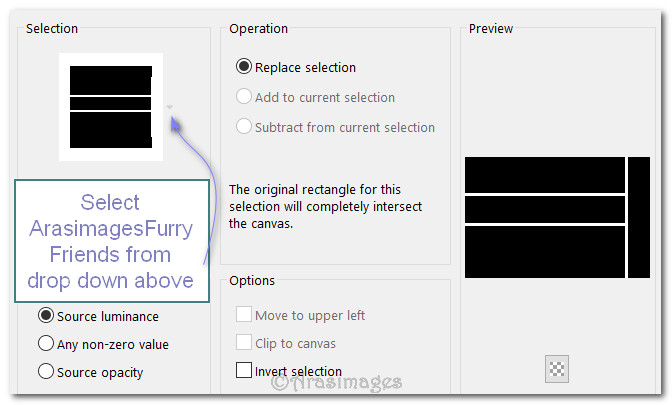
21. With color #fefefe in Foreground, left click once in the Selection.
22. Effects/3D Effects/Inner Bevel.
23. Effects/3D Effects/Drop Shadow. Vertical 10, Horizontal 10, Blur 50, Opacity 24, color #000000.
24. CTRL+D to deselect.
25. Open 0_9622a_1d43bb2c_XL.png of flowers. Copy/Paste as New Layer.
26. Image/Resize/Resize by 55%/Resize all layers unchecked.
27. Adjust/Sharpeness/Sharpen.
28. Effects/3D Effects/Drop Shadow. Vertical 10, Horizontal 10, Blur 50, Opacity 24, color #000000.
29. Place in bottom right corner.
30. Duplicate. Move to bottom left corner.
31. Open 0_9622a_1d43bb2c_XL.png of flowers. Copy/Paste as New Layer.
32. Image/Resize/Resize by 45%/Resize all layers unchecked.
33. Effects/3D Effects/Drop Shadow. Vertical 10, Horizontal 10, Blur 50, Opacity 24, color #000000. Move to right a little over flower.
34. Open 0_9622a_1d43bb2c_XL.png flowers again. Copy/Paste as New Layer. Resize by 27%.
35. Image/Mirror/Mirror Horizontal.
36. Adjust/Sharpeness/Sharpen.
37. Effects/3D Effects/Drop Shadow. Vertical 10, Horizontal 10, Blur 50, Opacity 24, color #000000.
38. Place small cluster of flowers on top of the fence on the left side of image.
39. Open Cloud.png. Copy/Paste as New Layer.
40. Image/Mirror/Mirror Horizontal. Move to left side above fence.
41. Paste as New Layer again. Place to the right of first cloud. Paste a third time and place toward the right side of image.
42. Open 12926130930_animaux_nikita.png of rabbit. Copy/Paste as New Layer.
43. Using Selections tool or Eraser tool, erase Nikita's watermark off tube.
44. Image/Resize/Resize by 27%/Resize all layers unchecked. Image/Mirror/Mirror Horizontal.
45. Adjust/Sharpness/Sharpen. Apply same drop shadow as you have been using. Place rabbit on path in lower center. You can adjust later.
46. Open LilGirlBack.png. Copy/Paste as New Layer.
47. Image/Resize/Resize by 80%/Resize all layers unchecked.
48. Adjust/Sharpness/Sharpen. Apply same drop shadow as you have been using. Place little girl in front of rabbit on brick path.
49. Layers/New Raster Layer.
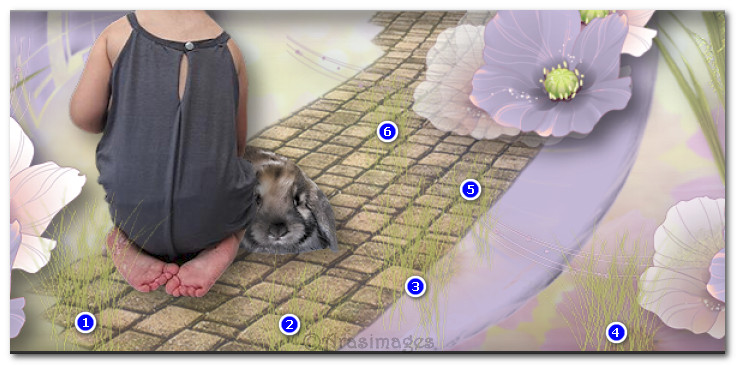
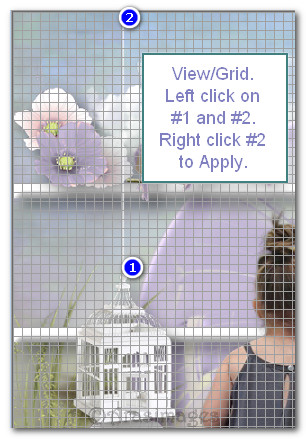
50. From Tool bar/Paint Brushes, select Arasimages_Grass_Clump brush. Using color #a1a554 in foreground, left click in places indicated below. Click once in spaces 1 through 4 with size 286. Change size to 192 and click in spaces 5 and 6.

51. Adjust/Sharpness/Sharpen. Apply drop shadow used in this tutorial and duplicate.
52. Open 1926130930_animaux_nikita.png of rabbit. Select around the watermark and delete.
53. Image/Resize/Resize by 27%/Resize all layers unchecked.
54. Copy/Paste as New Layer on the working image.
55. Place resized rabbit between flower and little girl's feet in bottom left corner.
56. Open LilGirlFront.png. Copy/Paste as New Layer. Apply drop shadow used throughout tutorial.
57. Place her between flowers on right with feet at bottom edge of image.
58. Open 12926131361_animaux_nikita.png of duck babies. Select around watermark and delete/Resize by 23%.
59. Copy/Paste as New Layer on working image. Place to the left of LilGirlFront at the bottom of the image.
60. Apply drop shadow used throughout tutorial.
61. Open 12926131307_animaux_nikita.png. Eliminate watermark and resize by 20%. Apply drop shadow.
62. Copy/Paste as New Layer on working image. Place to the right of little girl's feet near bottom right corner.
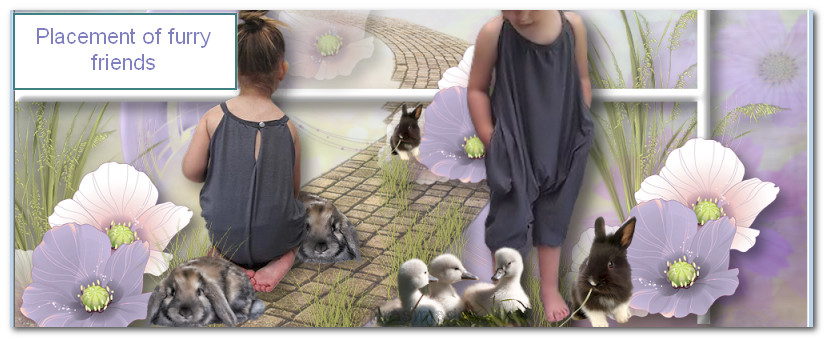
63. Duplicate. Resize by 50%. Move on path just under fence and left of flower. See below for placement of furry friends.
64. Open 0_77e351_21832e0f_XL.png of three birds. Resize by 23%. Apply drop shadow used in tutorial.
65. Copy/Paste as New Layer on working image. Adjust/Sharpness/Sharpen. Move to right side of flowers on top of fence.
66. Open 0_ac61c_39e824b6_XL.pspimage of birdcage. Resize by 50%. Adjust/Sharpness/Sharpen. Apply drop shadow.
67. Copy/Paste as New Layer on working image. Place to the left above flowers at bottom and over fence rail.
68. View/check Grid to help draw a straight line. Change Foreground color to #f6f6f6. Using the Pen Tool with settings as seen below, left click on top of birdcage then at the top edge of working image. Apply. Uncheck Grid.

69. Convert to Raster Layer. Duplicate.
70. Merge/Merge Down. Effects/3D Effects/Drop Shadow. Vertical 10, Horizontal 6, Opacity 50, Blur 9, color #000000.
71. Open Bow.png. Copy/Paste as New Layer.
72. Resize by 77%. Adjust/Sharpness/Sharpen. Move to right side of image over fence as seen in final image.
73. Image/Add Borders/Add 3px border. Symmetric checked, color #a1a554.
74. Image/Add Borders/Add 30px border, Symmetric checked, color #f6f6f6.
75. Using Magic Wand, select the 30px border to activate it.
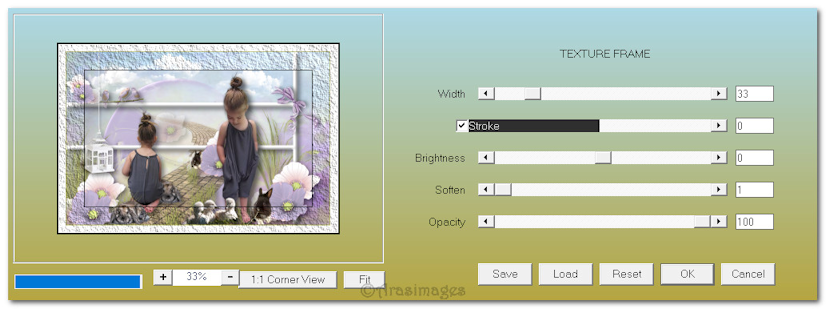
76. Effects/AAA Frames/Textured Frame.
77. Effects/3D Effects/Inner Bevel.
78. CTRL+D to deselect. Resize your image by 90%.
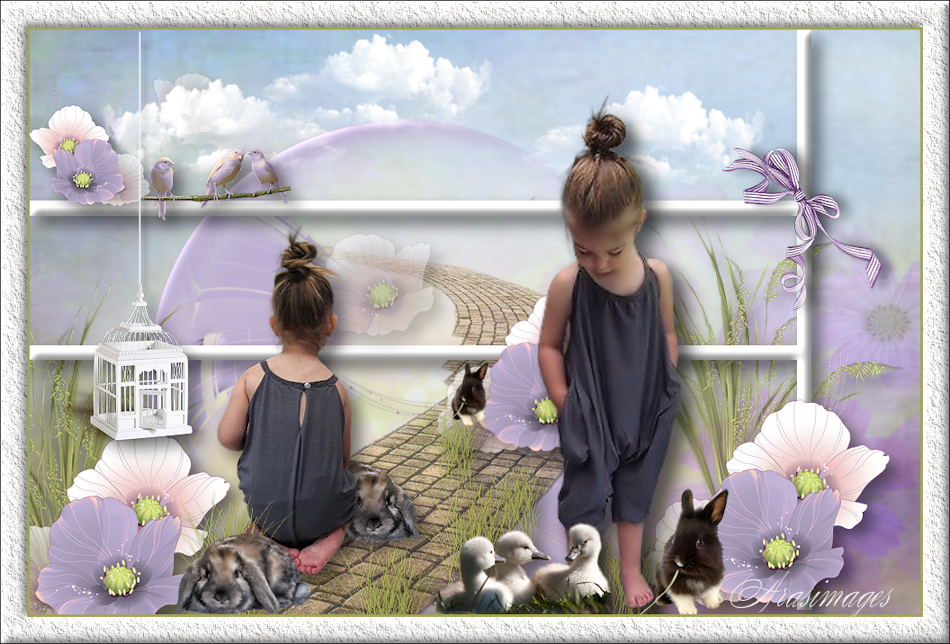
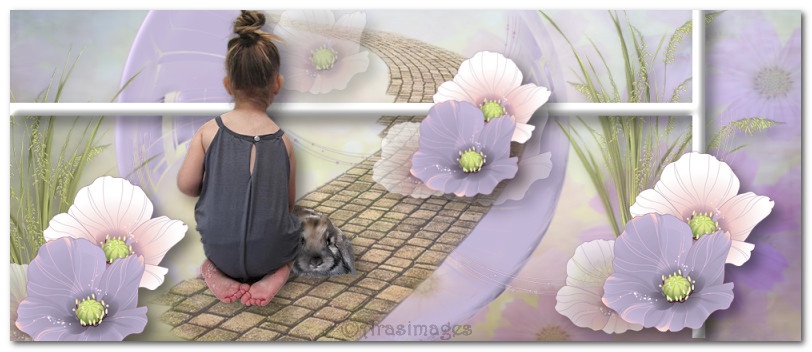
79. Add your name or watermark here if you wish. Save as a .jpg or .png file named Furry Friends.
This tutorial was tested by PamelaD and Evatexas March 2018. Thanks ladies!
If you are going to use this tutorial for stationery, cards or place the tutorial/tag on another site, I would appreciate you contacting me for permission, giving Arasimages credit for the original tutorial and if possible, a link back to my site. Thank you.
Copyright © Arasimages All Rights Reserved