

Tip Toe through the Tulips
For Italian, Dutch, Danish, French, German and Spanish translation, click on the flags.


For this tutorial you will need the materials in the zip file below.

Thanks go to Gerry and Sorensen Designs for the tulips tubes and to PamelaD for tubing the little girl found on the internet.
Unzip the materials into a working folder you have created on your desktop named Tip Toe through the Tulips. Please duplicate and close original tubes using the copies for your work so you will not lose the originals. Place Selection in your PSP/Selections folder. Place the Pattern in your PSP Files/Patterns folder. Place the Geometric10 brush in your PSP Files/Brushes folder. Place the ArasimagesTipToe.f1s into the Alien Skin/Eye Candy 5 Impact/Settings/Glass folder. OR...simply click on the ArasimagesToe.f1s file in materials and it automatically goes where it should be. It is assumed you have a working knowledge of PSP to follow these directions. The plugins Penta/color dot, Mystic Nights/Buttonize, Mura'sMeister/Perspective Tiling, Graphics Plus/Cut Glass and Eye Candy 5/Impact/Glass have been used, all other effects are those of PSP itself. I have used PSP2018 for this tutorial but other versions may be used.
Use the little tulip below to mark your place along the way.

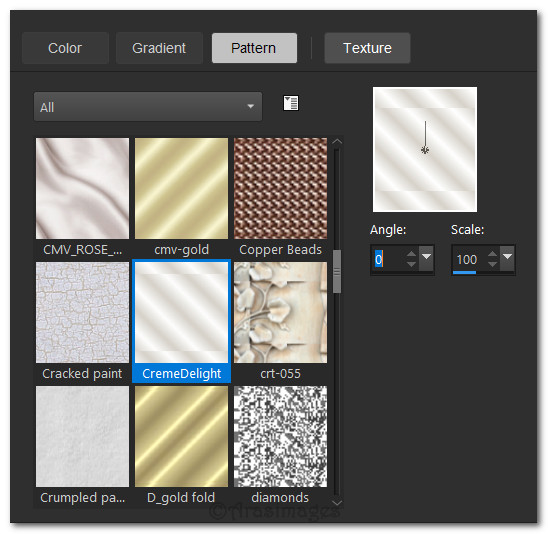
1. In Materials Palette, set Foreground to #ab2b28, Background to Pattern/CremeDelight.
2. New/New Image 890px by 750px. Flood fill with Foreground color #ab2b28.
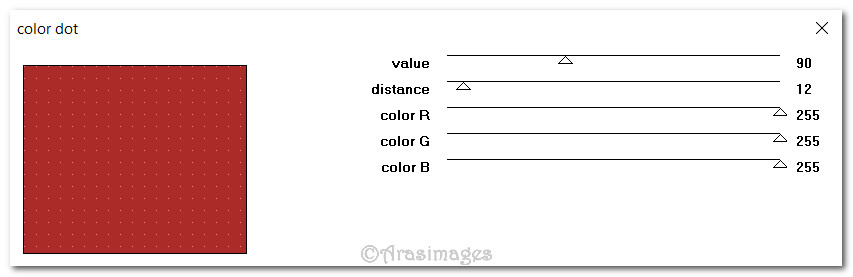
3. Effects/Penta/color Dot.
4. Effects/Edge Effects/Enhance. Layers/New Raster Layer.
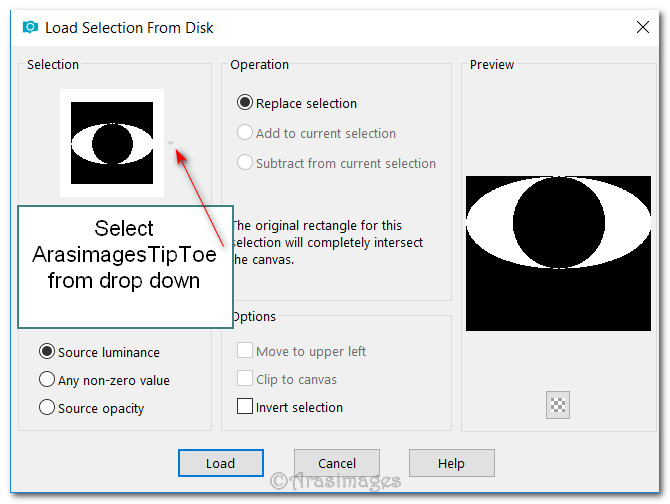
5. Selections/Load/Save Selection/Load Selection from Disk. Load.
6. Keep Selection Active. Flood fill with Pattern CremeDelight.
7. Effects/3D Effects/Drop Shadow. Vertical 15, Horizontal 15, Opacity 50, Blur 20, color #000000.
8. Effects/3D Effects/Drop Shadow. Vertical -15, Horizontal -15, Opacity 50, Blur 20, color #000000.
9. Open Misted By Sorensen_Designs Tulips April 168-08.pspimage. Copy/Paste into Selection.
10. Drop Opacity down to 90. Deselect.
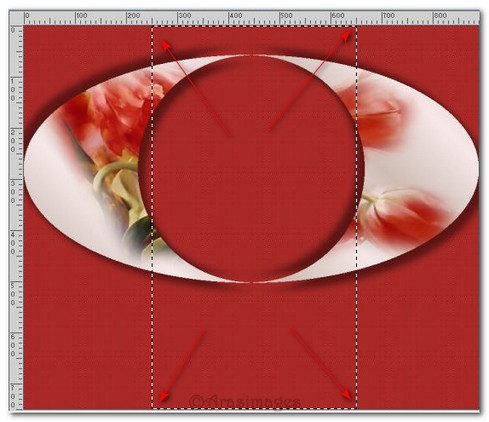
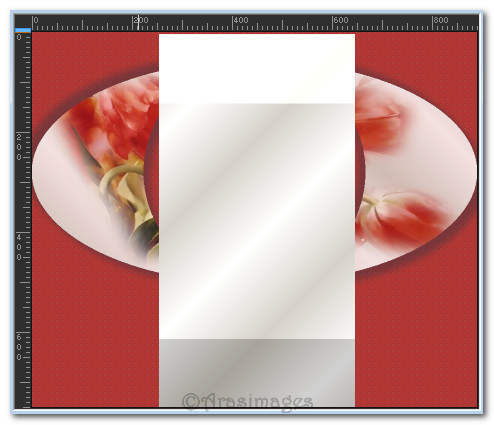
11. Layers/New Raster Layer. Using Selections tool set as seen below, draw out a rectangle from 250px to 650px.

12. Flood fill with CremeDelight Pattern.
13. Effects/Mystic Nights/Buttonize.
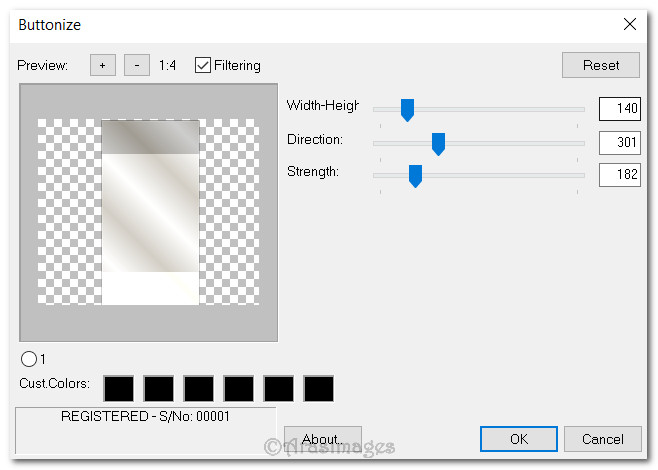
14. Adjust/Sharpness/High Pass Sharpen.

15. Image/Flip/Flip Vertical. Deselect.
16. Effects/Penta/color Dot.
17. Effects/Edge Effects/Enhance.
18. Effects/Mura'sMeister/Perspective Tiling.
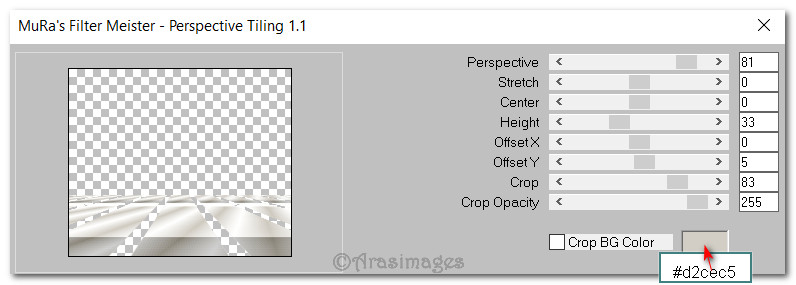
19. Effects/3D Effects/Drop Shadow. Vertical 0, Horizontal -15, Opacity 50, Blur 20, color #000000.
20. Open RedBeret.pspimage. Copy Tube/Paste as New Layer.
21. Image/Resize/Resize by 123%/Resize all layers unchecked.
22. Adjust/Sharpness/Sharpen.
23. Effects/3D Effects/Drop Shadow. Vertical -15, Horizontal -15, Opacity 50, Blur 20, color #000000.
24. Layers/New Raster Layer.
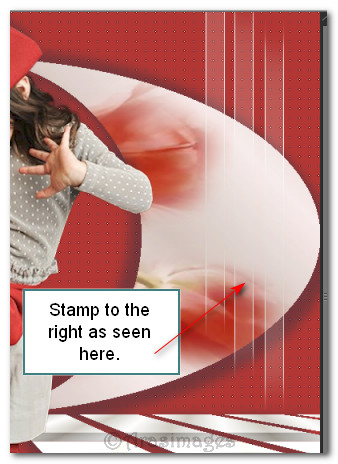
25. From tool bar select the Paint Brush tool. Set as seen below choosing Geometric10 brush. Right click/stamp three times on the right side.

26. Duplicate. Image/Mirror/Mirror Horizontal.
27. Open Gerry-Bloemen4-04 maart 2007.pspimage. Copy Tube/Paste as New Layer.
28. Image/Resize/Resize by 50%/Resize all layers unchecked.
29. Effects/3D Effects/Drop Shadow. Vertical -15, Horizontal -15, Opacity 50, Blur 20, color #000000.
30. Adjust/Sharpness/Sharpen. Place to bottom left corner along bottom border near little girl's leg.
31. Duplicate. Image/Resize/Resize 76%/Resize all layers unchecked. Place over the little girl's shoe at the bottom center area.
32. Open Gerry-Bloemen4-04 maart 2007.pspimage again. Copy Tube/Paste as New Layer.
33. Image/Mirror/Mirror Horizontal.
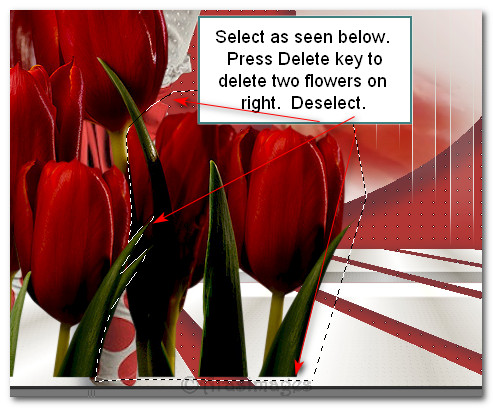
34. Scroll image larger so it will be easier to work with. Select Free Hand selection tool using settings below. Left click to draw around the tulips on the right, right click to connect the selection line. Press Delete key once to delete. Deselect.

35. Image/Resize/Resize 40%/Resize all layers unchecked.
36. Effects/3D Effects/Drop Shadow. Vertical -15, Horizontal -15, Opacity 50, Blur 20, color #000000.
37. Adjust/Sharpness/Sharpen. Place tulips in bottom right corner.
38. Image/Add Borders/Add 2px border, Symmetric checked, color #d2cec5.
39. Image/Add Borders/Add 42px border, Symmetric checked, color #ab2b28.
40. Using Magic Wand, activate the 42px border.
41. Layers/New Raster Layer.
42. Flood fill 42px border with Pattern CremeDelight.
43. Effects/Graphics Plus/Cut Glass. Use settings as seen below.

44. Adjust/Blur/Gaussian Blur, Radius 15.
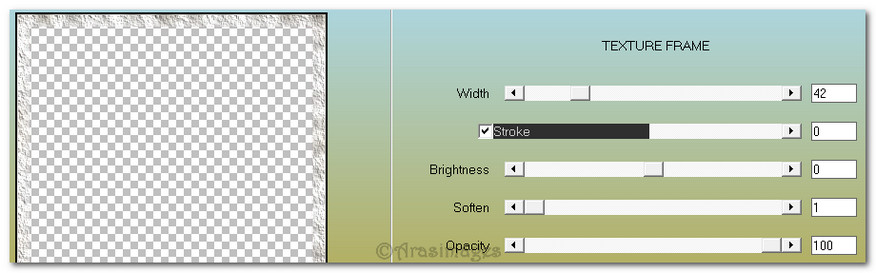
45. Effects/AAA Frames/Texture Frame.
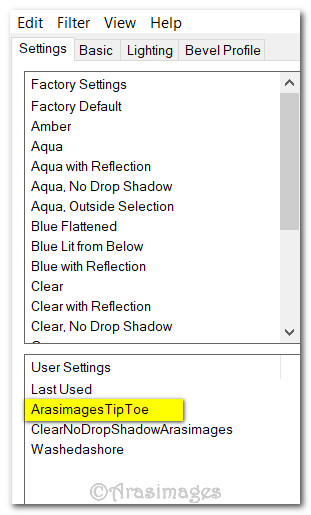
46. Effects/Alien Skin/Eye Candy 5 Impact/Glass. Use ArasimagesTipToe setting.
47. Deselect. Merge/Merge Visible.
48. Sign your name or leave watermark if you wish. Save as a .jpg or .png file named Tip Toe through the Tulips.
This tutorial was tested by PamelaD and Evatexas June 2018. Thanks ladies!
If you are going to use this tutorial for stationery, cards or place the tutorial/tag on another site, I would appreciate you contacting me for permission, giving Arasimages credit for the original tutorial and if possible, a link back to my site. Thank you.
Copyright © Arasimages All Rights Reserved