
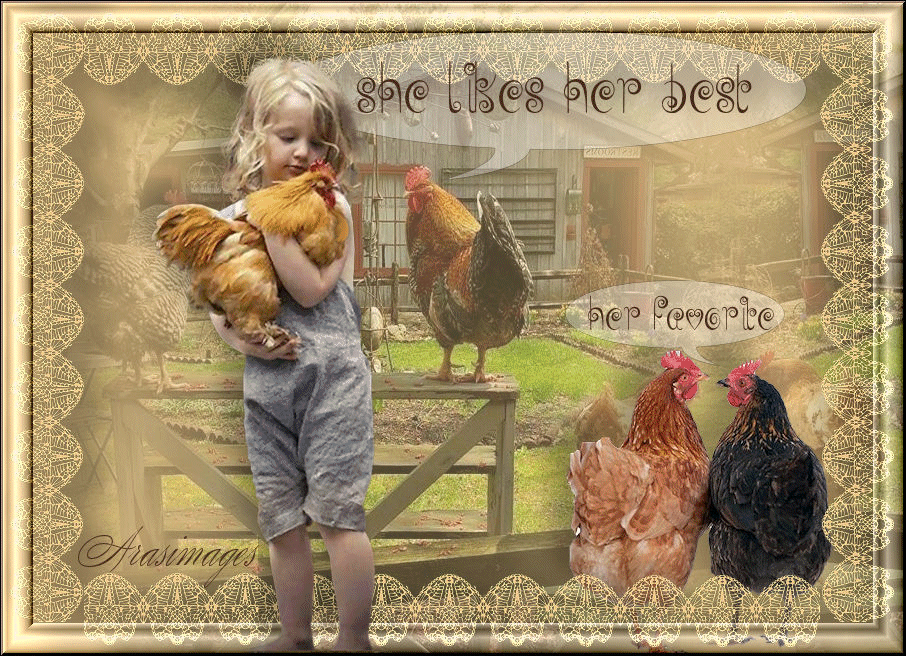
She Likes Her Best
For Italian, Danish, Dutch, German, Spanish and French translations, click on the flags.


For this tutorial you will need the materials in the zip file below.

Thanks go to Wieskes for the little girl tube and to the owners of the other various images I found on the net.
Unzip the materials into a working folder you have created on your desktop named She likes Her Best. Please duplicate and close original tubes using the copies for your work so you will not lose the originals. Place Mask in your PSP Files/Mask folder. It is assumed you have a working knowledge of PSP to follow these directions. Plugin Filters Unlimited 2.0/Buttons and Frames/3D Frame 1 and Animation Program are used in this tutorial. I have used PSP2019 for this tutorial but other versions may be used.
Use the chicken below to mark your place along the way.
1. In Materials Palette, set Foreground to #e9c689, Background to #472919.
2. New/New Image 900px by 650px. Flood fill with Foreground.
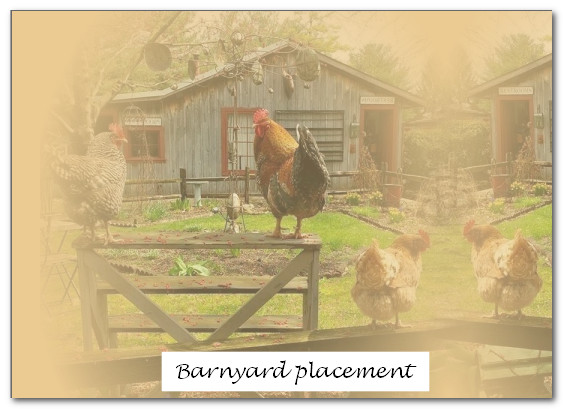
3. Open Barnyard.png image. Layers/Load/Save Mask. Load Mask from Disk. Load .

4. Merge/Merge Group. Copy/Paste as New Layer.
5. Image/Mirror/Mirror Horizontal. Move to the left a little.
6. Lower Opacity down to 66.
7. Paste as New Layer again. Drop Opacity to 66 and move to right side. (See snapshot for placement).
8. Open Chickens.png. Copy/Paste as New Layer.
9. Image/Resize/Resize by 75%/Resize all layers unchecked.
10. Effects/3D Effects/Drop Shadow. Vertical -20, Horizontal -20, Opacity 30, Blur 35, color #000000.
11. Adjust/Sharpness/Sharpen.
12. Open Lace.png. Copy/Paste as New Layer.
13. Effects/3D Effects/Drop Shadow. Vertical 20, Horizontal 20, Opacity 30, Blur 35, color #000000.
14. From the tool bar select the Preset Shape tool/+Callout 01. Use settings below.

15. Drawing from left to right, draw out a callout like this. You can adjust it using the nodes. Drop the opacity down to 32/Convert to Raster Layer. Move so it appears the Rooster is talking.
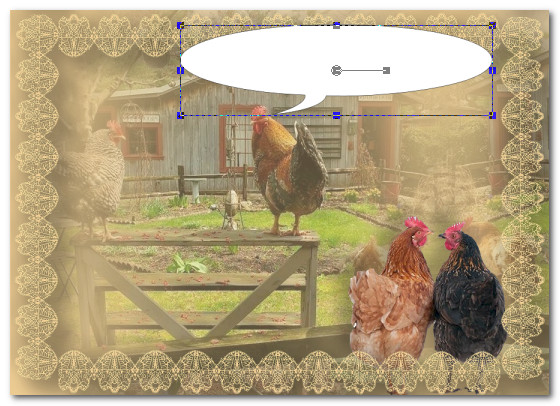
16. Using same settings, draw from right to left another smaller callout, adjusting as needed. Drop the opacity down to 32/Convert to Raster Layer. Move so it appears the chicken on the right is talking.
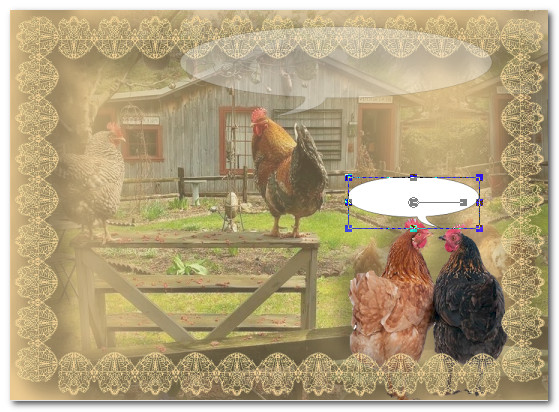
17. Work on small callout first. From tool bar select the Text tool. Select Font Jelly Swirls, Size 48, color #472919 in Background box, Stroke width 0.0, type out the words "her favorite". Convert to Raster Layer. Move text in center of callout.

18. Move to larger callout layer. Using same settings except for change font size to 72, type out the words "She likes her best". Convert to Raster Layer. Adjust as needed.

19. Image/Add Borders/Add 3px border, Symmetric checked, color #472919.
20. Effects/Filters Unlimited 2.0/Buttons & frames/3D Glass Frame 1. Frame Size 26, Contrast 128.
21. Open Wieskes Tube 813.png. Copy/Paste as New Layer.
22. Effects/3D Effects/Drop Shadow. Vertical -20, Horizontal- 20, Opacity 30, Blur 35, color #000000.
23. Adjust/Sharpness/Sharpen.
24. Using Eraser tool or Selections tool, erase or select around Wieses watermark, press Delete key. Deselect.
25. Place little girl to left of top callout.
26. Place your watermark or your name on image if you wish.
27. Merge/Merge Visible.
28. Open Animation1.mng file in Animation Shop. Highlight Frame 1/Edit/Select All. Copy.
29. Open She likes Her Best.jpg file. Edit/Selections All. On the top of the tool bar, click on Duplicate button. Continue to click on it until you have 22 frames in all. You may have to right click one at a time and Duplicate Selected to get just 22 or delete a few if you go over that number.
30. Click within the first Frame of She likes Her Best image/Edit/Select All.
31. Right click within first frame/Paste/Into Selected Frame. When the feather is seen, place it on the chicken the little girl is holding on its chest. Left click into place.
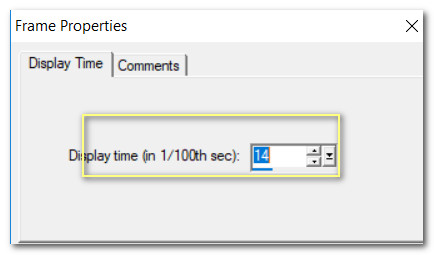
32. Click on the Animation/Frame Properties and set to 14.
33. Go to tool bar and click on the View Animation. Check your animation to see if it is correct. If so, then we will now save.
34. File/Save As. When the first box appears give your work a name. Designate where to save it (Your working folder). Leave it set to save as a .gif. Click Save.
35. As the boxes come up, keep clicking on Next, Next, Next and then Finish. Your tutorial image is now saved as a .gif file in your folder.
If you are going to use this tutorial for stationery, cards or place the tutorial/tag on another site, I would appreciate you contacting me for permission, giving Arasimages credit for the original tutorial and if possible, a link back to my site. Thank you.
This tutorial was tested by PamelaD and Evatexas May 2019. Thanks ladies!
Copyright © Arasimages All Rights Reserved