
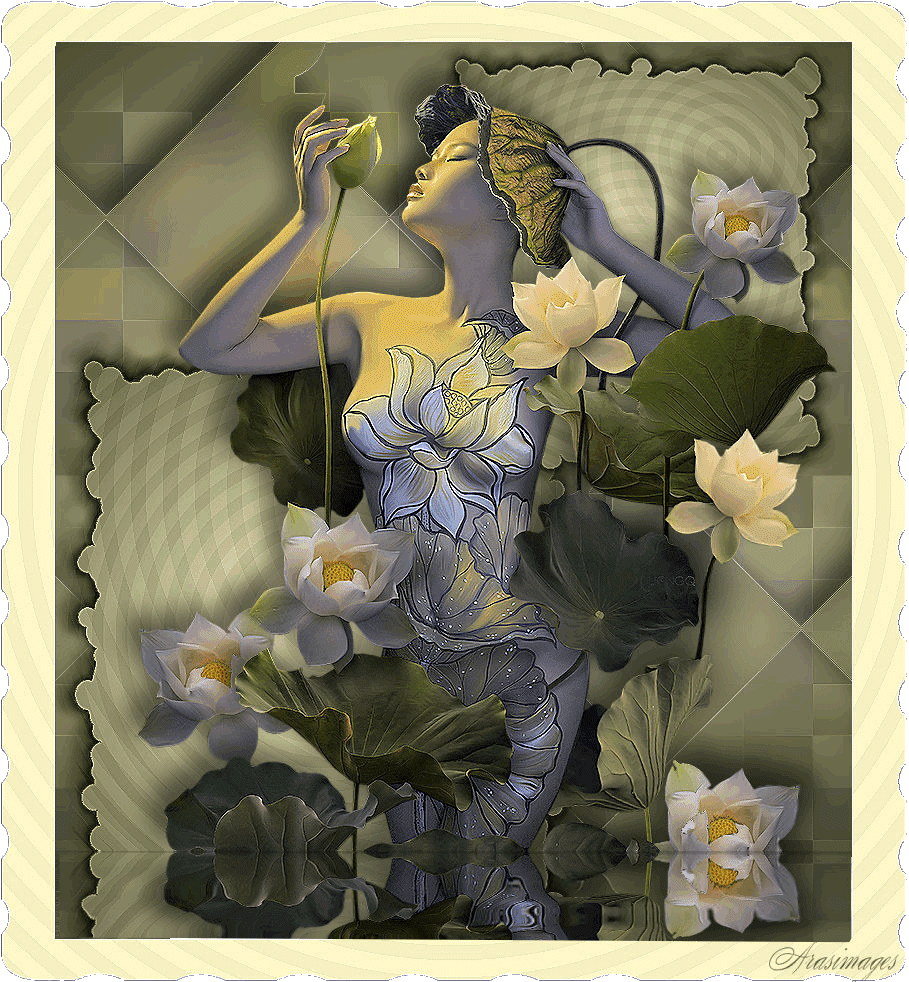
Water Lily
For an Italian, German, Danish, French and Spanish translation, click on the flags.


For this tutorial you will need the materials in the zip file below.

Thanks go to Maryse for the MR_Lotus Princess.
Unzip the materials into a working folder you have created on your desktop named Water Lily. Please duplicate and close original tubes using the copies for your work so you will not lose the originals. Place Selection/ArasimagesWaterLily in your PSP Selections folder. It is assumed you have a working knowledge of PSP to follow these directions. The plugins Carolaine & Sensibility/CS-BRectangles, Alien Skin Xenofex 2/Burnt Edges, Unplugged Shapes/Radials and various PSP effects are used in this tutorial. I have used PSP2019 for this tutorial but other versions may be used.
Use the little flower below to mark your place along the way.

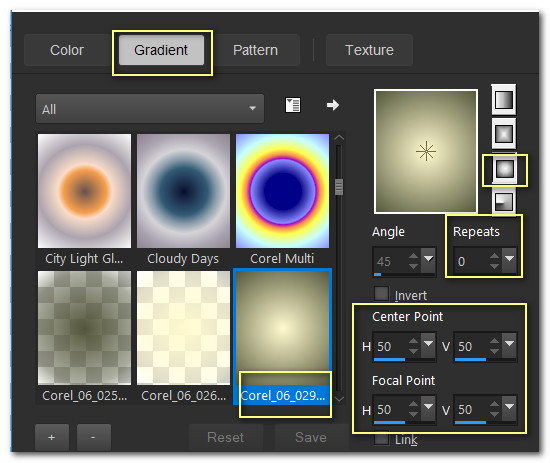
1. In Materials Palette, set Foreground to #fff9c9, Background to #494c30. Create a Gradient using Corel_06_029_foreground/background, Sunburst, Angle Null/ Repeats 0, Invert unchecked, Center Point at 50/50 and Focal Point set to 50/50.
2. New/New Image 800px by 900px. Flood fill with Gradient.
3. Open MR_Lotus Princess.png. Erase Maryse's watermark. Copy/Paste as New Layer.
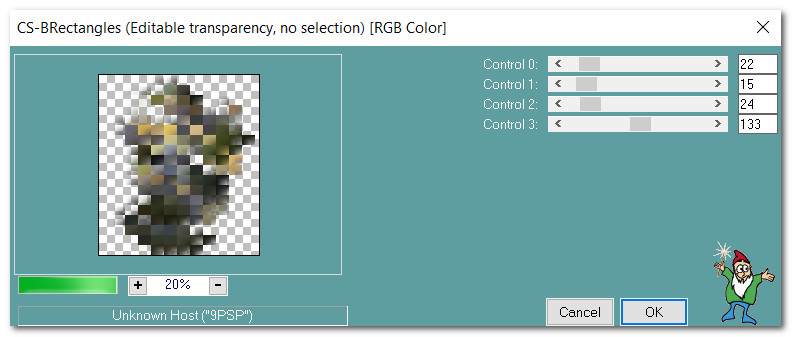
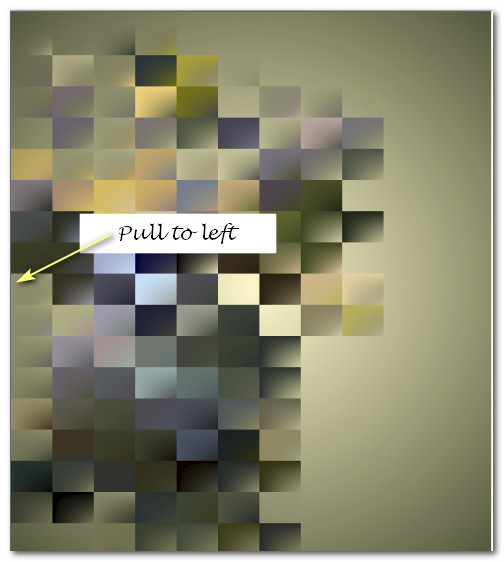
4. Effects/Caroline and Sensibility/CS-BRectangles. Pull a little to left.
5. Duplicate. Image/Mirror/Mirror Horizontal.
6. Adjust squares.
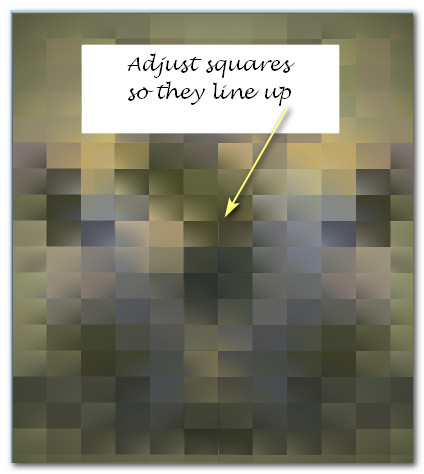
7. Merge/Merge Down. Set Opacity to 30.
8. Effects/Edge Effects/Enhance.
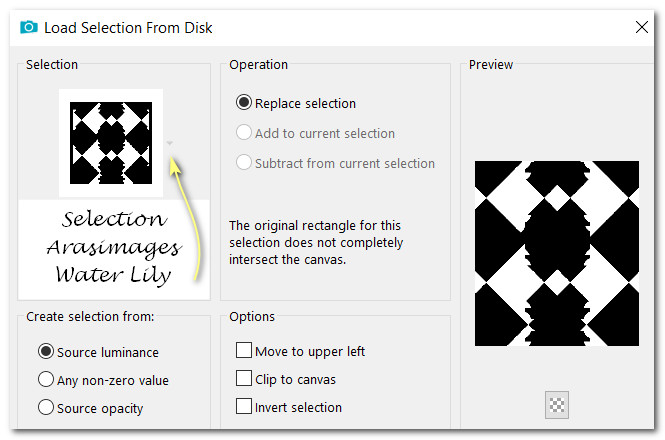
9. Selections/Load/Save Selection. Load Selection from Disk. Find Selection ArasimagesWaterLily from drop down. Load.
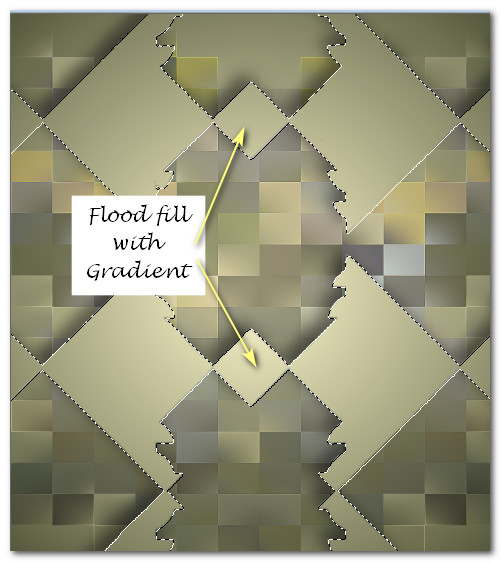
10. Layers/New Raster Layer.
11. Flood fill with Gradient by left clicking in two center diamonds.
12. Effects/3D Effects/Drop Shadow. Vertical -15, Horizontal -15, Opacity 50, Blur 35, Color #000000.
13. Open MR_Lotus Princess.png. Remove watermark. Copy/Paste into Selection.
14. Adjust/Blur/Gaussian Blur/Radius 23.
15. Selections/Select None.
16. Effects/Edge Effects/Enhance.
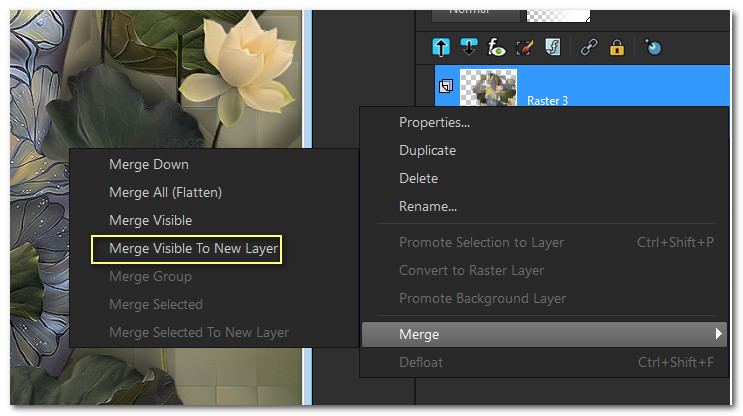
17. Layers/Merge Visible to New Layer.
18. Image/Resize/Resize by 75%/Resize all layers unchecked.
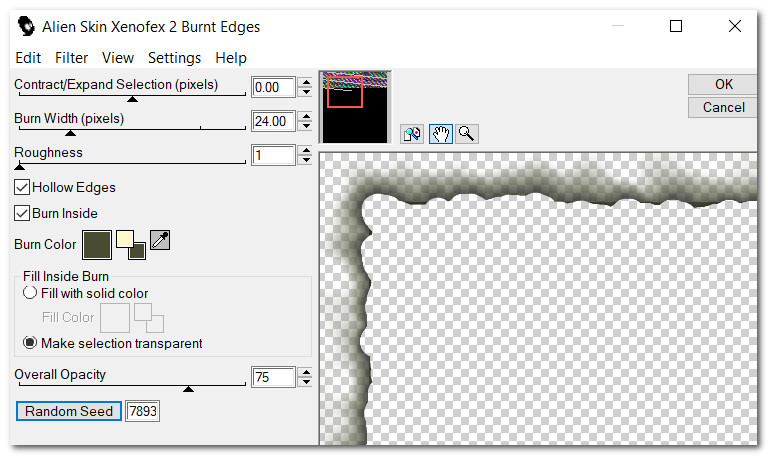
19. Effects/Alien Skin Xenofex 2/Burnt Edges.
20. Flood fill with Gradient.
21. Repeat Effects/Alien Skin Xenofex 2/Burnt Edges.
22. Flood fill with Gradient.
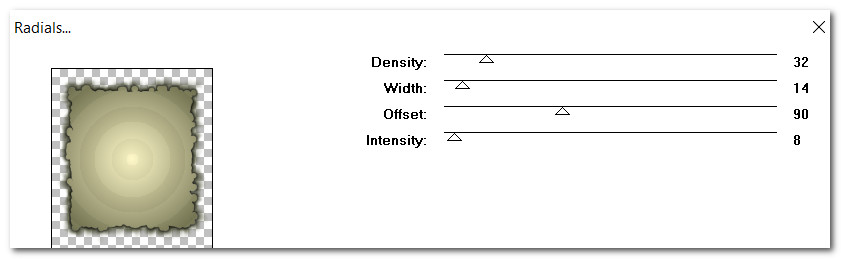
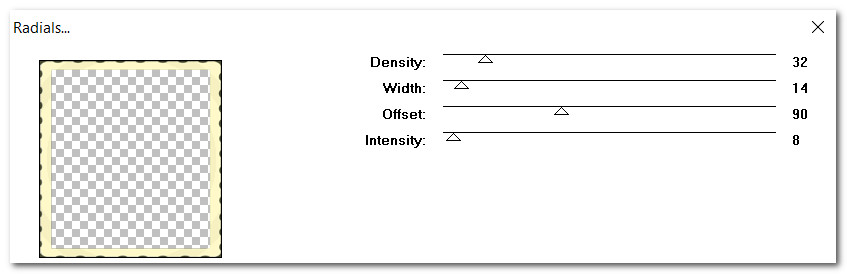
23. Effects/UnpluggedShapes/Radials.
24. Image/Resize/Resize by 75%/Resize all layers unchecked.
25. Place into bottom left corner.
26. Repeat Unplugged Shapes/Radials.
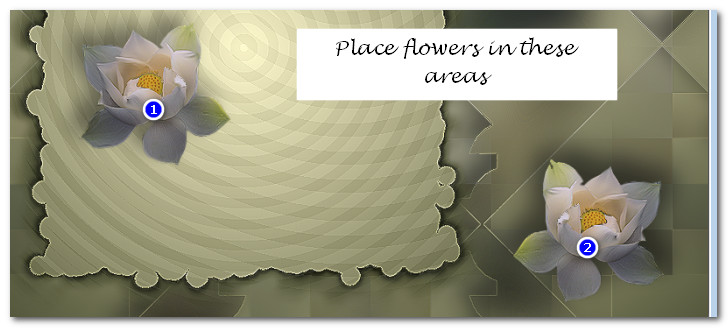
27. Effects/Edge Effects/Enhance.
28. Duplicate. Resize/Resize by 75%/Resize all layers checked.
29. Move into upper right corner.
30. Open LotusFlower.pspimage. Copy/Paste as New Layer.
31. Effects/3D Effects/Drop Shadow. Vertical -15, Horizontal -15, Opacity 50, Blur 35, color #000000.
32. Place Lotus flower in left rectangle as shown below.
33. Duplicate Lotus Flower. Image/Mirror/Mirror Horizontal.
34. Place Lotus Flower in bottom right corner.
35. Effects/3D Effects/Drop Shadow. Vertical -15, Horizontal -15, Opacity 50, Blur 35, color #000000.
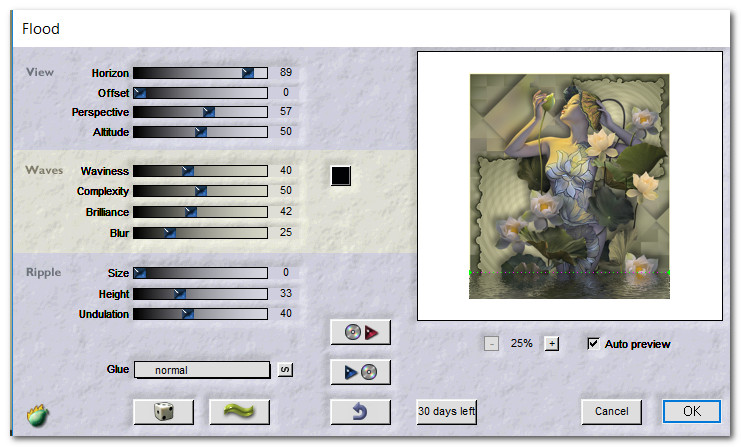
36. Open MR_ Lotus Princess.png. Remove Maryse's watermark. From tool bar select the Push tool and push over breast nipples if you wish. Please keep Maryse's original intact.
37. Copy/Paste as New Layer. Pull down so the bottom of Princess matches the bottom of the image. Pull over to the right side so upper flower is at edge of rectangle.
38. Effects/3D Effects/Drop Shadow. Vertical -15, Horizontal -15, Opacity 50, Blur 35, color #000000.
39. Adjust/Sharpness/Sharpen.
40. Merge/Merge Visible.
41. Effects/Flaming Pear/Flood.
42. Image/Picture Frame. From drop down choose Early Color.
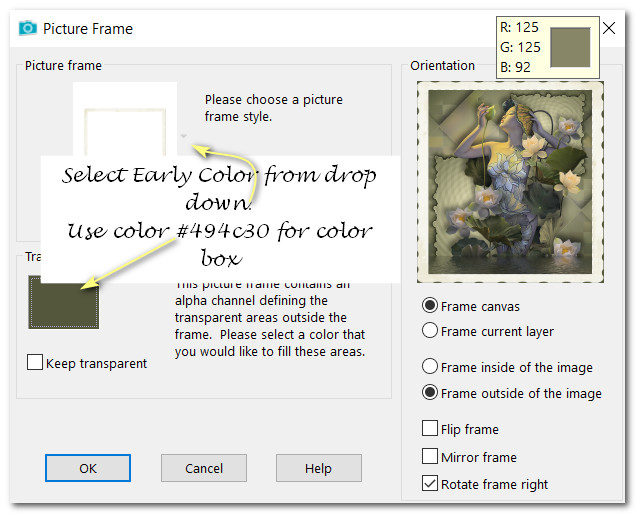
43. In Materials Palette change Foreground from Gradient to Color #fff9c9.
44. Using Magic Wand activate the frame around the image. Flood fill with #fff9c9.
45. Effects/UnpluggedShapes/Radials.
46. Effects/Edge Effects/Enhance.
47. Selections/Invert. Press Delete Key once. Deselect.
48. Merge/Merge Visible.
49. Leave your watermark or name if you wish. Save as Water Lily.png or .jpg.
This tutorial was tested by PamelaD and Evatexas June 2019. Thanks ladies!
If you are going to use this tutorial for stationery, cards or place the tutorial/tag on another site, I would appreciate you contacting me for permission, giving Arasimages credit for the original tutorial and if possible, a link back to my site. Thank you.
Copyright © Arasimages All Rights Reserved