
Soft as Snow
For an Italian, Spanish, Dutch, French, German and Danish translation click on the flags.


For this tutorial you will need the materials in the zip file below.

Unzip the materials into a working folder you have created on your desktop named Soft as Snow. Please duplicate and close original tubes using the copies for your work so you will not lose the originals. This tutorial was written using MurasMeister/Perspective and Copies, PhotoSwizzlePrism+ and effects of PSP. Place the Selections in your PSP Files/Selections folder. Place the Pattern in your PSP Files/Patterns folder. To work this tutorial, it is assumed you have some working knowledge of Paint Shop Pro.
Thanks go to Cibi for the lovely lady and dog tube and to the owners of the other various images I found on the net.
Use the pearls below to mark your place along the way.

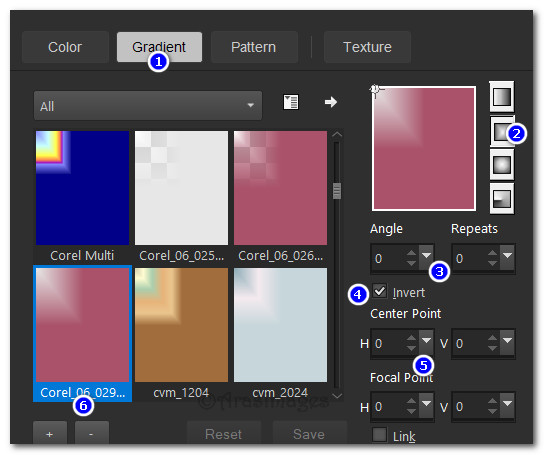
1. In Materials Palette, set Foreground to #a2475f/Background to #e4e4e4. Choose Gradient and Select Rectangular, Angle/Repeats at 0, Invert checked, Center Points/Focal Points all to 0. Use Corel_06_029 gradient.
2. New/New Image 850px by 700px. Flood fill with Gradient.
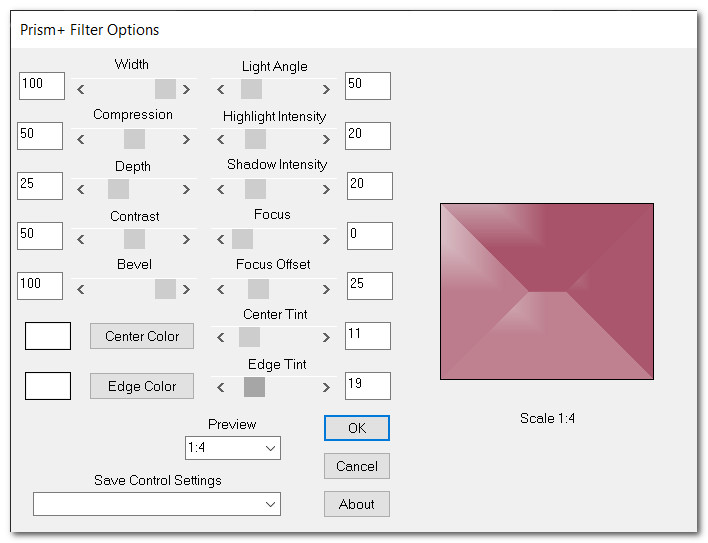
3. Effects/PhotoSwizzle/Prism+.
4. Adjust/Blur/Gaussian Blur. Radius 15.
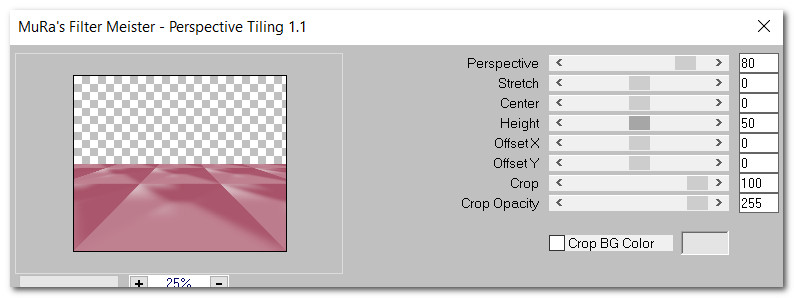
5. Effects/MurasMeister/PerspectiveTiling.
6. Effects/3D Effects/Drop Shadow. Vertical -7, Horizontal -14, Opacity 45, Blur 40, color #000000.
7. In Materials Palette change Rectangular to Linear, Angle to 90, Repeats to 1 and uncheck Invert. Leave Center Point and Focal Point the same. Use Corel_06_29 Gradient.
8. Layers/New Raster Layer. Flood fill with new Gradient. Pull Raster 2 below Raster 1.
9. Highlight Raster 1 to continue.
10. Layers/New Raster Layer.
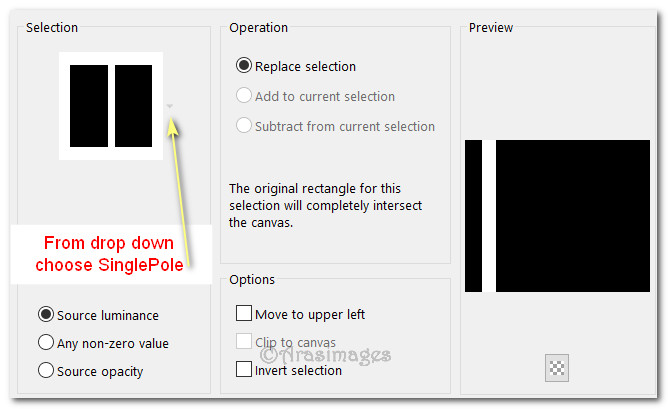
11. Selections/Load/Save Selection/Load Selection from Disk. Choose SinglePole from drop down. Load.
12. Flood fill Pole Selection with new Gradient. Deselect.
13. Duplicate/Image/Mirror/Mirror Horizontal. Merge/Merge Down.
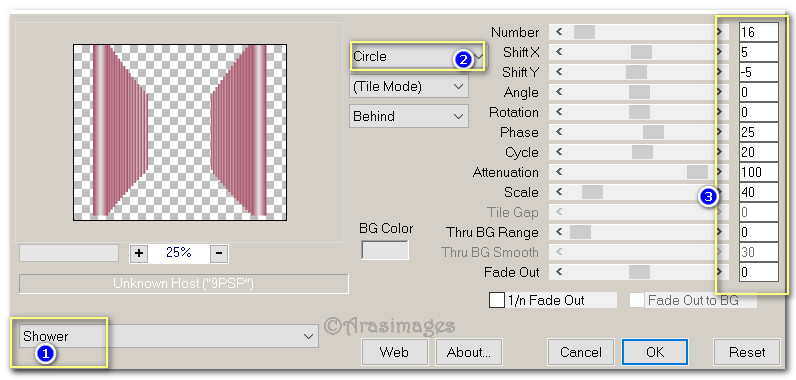
14. Effects/MurasMeister/Copies. Change settings as seen below.
15. Effects/3D Effects/Drop Shadow. Vertical -20, Horizontal -20, Opacity 50, Blur 45, color #000000.
16. Effects/3D Effects/Drop Shadow. Vertical 20, Horizontal 20, Opacity 50, Blur 45, color #000000.
17. Pull Copies layer down between Raster 1 and Raster 2. Go back to top layer to continue.
18. Open Winter2_21.01.2018.pspimage. Copy/Paste as New Layer. See Step #20 for placement.
19. Duplicate branch. Pull down into bottom right corner leaving a small amount of branch showing. See placement below in next step.
20. Duplicate branch again. Image/Mirror/Mirror Horizontal. Pull into bottom left corner.
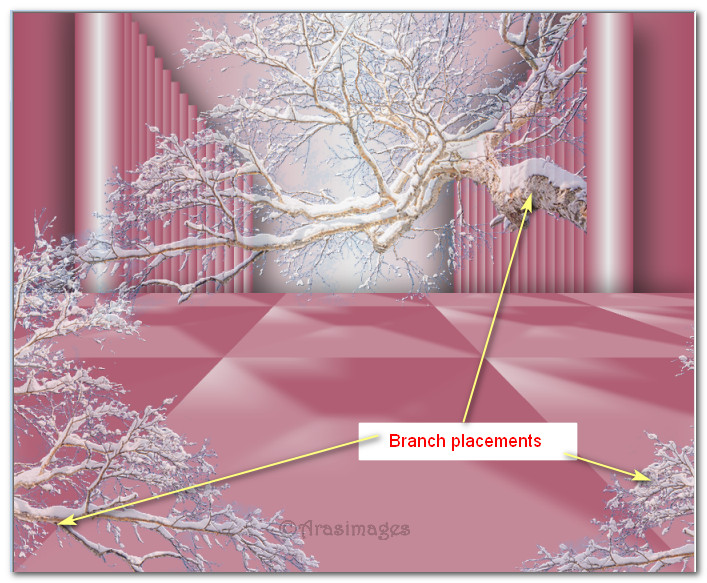
21. Lower Opacity to 75 on all tree branches. Highlight top layer to continue.
22. Open TopPearls.pspimage. Copy/Paste as New Layer. Move to top of image.
23. Open Beauty_hiver_blanc_CibiBijoux.pspimage. Copy/Paste as New Layer. Move to right side of image even with bottom edge.
24. Adjust/Sharpness/Sharpen.
25. Effects/3D Effects/Drop Shadow. Vertical -20, Horizontal -61, Opacity 20, Blur 45, color #000000.
26. Effects/3D Effects/Drop Shadow. Vertical 20, Horizontal 61, Opacity 20, Blur 45, color #000000.
27. Selections/Load/Save Selection/Load Selection from Disk. Choose TextTag Selection from drop down. Load.

28. Layers/New Raster Layer. Flood fill TextTagSelection with background color #e4e4e4.
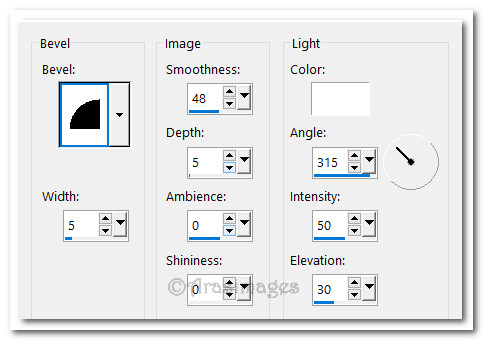
29. Lower Opacity down to 46. Effects/3D Effects/InnerBevel. Deselect.
30. Effects/3D Effects/Drop Shadow. Vertical -7, Horizontal -14, Opacity 50, Blur 20, color #000000.
31. Open BottomPearls.png. Copy/Paste as New Layer. Place along bottom of tag.
32. Using Selections tool, select the pearls on face of the tag and delete. Deselect.
33. Open WinterText.png. Copy/Paste as New Layer. Place in center of tag.
34. Open SinglePearl.png. Copy/Paste as New Layer.
35. Place in upper left corner of tag. Apply drop shadow of Vertical 2, Horizontal -11, Opacity 50, Blur 15, color #000000.
36. Image/Add Borders/Add 10px border, color #000000, Symmetric checked.
37. Highlight 10px border with Magic Wand. In Materials palette, select silverpunk Pattern.
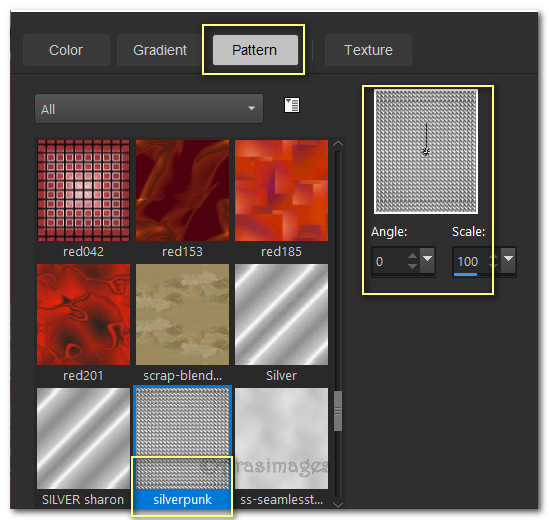
38. Flood fill with Silverpunk Pattern in Materials Palette.
39. Effects/EdgeEffects/Enhance. Deselect.
Thanks EvaTexas and PamelaD for testing my tutorial.
If you are going to use this tutorial for stationery, cards or place the tutorial/tag on another site, I would appreciate you contacting me for permission, giving Arasimages credit for the original tutorial and if possible, a link back to my site. Thank you.
Copyright © Arasimages All Rights Reserved