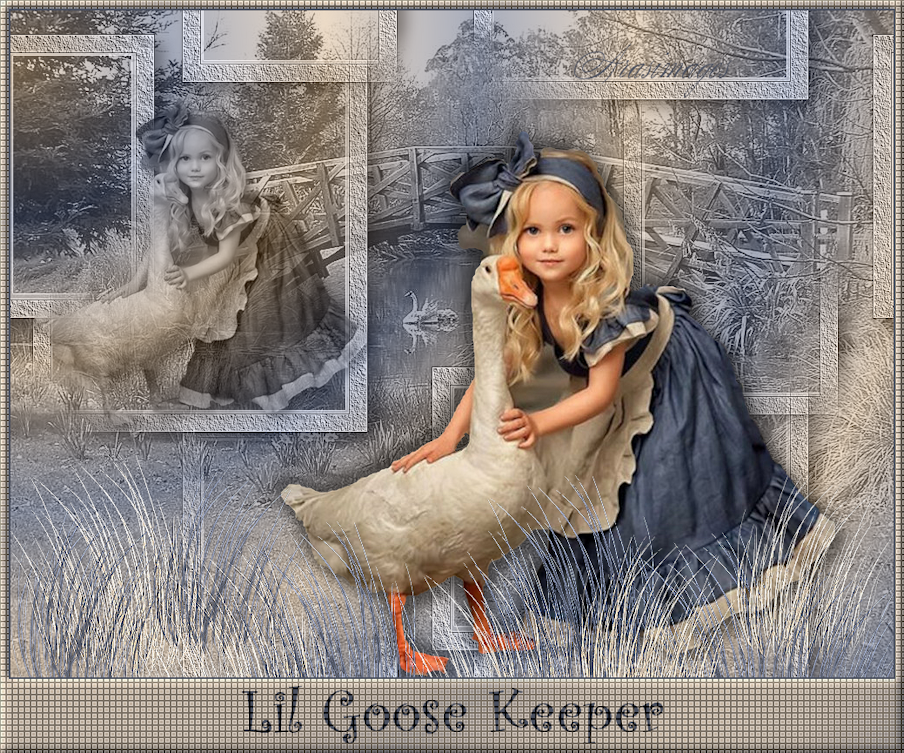
Lil Goose Keeper
For an Italian, Dutch, Danish, French, Spanish and German translation click on the flags.


For this tutorial you will need the materials in the zip file below.

Unzip the materials into a working folder you have created on your desktop named Lil Goose Keeper. Please duplicate and close original tubes using the copies for your work so you will not lose the originals. Open the Fur 6 .PspBrush in your PSP and export to your Brushes folder. This tutorial was written using Tymos/Gridmaker, AAA Frames/Texture Frame and effects of PSP. To work this tutorial, it is assumed you have some working knowledge of Paint Shop Pro. I used PSP2020 for this tutorial.
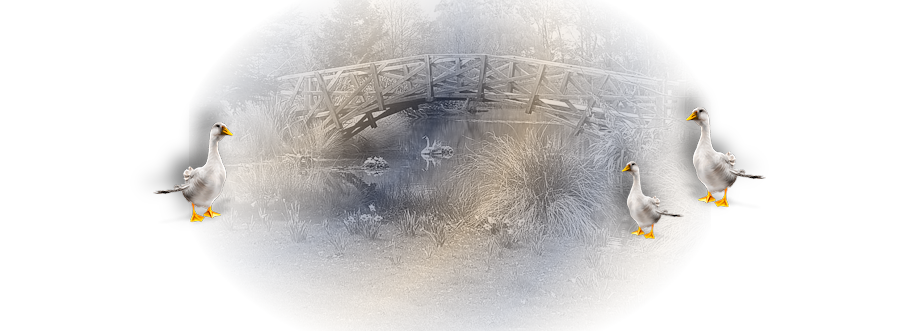
Use the Goose below to mark your place along the way.

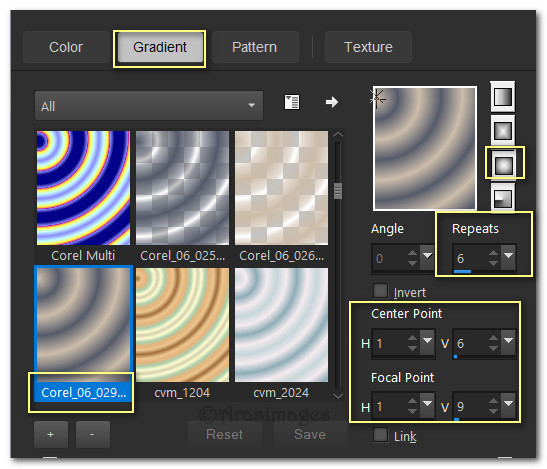
1. In Materials Palette, set Foreground to #c7b6a2/Background to #4a5060. Choose Gradient and Select Sunburst, Angle 0/Repeats 6, Invert unchecked, Center Points H1/V6 and/Focal Points H1./V9. Use Corel_06_029 gradient.
2. New/New Image 1015px by 766px. Flood fill with Gradient.
3. Layers/New Raster Layer. Selections/Select All.
4. Open Daffodils.jpg background. Copy/Paste into Selection. Select None.
5. Drop Opacity down to 53. Blend Mode set to Luminance(Legacy).
6. Adjust/Sharpness/Sharpen. Adjust/Sharpness/Sharpen More.
7. Layers/New Raster Layer.
8. Change the Foreground gradient to Foreground color #C7B6A2.
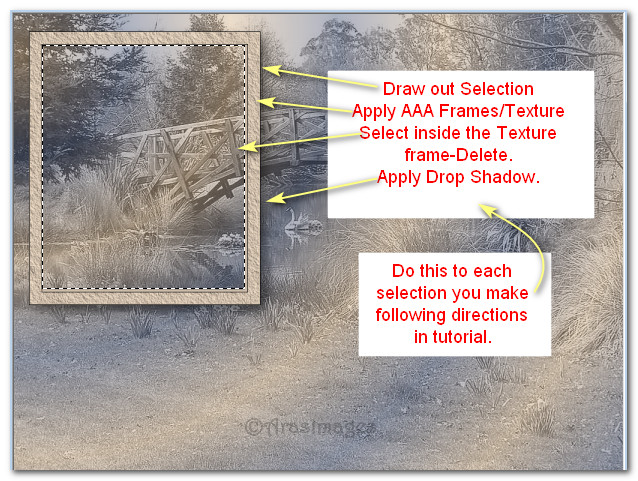
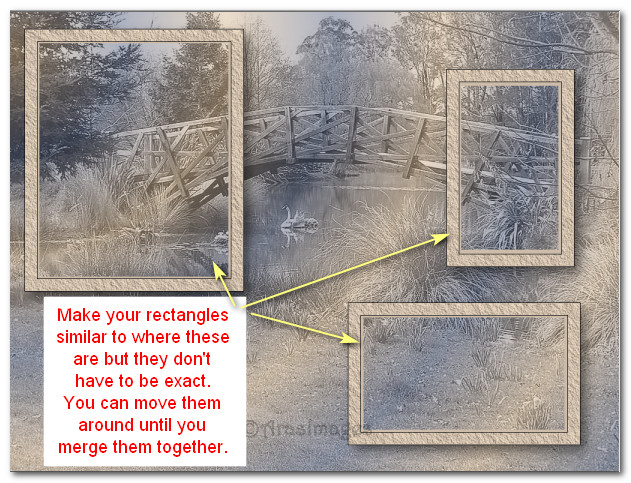
9. Using the Selections tool set to Rectangle, draw out three random rectangles on their own layer, similar to what you see below WORKING ONE AT A TIME. View Step #13 for placement. (You will end up having three rectangles in all.)

10. Flood fill each rectangle with Foreground color.
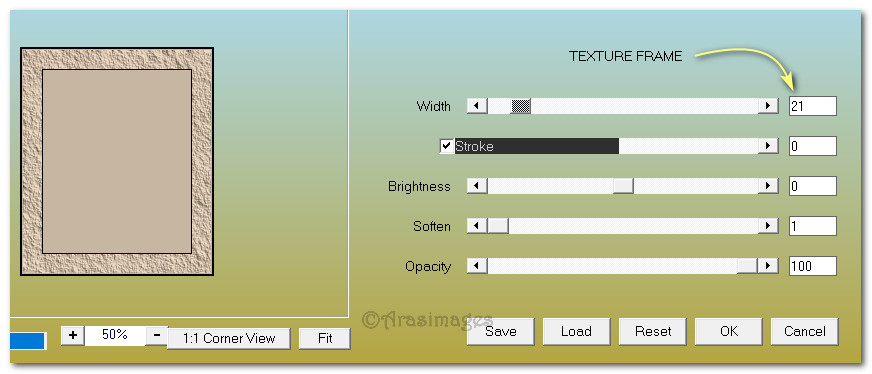
11. Effects/AAA Frames/Texture Frames. Apply to each rectangle.
12. Effects/3D Effects/Drop Shadow. Vertical 10, Horizontal 10, Opacity 50, Blur 25, color #000000.
13. Selections/Select None. Using Selections tool again, draw inside the line inside the frame. Delete. Selections/Select None. These directions apply to each rectangle doing one at a time on its own layer. Merge/Merge Down twice so all of the frames are on one layer.
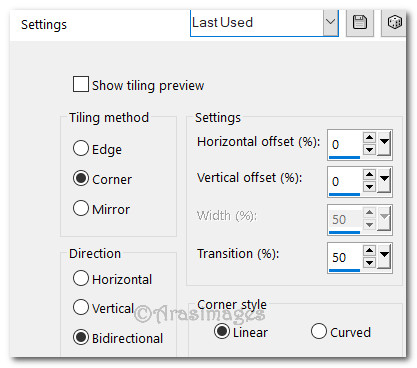
14. Effects/Image Effects/Seamless Tiling.
15. Drop Opacity down to 78. Set Blend Mode to Luminance (Legacy).
16. Open FarmGirl.png. Copy/Paste as New Layer.
17. Effects/3D Effects/Drop Shadow. Vertical 10, Horizontal 10, Opacity 50, Blur 25, color #000000. Repeat D/S Vertical and Horizontal with -10.
18. Adjust/Sharpness/Sharpen.
19. Move girl to bottom a little toward the right.
20. Duplicate. Resize/Resize by 60%/Resize all layers unchecked.
21. Move resized little girl into frame in top left corner. Lower Opacity to 68. Set Blend Mode to Luminance(Legacy).
22. Highlight Raster 2 of Background. Using your eraser tool set to Size 34, erase the little girls face, hair, arm and the goose face and neck. Go back to top layer to continue.
23. Layers/New Raster Layer.
24. Open Paint Brush tool from tool bar. Choose Fur 6 brush. Use settings below.

25. Randomly apply brush by left and right clicking to vary the blue and tan colors of the grass along bottom of image.
26. Image/Flip/Flip Horizontal.
27. Change Size in Settings to 235. Stamp again a few times to make grass appear to grow in different directions.
28. Effects/Edge Effects/Enhance.
29. Image/Add Borders/Add 2px border, Symmetric checked, color #4a5060.
30. Image/Add Borders/Add 10px border on top and sides and 85px border at bottom, Symmetric unchecked, Color #c7b6a2.
31. Using Magic Wand select the large border.
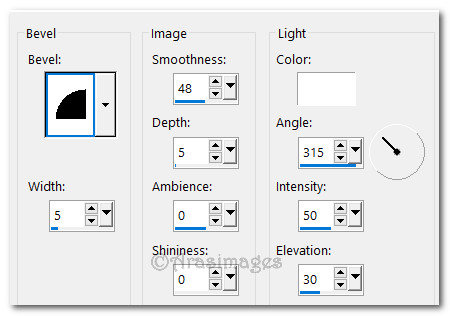
32. Effects/3D Effects/Inner Bevel.
33. In Materials Palette, make the gradient again. Layers/New Raster Layer. Flood fill the selected border with Gradient.
34. Effects/Tymos/Gridmaker.
35. Lower Opacity to 40. Effects/Edge Effects/Enhance. Merge/Merge Visible. Selections/Select None.
36. From tool bar select Text tool. Using Curlz MT, Size 72, Bold, Font color #4a5060, centered/Sharp and Stroke width 0.0, type out the words "Lil Goose Keeper". Promote to Raster Layer.

37. Move text into center of bottom border.
38. Apply Tymos/Gridmaker on text.
39. Apply your watermark or name if you wish.
40. Merge/Merge Visible. I resized my finished image so I could easily put it on my tutorial page but you may leave yours larger if you wish. Save.
Thanks EvaTexas and PamelaD for testing my tutorial.
If you are going to use this tutorial for stationery, cards or place the tutorial/tag on another site, I would appreciate you contacting me for permission, giving Arasimages credit for the original tutorial and if possible, a link back to my site. Thank you.
Copyright © Arasimages All Rights Reserved