
In Winter's Cold
For this tutorial you will need the materials in the zip file below.

For an Italian, Danish, French, Spanish and German translation click on the flags.


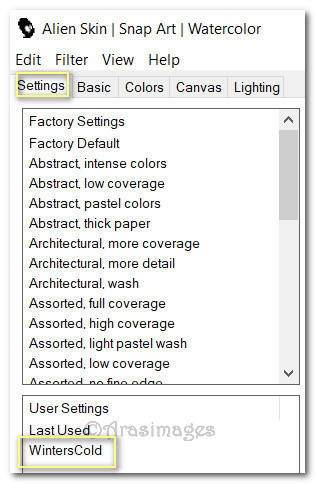
Create a folder on your desktop named In Winter's Cold and unzip the materials in it. When using tubes leave the watermark on originals, duplicate and close out original keeping as is using duplicates for the tutorial. Click on WintersCold.f1s to import it into AlienSkin Snap Art/Watercolor. This tutorial was written using plugins Transparency/Eliminate Black, AlienSkin Snap Art/Watercolor and effects of PSP2020. To work this tutorial, it is assumed you have some working knowledge of Paint Shop Pro.
Thanks go to Nikita, to Irene, to Macha, to Mists & Tubes by dragonblu and to the photographer ChervonaVorona for the young girl.
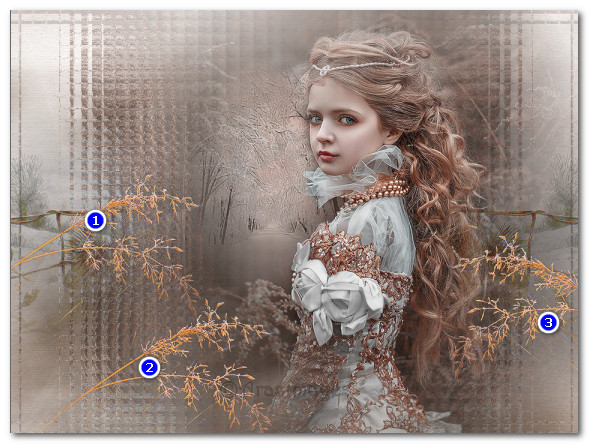
Use the branch below to mark your place along the way.
1. In Materials Palette set the Foreground to #e3e4e5 and Background to #845a4a.
2. New/New Image 950px by 710px. Selections/Select All.
3. Open Vorlage.jpg.
4. Copy/Paste into Selection. Selections/Select None.
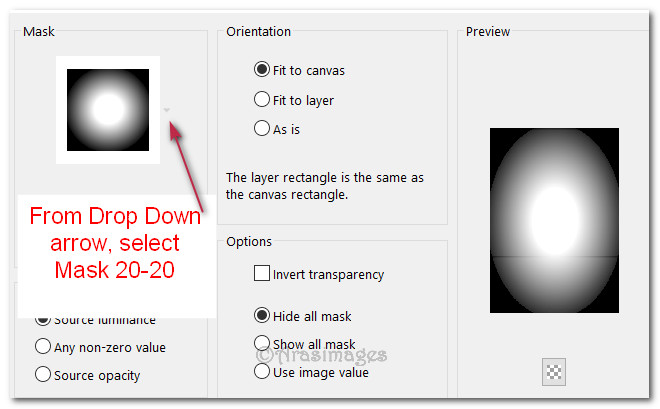
5. Open PhotobyChervonaVorona.jpg. Layers/Load/Save Mask/Save Mask from Disk. Choose Mask 20-20. Load.
6. Merge/Merge Group. Leave on workspace.
7. Copy/Paste as New Layer on working image.
8. Image/Resize/Resize by 75%/Resize all layers unchecked.
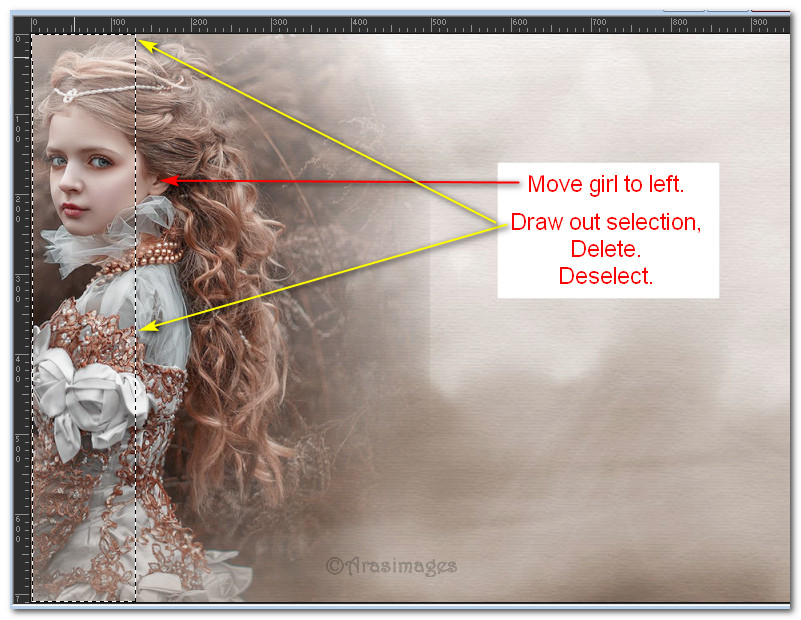
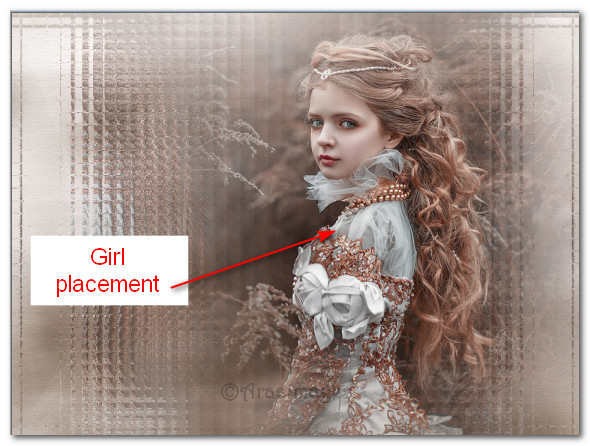
9. Move girl to left. (See below). Draw out a selection on left (See below) using Selection tool. Delete. Deselect.
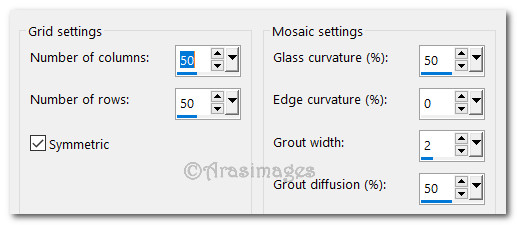
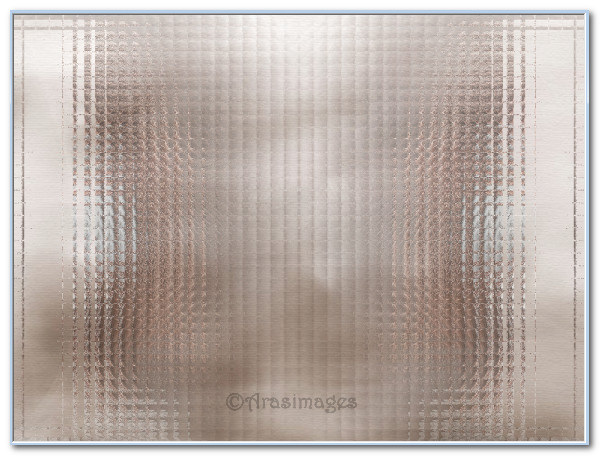
10. Effects/Texture Effects/Mosiac-Glass.
11. Move slightly to left. Drop Opacity down to 58.
12. Adjust/Sharpness/Sharpen.
13. Duplicate. Image/Mirror/Mirror Horizontal.
14. Open Merged young girl again, Copy/Paste as New Layer.
15. Image/Resize/Resize by 75%/Resize all layers unchecked.
16. Move toward right side.
17. Adjust/Sharpness/Sharpen.
18. Effects/3D Effects/Drop Shadow. Vertical -6, Horizontal -8, Opacity 50, Blur 30, color #000000.
19. Open 1381757226_hiver_nikita.pspimage. Copy/Paste as New Layer.
20. Image/Resize/Resize by 65%/Resize all layers unchecked. Remove watermark.
21. Blend Mode set to Luminance (Legacy)/Opacity down to 70.
22. Place upward a little from center. Using Eraser tool set to 50 or lower, erase the trees off young girl's facial area.
23. Adjust/Sharpness/Sharpen. Adjust/Sharpness/Sharpen More.
24. Open scenery53-misted by dragonflu220807.pspimage.
25. Highlight center layer. Layers/Load/Save Mask/Load Mask from Disk. Select Mask 20-20 from drop down arrow. Load. Merge/Merge Group.
26. Copy/Paste as New Layer on working image.
27. Place on right side of image.
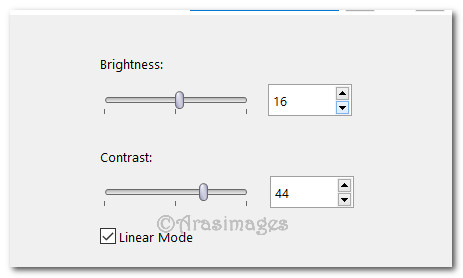
28. Adjust/Brightness and Contrast/Brightness/Contrast.
29. Duplicate. Image/Mirror/Mirror Horizontal.
30. Open Macha oct08 misted herbes sauvages.pspimage. Close off bottom and top layer. Highlight center layer.
31. Effects/Transparency/Elimimate Black.
32. Use Magic Wand on outer corners, delete. Deselect.
33. Layers/Load/Save Mask/Load Mask from Disk. Select Mask 20-20 from drop down arrow. Load. Merge/Merge Group.

34. Adjust/Sharpness/Sharpen. Copy. Paste as New Layer on working image.
35. Place on left side center. Duplicate. Pull down toward bottom center. Duplicate. Image/Mirror/Mirror Horizontal. Pull to right side almost to center. Lower Opacity to 60 on this layer. See snapshot below for placements. (The next step is already done in this snapshot.)
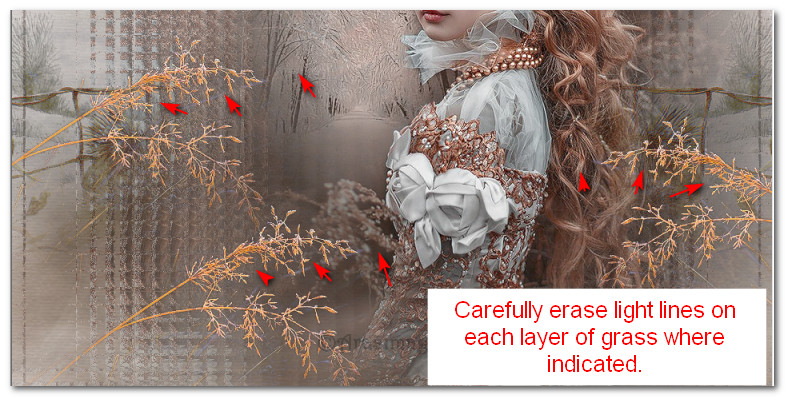
36. Using Eraser tool set to size 20 or less, carefully erase the light color lines where indicated on each grass layer. Make sure you are on highlighted top layer to continue.
37. Open 12930417598_fleurs_nikita.pspimage. Select watermark and delete. Deselect.
38. Copy. Paste as New Layer on working image.
39. Image/Resize/Resize by 70%/Resize all layers unchecked.
40. Place snow branch in bottom left corner.
41. Open DI_tube1194.psp. Close off bottom layer/highlight top layer.
42. Layers/Load/Save Mask/Load Mask from Disk. Select Mask 20-20 from drop down arrow. Load. Merge/Merge Group.
43. Copy/Paste as New Layer on working image.
44. Image/Resize/Resize by 75%/Resize all layers unchecked.
45. Place in bottom right corner. Blend Mode set to Luminance (Legacy).
46. Adjust/Sharpness/Sharpen.
47. Image/Add Borders/Add 3px border, Symmetric checked, color #845a4a.
48. Image/Add Borders/Add 35px border, Symmetric checked, color #e3e4e5.
49. Using Magic Wand, select the 35px border.
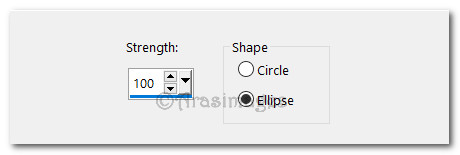
50. Effects/Geometric Effects/Spherize.
51. Flood fill corners with background color #845a4a.
52. Effects/Alien Skin Snap Art/Watercolor. Choose WintersCold setting.
53. Adjust/Blur/Gaussian Blur. Radius: 15.
54. Selections/Invert. Effects/3D Effects/Drop Shadow. Vertical 6, Horizontal 8, Opacity 45, Blur 30, color #000000.
55.Effects/3D Effects/Drop Shadow. Vertical -6, Horizontal -8, Opacity 45, Blur 30, color #000000.
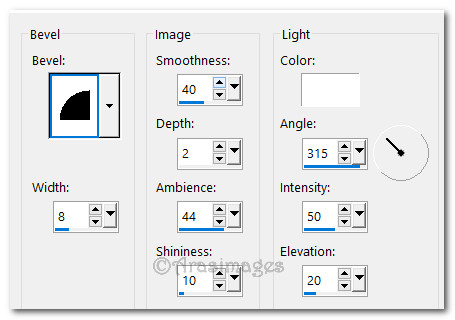
56. Invert. Effects/3D Effects/Inner Bevel.
57. Selections/Select None.
58. Leave your watermark or name if you wish. Save as .jpg.
OPTIONAL: Animation.
1. Copy the InWintersCold.jpg. Open Animation Shop/Paste as New Animation.
2. Using the Duplicate icon in the top tool bar, click until you have 20 frames. Edit/Select All.
3. In PSP, using the Selections tool, select the main image INSIDE the frame. Copy/then go to AS and Paste as New Animation. This image will not have a frame.
4. Using the Duplicate icon in the top tool bar, click until you have 20 frames without the main frame.
5. Open sneeuwjin.gif of snow. Highlight first frame/Edit/Select All. Copy.
6. Go back to the main image without the frame. Highlight the first frame/Edit/Select All.
7. Right click inside the first frame of main image/Paste into Selected Frame where you want the snow and left click to set in place.
8. Continue to fill the main image without the frame, omitting the young lady's face, until your image is filled with snow.
9. Edit/Select All. Copy the main image WITHOUT the main frame by clicking on the blue bar at the top. Go to the main .jpg image WITH the frame and Paste into Selection so it fits exactly over the first image.
10. You should now have an image with snow falling beautifully within the main image and not on the young girl's face. Click on the View Animation icon to check animation. If it is as you like it, then we can save. If not, use the Undo (or Back) arrow at the top tool bar and redo the snow until you are satisfied.

11. To save, File/Save As. When the box appears for you to Save As, direct it to where you want it saved, give your work the name In Winter's Cold and keep it to save as a .gif file. Click Save. As the boxes appear, click, Next, Next, Next and Finish. You should now have a beautiful animated image!
Thank you PamelaD and EvaTexas for testing this tutorial for me. December 2019.
If you are going to use this tutorial for stationery, cards or place the tutorial/tag on another site, I would appreciate you contacting me for permission, giving Arasimages credit for the original tutorial and if possible, a link back to my site. Thank you.
Copyright © Arasimages All Rights Reserved