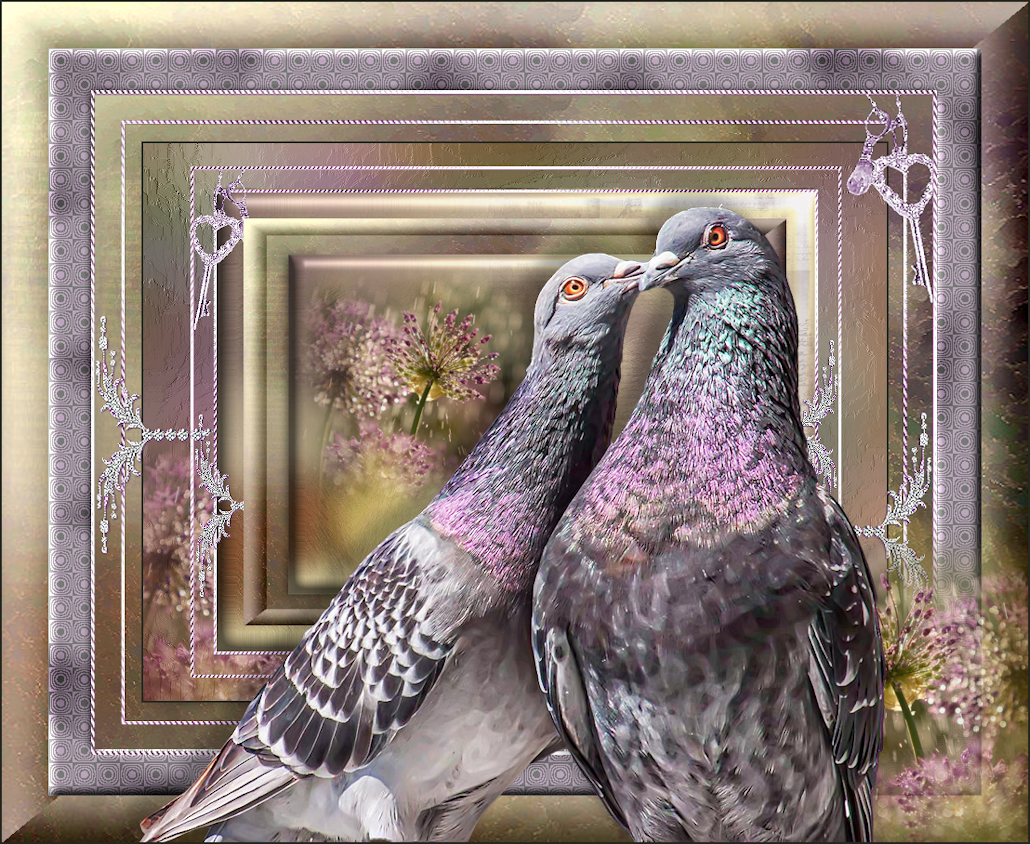
Come to my Nest
For this tutorial you will need the materials in the zip file below.

For an Italian, Danish, Dutch, German, Spanish and French translation click on the flags.


Create a folder on your desktop named Come to my Nest and unzip the materials in it. When using tubes leave the watermark on originals, duplicate and close out original keeping as is using duplicates for the tutorial. This tutorial used Filters Unlimited/Buttons and Frames/3D Glass Frame, AP 07 [Gradient-Pattern]/Pattern Squares and effects of PSP2020. To work this tutorial, it is assumed you have some working knowledge of Paint Shop Pro.
Thanks go to Nikita, to JHanna, to ChezColombe and to MDS for the beautiful tubes used.
Use the feather below to mark your place along the way.
1. In Materials Palette, set Foreground to #25272b and Background to #bf8dbf.
2. Open JHanna_184-background.jpg. Copy/Paste as New Image. Close out original.
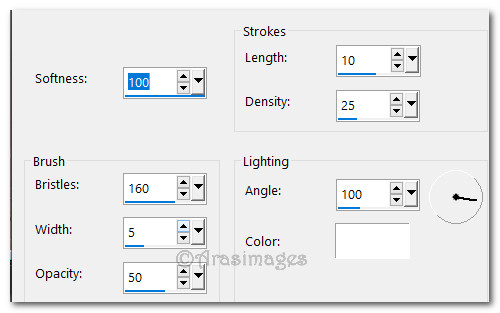
3. Effects/Art Media Effects/Brush Strokes.
4. Open mds8219 Flowers in Rain Background.pspimage. Copy/Paste as New Layer.
5. Image/Mirror/Mirror Horizontal. Move to bottom left corner.
6. Open JHanna_178-background.jpg.
7. Copy the mds 8219 flowers and Paste as New Layer in the JHanna_178-background.jpg.
8. Image/Mirror/Mirror Horizontal. Place in upper left side. Merge/Merge Down.
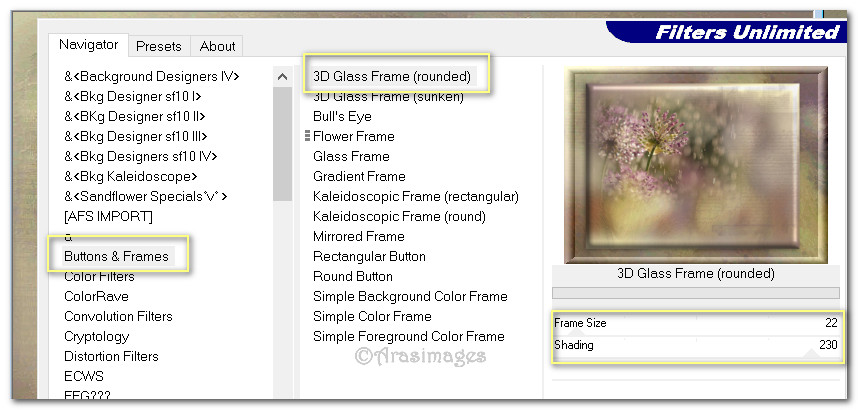
9. Effects/Filters Unlimited/Buttons & Frames/3D Glass Frame (rounded). Change Frame size to 22. Apply.
10. Copy the JHanna_178 background/Paste as New Layer on the working image.
11. Image/Resize/Resize by 73%/Resize all layers unchecked.
12. Go back to the original JHanna_178-background.jpg. Using Selections tool. Using settings seen below, select the center rectangle. Copy.

13. Paste as New Layer on working image. Pull below top layer.
14. Open frame-diamant-colombe.pspimage. Copy/Paste as New Layer.
15. Adjust/Sharpness/Sharpen.
16. Image/Add Borders/Add 2px border, Symmetric checked, color #25272b.
17. Image/Add Borders/Add 50px border, Symmetric checked, color #00ff00.
18. Using Magic Wand, activate the 50px border. Layers/New Raster Layer.
19. Copy original JHanna_178-background.jpg/Paste into Selection. Deselect.
20. Image/Add Borders/Add 50px border, Symmetric checked, color #00ff00.
21. Using Magic Wand, activate the 50px border.
22. Layers/New Raster Layer.
23. Paste original JHanna_178-background.jpg into Selection.
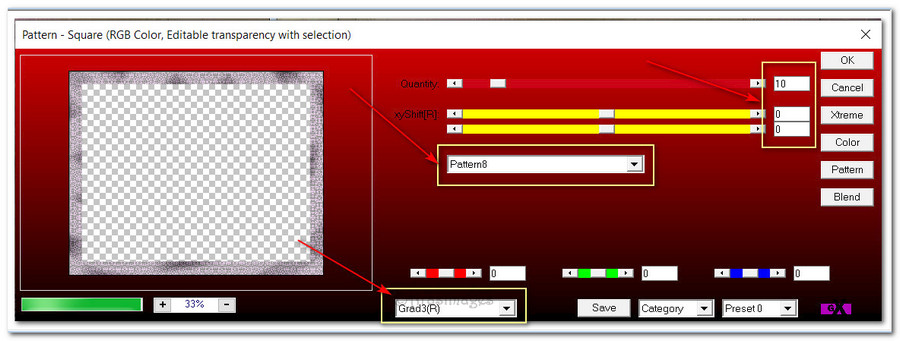
24. Effects/AP 07 [Gradients/Pattern]/Pattern square.
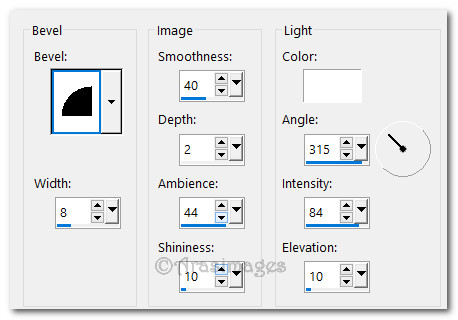
25. Effects/3D Effects/Inner Bevel.
26. Selections/Select None.
27. Open frame-diamant-colombe.pspimage. Copy/Paste as New Layer.
28. Images/Resize/Resize by 130%/Resize all layers unchecked.
29. Image/Mirror. Mirror Horizontal.
30. Adjust/Sharpness/Sharpen.
31. Image/Add Borders/Add 50px border, Symmetric checked, color #00ff00.
32. Using Magic Wand, activate the 50px border. Copy original JHanna_178-background.jpg/Paste into Selection.
33. Effects/Filters Unlimited/Buttons & Frames/3D Glass Frame (rounded). Settings left at Default 41/230.
34. Selections/Select None.
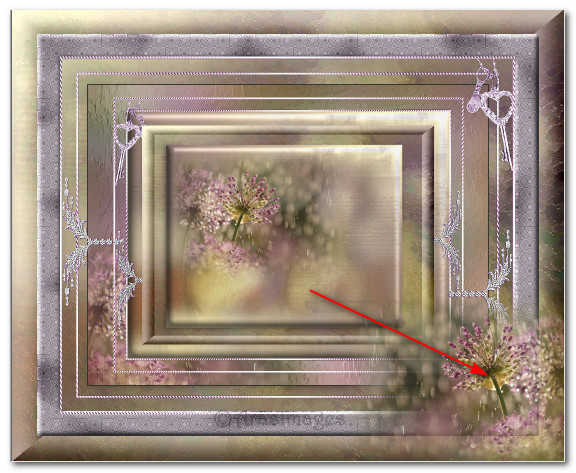
35. Open mds8219 Flowers in Rain Background.pspimage. Copy/Paste as New Layer.
36. Place flowers in bottom right corner.
37. Open 15698543483_animaux_nikita.pspimage. Select around the watermark with selection tool/Delete. Deselect. Copy.
38. Paste as New layer.
39. Image/Resize/Resize by 73%/Resize all layers unchecked.
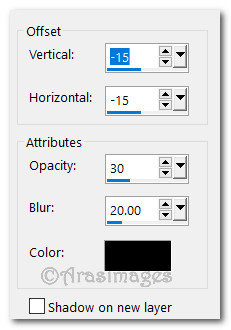
40. Effects/3D Effects/Drop Shadow. Vertical -15, Horizontal -15, Opacity 30, Blur 20, color #000000.
41. Place birds at the bottom of image.
42. Image/Add Borders/Add 2px border, Symmetric checked, Color #25272b.
43. Apply your watermark or name if you wish. Save as .jpg or .png file.
Thank you EvaTexas and PamelaD for checking this tutorial for me. January 25, 2020
If you are going to use this tutorial for stationery, cards or place the tutorial/tag on another site, I would appreciate you contacting me for permission, giving Arasimages credit for the original tutorial and if possible, a link back to my site. Thank you.
Copyright © Arasimages All Rights Reserved