
Hot Winds of Africa
For this tutorial you will need the materials in the zip file below.

For an Italian, German, Danish, Spanish and Dutch translation click on the flags.


Create a folder on your desktop named Hot Winds of Africa and unzip the materials in it. When using tubes leave the watermark on originals, duplicate and close out original keeping as is using duplicates for the tutorial. This tutorial used Filters Alien Skin Xenofex 2/Cracks, Bordermania/Ellipse, Olivers/Tunnel, Penta/ColorDot and MuraMeister/Perspective and effects of PSP2020. To work this tutorial, it is assumed you have some working knowledge of Paint Shop Pro.
Thanks go to PSP_Jet and to SuzannePhotography of South Africa for her outstanding zebra photograph used in this tutorial.
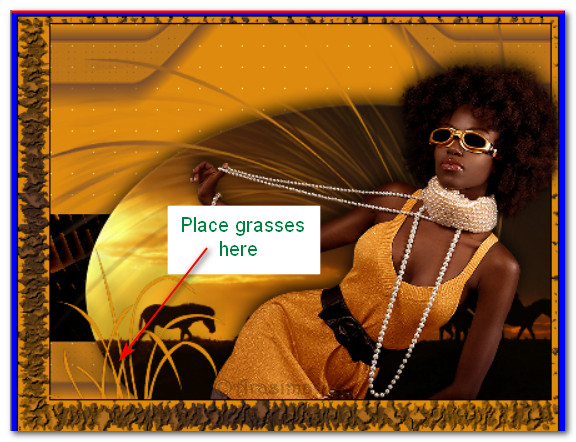
Use the grasses below to mark your place along the way.

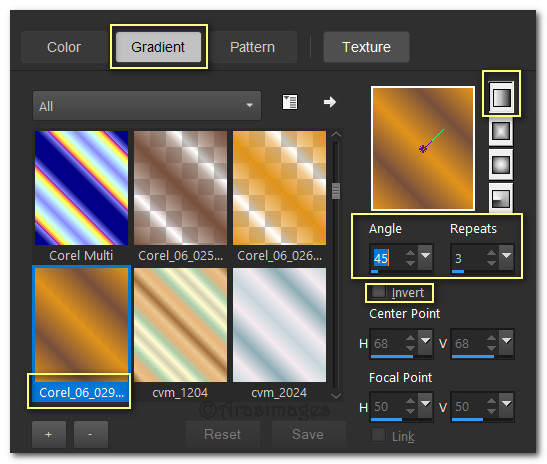
1. In Materials Palette, set Foreground to #de8a0e, Background to #6d4430, Corel_06_029 foreground/background, Linear at Angle 45/Repeats 3, Invert unchecked, Center and Focal points null.
2. New/New Image Width 800px/Height 600px. Change Foreground to color and flood fill with Foreground color #de8a0e.
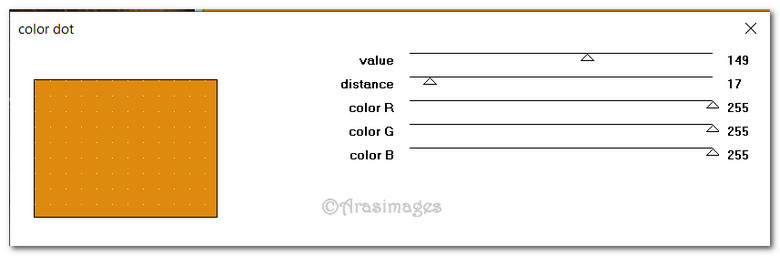
3. Effects/Penta/ColorDot.
4. Layers/New Raster Layer. Flood fill with Background color #6d4430.
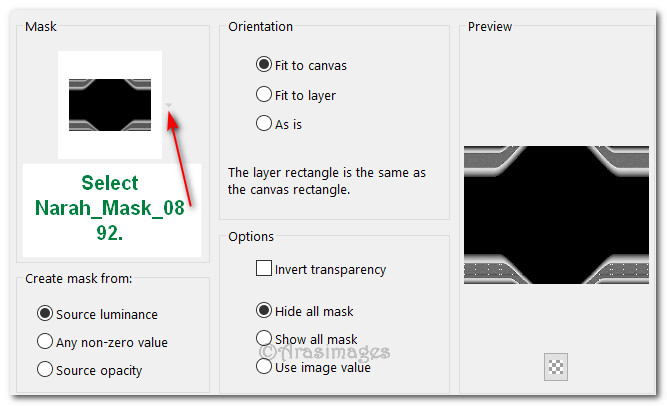
5. Layers/Load/Save Mask/Load Save Mask from Disk. From drop down arrow select Narah_mask_0892. Load. Merge/Merge Group.
6. Layers/New Raster Layer. Selections/Select All.
7. Open IMG_20190310_122448_SuzannePhotography.jpg. Copy/Paste Into Selection of new layer. Selections/Select None.
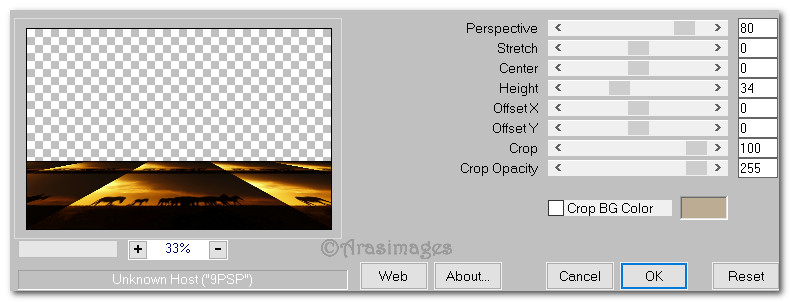
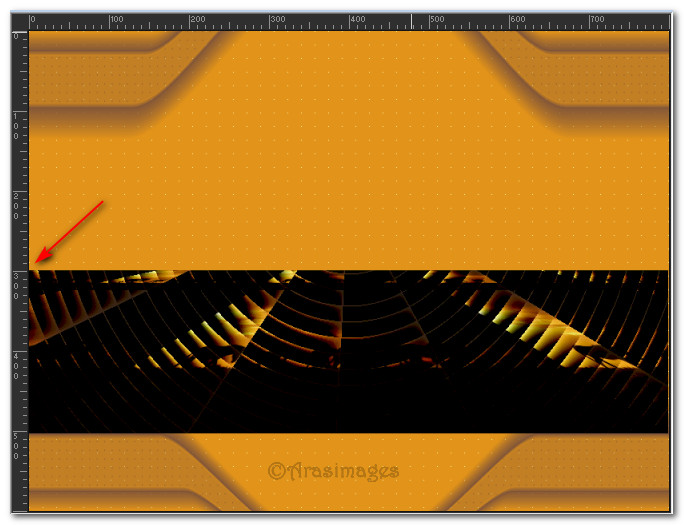
8. Effects/MuraMeister/PerspectiveTiling.
10. Layers/New Raster Layer.
11. Open IMG_20190310_122448_SuzannePhotography.jpg (if it is not still in memory). Copy/Paste as New Layer.
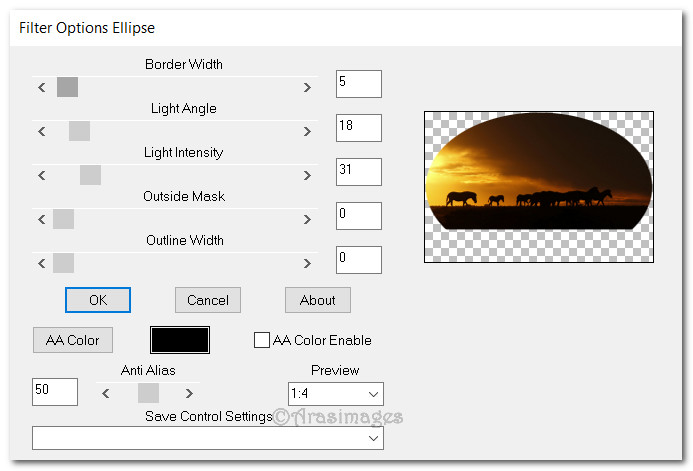
12. Move layer to top of image. Effects/Bordermania/Ellipse.
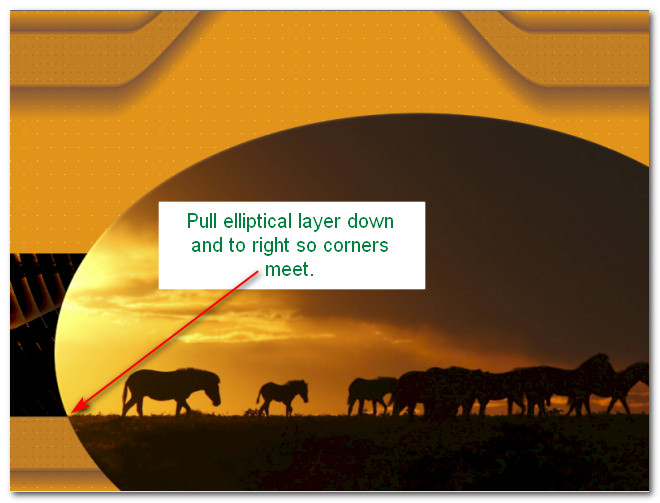
13. Pull Elliptical layer to bottom of image and to right side.
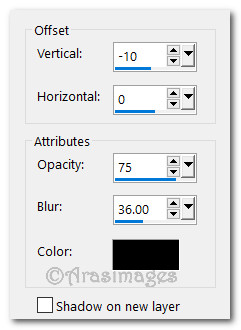
14. Effects/3D Effects/Drop Shadow. Vertical -10, Horizontal 0, Opacity 75, Blur 36, color #000000.
15. Image/Add Borders/Add 2px border, Symmetric checked, color #000000.
16. Image/Add Borders/Add 10px borders to top and right side, 50px borders on left side and bottom, Symmetric unchecked, color #ffffff.
17. Click the Magic Wand on the large border to activate it. Layers/New Raster Layer.
18. In Material Palette, set to Gradient as directed in Step 1. Flood fill the large border with Gradient.
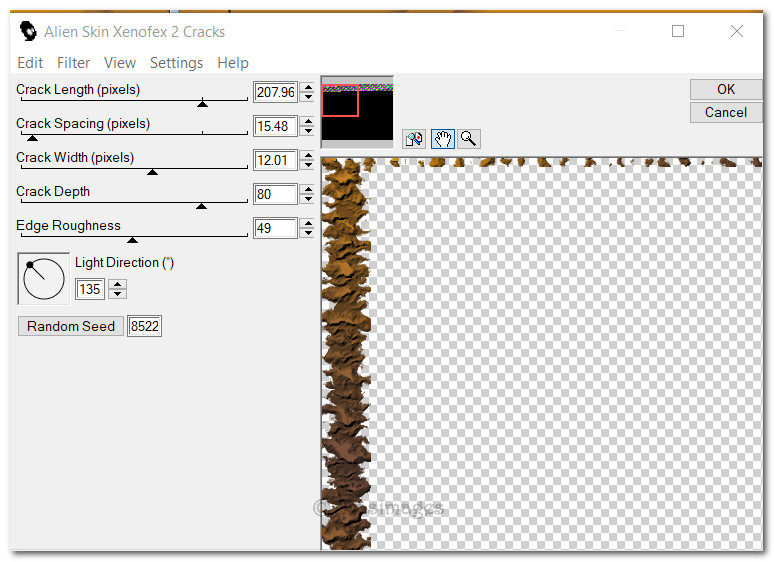
19. Effects/Alien Skin Xenofex 2/Cracks.
20. Layers/New Raster Layer. Flood fill border with Foreground color #de8a0e. Selections/Select None.
21. Pull layer below Xenofex layer. Go back to top to continue.
22. Image/Add Borders/Add 2px border, Symmetric checked, color #000000. Repeat 2px border with color #de8a0e.
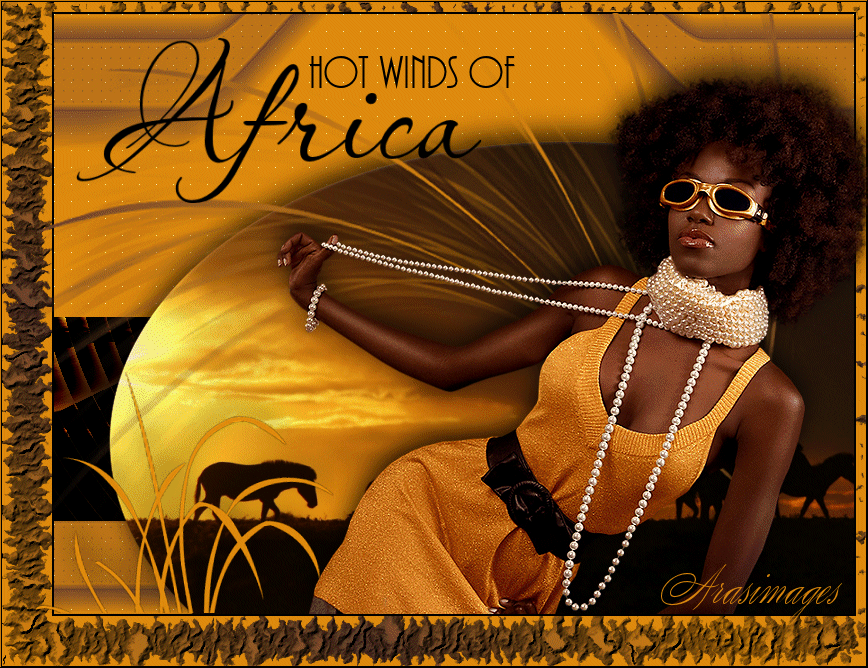
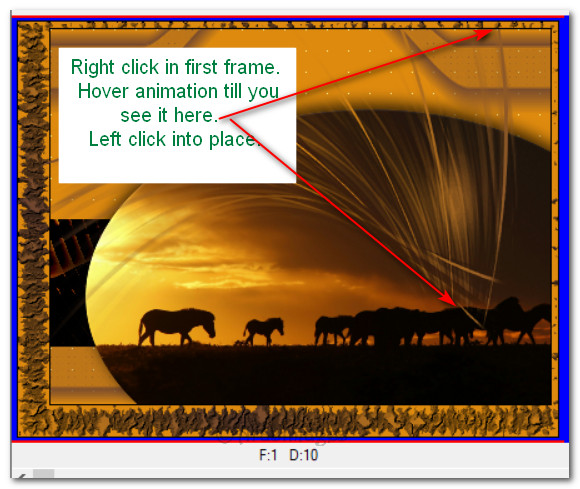
23. Sign your name or leave your watermark if you wish. Name working image Hot Winds of Africa. Save as .jpg.
24. Copy. Go to Animation Shop and Paste as New Animation (now main working image). Duplicate 31 times having 32 frames in all.
25. Highlight first frame. Edit/Select All.
26. File/Open EveningHour.mng of 32 frames. Highlight first frame. Edit/Select All. Copy.
27. Go to the New Animation main working image. Right click in first frame/Paste/Into Selected Frame. Left click to set in place where you see in example below.
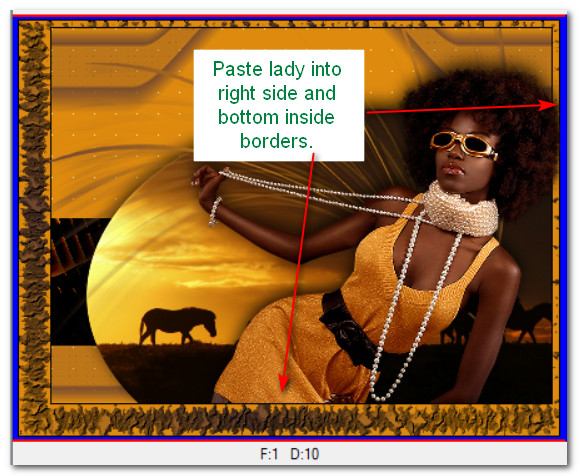
28. Working on main image/Edit/Propagate Paste. File/Open jet-woman with DS.psp file. Copy. Right click in first frame of main image/Paste/Into Selected Frame, placing her in the right side of image and inside the 2px border on bottom. Left click to set into place.
29. File/Open GrassesAS.psp. Copy. Right click in first frame/Paste/Into Selected Frame of main image in bottom left corner inside black 2px borders. Left click to set into place.
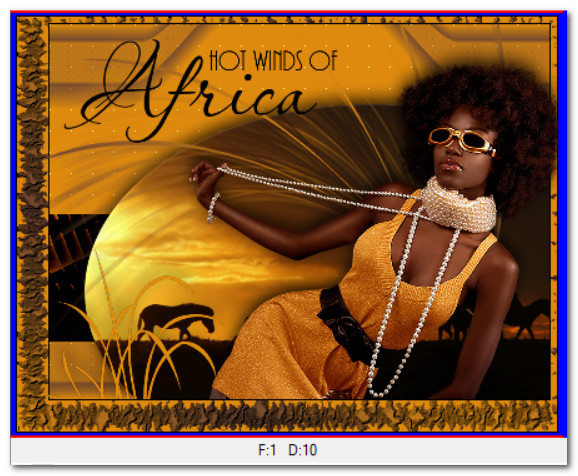
30. File/Open Africatext.psp. Copy. Right click in first frame/Paste/Into Selected Frame of main image placing them in upper left corner. Left click to set into place. See below.
31. Check your animations by clicking on the View Animation button in top tool bar. If they are not what you want, click the back arrow and try again. (I had to do this several times to paste the lady and grasses in!)
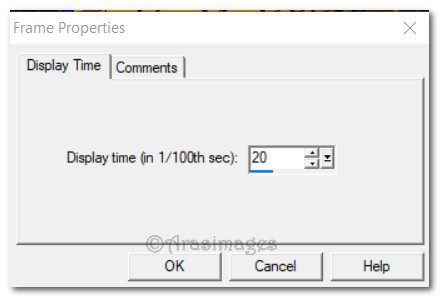
32. Animation/Frame Properties. Set this to 20. The higher the number the slower the animation moves.
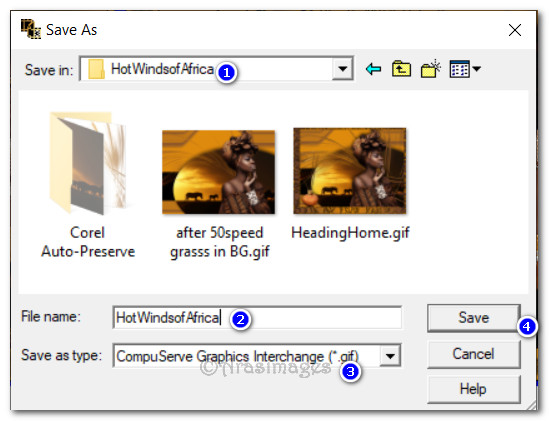
33. Now we will save our work. File/Save As. When the SaveAs box appears, name where to Save it in, Give your work a file name (Hot Winds of Africa) and leave Save as type as .gif. Click Save.
34. When the next boxes appear, click Next, Next, Next then Finish. All done!
This tutorial was checked by EvaTexas and PamelaD. Thanks ladies! February 6, 2020.
If you are going to use this tutorial for stationery, cards or place the tutorial/tag on another site, I would appreciate you contacting me for permission, giving Arasimages credit for the original tutorial and if possible, a link back to my site. Thank you.
Copyright © Arasimages All Rights Reserved