
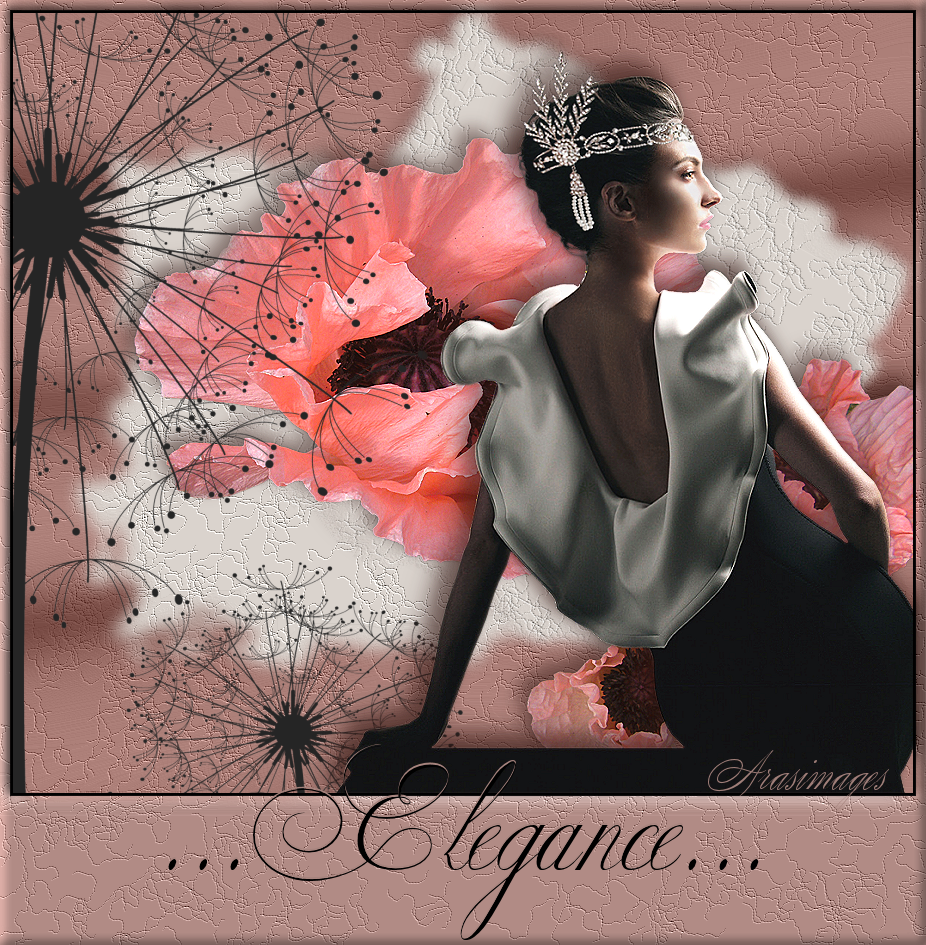
Elegance
For this tutorial you will need the materials in the zip file below.


This tutorial was written using Filters Unlimited 2/Lens Effects/Inverse Fisheye Tiler and Chopper, and effects from PSP2020 which I used to write the tutorial. To work this tutorial, it is assumed you have working knowledge of Paint Shop Pro.
Thanks go to Cibi and to Silvie for the lovely tubes used.
Use the flower below to mark your place along the way.

1. In Materials Palette set Foreground to #a7847e, Background to #50231c.
2. New/New Image 900W/780H. Flood fill with Background color #50231c.
3. Layers/New Raster Layer.
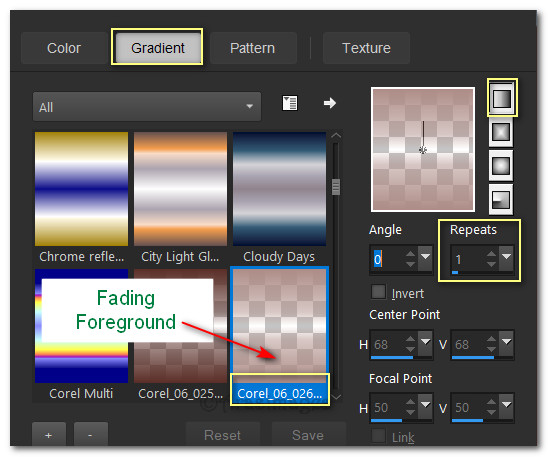
4. In Materials Palette use the Gradient called Corel_06_026 Fading Foreground to flood fill New Layer.
5. Effects/Filters Unlimited 2/Lens Effect/Inverse Fisheye Tiler.

6. Adjust/Blur/Gaussian Blur. Radius set to 20. Set Blend Mode to Luminance (Legacy).
7. Effects/TextureEffects/Fine Leather.
8. Layers/New Raster Layer.
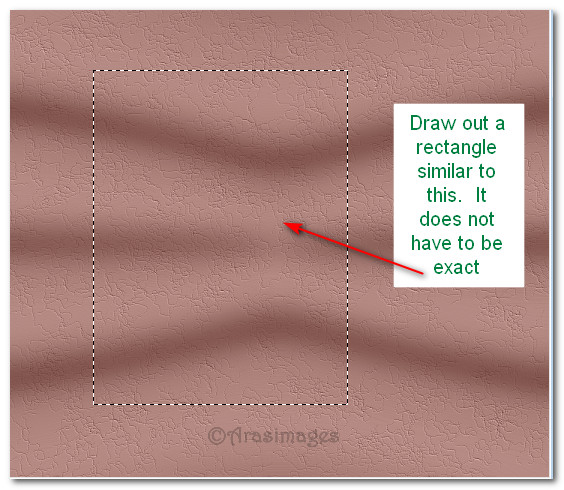
9. Using Selections tool set to Rectangle/Add (Shift)/Feather 0, Anti-alias, draw out a rectangle as seen below. It does not have to be exact.

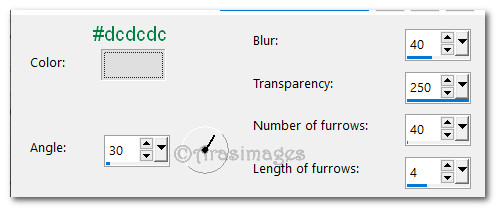
10. Change Foreground to #dad3cd. Flood fill rectangle with Foreground color. Deselect.
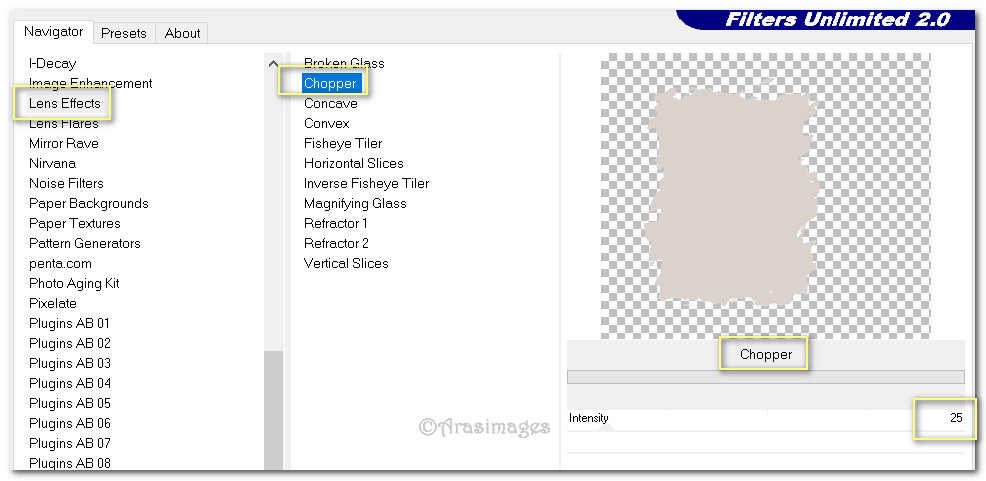
11. Effects/Filters Unlimited 2.0/Lens Effect/Chopper.
12. Effects/TextureEffects/Fine Leather.
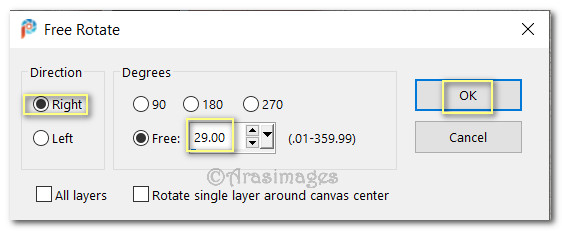
13. Duplicate. Image/Free Rotate/Rotate Right 29 degrees.
14. Effects/3D Effects/Drop Shadow. Vertical -10, Horizontal -10, Opacity 50, Blur 26, Color #311511.
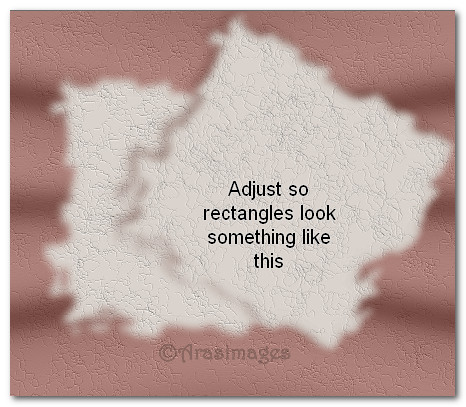
15. Adjust rectangles so bottom one is to the left side of image and top one is on top of it and toward top and right sides.
16. Open Rosa Poppy10.pspimage. Copy/Paste as New Layer.
17. Move poppy to right side so it meets right border of image and down about half way to bottom.
18. Effects/3D Effects/Drop Shadow. Vertical -10, Horizontal -10, Opacity 50, Blur 26, color #000000.
19. Adjust/Sharpness/Sharpen.
20. Open dandelion_PNG12858.png. Copy/Paste as New Layer.
21. Image/Resize/Resize by 76%/Resize all layers unchecked.
22. Move to left side of image having stem along left side of image.
23. Open Beauty_Inouma_diademe_CibiBijoux.png. Copy/Paste as New Layer.
24. Use Eraser tool or Selections tool to select and erase Cibi's watermark. Deselect if Selections tool was used.
25. Image/Resize/Resize by 86%/Resize all layers unchecked.
26. Effects/3D Effects/Drop Shadow. Vertical -10, Horizontal -10, Opacity 50, Blur 26, color #000000.
27. Adjust/Sharpness/Sharpen.
28. Move lady to bottom and right side.
29. Image/Add Borders/Add 3px border, Symmetric checked, color #000000.
30. Image/Add Borders/Add 10px border on top/sides and 150px on bottom, Symmetric unchecked, color #00ff00.
31. Using Magic Wand activate the large green border. Flood fill with #a7847e.
32. Effects/Texture Effects/Fine Leather.
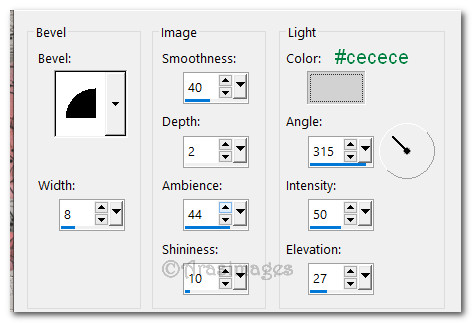
33. Effects/3D Effects/InnerBevel. Deselect.
34. Set Background color in Materials palette to #000000.
35. From Tool bar select Text Tool. Choose Copper Alt Caps Expert, Size 100, font color #000000, Stroke width 0.0. Type out three dots, then the word Elegance, then three dots again.

36. Convert to Raster Layer.
37. Adjust so text is in place. Objects/Align/Horizontal Center.
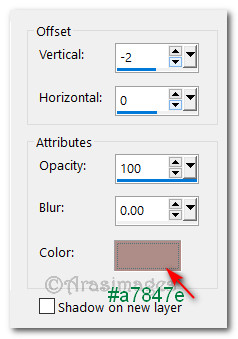
38. Effects/3D Effects/Drop Shadow. Vertical -2, Horizontal 0, Opacity 100, Blur 0, color #a7847e.
39. Merge/Merge Visible.
40. Sign your name or leave your watermark if you wish. Save as .jpg or .png file.
Thank you PamelaD and EvaTexas for testing this tutorial for me. February 21, 2020.
If you are going to use this tutorial for stationery, cards or place the tutorial/tag on another site, I would appreciate you contacting me for permission, giving Arasimages credit for the original tutorial and if possible, a link back to my site. Thank you.
Copyright © Arasimages All Rights Reserved