My Dearest
For this tutorial you will need the materials in the zip file below.

For an Italian, German, Danish, French, Spanish and Dutch translation click on the flags.


This tutorial was written using MuraMeister/Copies, the program Animation Shop and effects of PSP2020. Make copies of the materials so you will not lose the originals and use copies for your work. Place the brush a-dozi's-oldtext-10-Brush-001 into your PSP Brush folder and the Dusty Pinks.PspGradient in your PSP Gradient folder. Place the Preset_BallsAndBubbles_MyDearest.PspScript in your PSP Preset folder. Place the Selection ArasimagesMyDearest.PspSelection in your PSP Selections folder. To work this tutorial, it is assumed you have some working knowledge of Paint Shop Pro.
Thanks go to the unknown tubers of the lady tube and several scraps used. If any are yours, please let me know so I can give you credit.
Use the butterfly below to mark your place along the way.

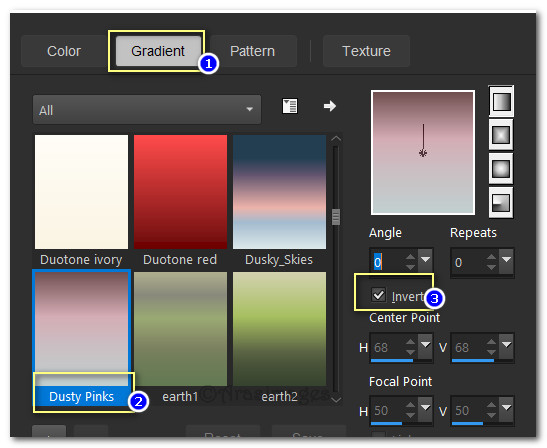
1. In Materials Palette, set the Foreground to Gradient selecting Corel_06\Dusty Pinks.PspGradient. Set Background color to #f1efed. Invert checked, Center Point and Focal Point Null, Angle/Repeats both at 0.
2. New/New Image. 900px by 700px. Flood fill with Gradient.
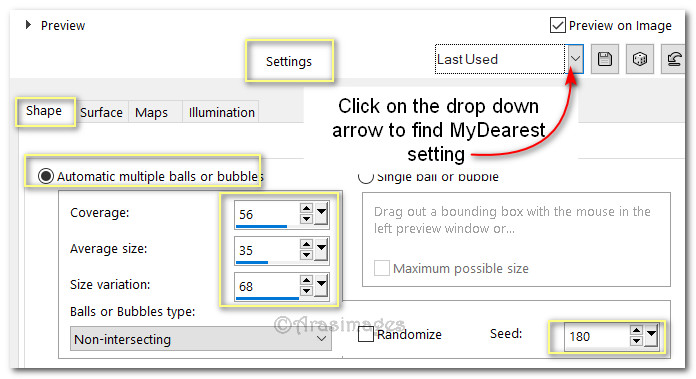
3. Duplicate. Effects/Artistic Effects/Balls and Bubbles. Select from Settings MyDearest Preset and click. OK.
4. Effects/Edge Effects/Enhance.
5. Adjust/Blur/Gaussian Blur. Radius set to 15.
6. Layers/New Raster Layer. Uncheck the Invert in Materials Palette.
7. Selections/Load/Save Selections/Load Selection from Disk. Load.
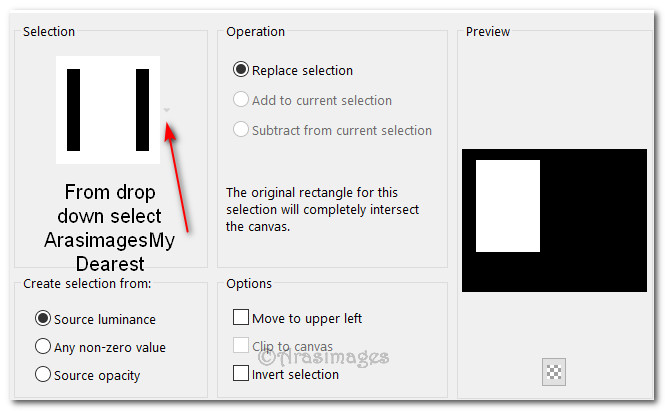
8. Flood fill Selection with Foreground Gradient. Selections/Select None.
9. Effects/3D Effects/Drop Shadow. Vertical -15, Horizontal -15, Opacity 50, Blur 25, color #000000.
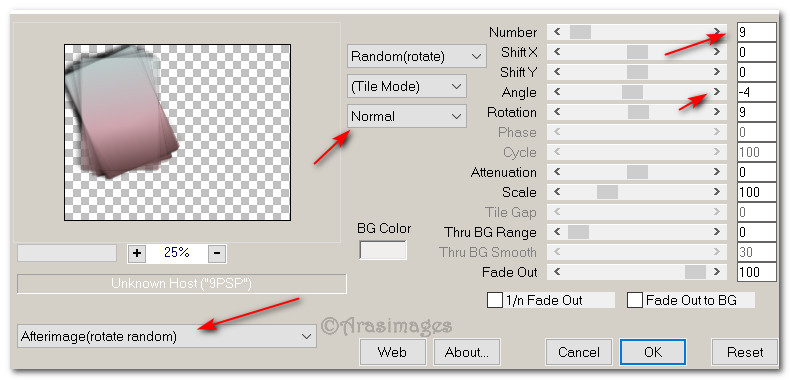
10. Effects/MuraMeister/Copies.
11. From tool bar select Paint Brush/a-dozi's-oldtext-10-Brush 001.PspBrush. Reset size to 350 leaving all other settings at default.
12. Layers/New Raster Layer. Using brush in above step, Background color #000000, using right click stamp brush in center of copies.
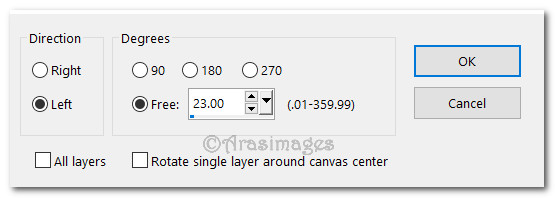
13. Image/Free Rotate. Rotate Left by 23 degrees.
14. Lower Opacity to 48. Effects/Edge Effects/Enhance.
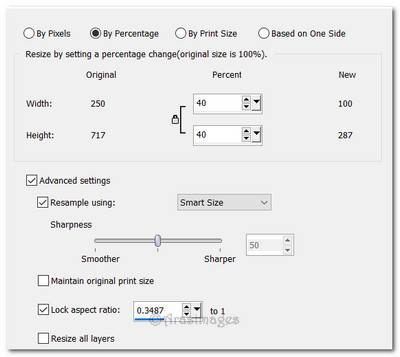
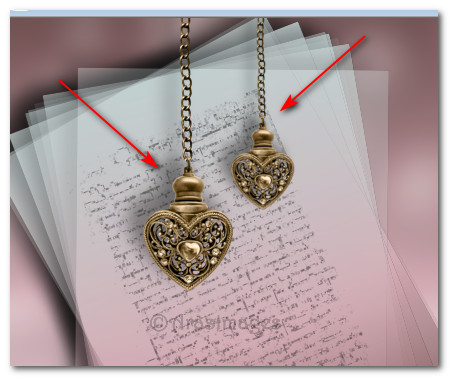
15. Open D-p_DFb8vxqIYUdxj6UaOlwiP2Y@250x717.psp of heart. Working on the tube itself, resize by 40%.
16. Copy/Paste as New Layer on main image. Move to left over letter.
17. Effects/3D Effects/Drop Shadow. Vertical -15, Horizontal -15, Opacity 50, Blur 25, color #000000.
18. Duplicate. Resize by 70%, move to right of first heart. (See placement below).
19. Click on X to close out heart tube chosing No to save changes.
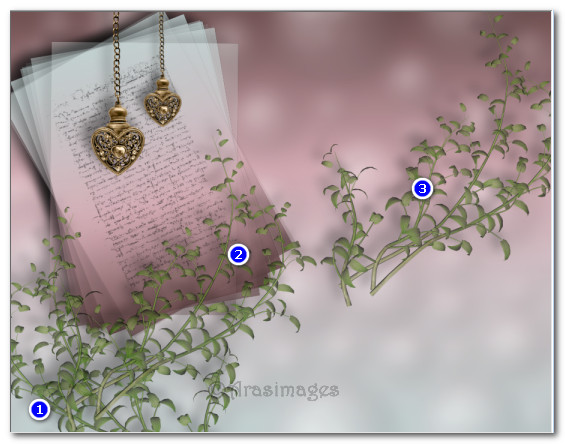
20. Open Juliette_Rom'Antique_ÚlÚments (14).psp of leaves. Copy/Paste as New layer.
21. Drop Opacity down to 74. Apply a drop shadow as in Step #17. Move into bottom left corner.
22. Adjust/Sharpness/Sharpen.
23. Paste again as New Layer. Image/Mirror/Mirror Horizontal.
24. Drop Opacity down to 74. Apply a drop shadow as in Step #17.
25. Adjust/Sharpness/Sharpen. Move to the right of first leaves and over paper.
26. Duplicate. Move into upper right corner. See below for leaves placement.
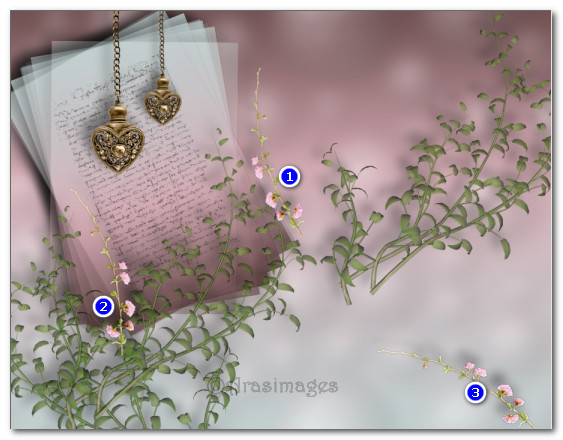
27. Open Flower.png. Copy/Paste as New Layer.
28. Place in center of image. Adjust/Sharpness/Sharpen.
29. Duplicate/Image/Mirror/Mirror Horizontal. Adjust/Sharpness/Sharpen.
30. Image/FreeRotate/Rotate by 31 degrees. Place in left side toward bottom on top of leaves and paper.
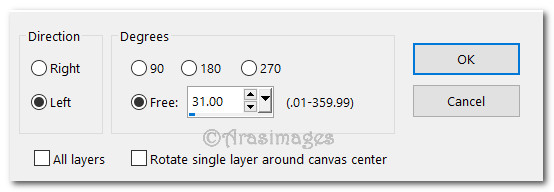
31. Duplicate. Image/FreeRotate/Rotate by 45 degrees. Adjust/Sharpness/Sharpen.
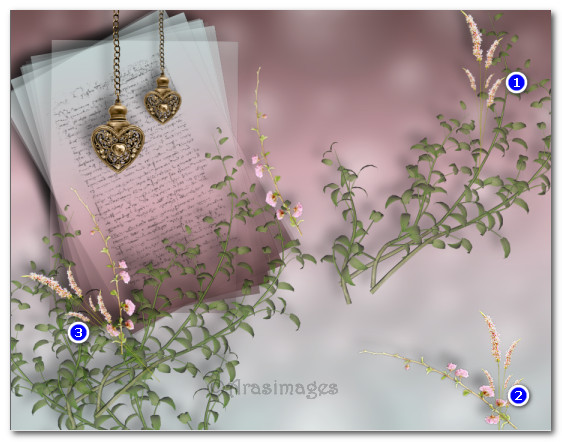
32. Place in bottom right corner. See image below for placement of Flower.
33. Open PinkStalk.png. Copy/Paste as New Layer.
34. Apply Drop Shadow of Vertical -15, Horizontal -15, Opacity 50, Blur 25, color #000000.
35. Adjust/Sharpness/Sharpen. Place in upper right corner.
36. PinkStalk.png/Copy/Paste as New Layer. Adjust/Sharpness/Sharpen. Place in bottom right corner.
37. Apply Drop Shadow of Vertical -15, Horizontal -15, Opacity 50, Blur 25, color #000000.
38. PinkStalk.png/Copy/Paste as New Layer. Apply drop shadow as above step.
39. Adjust/Sharpness/Sharpen. FreeRotate by 47 Degrees. Place to left of Flower in bottom left corner area.
40. Open 3ZHMtbsaA5hE3xYfq2km2XbZzd8@500x343.psp of car. Copy/Paste as New Layer.
41. Image/Resize/Resize by 90%/Resize all layers unchecked.
42. Adjust/Sharpeness/Sharpen. Apply drop shadow as you did in other steps. Place car in bottom left of center.
43. Open dxHQGZZcK0xzyViU3m4hvlfRndA@500x649.psp of lady. Copy/Paste as New Layer.
44. Adjust/Sharpness/Sharpen. Apply drop shadow as you did in other steps. Place lady in bottom right corner so tube fits.
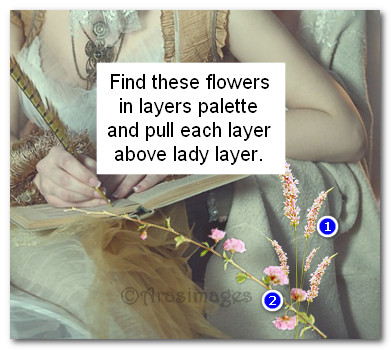
45. Close off Lady layer. Use the move tool to select the layers of flowers in right corner of image and pull each of those highlighted layers above layer of lady. Reopen Lady layer.
46. Image/Add Borders/Add 3px border, Symmetric checked, color #f1efed.
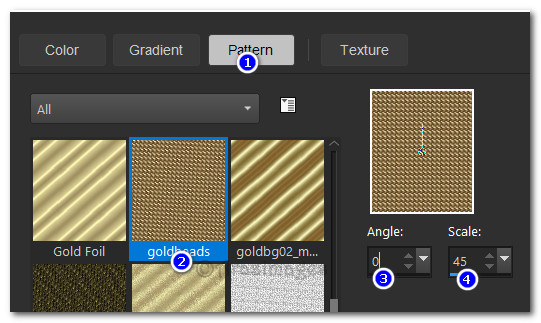
47. In Materials Palette, switch from Gradient to Pattern. Foreground Goldbeads/Angle 0/Scale 45.
48. Use Magic Wand on 3px border to activate it. Flood fill with Goldbeads pattern.
49. Effects/Edge Effects/Enhance. Deselect.
50. Image/Mirror/Mirror Horizontal. (Entire image!)
51. From Tool bar, select Smudge tool and smudge off writing from license plate. Place your name there if you wish.
52. Layers/New Raster Layer. I stamped my Arasimages there and used Pick tool to align it. Merge/Merge Visible. Save as .jpg or .png named My Dearest.
FOR ANIMATION
1. In Animation Shop, File/Open. Open the My Dearest file. Duplicate it 28 times for a total of 29 frames in all. Left click within first frame/Edit/Select All.
2. File/Open ButterflyAngled.mng file. Left click within first frame/Edit Select All/Copy.
3. Go back to My Dearest frames. Right click in first frame, Paste/Paste into Selected Frame. Place butterfly on woman's hand. Left click into place.

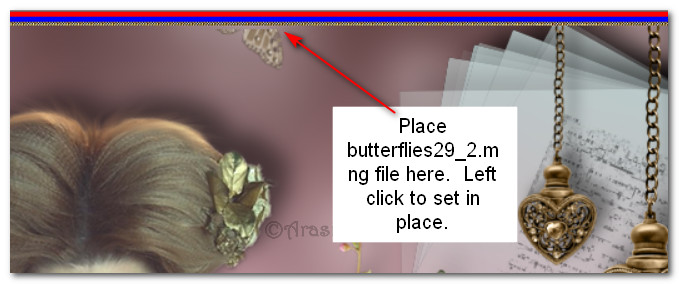
4. File/Open Butterflies29_2.mng. Left click within first frame/Edit/Select All/Copy.
5. Go back to My Dearest frames. Right click in first frame, Paste/Paste into Selected Frame. Place butterfly tip of wing at the top of image above lady's hair flower. Left click into place.
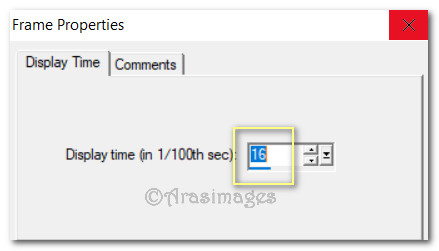
6. Animation/Frame Properties. Set the speed to 16. The higher the number, the slower the animation will be.
7. Click on the View Animation button at the top tool bar to check your animations. If your image with animation looks good, then we will now save.

8. File/Save As. The SaveAs box will appear. Name where you will save your work, file name it My Dearest and leave the Save as type left to .gif. Click Save.
9. As the boxes come up click Next, Next, Next then Finish. Your file is now saved where you directed it to go as My Dearest.gif.
Thank you Evatexas and PamelaD for testing this tutorial for me. March 5, 2020.
If you are going to use this tutorial for stationery, cards or place the tutorial/tag on another site, I would appreciate you contacting me for permission, giving Arasimages credit for the original tutorial and if possible, a link back to my site. Thank you.
Copyright © Arasimages All Rights Reserved