
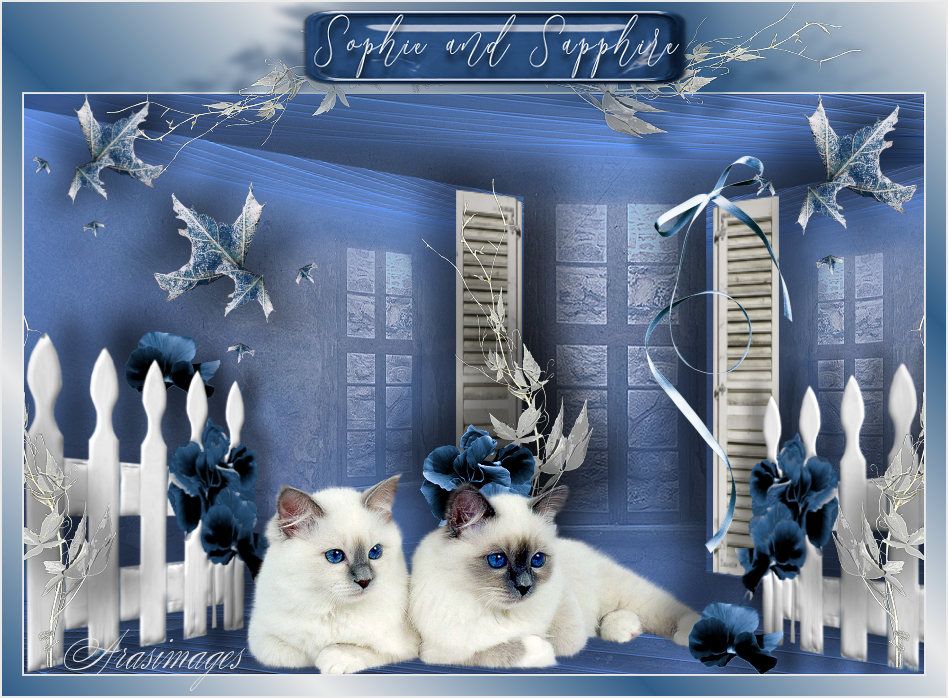
Sophie and Sapphire
For this tutorial you will need the materials in the zip file below.

For an Italian, Danish, German, French, Spanish and Dutch translation click on the flags.


Unzip the materials into a working folder you have created on your desktop named Sophie and Sapphire. Please duplicate and close original tubes using the copies for your work so you will not lose the originals. This tutorial was written using AbstractCurves/AbstractCurves, Andromeda/Perspective and effects of PSP. Place the preset for Andromeda/Perspective in the Andromeda Perspective/PerspectivePresets/andromeda/02Full Canvas/22Side Walls folder. To work this tutorial, it is assumed you have some working knowledge of Paint Shop Pro. I used PSP2020 for this tutorial.
Thanks go to JHanna and to httpchantalou1607eden.eklablog.com/ for their lovely tubes and also to the owners of the tubes without identification on them.
Use the branch below to mark your place along the way.

1. In Materials Palette, set Foreground to #e9e9e9/Background to #2f5c86.
2. New/New Image 900px by 580px. Selections/Select All.
3. Open JHanna_811 background.jpg. Copy/Paste into Selection. Deselect.
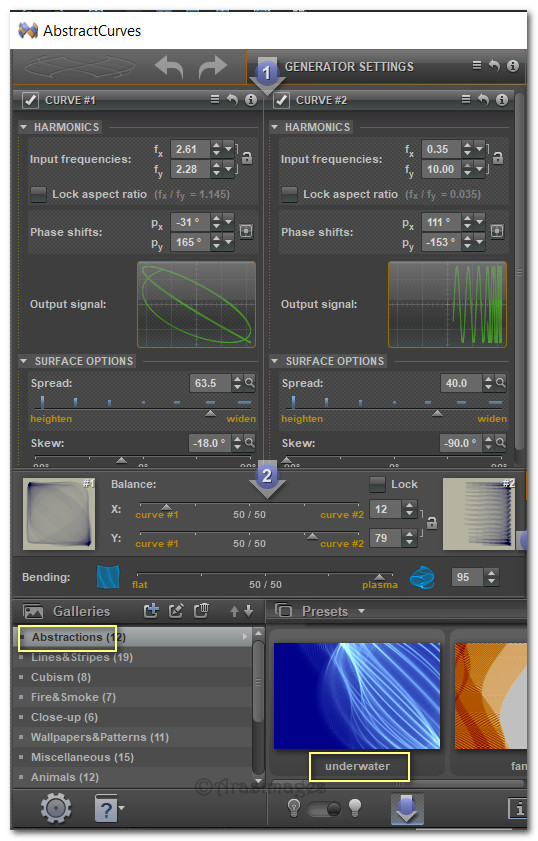
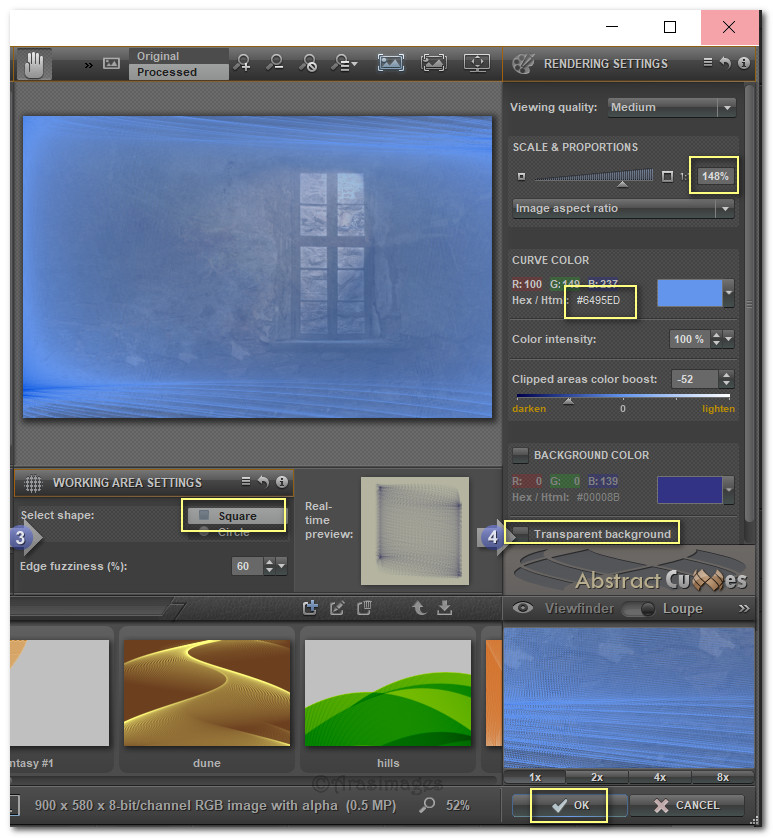
4. Effects/AbstractCurves/Abstract Curves. Choose Abstractions/underwater and all the other settings that apply to this effect.
5. Effects/Edge Effects/Enhance.
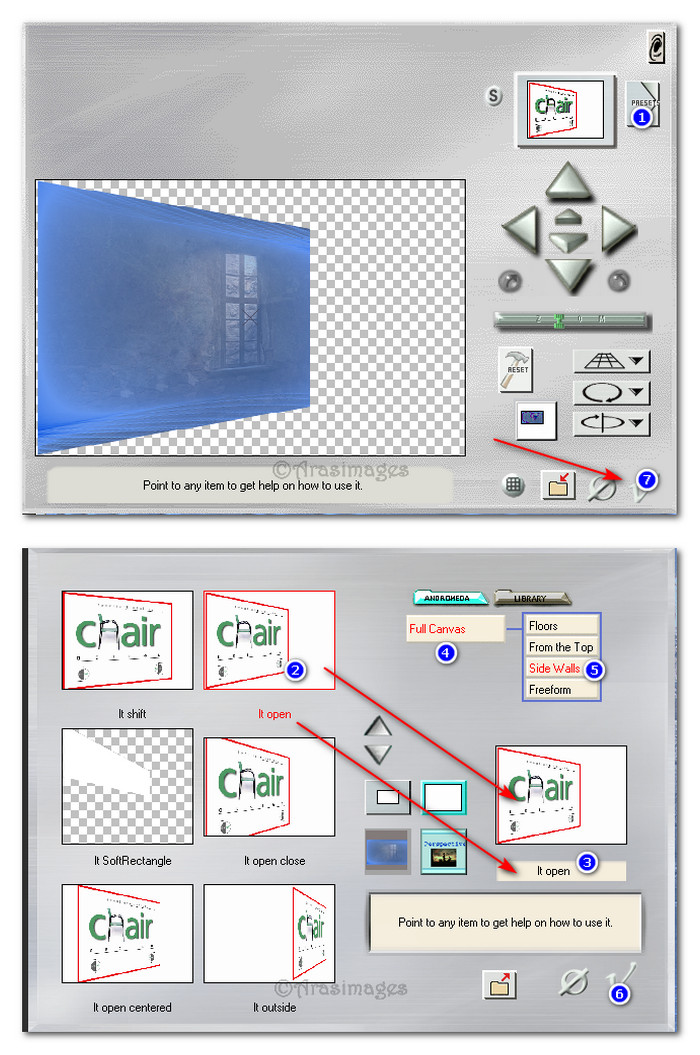
6. Duplicate. Effects/Andromeda/Perspective. Click Presets in upper right corner and in other areas indicated.
7. Effects/3D Effects/Drop Shadow. Vertical 40, Horizontal -43, Opacity 40, Blur 50, color #000000.
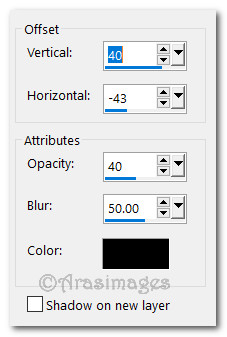
8. Effects/3D Effects/Drop Shadow. Vertical -40, Horizontal 43, Opacity 40, Blur 50, color #000000.
9. Duplicate. Image/Mirror/Mirror Horizontal.
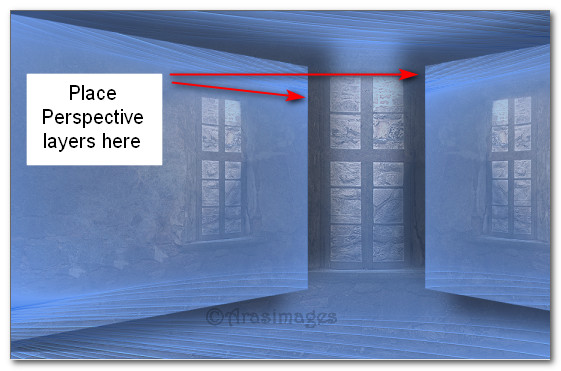
10. Move toward sides so perspective layers look like this example below.
11. Open httpchantalou1607eden.eklablog.comn-rideaux-et-fenetres-c179567792.png of shutter.
12. Working on tube, using Selections tool set to Rectangle/Add )Shift)/Feather 0, select the left shutter.
13. Copy/Paste as New Layer on main image.
14. Effects/Andromeda/Perspective. Use same settings as in Step #6.
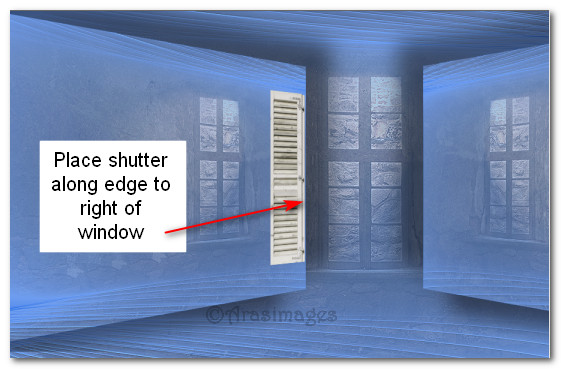
15. Move shutter to left perspective/right of window.
16. Using Pick tool pull up and down on shutter using nodes and a little to the left to resize it.
17. Effects/3D Effects/Drop Shadow. Vertical 22, Horizontal 28, Opacity 40, Blur 50, color #000000.
18. Effects/3D Effects/Drop Shadow. Vertical -22, Horizontal -28, Opacity 40, Blur 50, color #000000.
19. Duplicate. Image/Mirror. Mirror Horizontal. Place shutter to right of doorway. Shutters are now on both sides of doorway.
20. Open 0_8af11_566cb6ce_XL.pspimage of fence. Working on tube, do the following.
21. Image/Resize/Resize by 80%/Resize all layers unchecked.
22. Using Magic Wand, click on the white fence to activate it.
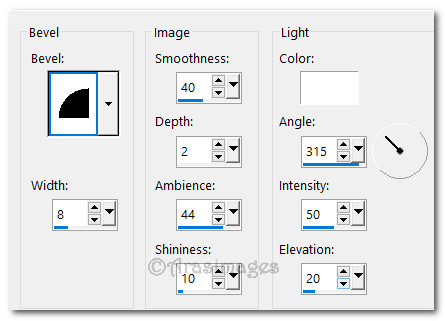
23. Effects/3D Effects/Inner Bevel. Deselect.
24. Effects/3D Effects/Drop Shadow. Vertical 40, Horizontal -43, Opacity 40, Blur 50, color #000000.
25. Effects/3D Effects/Drop Shadow. Vertical -40, Horizontal 43, Opacity 40, Blur 50, color #000000.
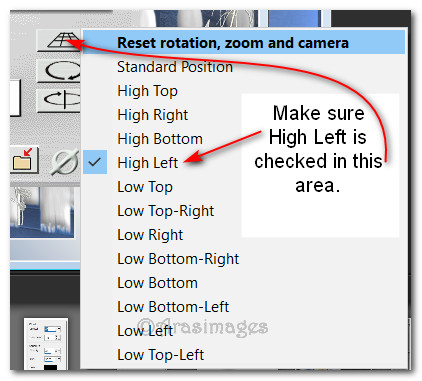
26. Effects/Andromeda/Perspective. Repeating Step #6 make sure High Left is checked where indicated.
27. Resize 65%. Copy/Paste as New Layer on main image. Place in bottom left corner. Using Pick tool to pull wider if needed.
28. Duplicate. Image/Mirror/Mirror Horizontal.
29. Move into right bottom corner of image so only 4 fence posts show.
30. Open 0_8af59_da851232_XL.pspimage of small blue pansy. Copy/Paste as New Layer.
31. Pull small blue pansy below left fence layer and place above other pansies behind fence.
32. Effects/3D Effects/Drop Shadow. Vertical 22, Horizontal 28, Opacity 50, Blur 50, color #000000.
33. Effects/3D Effects/Drop Shadow. Vertical -22, Horizontal -28, Opacity 50, Blur 50, color #000000.
34. Duplicate small pansy. Place on right bottom left of fence. Go to top layer to continue.
35. Open 0_b57a8_a613464_XL.png of leaves. Copy/Paste as New Layer.
36. Image/Resize/Resize by 23%/Resize all layers unchecked.
37. Create a Drop Shadow as in Steps #32 and #33.
38. Place leaves above fence on left. Duplicate. Image/Mirror/Mirror Horizontal.
39. Place leaves in upper right corner. Duplicate. Resize by 80%/Resize all layers unchecked. Place leaves in upper left corner.
40. Open 0_b57ba_a728dcc9_XL.png of ribbon. Resize by 50%/Resize all layers unchecked. Copy/Paste as New Layer. Place at the top of right shutter.
41. Open UpwardLeaves.pspimage. Copy/Paste as New Layer.
42. Resize by 50%/Resize all layers unchecked. Place at the bottom of left shutter.
43. Adjust/Sharpness/Sharpen.
44. Create a Drop Shadow as in Steps #32 and #33.
45. Duplicate. Place in bottom left corner. Duplicate. Image/Mirror/Mirror Horizontal. Place in bottom right corner.
46. Open 0_8af2a_d77494c7_XL.Resized.png of pansy cluster. Copy/Paste as New Layer.
47. Move to bottom of left window. Apply Drop Shadow as in Steps #32 and #33.
48. Open 61692749_Saphiere_GraphicDream_Tubes_Cat_118.png of kitties. Copy/Paste as New Layer.
49. Image/Resize/Resize by 73%/Resize all layers unchecked.
50. Effects/3D Effects/Drop Shadow. Vertical 40, Horizontal -43, Opacity 40, Blur 50, color #000000.
51. Place kitties in center of image almost to the bottom.
52. Adjust/Sharpness/Sharpen.
53. Drop down in Layers Palette to Copy of Raster 4 (the small single pansy). Highlight it/Layers/Arrange/Bring to Top. It will lay over the litties paw.
54. Image/Add Borders/Add 2px border, Symmetric checked, color #e9e9e9.
55. Image/Add Borders/Add 20px Borders on sides and bottom, 90px border on top, Symmetric unchecked, color #2f5c86.
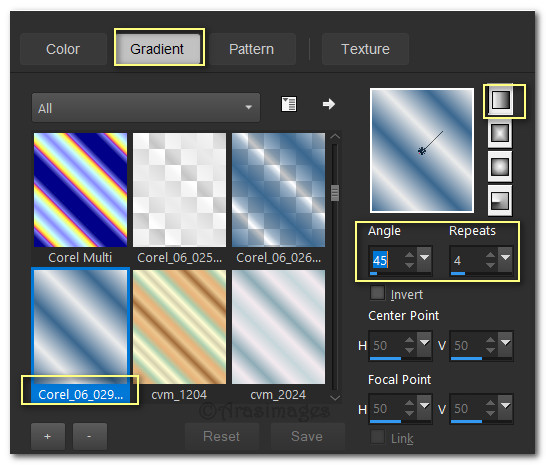
56. Create a Gradient in Materials Palette using Foreground #345e94 and Background color #e9e9e9, Linear, Angle 45/Repeats4, Invert unchecked. Center Point/Focal Point null.
57. Using Magic Wand, select the wide border. Layers/New Raster Layer/Flood fill with Gradient. Deselect.
58. Open Upwardleaves.pspimage. Image/Rotate Right.
59. Image/Resize/Resize by 44%/Resize all layers unchecked.
60. Effects/3D Effects/Drop Shadow. Vertical 22, Horizontal 28, Opacity 50, Blur 12, color #233f63.
61. Copy/Paste as New Layer on main image. Adjust/Sharpness/Sharpen. Move to upper right top.
62. Duplicate. Image/Mirror/Mirror Horizontal. Image/Flip/Flip Vertical.
63. Move to upper left top.

64. Open Sign.png. Copy/Paste as New Layer. Move to center top.
65. Effects/3D Effects/Drop Shadow. Vertical -28, Horizontal 22, Opacity 40, Blur 50, color #233f63.
66. Objects/Align/Horizontal Center. Adjust up/down if necessary.
67. Image/Add Borders/Add 2px border, Symmetric checked, color #e9e9e9.
68. Sign your name or leave a watermark if you wish. Save.
Thank you PamelaD and EvaTexas for testing this tutorial for me. April 6, 2020.
If you are going to use this tutorial for stationery, cards or place the tutorial/tag on another site, I would appreciate you contacting me for permission, giving Arasimages credit for the original tutorial and if possible, a link back to my site. Thank you.
Copyright © Arasimages All Rights Reserved