Feathers
For this tutorial you will need the materials in the zip file below.


Copy the original tubes and use the copies for your work so you will not lose the originals. Create a folder on your desktop called Feathers. Keep all your work files and tubes in it. I have used plugins MV's Plugins/Perspective Transformations, LOtis Filters/Mosaic ToolKit Plus v.255 and effects of this PSP to create this tutorial. I also used Animation Shop for the animated feathers which are optional. Place the Preset Balls and Bubbles Feather in your PSP Files/Presets folder. Place the Nikita Mask in your PSP Files/Masks folder. This tutorial was written using PSP2020. To work this tutorial, it is assumed you have some working knowledge of Paint Shop Pro.
Thanks go to Nikita for her lovely tube used in this tutorial.
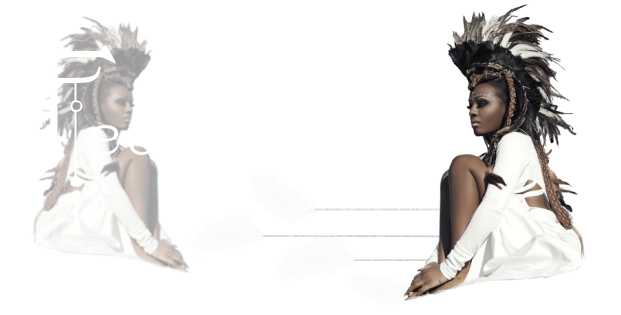
Use the feather below to mark your place along the way.

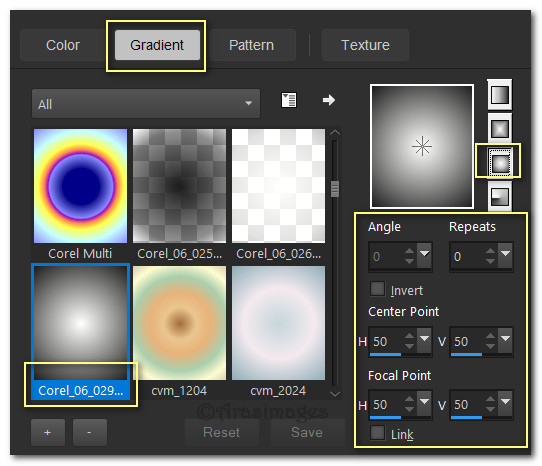
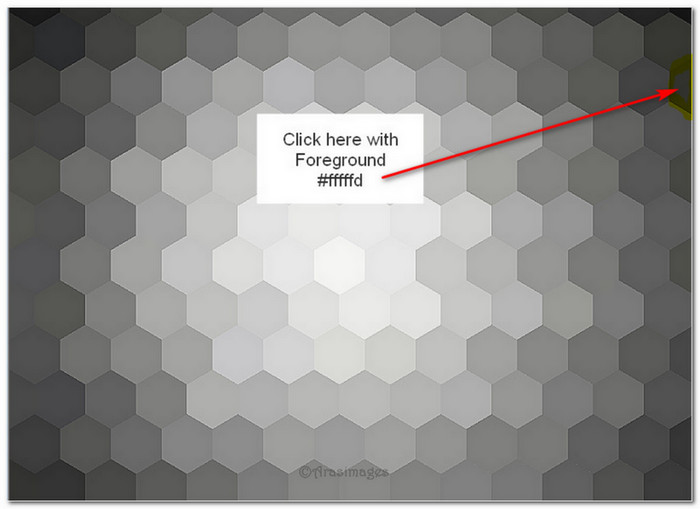
1. In Materials Palette, set the Foreground to #fffffd/Background to #101010. Using these colors create a Gradient from Sunburst, Corel_06_029, Angle/Repeats set to 0, Invert unchecked, Center and Focal Point H/V all to 50.
2. File/New/New Image 900px by 780px. Flood fill with Gradient.
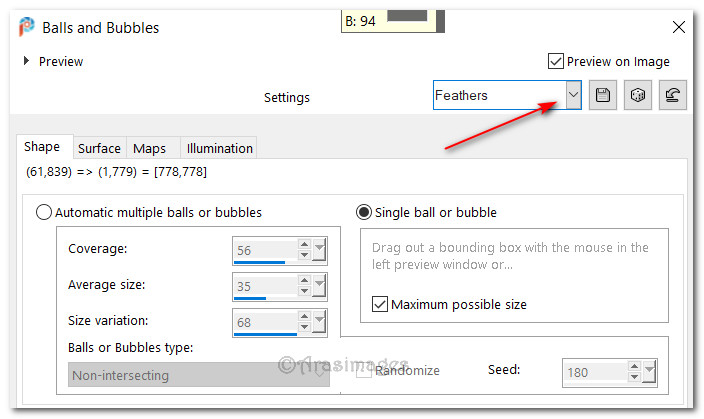
3. Effects/Artistic Effects/Balls and Bubbles. Click the Settings drop down and select Feathers and Single Ball or Bubble for settings. Click OK.
4. Adjust/Blur/Gaussian Blur. Radius set to 12.
5. Effects/Edge Effects/Enhance.
6. Effects/LOtis/Mosaic ToolKit Plus v2.55.

7. Effects/Edge Effects/Enhance More.
8. Using Color Changer tool, Tolerance and Edge Softness both set to 10, click here to change color using Foreground color #fffffd.
9. Set Materials Palette back to Gradient. Layers/New Raster Layer. Flood fill with Gradient.
10. Effects/Artistic Effects/Balls and Bubbles. Click the Settings drop down and select Feathers for settings. Click OK.
11. Adjust/Blur/Gaussian Blur. Radius 12.
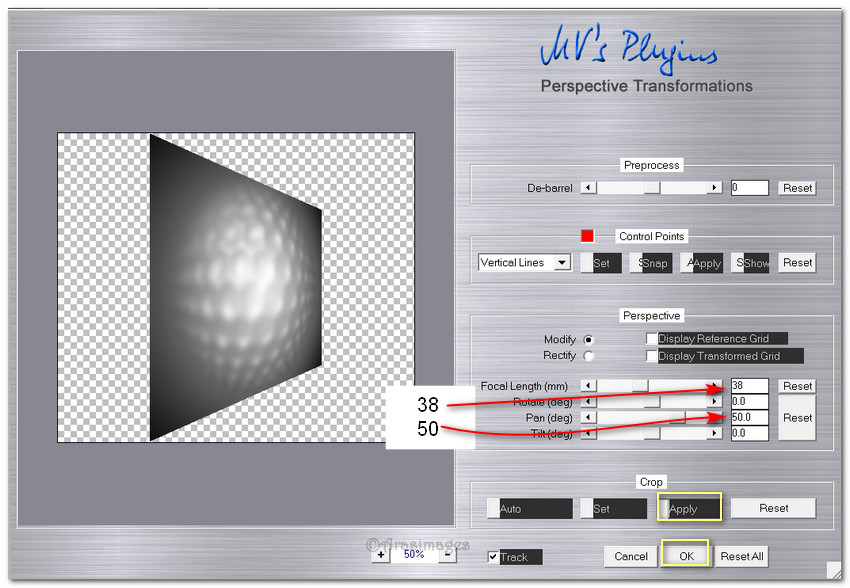
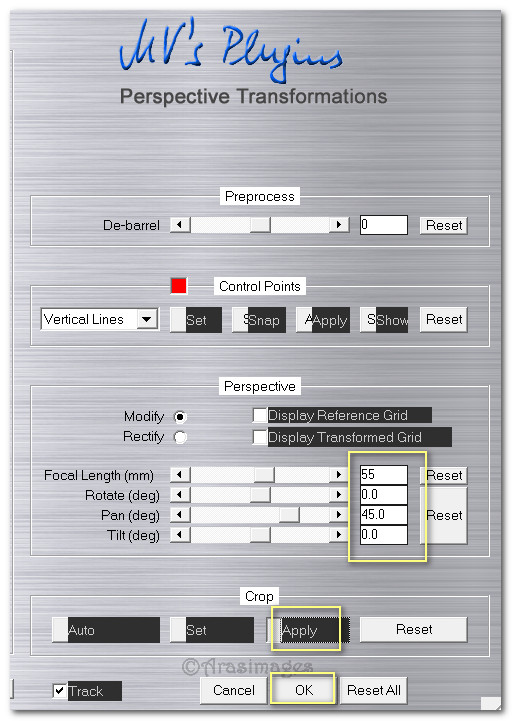
12. Effects/MV's Plugin/Perspective Transformations. Use settings below (Focal Length 38/Pan 50) click on Apply and OK .
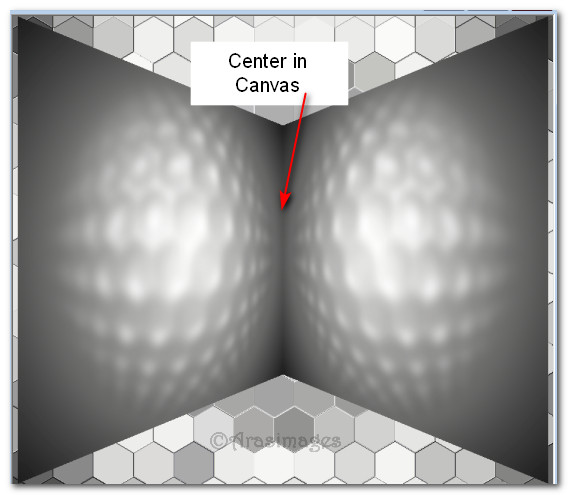
13. Duplicate. Image/Mirror. Mirror Horizontal.
14. Pull the two perspective images so they meet in middle. Merge/Merge Down.
15. Objects/Align/Center in Canvas.
16. Image/Resize/Resize by 90%/Resize all layers unchecked.
17. Effects/Distortion Effects/Polar Coordinates, color #101010.

18. Layers/New Raster Layer. Flood fill with Background color #101010.
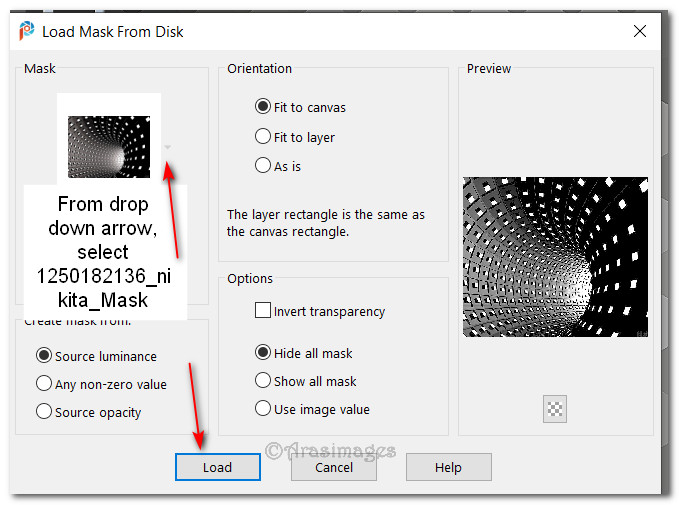
19. Layers/Load SaveMask/Load Mask From Disk. From drop down select 1250182136_nikita_Mask. Load.
20. Merge/Merge Group.
21. Layers/New Raster Layer. Flood fill with Background color #101010.
22. Selections/Select All. SelectionsModify/Contract by 3px. Delete. Deselect.
23. Merge/Merge Down.
24. Image/Resize/Resize by 83%/Resize all layers unchecked.
25. Open 156914730923_femmes_nikita.png. Copy/Paste as New Layer.
26. Using Selections tool, select around Nikita's watermark and Delete. Deselect.
27. Effects/3D Effects/Drop Shadow. Vertical 18, Horizontal -52, Opacity 50, Blur 3, Color #101010.
28. Move lady to bottom right corner.
29. Adjust/Sharpness/Sharpen.
30. Image/Add Borders/Add 3px border, Symmetric checked, color #fffffd.
31. Image/Add Borders/Add 100px border, Symmetric checked, color #101010.
32. Activate 100px border with Magic Wand.
33. Layers/New Raster Layer. Flood fill with Gradient.
34. Apply multiple balls and bubbles as seen in example below.

35. Adjust/Blur/Gaussian Blur, Radius 12.
36. Deselect. Image/Add Borders/Add 3px Border, Symmetric checked, color #fffffd.
37. Duplicate image. Image/Resize/Resize by 66%/Resize all layers unchecked.
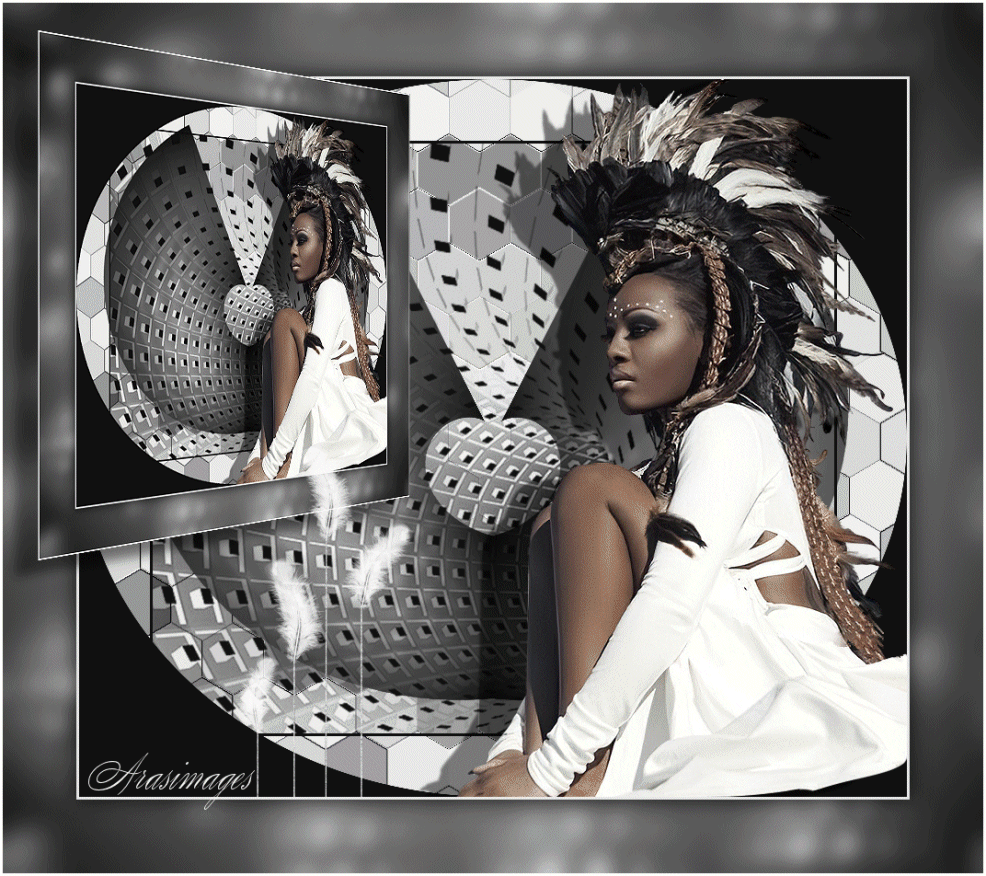
38. Effects/MV's Plugins/Perspective Transformations.
39. Move the small image into top left corner.
40. Effects/3D Effects/Drop Shadow. Vertical 18, Horizontal -25, Opacity 50, Blur 18, color #101010.
41. Adjust/Sharpness/Sharpen.
42. Sign your name or place your watermark if you wish. Merge/Merge Visible. Save as Feathers.jpg.
43. OPTIONAL ANIMATION.
44. In Animation Shop open Feathers.jpg. Duplicate 41 times having 42 frames in all.
45. Highlight first frame/Edit/Select All.
46. Open GoodFeatherAnimation.mng file. Highlight first frame/Edit/Select All. Copy.
47. Go back to main Feathers image. In first frame, right click/Paste/Into Selected Frame. Left click to set into place at bottom frame.
48. Click on the Animation button in top tool bar to check your animation. If you wish for feathers to move faster, click on Animation/Frame Properties and set as a lower number. The higher the number, the slower the animation moves.
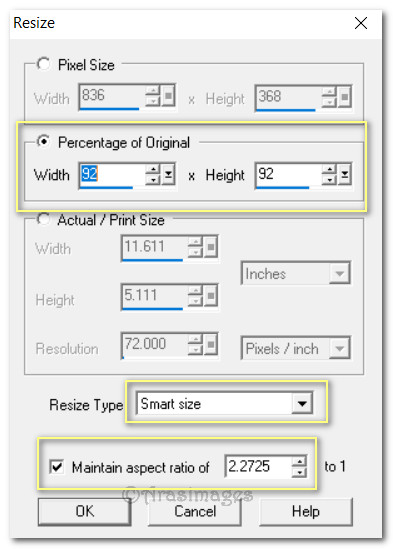
49. To make main image smaller go to Animation/Resize Animation. Place 92 in both spaces of Percentage of Original. Click OK.
50. To save your work: File/Save As. SaveAs box appears/name where you are saving your file, give the file the name Feathers and leave the .gif as is. Save.
51. The boxes will change and as they do, click on Next, Next, Next and Finish.
Thank you PamelaD and Evatexas for testing my tutorial. April 18, 2020.
If you are going to use this tutorial for stationery, cards or place the tutorial/tag on another site, I would appreciate you contacting me for permission, giving Arasimages credit for the original tutorial and if possible, a link back to my site. Thank you.
Copyright © Arasimages All Rights Reserved