
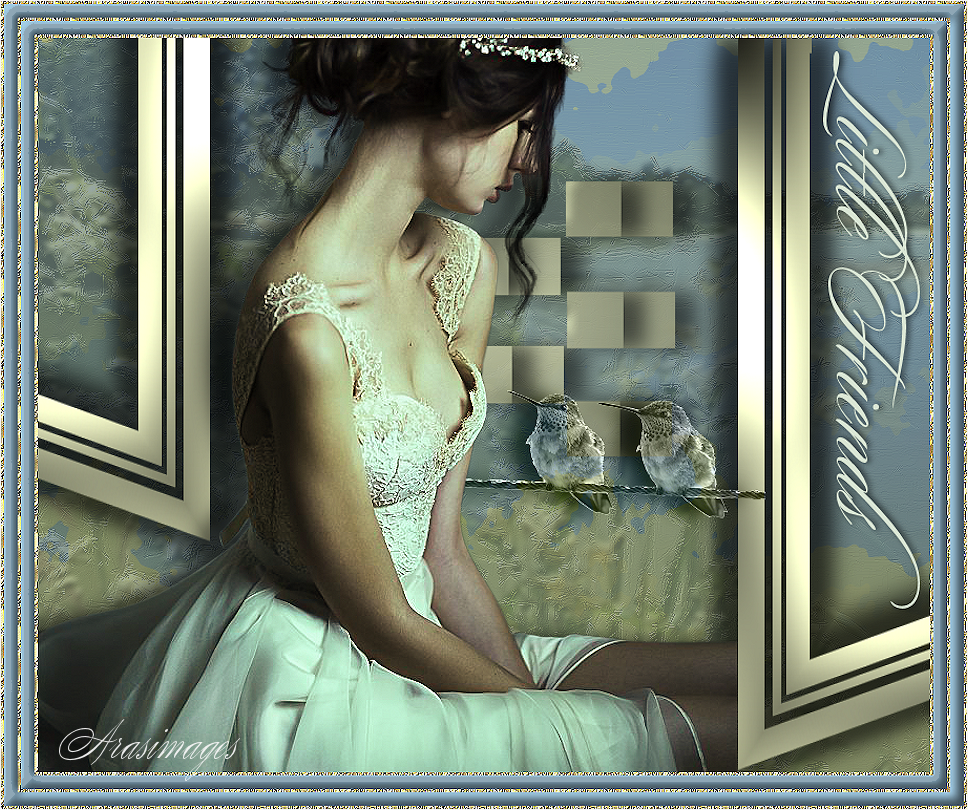
Little Friends
For this tutorial you will need the materials in the zip file below.

For a Danish, Italian, French, Spanish, German and Dutch translation click on the flags.


Unzip the materials into a working folder you have created on your desktop named Little Friends. Please duplicate and close original tubes using the copies for your work so you will not lose the originals. Place the steffi14 Pattern in your PSP Files/Patterns folder. Place Selections in your PSP Files/Selections folder. Click on the AlienSkin/Eye Candy 5: Textures/Marble ArasMarble.f1s file. It automatically imports it to your EC5/Textures/Marble folder. This tutorial was written using Alien Skin/Eye Candy 5: Textures/Marble, Graphics Plus/Cross Shadow and effects of PSP. To work this tutorial, it is assumed you have some working knowledge of Paint Shop Pro. I used PSP2020 for this tutorial.
Thanks go to Lisa for her amazing background photograph taken on their trip through France, to Linda Youngblood whose photography is outstanding (you can find her on Facebook where I found the hummingbirds) and to Nikita
Use the arrow below to mark your place along the way.

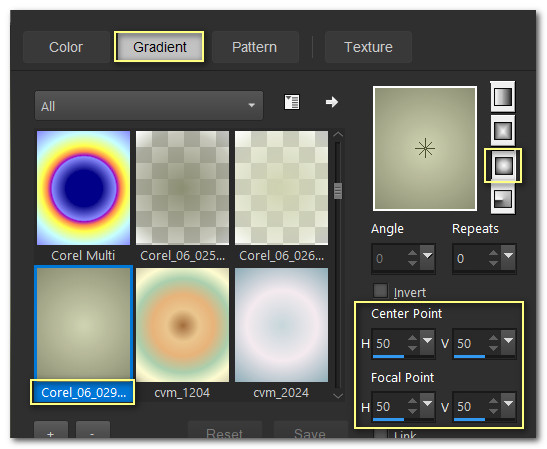
1. In Materials Palette, set Foreground to #cbcfaa, Background to #838569. Set to Gradient, Sunburst, Corel_06_29, Center and Focal Points all set to 50, Invert null.
2. New/New Image 850px by 700px. Flood fill with Gradient.
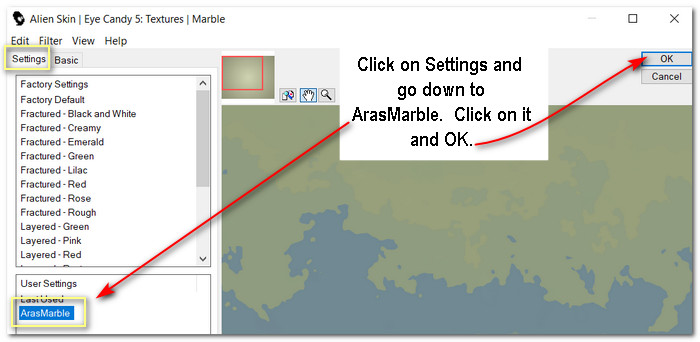
3. Effects/Alien Skin Eye Candy 5: Textures/Marble. Click on ArasMarble under Settings then OK.
4. Image/Flip. Flip/Vertical.
5. Layers/New Raster Layer. CTRL+A.
6. Open zIMG_0005.jpg. Copy/Paste into Selection. CTRL+D.
7. Image/Mirror. Mirror/Horizontal.
8. Drop Opacity down to 27.
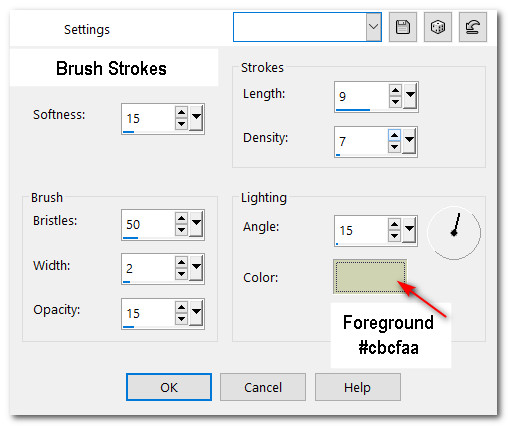
9. Effects/Art Media Effects/Brush Strokes.
10. Effects/Edge Effects/Enhance.
11. Layers/New Raster Layer.
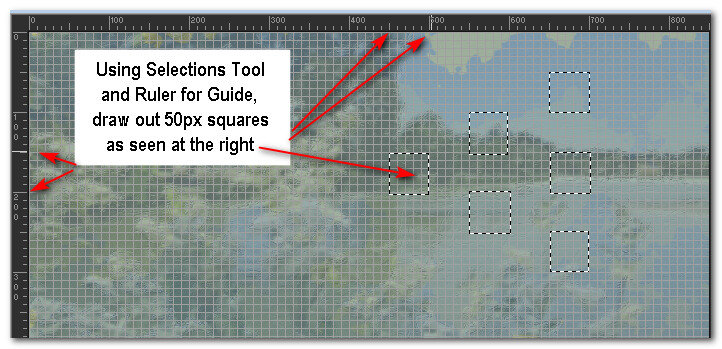
12. Set Image to View/Ruler. View/Grid. Using the Ruler and the Selections tool set to Square, draw out 50px squares as seen below. View/uncheck Grid.
13. Flood fill each square with Gradient.
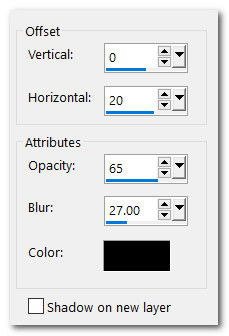
14. Effects/3D Effects/Drop Shadow. Vertical 0, Horizontal 20, Opacity 65, Blur 27, color #000000.
15. Right click on squares layer/Promote Selections to Layer.
16. Repeat drop shadow on Promoted squares. CTRL+D.
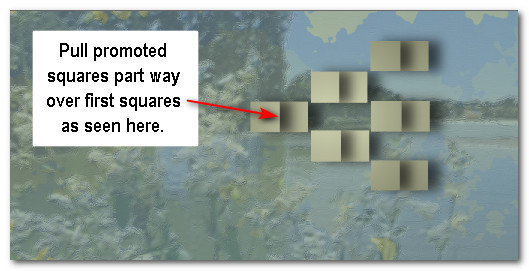
17. Pull Promoted squares to left so shadow overlaps first drawn squares.
18. Merge/Merge Down. Drop Opacity down to 85. View finished image for square placement.
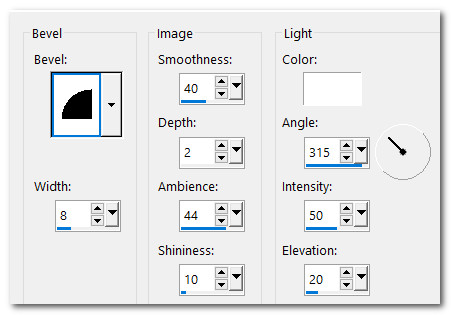
19. Effects/3D Effects/Inner Bevel.
20. Layers/New Raster Layer.
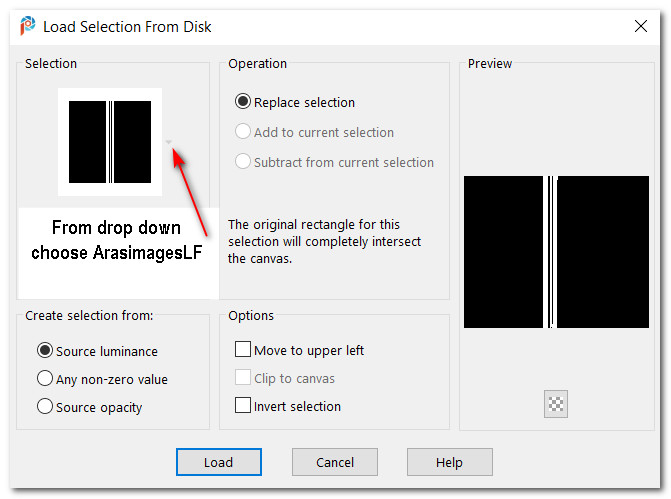
21. Selections/Load/Save Selection/Save Selection from Disk. From drop down, select ArasimagesLFSelection. Load.
22. Flood selection with Gradient.
23. Effects/GraphicsPlus/Cross Shadow. Default Settings.
24. Effects/3D Effects/Drop Shadow. Vertical 0, Horizontal 20, Opacity 65, Blur 27, color #000000.
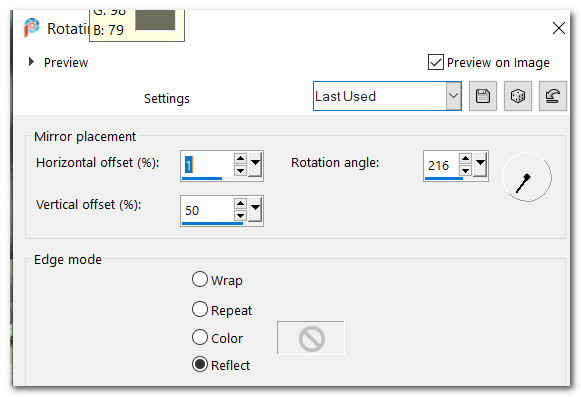
25. CTRL+D. Effects/ReflectionEffects/Rotating Mirror.
26. Effects/3D Effects/Drop Shadow. Vertical 0, Horizontal -20, Opacity 65, Blur 27, color #000000.
27. Effects/3D Effects/Drop Shadow. Vertical 18, Horizontal 0, Opacity 65, Blur 27, color #000000.
28. Using Pick Tool, pull upward/downward until selection fits vertically in image. Move to right side.
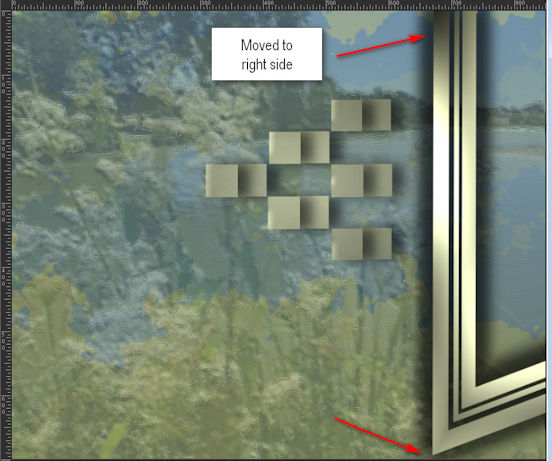
29. Duplicate. Image/Mirror. Mirror Horizontal. View main image for placement.
30. Open 134581677223_femmes_nikita.png. Use Selection Tool, select watermark, delete. CTRL+D.
31. Copy/Paste as New Layer. Move lady to left side to fit into bottom left corner and with her legs touching the right Selection.
32. Adjust/Sharpness/Sharpen.
33. Effects/3D Effects/Drop Shadow. Vertical 0, Horizontal -20, Opacity 65, Blur 27, color #000000.
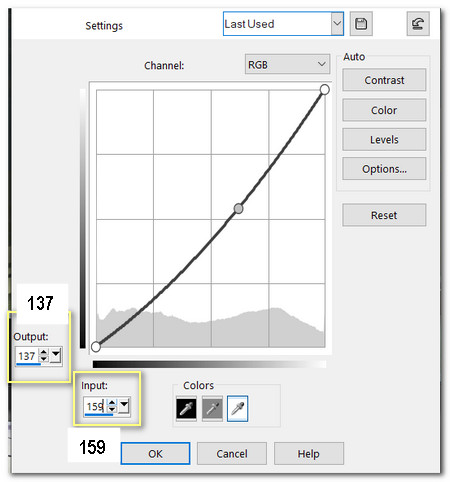
34. Adjust/Brightness and Contrast/Curves.
35. In Materials palette, change Background color to #dae6d5.
36. From Tool bar select Text tool. Find Sloop Script Three and set Size to 100/Color #dae6d5.

37. Type out the words "Little Friends". Convert to Raster Layer.
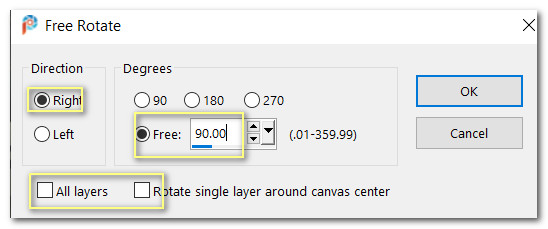
38. Image/Free Rotate by 90 degrees.
39. Place words in right side between selection and border.
40. Effects/3D Effects/Drop Shadow. Vertical 0, Horizontal 3, Opacity 70, Blur 9, color #000000.
41. Open LindaYoungbloodPhotographer-2020.pspimage. Using Selection tool, surround watermark and delete. CTRL+D.
42. Image/Resize/Resize by 27%/Resize all layers unchecked.
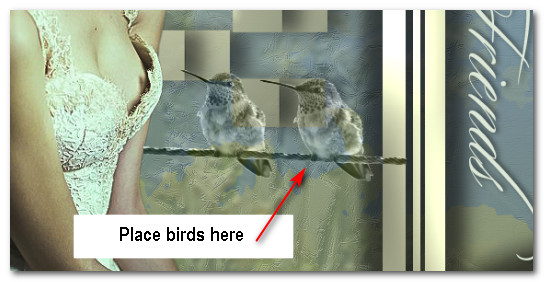
43. Set Blend Mode to Luminance (L). Move birds to right side of image as seen below.
44. Adjust/Sharpness/Sharpen.
45. Effects/3D Effects/Drop Shadow. Vertical 0, Horizontal -20, Opacity 70, Blur 27, color #000000.
46. Pull bird layer beneath lady layer. Go back to top layer to continue.
47. Image/Add Borders/Add 3px border, Symmetric checked, color #2d206a.
48. Using Magic Wand, click and activate 3px border.
49. In Materials Palette, change Foreground to Pattern steffi14, Angle: 0/Scale:100. Flood fill the 3px border with Pattern.
50. Effects/Edge Effects/Enhance. CTRL+D.
51. Image/Add Borders/Add 13px border, Symmetric checked, color #7796a8.
52. Using Magic Wand, click to highlight 13px border.
53. Effects/3D Effects/Inner Bevel. CTRL+D.
54. Image/Add Borders/Add 3px border, Symmetric checked, color #2d206a.
55. Repeat Steps #48 through #50.
56. Image/Add Borders/Add 13px border, Symmetric checked, color #7796a8.
57. Using Magic Wand, click to highlight 13px border.
58. Effects/3D Effects/Inner Bevel. CTRL+D.
59. Image/Add Borders/Add 3px border, Symmetric checked, color #2d206a.
60. Repeat Steps #48 through #50.
61. Image/Resize/Resize by 105%/Resize all layers checked.
62. Adjust/Sharpness/Sharpen.
63. Image/Add Borders/Add 1px border, Symmetric checked, color #f6f6f6.
64. Sign your name or leave your watermark if you wish. Save.
Thank you PamelaD and Evatexas for checking this tutorial for me. June 7, 2020.
If you are going to use this tutorial for stationery, cards or place the tutorial/tag on another site, I would appreciate you contacting me for permission, giving Arasimages credit for the original tutorial and if possible, a link back to my site. Thank you.
Copyright © Arasimages All Rights Reserved