
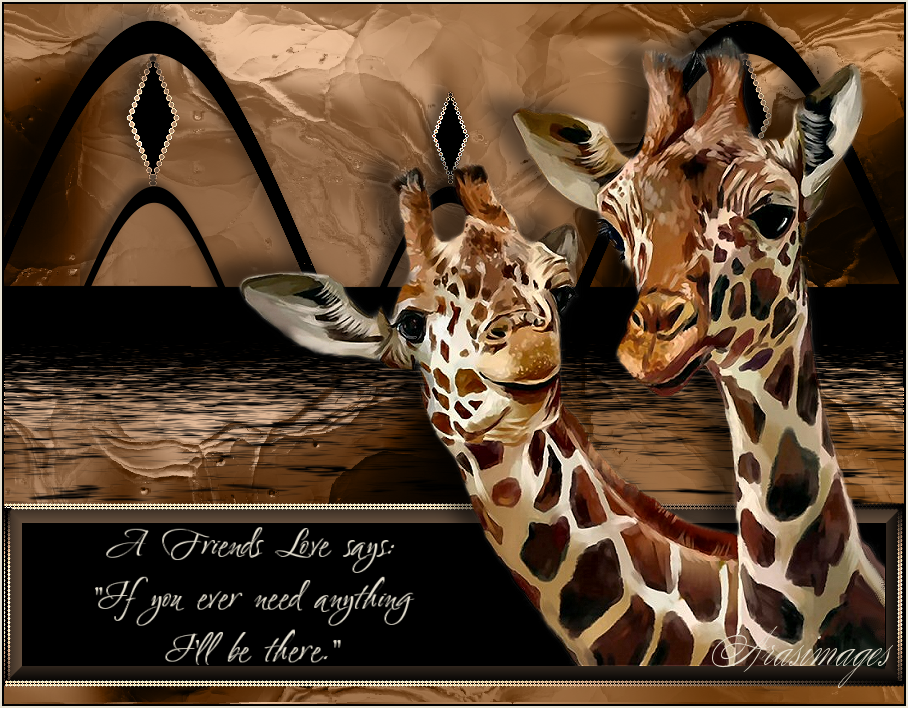
I'll be There
For an Italian, French, Danish, Spanish and Dutch translation click on the flags .


For this tutorial you will need the materials in the zip file below.

Open the giraffe tube and make a copy. Place this copy in a folder on your desktop named I'll be There and use the copy for your work so you will not lose the original. This tutorial was written using Filter Factory Gallery H/Zoom Blur, Flaming Pear/Flood, Filter Forge/Filter Forge 6/Creative/Ice Age and effects from PSP. Place the Gradient GiraffeTwo in your PSP Files/Gradient folder. Place Preset Diamond 1 (Objects .jsl) in your PSP Files/Preset Shapes folder. Place the krisbigdot sld in your PSP Files/Styled Lines folder. Place both of the Selections in your PSP Files/Selections folder. Export the brush to your PSP Files/Brushes folder. To work this tutorial, it is assumed you have some working knowledge of Paint Shop Pro. Hint: If you do not have Ice Age in your Filter Forge, go to their Home page, click on Filter Library to download any of their 13,126 free Plugins. You cannot resist collecting several!
Thanks go to Silvie for tubing these beautiful Giraffes. Original creator unknown.
Use the bookmark below to mark your place along the way.

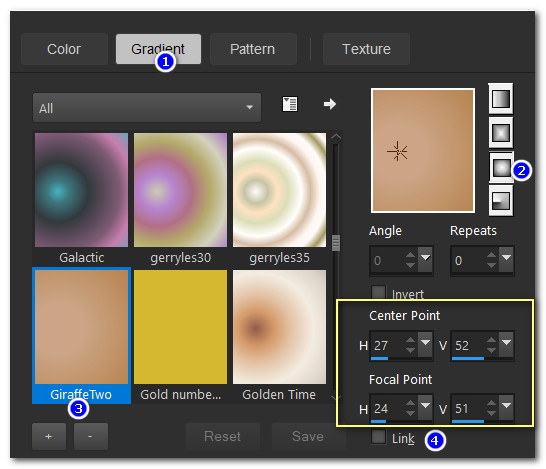
1. In Materials Palette, set color #c69d7b in Foreground, color #b07944 in Background. Select to Sunburst, Angle/Repeats at 0, Invert unchecked, Center Point H27/V52, Focal Point H24/V51. Click on Gradient and set GiraffeTwo in Foreground.
2. New/New Image 900px by 700px. Flood fill with GiraffeTwo Gradient.
3. Open Giraffes_Silvie_05.09.2018.pspimage. Close off Silvie's watermark and background. Highlight Tube.
4. Using the Selections tool set to Rectangle, Add(Shift), Feather 0. Select around Giraffe head similar to what I have done in example below. Copy/Paste as New Layer on image. Move to where I show in example below.

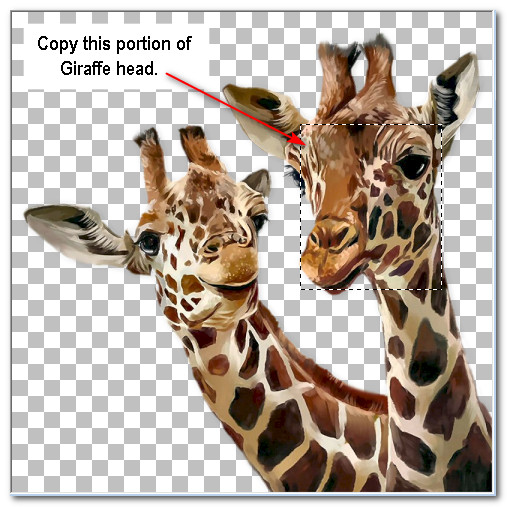
5. Deselect. Merge/Merge Down.
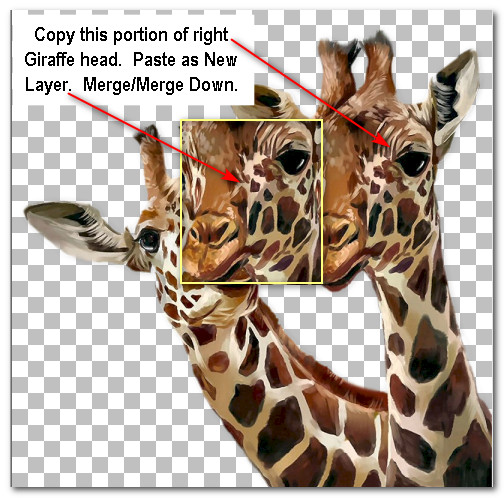
6. Using the same Selections settings, select a very narrow horizontal section.

7. Promote Selection to Layer. Copy/Paste as New Layer on main working image.
8. Object/Align/Left. Using the Pick tool set to Mode Free (Shift) other settings set to Default, pull all the way to right. Then pull upward and downward to cover the whole page with stripes. Set back to Move tool.
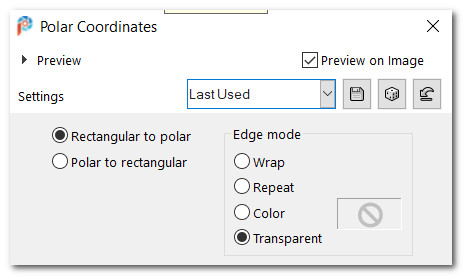
9. Effects/Distortion/Effects/Polar Coordinates.
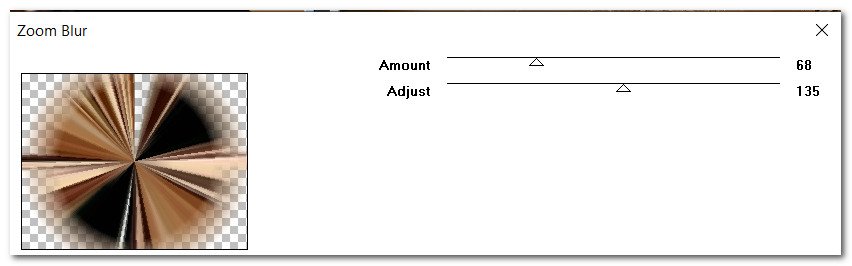
10. Effects/Filter Factory Gallery H/Zoom Blur.
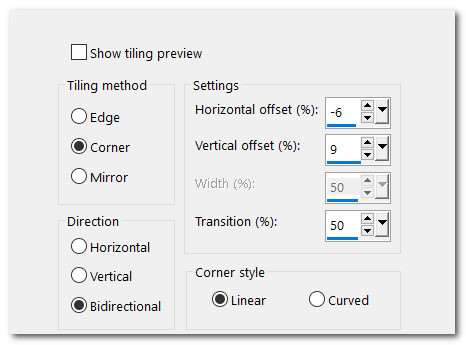
11. Effects/Image Effects/Seamless Tile.
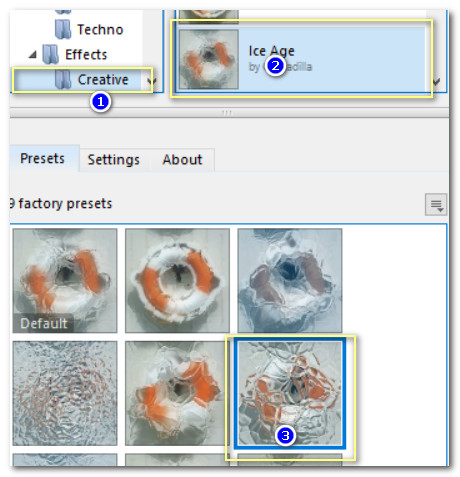
12. Effects/Filter Forge/Filter Forge 6.0/Creative/Ice Age. Select center square on right. Apply.
13. Layers/Blend Mode set to Luminance (Legacy).
14. Effects/Image Effects/SeamlessTiling.
15. Layers/New Layer.
16. Using Selections tool, select from 280px to bottom. Flood fill with #000000. Deselect.
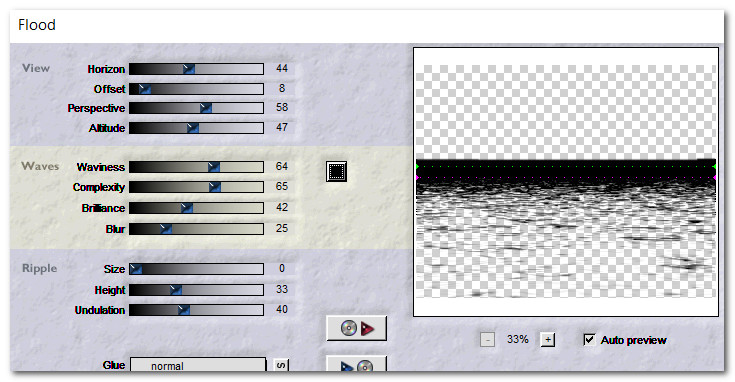
17. Effects/Flaming Pear/Flood.
18. Layers/New Raster Layer.
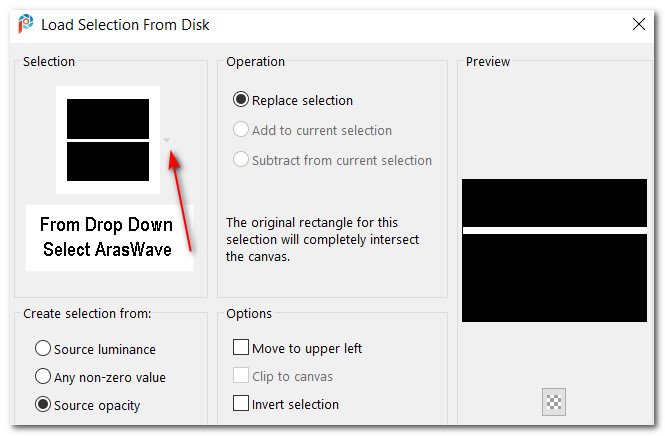
19. Selections/Load/Save Selections/Load Selection from Disk. Choose ArasWave selection. Load.
20. Flood fill with #000000. Deselect.
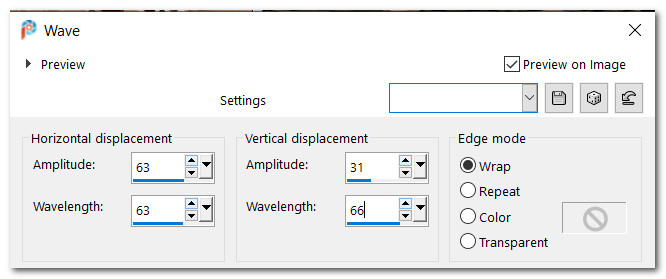
21. Effects/Distortion Effects/Wave.
22. Duplicate. Image/Resize/Resize by 53%/Resize all layers unchecked.
23. Pull resized waves to the left so they are under the larger waves (arches) on left side and middle.
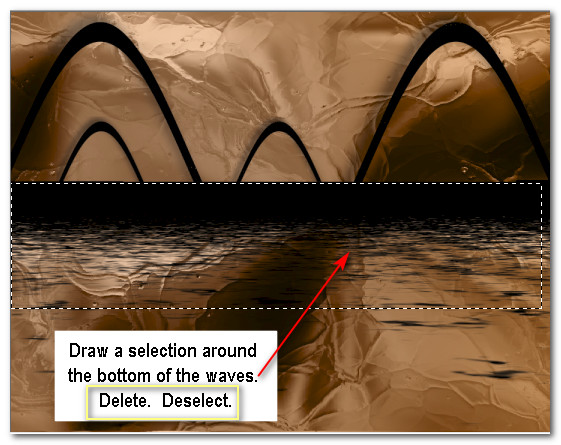
24. Merge/Merge Down. Draw a selection with Selection tool around waves from horizon to bottom of waves. Delete. Deselect.
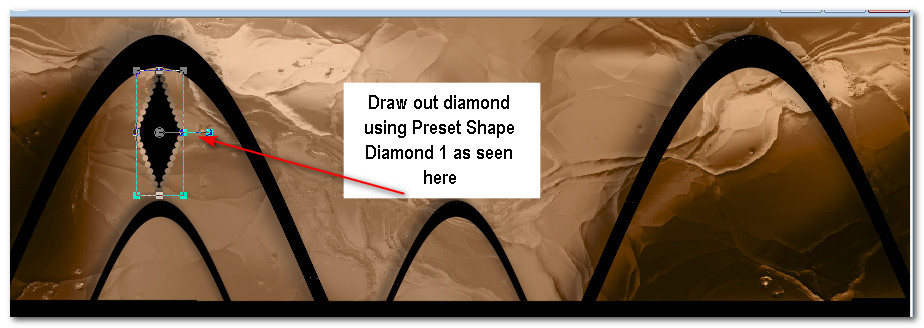
25. Using Preset Shapes Diamond 1 from Tool bar, Anti-alias, Line style krisbigdot set to Width: 2.00, use the materials palette as is, draw out a diamond between the two archs on the left. Use nodes to pull them to this size.

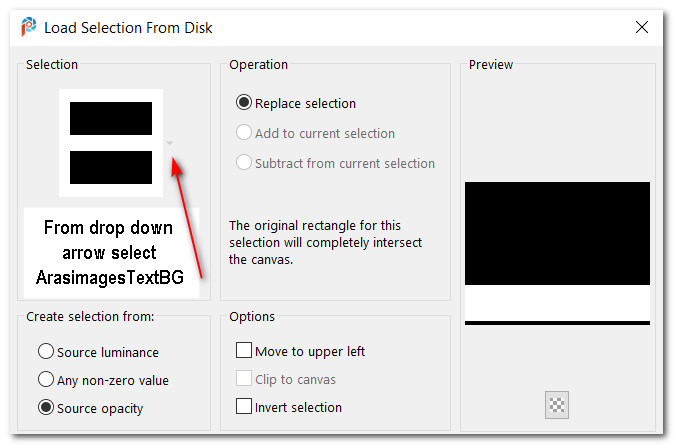
26. Effects/3D Effects/Drop Shadow. Vertical -12, Horizontal -12, Opacity 50, Blur 25, color #000000.
27. Effects/Edge Effects/Enhance.
28. Duplicate. Pull duplicated diamond to right side under large arch. Duplicate.
29. Image/Resize/Resize by 70%/Resize all layers unchecked. Place smaller diamond on top of small arch in center. Enhance again.
30. Layers/New Raster Layer.
31. Selections/Load/Save Selections/Load from Disk. From drop down arrow, choose ArasimagesTextBG. Load.
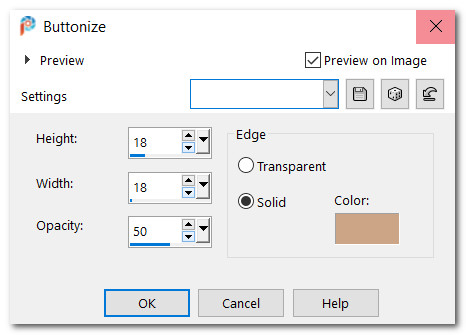
32. Flood fill selection with #000000. Effects/3D Effects/Buttonize, Foreground color. Deselect.
33. Using Preset Shapes from Tool Bar, Rectangle, settings at Default except change Line style to: krisbigbot, Width 2.00. Close Background color in Material Palette. Draw out a line around top, sides and bottom of black text box. Repeat for two lines.

34. Effects/Edge Effects/Enhance.
35. Open Giraffes_Silvie_05.09.2018.pspimage. Use Undo arrow to undo the selection changes you made earlier so it is now back to original.
36. Copy/Paste as New Layer.
37. Image/Resize/Resize by 82%/Resize all layers unchecked.
38. Move almost into bottom right corner. See my next step example to see my results of Steps #38 and #39 and #40.
39. Using Smudge Brush from tool bar, push the bottom right corner of the giraffe outwards to make him wider. Or use a tool of your choice to achieve the same effect, i.e. Clone tool.
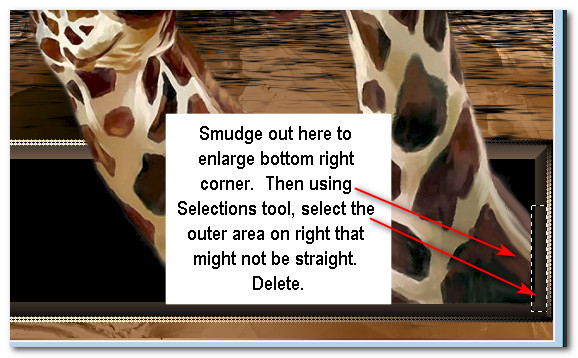
40. Using Selections tool, surround the smudged part that overlaps the frame of the text box. Delete. Deselect.
41. Effects/3D Effects/Drop Shadow. Vertical -12, Horizontal -27, Opacity 50, Blur 25, Color #000000.
42. Adjust/Sharpness/Sharpen.
43. From Tool bar select Brush tool. Find a friend001 Brush. Set background in Materials palette to #e8e2d2.
44. Layers/New Raster Layer.
45. Change size of Paint brush a friend001 to 400. Right click to stamp in opening of text box on left at bottom of image.
46. Image/Add Borders/Add 2px border/Symmetric checked, color #000000.
47. Image/Add Borders/Add 2px border/Symmetric checked, color #e8e2d2.
48. Sign your name or leave your watermark and save as .jpg or .png file.
Thank you PamelaD and Evatexas for testing my tutorial. June 22, 2020.
If you are going to use this tutorial for stationery, cards or place the tutorial/tag on another site, I would appreciate you contacting me for permission, giving Arasimages credit for the original tutorial and if possible, a link back to my site. Thank you.
Copyright © Arasimages All Rights Reserved