
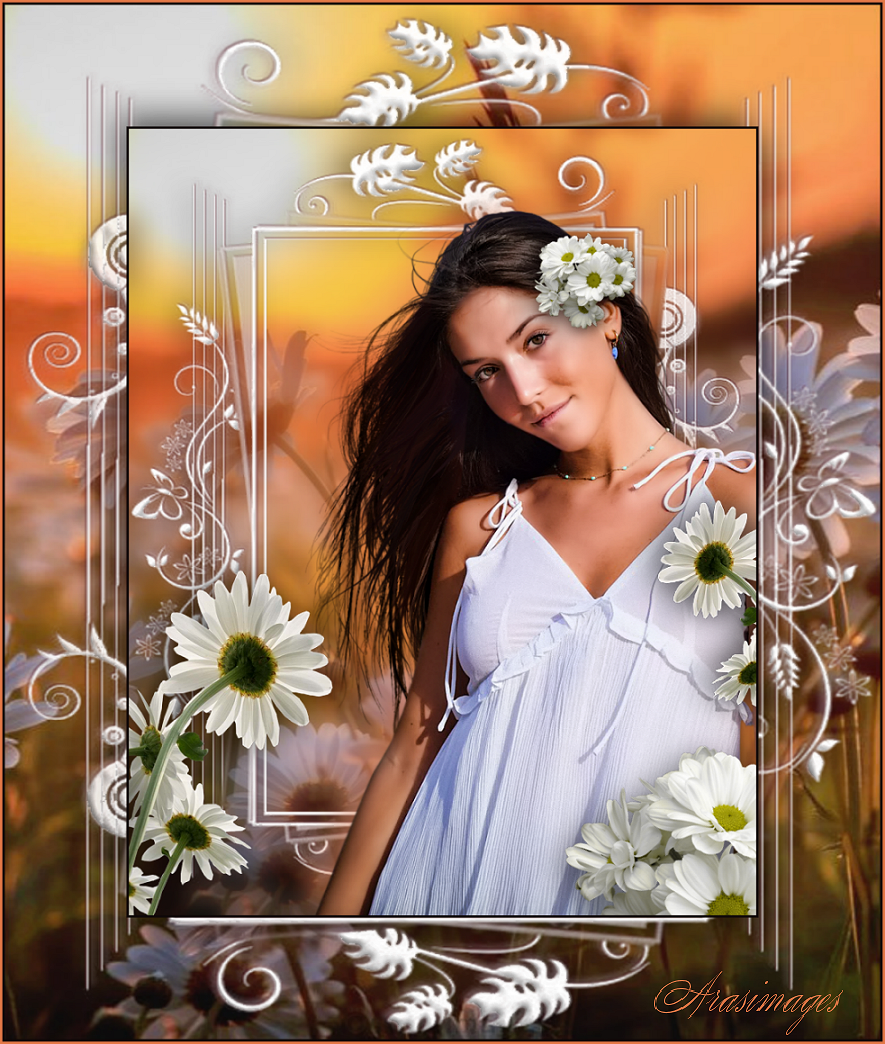
Lady Daisy
For this tutorial you will need the materials in the zip file below.

For a Danish, French, Italian, German, Spanish and Dutch translation click on the flags.


Unzip the materials into a working folder you have created on your desktop named Lady Daisy. Please duplicate and close original tubes using the copies for your work so you will not lose the originals. For this tutorial I have used Plugins Flaming Pear/Flexify and effects found in PSP. To work this tutorial, it is assumed you have some working knowledge of Paint Shop Pro. In this tutorial, I have used CTRL+A for Select All and CTRL+D for deselect. I have used PSP2020.
Thanks go to Lisa for the tubing of her beautiful granddaughter, Maeva, to Maeva for her permission to use the tube and to Berna for her lovely daisy tube.
Use the daisy below to mark your place along the way.
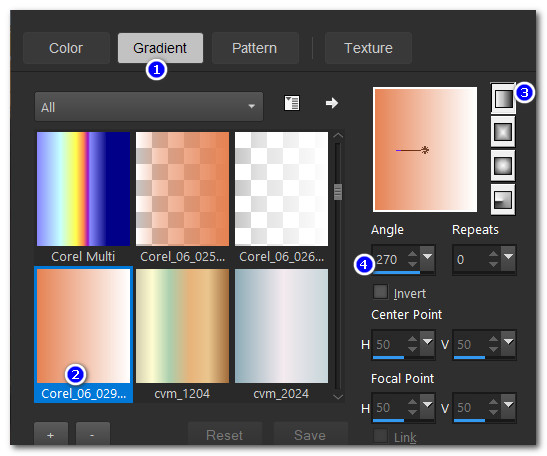
1. In Materials Palette, set Foreground to #fefefe, Background to #e37847. Create a Gradient using Linear set to Angle 270/Repeats 0. Select Corel_06_029. Invert and Center and Focal Points all at Null.
2. New/New Image 774px by 971px. Flood fill with Gradient.
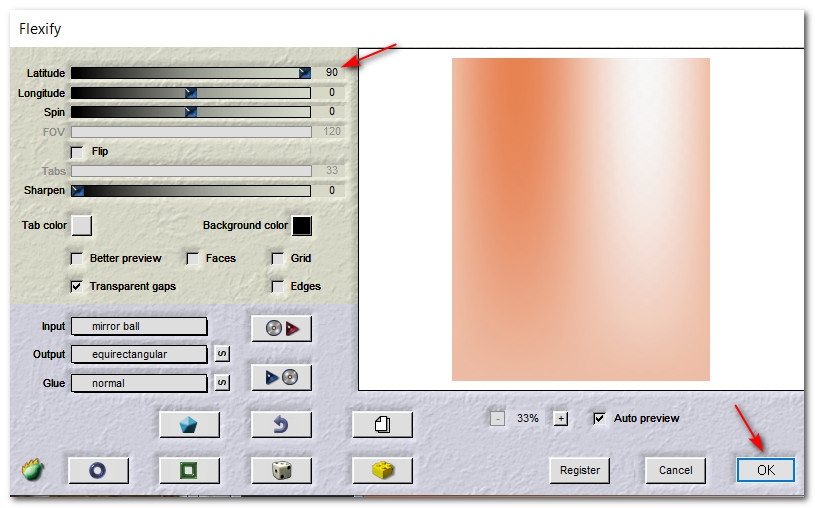
3. Effects/Flaming Pear/Flexify.
4. Open 2017-09-14_164750.jpg of daisy field. Using Selection tool, select the image inside the white border. CTRL+C.
5. On main image, Layers/New Raster Layer. CTRL+A. Paste into Selection. CTRL+D.
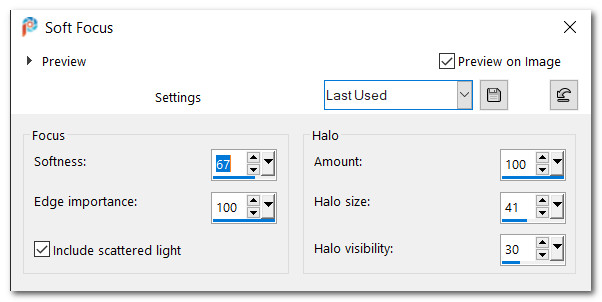
6. Adjust/Softness/Soft Focus.
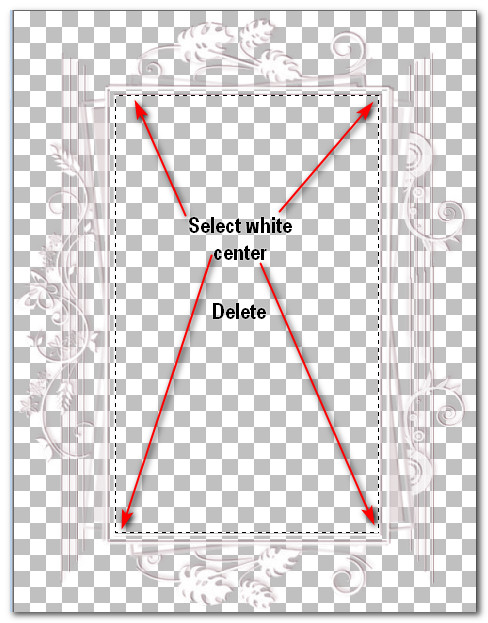
7. Open masque_tut_precious_day.png of frame. Using Selections tool, select the inner white part of the frame leaving a narrow border. Delete. CTRL+D. Copy.
8. Layers/New Raster Layer on main image. CTRL+A. Paste into Selection. CTRL+D.
9. Adjust/Sharpness/Sharpen.
10. Use the settings below, use Magic Wand on frame to activate it. Click more than once if needed to select all.

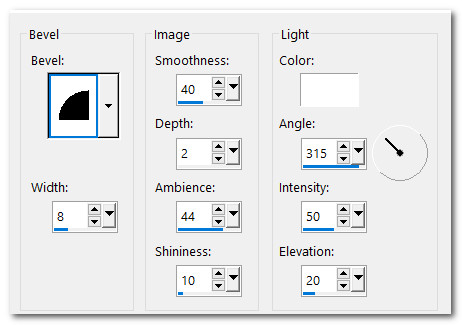
11. Effects/3D Effects/Inner Bevel. CTRL+D.
12. Effects/3D Effects/Drop Shadow. Vertical -1, Horizontal -15, Opacity 50, Blur 60, color #000000.
13. Open femmes_0056_lisat.png of young lady.
14. Using Select tool to surround or Eraser tool, delete Lisa's watermark. Copy. Close original copy.
15. Paste as New Layer.
16. Image/Resize/Resize by 90%/Resize all layers unchecked.
17. Move young lady into bottom right corner.
18. Adjust/Sharpness/Sharpen.
19. Effects/3D Effects/Drop Shadow. Vertical -1, Horizontal -15, Opacity 50, Blur 60, color #e37847.
20. Open Berna_Flowers_57_2008.pspimage. Copy/Paste as New Layer.
21. Image/Resize/Resize by 66%/Resize all layers unchecked.
22. Adjust/Sharpness/Sharpen.
23. Effects/3D Effects/Drop Shadow. Vertical -1, Horizontal -15, Opacity 50, Blur 60, color #000000.
24. Move into bottom left corner.
25. Duplicate. Image/Mirror. Mirror Horizontal.
26. Image/Resize/Resize by 66%/Resize all layers unchecked.
27. Effects/3D Effects/Drop Shadow. Vertical -1, Horizontal -15, Opacity 50, Blur 60, color #000000.
28. Place half way up on right side of image over her dress.
29. Open 0_98c5d_a395e579_XL.png of daisy cluster. Copy/Paste as New Layer.
30. Image/Resize/Resize by 46%/Resize all layers unchecked.
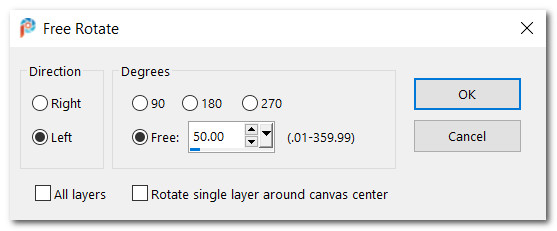
31. Image/Free Rotate/Rotate Left by 50.
32. Effects/3D Effects/Drop Shadow. Vertical -1, Horizontal -15, Opacity 50, Blur 60, color #000000.
33. Adjust/Sharpness/Sharpen.
34. Move into bottom right corner.
35. Duplicate. Image/Resize/Resize by 36%/Resize all layers unchecked.
36. Image/Free Rotate/Rotate Left by 50.
37. Adjust/Sharpness/Sharpen.
38. Effects/3D Effects/Drop Shadow. Vertical -1, Horizontal -15, Opacity 50, Blur 60, color #000000.
39. Place above young lady's ear.
40. Image/Add Borders/Add 3px border, Symmetric checked, color #100909.
41. Image/Add Borders/Add 150px border, Symmetric checked, color #e37847.
42. Reset your settings for Magic Wand back to Default. Using Magic Wand select the 150px border.
43. Open the 2017-09-14_164750.jpg of flower scene. Select the image inside the white border. Copy.
44. Layers/New Raster Layer on main image. Paste into Selection.
45. Selections/Invert.
46. Effects/3D Effects/Drop Shadow. Vertical -15, Horizontal -15, Opacity 50, Blur 60, color #000000.
47. Effects/3D Effects/Drop Shadow. Vertical 15, Horizontal 15, Opacity 50, Blur 60, color #000000.
48. Selections/Invert.
49. Layers/New Raster Layer.
50. Open masque_tut_precious_day.png. Copy/Paste into Selection. CTRL+D.
51. Reset the Magic Wand setting to this setting and select the frame.
52. Effects/3D Effects/Inner Bevel. CTRL+D.
53. Effects/3D Effects/Drop Shadow. Vertical -1, Horizontal -15, Opacity 50, Blur 60, color #000000.
54. Image/Mirror. Mirror Horizontal.
55. Image/Add Borders/Add 3px border, Symmetric checked, color #100909.
56. Image/Add Borders/Add 3px border, Symmetric checked, color #e37847.
57. Add your watermark or name if you wish. Save as Lady Daisy .jpg or .png file.
58. If your file is too large for your use, please resize it.
Thank you PamelaD and EvaTexas for testing my tutorial. Your help is invaluable. July 9, 2020.
If you are going to use this tutorial for stationery, cards or place the tutorial/tag on another site, I would appreciate you contacting me for permission, giving Arasimages credit for the original tutorial and if possible, a link back to my site. Thank you.
Copyright © Arasimages All Rights Reserved